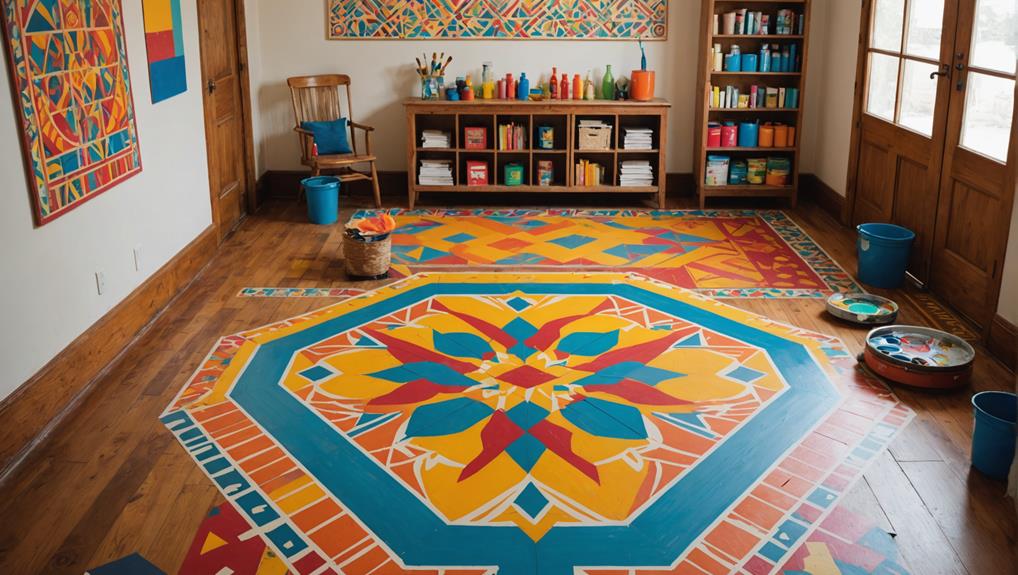
To create custom stenciled floor designs, start by choosing a pattern that sets your space's tone. Gather materials like stencils, durable paint, and essential tools. Clean the floor thoroughly, filling cracks and sanding glossy areas for better adhesion. Secure your stencil with painter's tape to avoid paint bleed, and apply paint using a foam roller or brush. Work carefully, allowing sections to dry slightly before shifting. Once painted, seal your masterpiece for durability, choosing a sheen that suits your style. With the right approach, you can define your space beautifully, and there are tips ahead to refine your technique further.
Choosing Your Design
Choosing a design for your stenciled floor is like picking the perfect frame for a masterpiece; it sets the tone for the entire space. When you immerse yourself in design inspiration, consider how the patterns, colors, and textures will harmonize with your existing decor. Think about the atmosphere you want to create—do you envision a cozy retreat or a vibrant, energetic space? Style trends can guide your choices, whether you're drawn to minimalist geometric shapes or intricate vintage motifs.
As you explore potential designs, keep safety in mind. Opt for patterns that maintain a non-slip surface, especially in high-traffic areas or spaces prone to moisture, like kitchens and bathrooms. It's crucial to balance aesthetics with functionality. You might find inspiration in nature, architecture, or even cultural art, ensuring your design resonates with your personal style while adhering to safety standards.
Consider incorporating color psychology into your design. Soft hues can evoke calmness, while bold shades might energize the room. Using stencils allows for creativity; you can mix and match elements to create a custom look that's uniquely yours.
Gathering Necessary Materials
Before diving into your stenciled floor project, it's essential to gather all the necessary materials to guarantee a smooth and successful execution. The right tools and supplies not only enhance your creative process but also assure the safety and durability of your design.
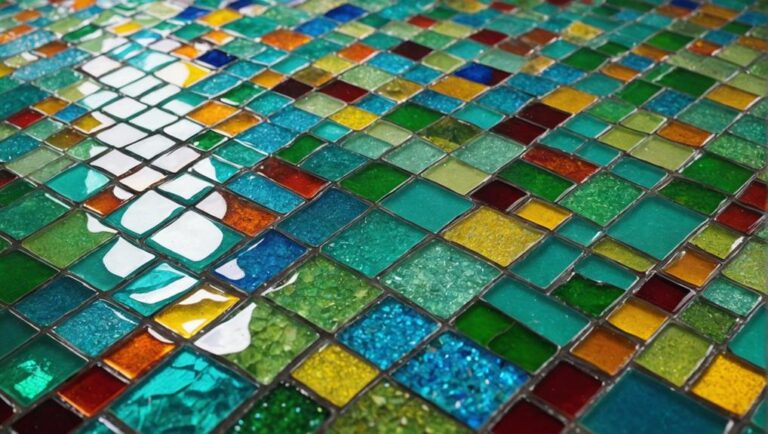
Start by selecting the appropriate stencil types. You can choose from reusable plastic stencils, which are great for multiple uses, or paper stencils for a more temporary solution. Next, consider your paint options. Acrylic paints are popular due to their versatility and ease of clean-up, while specialized floor paints offer durability against wear and tear.
Here's a handy table to help you organize your materials:
| Material | Description | Purpose |
|---|---|---|
| Stencil | Plastic or paper | Creates your design |
| Paint | Acrylic or floor paint | Provides color and finish |
| Paintbrushes/Rollers | Various sizes | Applies the paint evenly |
| Painter's Tape | Adhesive tape | Secures stencil and prevents bleed |
| Drop Cloth | Protective covering | Catches spills and protects floor |
Make sure to also have safety gear on hand, like gloves and a mask, especially if you're working with strong paints or chemicals. With everything collected, you'll be ready to proceed confidently, knowing you've laid the groundwork for your stunning stenciled masterpiece.
Preparing the Floor Surface
As you prepare to create your stunning stenciled floor design, guaranteeing the surface is clean and primed is vital for achieving the best results. Begin by inspecting the area for any debris, dust, or stains that could interfere with your design. Use effective cleaning techniques, such as sweeping or vacuuming, to remove loose particles. For stubborn stains, a gentle scrub with a mixture of warm water and mild soap can work wonders. Always rinse thoroughly to eliminate any residue.
Next, it's important to assess the floor's condition. If you notice any cracks or imperfections, fill them with a suitable patching compound, assuring a smooth surface for your stencil. Allow the compound to cure fully before moving on. If your floor has a glossy finish, consider lightly sanding it to promote better paint adhesion. Remember to wear a dust mask and safety goggles during this process for your protection.
Once the floor is clean and repaired, apply a primer suited to your flooring type. This step not only enhances the durability of your design but also helps the paint adhere more effectively. Choose a primer that's low in volatile organic compounds (VOCs) for a safer indoor environment. After the primer dries completely, you'll have a pristine canvas ready for your artistic expression. Taking the time for thorough surface preparation guarantees that your stenciled masterpiece will be both beautiful and long-lasting.
Applying the Stencil
With your floor perfectly prepared, it's time to bring your design vision to life by applying the stencil. Begin by selecting the right stencil type for your project, whether it's adhesive, reusable, or vinyl. Each type has its advantages, so consider your design's complexity and the paint you'll be using.
Before you start, verify you've got the right tools at hand: a foam roller or stencil brush, painter's tape, and a level for accurate placement. Position your stencil on the floor, making sure it's aligned properly. It's essential to use painter's tape to secure the edges, preventing paint from bleeding underneath.
When it comes to application techniques, a light touch is key. Dip your roller or brush into the paint, then offload excess onto a paper towel. This prevents drips and guarantees a clean application. For best results, apply paint using a stippling motion—this helps to push paint into the stencil's openings without over-saturating the surface.
Work systematically, moving from one stencil section to another, allowing each section to dry slightly before shifting the stencil. This cautious approach will help maintain sharp edges and prevent smudging.
Sealing and Finishing Touches
The beauty of your custom stenciled floor deserves the protection and enhancement that a proper sealing brings. After investing time and creativity into your design, it's essential to select the right sealer options to preserve its vibrancy and durability. Start by evaluating water-based sealers, which offer low VOC levels and a user-friendly application, making them ideal for indoor spaces. Alternatively, solvent-based sealers provide a robust finish, perfect for high-traffic areas that demand extra resilience.
Before applying your chosen sealer, verify the floor is clean and dry. Use a mop or vacuum to remove any dust or debris, as this will prevent imperfections in the finish. For the application, a foam roller or brush can help you achieve an even coat, allowing the sealer to penetrate the surface effectively.
When it comes to finishing techniques, think about the desired sheen. Matte finishes offer a subtle elegance, while satin or gloss finishes can enhance colors and patterns, giving them a lively pop. Remember to follow the manufacturer's instructions regarding drying times and number of coats; typically, two to three coats will provide ideal protection.
Lastly, once the sealer is fully cured, consider adding non-slip additives for safety, especially in areas prone to moisture. This final touch not only safeguards your stunning design but also guarantees it remains a safe environment for family and friends. Your stenciled floor is now a masterpiece, ready to be admired and enjoyed for years to come.
Frequently Asked Questions
Can I Use Stencils on Outdoor Surfaces?
Yes, you can definitely use stencils on outdoor surfaces! Just make certain you choose stencil materials designed for outdoor durability, like weather-resistant plastics or metal. These will withstand the elements and maintain their integrity over time. When applying, use outdoor-safe paint to guarantee a long-lasting finish that won't fade or peel. It's crucial to prep the surface properly, ensuring safety and durability, so your designs shine bright in all conditions!
How Long Does the Stencil Application Process Take?
When you're planning your stencil project, it's essential to take into account how long the stencil application process takes. Stencil preparation time can vary based on your design's complexity, but you should account for at least an hour. Once applied, the drying duration usually spans several hours to guarantee a crisp finish. Remember, patience is key; rushing can compromise your work's safety and longevity. Always follow product guidelines for the best results and a safe environment.
What Type of Paint Works Best for Stenciling Floors?
When you're stenciling floors, choosing the right paint types is essential for achieving that perfect finish. Opt for high-quality acrylic or polyurethane paints, as they offer excellent paint durability and resistance to wear. These paints not only adhere well but also provide a safe, non-toxic option for indoor spaces. Make sure you select low-VOC formulations to maintain air quality, and always follow the manufacturer's guidelines for the best results. Your creative vision deserves the finest foundation!
How Do I Fix Mistakes During the Stenciling Process?
When you encounter stencil errors during your project, don't panic! First, let the paint dry completely. Then, for paint touch ups, use a small brush to carefully fill in any mistakes, matching the original color. If the error's significant, you might need to reapply the stencil. Always guarantee proper ventilation and safety precautions while working with paints. With patience and attention to detail, your floor will look stunning and flawless again!
Are There Any Specific Maintenance Tips for Stenciled Floors?
When it comes to maintaining your stenciled floors, think of them like a classic car—requiring care to keep them looking sharp. Start with gentle cleaning techniques; use a soft mop and mild, pH-balanced cleaner. Avoid harsh chemicals that can damage your design. Consider sealing options to protect your artwork from wear and tear. Regular maintenance not only enhances the beauty but also guarantees your stenciled floors remain safe and vibrant for years to come.