First, gather your cleaning supplies like a broom, mop, pH-neutral cleaner, gloves, and bucket. Next, sweep or vacuum loose dirt thoroughly, focusing on corners. Mix a mild cleaning solution, mop the floor evenly, and wring out excess water to prevent damage. Treat stains gently with appropriate cleaners before rinsing the floor with clean water. Finally, let the floor dry completely while improving airflow. Follow these steps, and you’ll maintain a clean, durable concrete floor—explore further for detailed tips.
Gather Your Cleaning Supplies
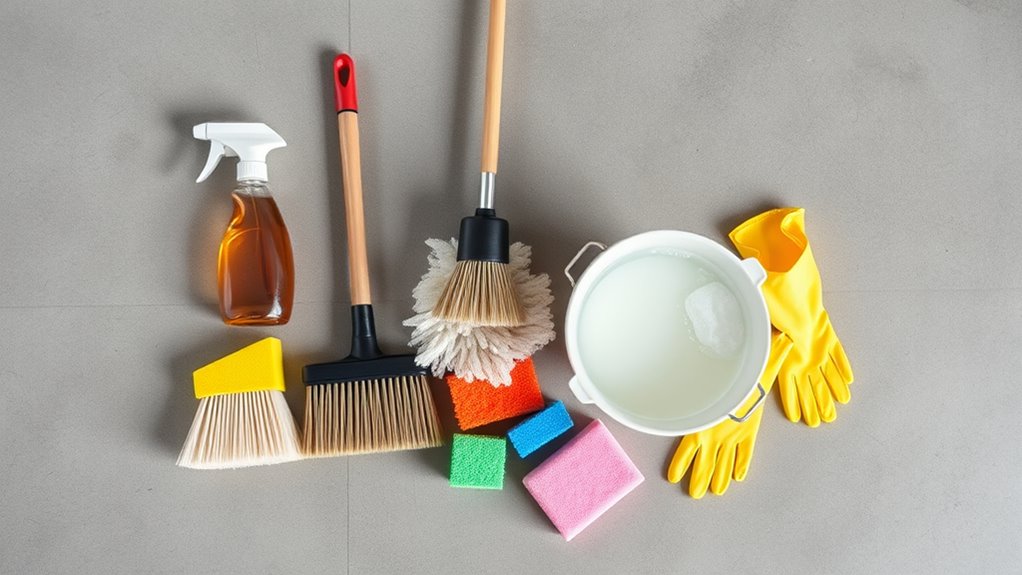
Before you begin cleaning your concrete floors, you’ll need to gather a few essential supplies. Start with reliable cleaning tools: a stiff-bristled broom or a vacuum designed for hard surfaces to tackle dust and debris later on. Have a mop with a sturdy handle and a bucket for mixing cleaning solutions. Choose a pH-neutral cleaner to protect your floor’s finish. Don’t forget gloves and safety goggles—safety precautions are vital to shield your skin and eyes from harsh chemicals. If you plan to use any stronger cleaners, guarantee good ventilation and consider a mask to avoid inhaling fumes. Having these supplies ready not only streamlines your process but gives you the freedom to clean confidently and efficiently without interruptions.
Remove Loose Dirt and Debris
Start by removing all loose dirt and debris from your concrete floors using a stiff-bristled broom or a vacuum designed for hard surfaces. Effective debris removal is essential to prevent scratches and prepare the floor for a thorough clean. Focus on dirt collection in corners and along baseboards, where dust tends to accumulate.
- Use slow, deliberate strokes with the broom to lift debris rather than pushing it around.
- For larger areas, a vacuum with a hard-floor attachment speeds up dirt collection and guarantees deeper removal.
- Don’t forget to check under furniture and appliances, as these spots often harbor hidden dust and grit.
Prepare a Cleaning Solution
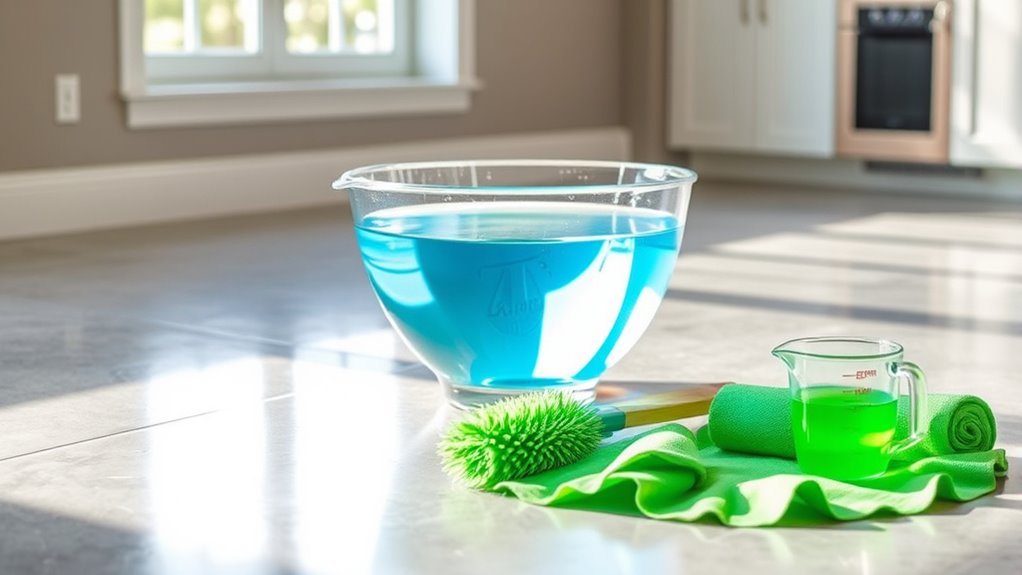
With loose dirt and debris cleared away, you can now focus on preparing a cleaning solution tailored to your concrete floor. Start by selecting appropriate cleaning agents—mild detergents or pH-neutral cleaners work best to protect the floor’s surface without causing damage. Avoid harsh chemicals that can erode or discolor concrete. Next, pay close attention to solution ratios: typically, mixing one part cleaning agent to ten parts warm water guarantees effective cleaning without residue. Stir the mixture thoroughly to dissolve the cleaning agent evenly. If your floor has stubborn stains, you might need a slightly stronger ratio, but always test in a small area first. Preparing the solution correctly sets the foundation for efficient cleaning and preserves your concrete’s integrity.
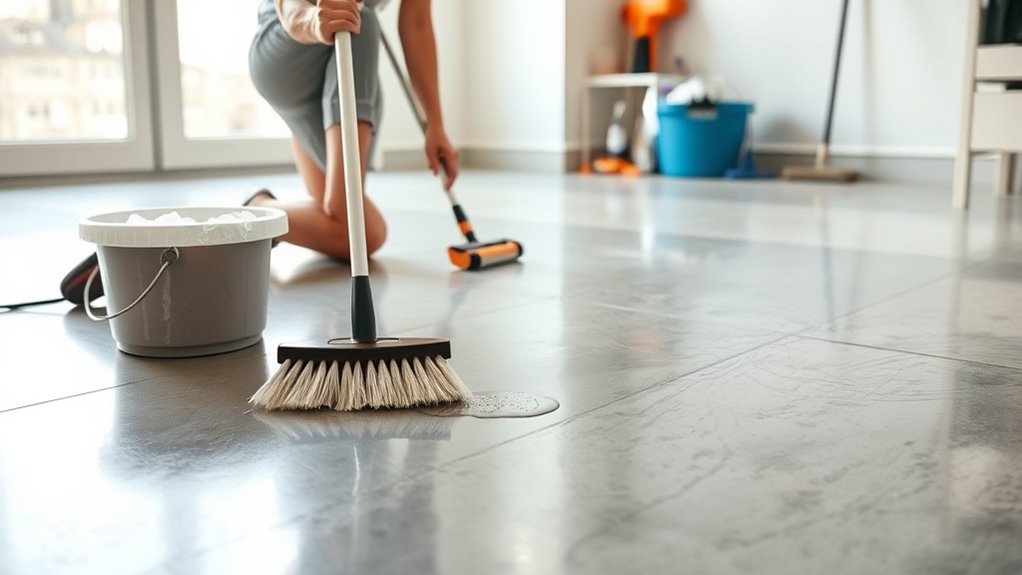
Mop the Floor Thoroughly
Dip your mop into the cleaning solution and wring it out well to avoid excess water on the floor. Using proper mop techniques guarantees effective cleaning without damaging the concrete. Start mopping in a systematic pattern, such as overlapping strokes, to cover every inch evenly. Remember, too much water can seep into the concrete and cause issues, so keep the mop damp, not soaking.
Wring out your mop well and use overlapping strokes to clean concrete without excess water damage.
For ideal floor maintenance, focus on:
- Using a mop with absorbent, non-abrasive fibers to protect the surface
- Changing the cleaning solution frequently to avoid spreading dirt
- Allowing the floor to air dry fully before walking on it
This approach delivers a clean, streak-free finish while safeguarding the durability of your concrete floor.
Address Stubborn Stains
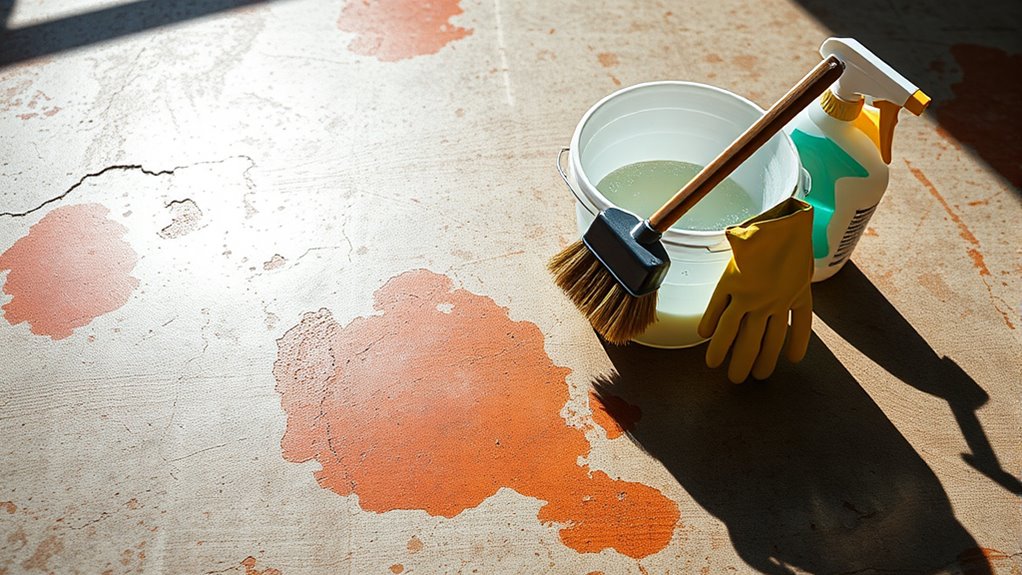
Even after thorough mopping, some stains may persist on your concrete floor. For effective stain removal, identify the stain type and select appropriate cleaning products. Use a soft brush to apply the cleaner and let it sit briefly before scrubbing. Avoid harsh abrasives that damage the surface.
| Stain Type | Recommended Cleaning Product | Application Tip |
|---|---|---|
| Oil | Degreaser | Apply, wait 10 min, scrub |
| Rust | Lemon juice or vinegar | Soak, scrub gently |
| Paint | Paint stripper or acetone | Test spot, use carefully |
| Mold/Mildew | Bleach solution | Ventilate, scrub, rinse |
| Ink | Rubbing alcohol | Dab, avoid spreading stain |
Rinse the Floor With Clean Water
When rinsing your concrete floor, using clean, high-quality water is essential to avoid leaving behind residues or minerals. Make certain to rinse thoroughly, moving methodically to cover every section evenly. Proper rinsing guarantees the floor is free from cleaning agents and ready to dry without streaks or spots.
Importance of Water Quality
Although it might seem trivial, rinsing your concrete floor with clean water is essential to avoid leaving behind residues that can damage the surface or attract dirt. The quality of water you use directly affects the outcome. Water hardness, for example, can leave mineral deposits that dull your floor’s finish. Maintaining the proper chemical balance in the rinse water prevents unwanted reactions with cleaning agents, guaranteeing your floor remains in pristine condition. Pay attention to these factors:
- Use water with low mineral content to prevent spotting and buildup.
- Maintain chemical balance to avoid neutralizing or intensifying cleaning residues.
- Avoid hard water that can cause scale formation and surface degradation.
Proper Rinsing Techniques
One essential step in maintaining your concrete floor’s appearance is rinsing it thoroughly with clean water to remove any remaining cleaning agents or debris. Start by selecting rinsing methods that evenly distribute clean water across the surface, such as using a mop soaked in fresh water or a low-pressure hose if accessible indoors. Avoid harsh sprays that might spread dirt. Work systematically from one corner to the exit to prevent stepping on wet areas. Change the rinse water frequently to guarantee it stays free of contaminants. After rinsing, use a squeegee or dry mop to remove excess water, accelerating drying and preventing water spots. By mastering proper rinsing techniques with clean water, you’ll protect your floor’s finish and keep it looking fresh without unnecessary effort or damage.
Allow the Floor to Dry Completely
You need to let the concrete floor dry completely to prevent slips and guarantee any sealants or treatments adhere properly. Drying time depends on factors like room temperature, humidity, and ventilation. To speed up drying, open windows, use fans, or increase airflow in the area.
Importance of Drying
Before moving on to the next steps, it’s essential that you allow the concrete floor to dry completely. Proper drying guarantees the floor’s durability and prevents issues like mold or peeling finishes. Using effective drying techniques and drying equipment, such as fans or dehumidifiers, speeds up this process and promotes even drying.
Here’s why drying matters:
- Prevents moisture from weakening concrete or adhesives.
- Guarantees coatings or sealants bond properly.
- Reduces risk of mold and unpleasant odors.
Drying Time Factors
Proper drying sets the stage, but how long it takes depends on several factors. Primarily, humidity levels in your indoor space play a significant role. High humidity slows evaporation, extending drying time, while low humidity speeds it up. You’ll also want to take into account airflow circulation; stagnant air traps moisture, delaying the process. Ensuring good ventilation helps moisture escape, promoting faster drying. The thickness and porosity of your concrete floor affect how deeply water penetrates, influencing drying duration as well. Temperature matters too—warmer conditions encourage evaporation. Remember, you need to allow the floor to dry completely before using it again to avoid damage or slippery surfaces. Understanding these variables gives you control, letting you plan accordingly and maintain your freedom to use your space safely and confidently.
Tips for Faster Drying
Although drying concrete floors completely can take time, there are effective steps you can take to speed up the process. Ensuring your floor dries thoroughly is essential to avoid damage or mold growth. Focus on enhancing air circulation and carefully applying heat to accelerate drying without compromising the surface.
Here’s how you can promote faster drying:
- Use fans or open windows to improve air circulation, helping moisture evaporate quicker.
- Apply gentle heat with space heaters or heat lamps, but avoid excessive temperature to prevent cracking.
- Remove any barriers like rugs or furniture that trap moisture and block airflow.


