
To clean your freezer floor, first, empty it and defrost by unplugging your appliance. Remove loose debris with a broom or vacuum. Then, mix a cleaning solution of vinegar and water. Scrub the floor using circular motions, then rinse with warm water. Make sure the floor is completely dry before restocking items. Organize them by category for easy access, and if you want tips on organization and maintenance, there's more to discover.
Gather Your Cleaning Supplies

Before you plunge into cleaning your freezer floor, it's essential to gather your cleaning supplies. Start with important cleaning tools like a sturdy sponge, a soft-bristle brush, and a microfiber cloth. These will help you tackle grime and spills effectively. Next, opt for eco-friendly solutions—vinegar and baking soda work wonders together. Mix a solution of equal parts vinegar and water in a spray bottle for a natural cleaner that cuts through frost and dirt without harsh chemicals. Don't forget a bucket for rinsing and a trash bag for any debris you find. Having everything ready will streamline your process, giving you the freedom to clean efficiently and enjoy a fresh, organized freezer space afterward.
Empty the Freezer
To start cleaning your freezer, you'll need to remove all items inside. As you take everything out, check expiration dates and toss anything that's no longer good. This is also a great opportunity to organize the remaining items for easier cleaning and future access.
Remove All Items
Emptying your freezer is an essential first step in the cleaning process. Begin by unplugging the appliance to guarantee freezer safety while you work. Gather a cooler or insulated bags to keep items frozen during the cleaning. As you remove each item, create an item inventory; this helps you know what you have and makes it easier to organize later. Place perishables in the cooler to prevent thawing. For items that you no longer want or that have been in there too long, consider discarding them responsibly. This step not only prepares your freezer for a deep clean but also gives you a chance to reassess what you truly need, ultimately freeing up valuable space.
Check Expiration Dates
As you sift through the items in your freezer, it's crucial to check expiration dates to confirm you're only keeping what's safe to eat. Start by pulling out each item and looking for any expiration or best-by dates. If you find something past its date, it's time to let it go. Proper expiration management not only enhances food safety but also frees up space for fresh items. Remember, frozen food can maintain quality for a long time, but it doesn't last forever. If you're unsure about an item's safety, trust your instincts—when in doubt, toss it out! This process not only guarantees your food is safe but also prepares you for the next steps in cleaning your freezer.
Organize for Cleaning
Before diving into the cleaning process, you'll need to completely empty your freezer. Start by creating a cleaning checklist to keep track of everything you remove. Gather some cooler bags or ice chests to store items temporarily. As you take out each item, check for expiration dates and toss anything that's no longer good. Use this opportunity to organize your food—group similar items together, like meats, veggies, and frozen meals. Consider labeling bags or containers for easy access later. These organizational tips not only streamline your cleaning process but also make it easier to maintain your freezer's order in the future. With everything out, you're ready to tackle the cleaning!
Defrost the Freezer
To effectively defrost the freezer, you'll want to unplug the appliance and allow the ice to start melting. This step is vital to prevent further ice buildup and maintain the freezer's efficiency. You can choose from various defrost methods, like letting it thaw naturally or using a fan to speed things up.
Here's a quick comparison of common defrost methods:
| Method | Description |
|---|---|
| Natural Defrosting | Allowing ice to melt at room temperature. |
| Hot Water Bowl | Placing a bowl of hot water inside to speed up melting. |
| Hair Dryer | Using a hairdryer on a low setting to melt ice. |
| Fan | Directing a fan towards the ice to expedite thawing. |
Pick a method that suits your time and preferences, and enjoy the freedom of a clean freezer floor!
Remove Loose Debris
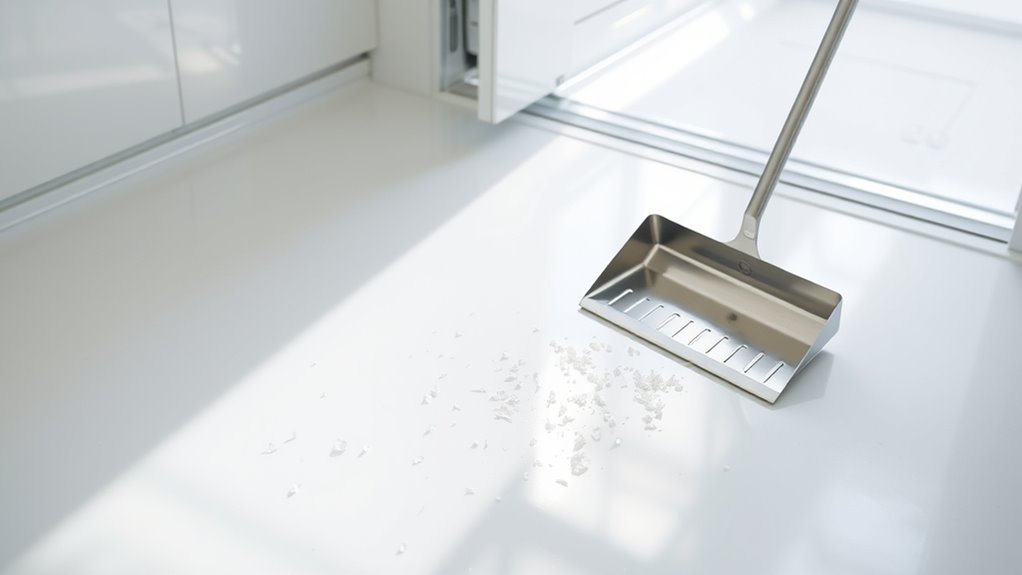
Before you start cleaning, gather your cleaning supplies, including a broom or vacuum. Once you have everything ready, sweep the floor to collect any loose debris like crumbs or spills. This step is essential for ensuring a thorough clean and making the next stages easier.
Gather Cleaning Supplies
Cleaning a freezer floor starts with the right supplies and the removal of any loose debris. First, gather your essential cleaning tools, like a sturdy sponge, scrub brush, and a bucket. You'll also need eco-friendly supplies, such as a vinegar and water solution or baking soda paste, to guarantee a safe cleaning process. These options are great for tackling stubborn stains without harming the environment. Make sure to have a mop or cloth handy for drying afterward. Once you've collected everything, you'll be ready to plunge in, knowing you've got the right resources at your fingertips. This preparation sets you up for a successful cleaning experience, giving you the freedom to enjoy a spotless freezer floor.
Sweep or Vacuum Debris
A clean slate is essential when tackling the freezer floor, so start by sweeping or vacuuming up any loose debris. Use effective sweeping techniques to gather crumbs and ice particles—angle your broom to reach corners where dirt hides. If you opt for vacuuming, choose a model with a hose attachment to get those hard-to-reach spots. Here are some handy tips:
- Use a soft-bristle broom to avoid scratching the floor.
- Make short, deliberate strokes to guarantee you're capturing everything.
- Empty the vacuum canister frequently to maintain suction power.
Prepare the Cleaning Solution
Once you've emptied the freezer and removed any removable parts, it's time to prepare the cleaning solution that will effectively tackle the grime and odors. You'll want a mix that combines cleaning agents with water at proper solution ratios. Here's a simple guide:
| Cleaning Agent | Ratio (Agent:Water) |
|---|---|
| White Vinegar | 1:1 |
| Baking Soda | 1:2 |
| Dish Soap | 1:3 |
| Hydrogen Peroxide | 1:1 |
Choose the cleaning agent that suits your needs best. Mix the solution in a spray bottle or bucket, ensuring it's well combined. This will give you a powerful tool to combat the stubborn mess on your freezer floor.
Scrub the Floor
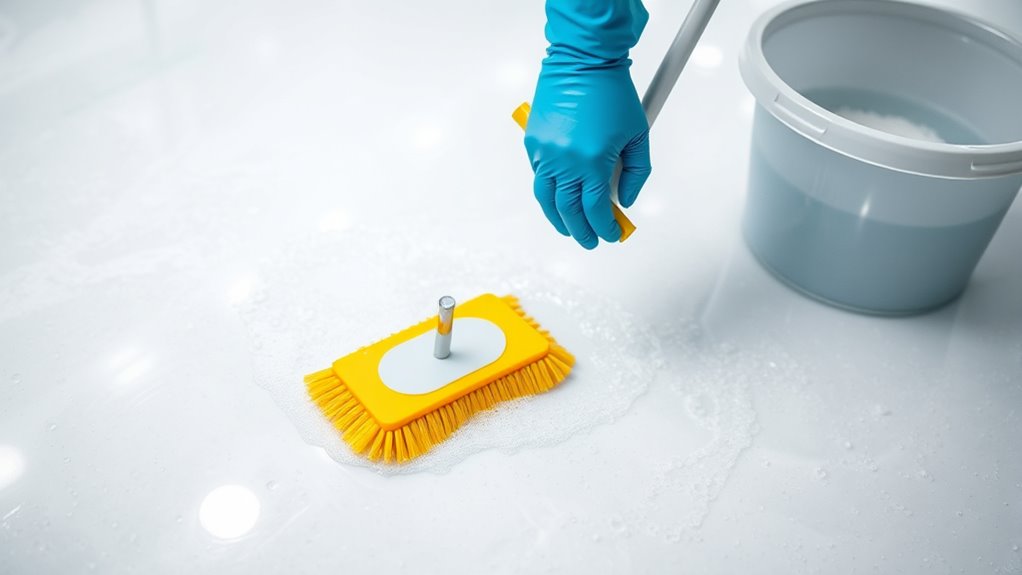
Grab your cleaning solution and a sturdy scrub brush or sponge, and let's plunge into scrubbing the floor. Start by applying your cleaning solution directly onto the floor materials. If your freezer has a vinyl or tile surface, use circular scrubbing techniques for effective cleaning. For tougher stains or grime, switch to a back-and-forth motion, putting a little extra elbow grease into it.
- Focus on corners and edges where dirt tends to accumulate.
- Don't forget to scrub any removable mats or liners.
- Rinse your brush or sponge frequently to avoid spreading grime.
Keep scrubbing until the floor shines, and you'll feel that sense of freedom from a clean, sanitized space!
Rinse and Dry
Now that you've scrubbed the floor, it's essential to rinse away any remaining cleaning solution and dirt. Start by using a bucket filled with warm water and a clean mop or cloth. For effective rinse techniques, make sure the mop is damp—not soaking—so you can control the water flow. Work from the back of the freezer toward the door, making certain to cover all areas. After rinsing, it's important to dry the floor properly. You can use absorbent towels to soak up excess water or let the air do the work by leaving the freezer door open. If you prefer quicker drying methods, a fan can help circulate air and speed up the drying process.
Organize and Restock the Freezer
After ensuring your freezer floor is clean and dry, it's time to organize and restock it effectively. Start by creating a freezer inventory to keep track of what you have. This'll save you time and prevent any food loss. Next, use item categorization to group similar items together.
- Meat and poultry
- Vegetables and fruits
- Prepared meals
Label containers, if possible, so you can easily find what you need. Remember to place older items at the front and newer ones at the back to maintain freshness. By taking these steps, you'll not only maximize your freezer space but also enjoy the freedom of knowing exactly what you have on hand!
Frequently Asked Questions
How Often Should I Clean My Freezer Floor?
You should aim to clean your freezer floor at least every three to six months for ideal freezer maintenance. Regular cleaning helps prevent buildup of spills or frost, ensuring your freezer operates efficiently. If you notice any spills or odors, don't wait—clean it immediately! Keeping a consistent cleaning frequency not only extends the life of your appliance but also keeps your food fresh and free from contamination. Enjoy the freedom of a well-maintained freezer!
Can I Use Bleach to Clean the Freezer Floor?
You might be surprised to learn that nearly 70% of people prefer using bleach for cleaning due to its effectiveness. However, while it can kill bacteria, it's not the best choice for your freezer floor. Instead, consider bleach alternatives like vinegar or baking soda for a safer clean. For effective cleaning tips, mix these alternatives with warm water, scrub gently, and rinse well. This way, you maintain cleanliness without harsh chemicals in your food storage!
What Should I Do if There's a Bad Odor?
If you're dealing with a bad odor, start by removing everything from the freezer. Check for any expired or spoiled food—those are often the culprits. For odor removal, mix a solution of warm water and baking soda, and wipe down surfaces. Make sure to keep your freezer well-organized in the future for better freezer maintenance. Finally, consider placing an open box of baking soda inside to absorb smells regularly.
Is It Safe to Use a Steam Cleaner?
When it comes to cleaning, "a stitch in time saves nine." Using a steam cleaner can be beneficial for deep cleaning surfaces, as it effectively sanitizes without harsh chemicals. However, you should be cautious. Make sure the area is dry and avoid using it on certain materials that could get damaged by moisture. Always read the manufacturer's instructions and guarantee proper ventilation while you clean. That way, you can enjoy a fresh, safe environment!
How Do I Prevent Freezer Floor Buildup in the Future?
To prevent freezer floor buildup in the future, focus on preventive measures and regular maintenance. You can start by checking your freezer's temperature regularly, keeping it at or below 0°F. Also, make it a habit to clean spills immediately and avoid overloading the freezer, which can trap moisture. Finally, consider placing a mat or tray at the bottom to catch drips, making cleanup easier and keeping your freezer floor in great shape.


