Imagine stepping into your backyard and seeing a sturdy, well-built shed ready to house your tools, gardening supplies, or even serve as a quiet retreat. You might think building a shed floor is complicated, but with the right guidance, it can be surprisingly straightforward.
You don’t need to be a construction expert to create a solid foundation for your shed; you just need clear instructions and a bit of patience. By following the steps outlined you’ll gain the confidence to tackle this project and transform your outdoor space.
As you read on, you’ll discover tips and tricks that can save you time and effort, ensuring your shed floor is not only durable but also perfectly suited to your needs. Let’s dive in and start building the shed floor of your dreams.
Planning Your Shed Floor
Location is important for a shed. Choose a flat area for stability. Avoid spots with water. Wet ground can cause damage. Check for sunlight. Sheds need light and air. Keep it away from trees. Falling branches can harm the shed.
Size matters for a shed floor. Think about what you will store. A small shed might be too tight. A big one might waste space. Measure your items. Plan space for walking. Design affects use. A simple square is easy to build. Add extra space for tools. A ramp can help for easy access. Draw a plan to guide your build.
Gathering Materials And Tools
Wood is a must-have. Choose pressure-treated lumber for durability. Plywood sheets are needed for the base. Make sure they are thick and strong. Nails and screws will hold everything together. Use galvanized nails to avoid rust. Sand and gravel will help level the ground. Don’t forget a wood sealant to protect against weather.
| Tool | Purpose |
|---|---|
| Hammer | Drive nails into wood |
| Screwdriver | Tighten screws |
| Level | Ensure even surface |
| Saw | Cut wood to size |
| Measuring Tape | Measure dimensions |
Preparing The Site
First, remove all rocks and debris from the area. This makes the ground safe. Use a shovel to dig out large stones. Grass and weeds need to go too. Smooth the soil with a rake. Make sure the ground is flat and even. A level ground is important for a strong shed floor. It helps keep the shed stable. Check with a level tool often. Adjust the soil until it’s right.
Use stakes and string to mark the shed’s outline. Hammer the stakes into each corner. Tie the string tightly between stakes. Make sure the shape is a rectangle or square. Measure the sides with a tape measure. Check that opposite sides are equal. The corners should form right angles. Adjust stakes if needed. This will guide you when building the floor.
Building The Foundation
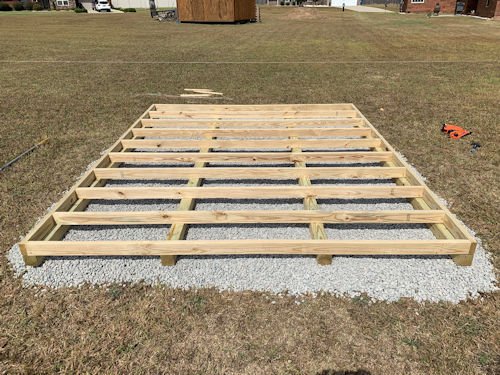
Choosing the right foundation for your shed is important. Concrete blocks are popular. They provide strong support. Wooden beams are another choice. They are easy to install. Gravel pads are also used. They help with drainage. Each type has its pros. Think about your needs. Consider your budget too. This helps in decision making.
Concrete blocks make a good shed base. Start with leveling the ground. Use a shovel for this. Place blocks evenly on the ground. Keep them straight. Use a level tool to check. Space them correctly. This will support the floor. Make sure blocks are sturdy. Strong blocks prevent sinking. They keep your shed stable.
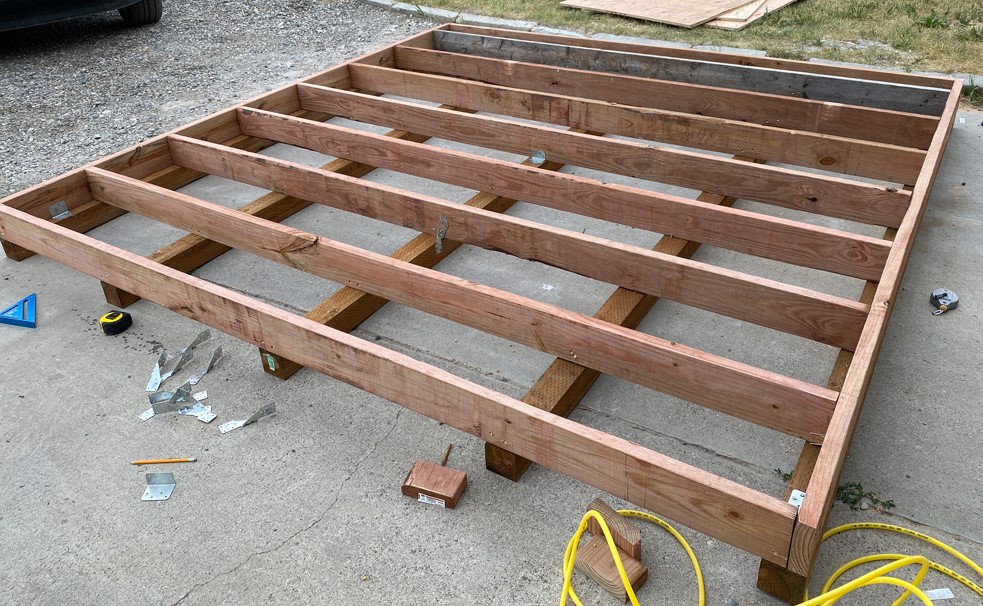
Constructing The Floor Frame
First, gather all the necessary tools and materials. You will need a saw, tape measure, and lumber. Measure the lumber carefully. This ensures it fits well. Mark the lengths you need. Cut along the marked lines. Always wear safety gear. Safety is very important while cutting. Check each piece after cutting. They should be of equal length.
Lay the cut pieces on the ground. Arrange them in a rectangle shape. Use nails or screws to join them. Make sure the corners are square. You can use a square tool for this. Secure each joint tightly. The frame should be strong. It must hold the weight of the shed. Double-check each connection. The frame should not wobble.
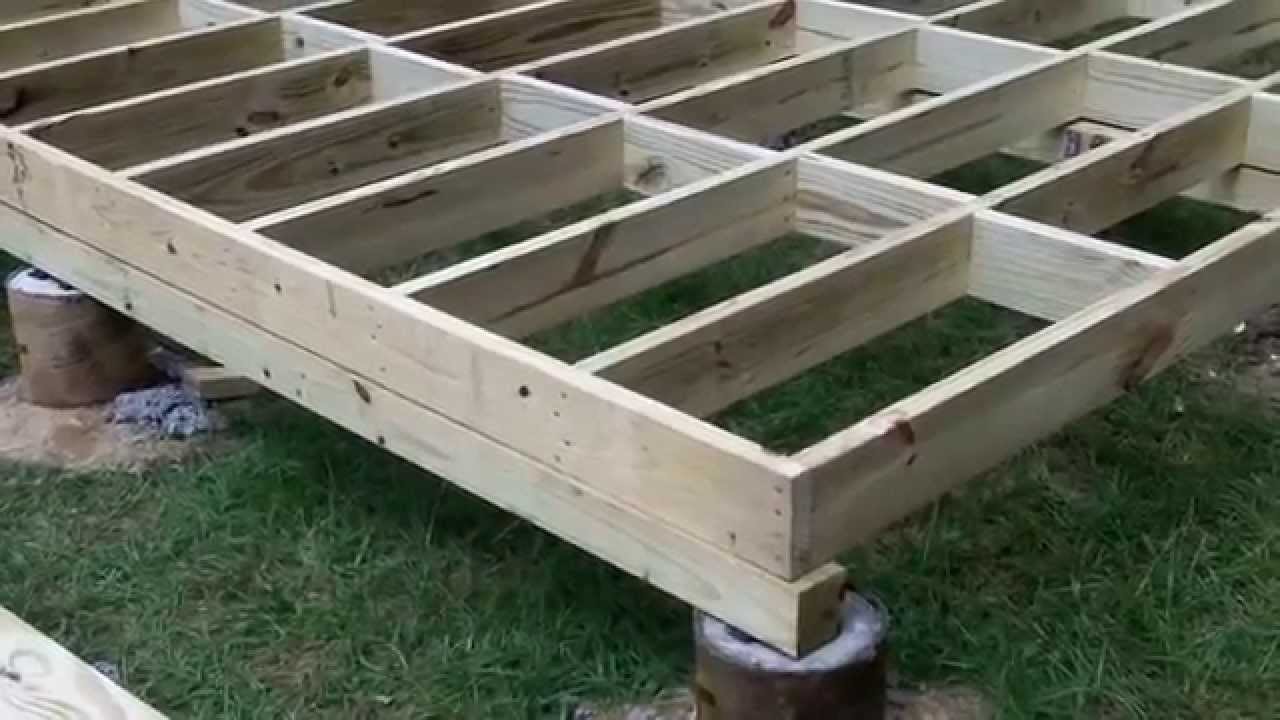
Installing Floor Joists
Start by marking the spots for each joist. Measure 16 inches between each mark. This spacing gives support. It also helps the floor stay strong. Use a tape measure for accuracy. Align each joist with the marks. Ensure they are straight and even. A straight line helps balance the shed floor. Use a chalk line to guide your placement. Place joists carefully. Check that they are level. Adjust if needed.
After aligning, secure each joist to the frame. Use strong nails or screws. Nails should be long enough for a tight hold. Three screws per joist end is ideal. This keeps them in place. Make sure each joist is firmly attached. Test by gently shaking. If it moves, add more screws. A secure joist means a stable shed floor. Check each connection for strength. Adjust as needed.
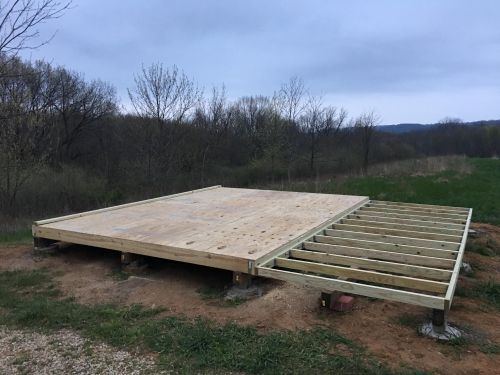
Adding The Plywood Floor
Measure the shed floor area. Use a tape measure for accuracy. Mark the plywood sheets with a pencil. Ensure the lines are straight. A saw is needed to cut along the lines. Safety goggles are important during cutting. Cut slowly to avoid mistakes. Each sheet must fit snugly. Check the fit before moving on.
Place the plywood on the joists. Make sure they are aligned. Use screws to hold the plywood down. A drill makes this task easier. Start at one corner. Work your way across. Screws should be about 6 inches apart. This keeps the plywood secure. Double-check for any loose spots. Tighten any loose screws.
Finishing Touches
Adding the final details ensures a sturdy shed floor. Level the surface, secure boards tightly, and check alignment. These steps create a durable base for any shed project.
Sealing And Protecting The Floor
Sealing the shed floor keeps it safe from water. Water can damage wood. Use a good sealant for this task. Apply the sealant evenly across the floor. This adds a protective layer. Let the sealant dry completely. Dry time may vary based on sealant type. Follow the instructions on the product. Check for areas that need extra attention. Make sure no spots are missed. A well-sealed floor lasts longer. It also looks better.
Inspecting And Final Adjustments
Inspect the floor for any loose boards. Fix them right away. Check for any nails sticking out. Hammer them down safely. Look for any uneven spots. Use a level tool if needed. Make necessary adjustments for a flat surface. Tighten any screws that are loose. Ensure everything is in place. A final check helps avoid future issues. A well-inspected floor is safe and sturdy.
Frequently Asked Questions
What Materials Are Best For Shed Floors?
Concrete, plywood, and pressure-treated lumber are popular choices. Concrete offers durability and strength. Plywood is cost-effective and easy to install. Pressure-treated lumber resists moisture and pests, ensuring longevity. Each material has its pros and cons, so choose based on budget, environment, and intended use.
How Thick Should A Shed Floor Be?
A shed floor should typically be at least ¾ inch thick for plywood. For concrete, a thickness of 4 inches is recommended. Thickness ensures durability and supports heavy loads. Consider the type of items you’ll store and local weather conditions to determine the appropriate thickness.
Do Shed Floors Need Insulation?
Insulation is beneficial for sheds used year-round. It helps regulate temperature and prevents condensation. Insulated floors can improve comfort and protect stored items from moisture damage. Consider using foam board or fiberglass insulation for effective thermal protection. Insulation is especially important in colder climates.
Can I Build A Shed Floor Without A Foundation?
Building without a foundation is possible but not recommended. A foundation provides stability and prevents moisture damage. It ensures the shed remains level over time. Consider using concrete piers, blocks, or gravel for a solid base. Foundation choice depends on shed size and soil type.
Conclusion
Building a shed floor is a manageable task. With clear steps, anyone can do it. Start with a solid plan. Gather the right tools and materials. Follow the outlined instructions carefully. This ensures a sturdy and durable floor. Regular checks maintain quality.
Enjoy the satisfaction of a job well done. The shed will serve its purpose for years. Remember, patience and precision are key. Celebrate your achievement. Share your success with friends and family. Inspire others to take on similar projects. A well-built shed floor makes all the difference.


