When filming the floor, you first choose materials that complement your scene’s mood, like polished wood or textured concrete. You’ll use low-angle or overhead shots, often with a dolly track close to the floor, to capture surface details and patterns. Lighting at shallow angles enhances texture by casting delicate shadows and highlights. Managing reflections with filters and post-production boosts realism. Different floor types pose unique challenges that careful technique overcomes—explore deeper to master these cinematic nuances.
Selecting the Right Flooring Material for the Scene
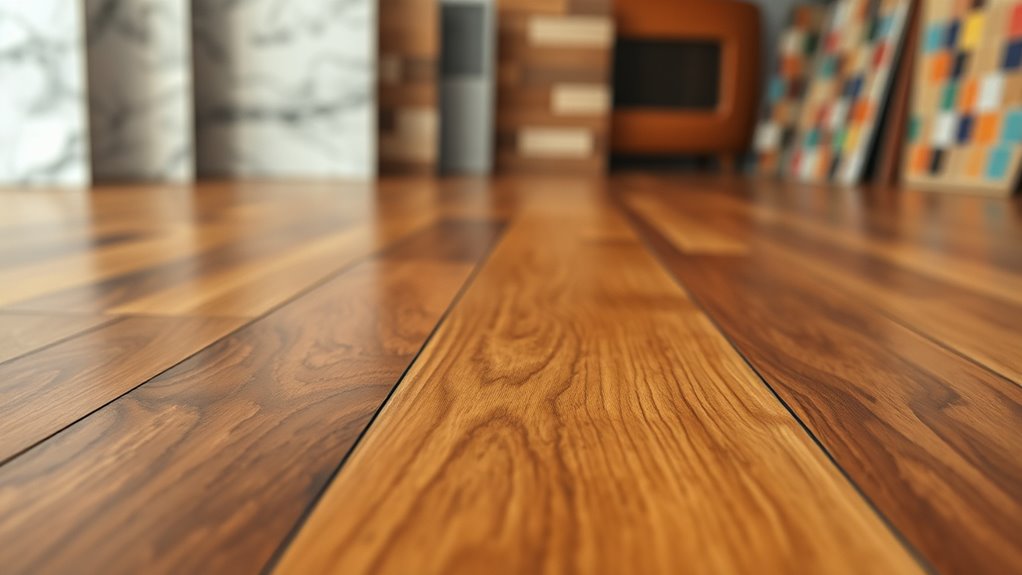
When choosing the right flooring material for a scene, you need to contemplate how it interacts with lighting, camera angles, and the overall aesthetic. Your scene selection dictates whether you opt for polished hardwood, matte concrete, or textured carpet, each offering distinct visual cues. Flooring material reflects or absorbs light differently—glossy surfaces create sharp highlights, while rough textures scatter light softly, influencing mood and depth. You want a floor that complements the narrative, supports set design, and enhances freedom in shot composition. Consider durability and ease of modification too, as you’ll often retouch or adjust the floor during filming. By meticulously selecting flooring material aligned with your scene’s atmosphere, you guarantee the floor becomes an active, expressive participant rather than a passive backdrop.
Camera Angles That Highlight Floor Textures
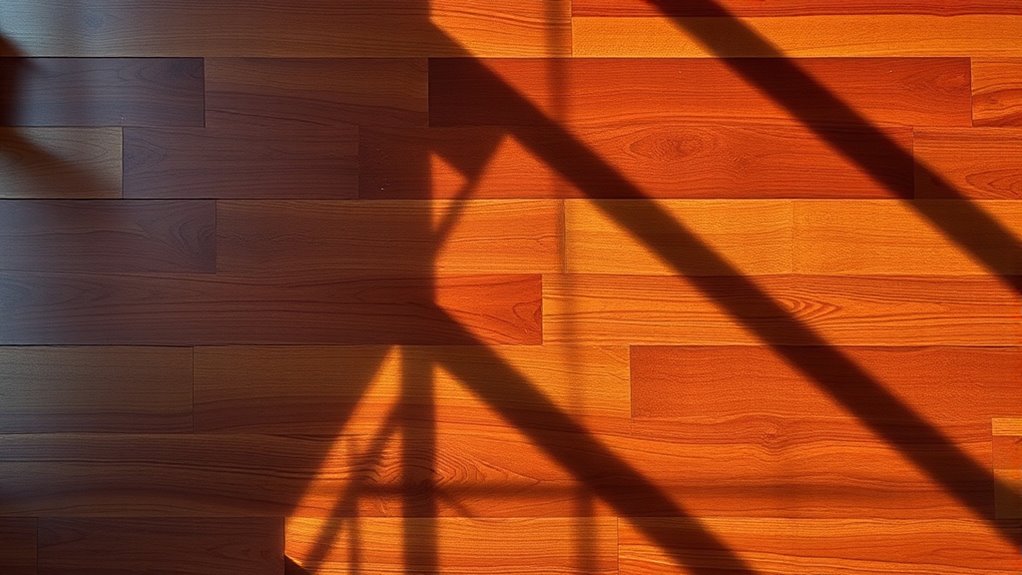
Although floor textures can subtly influence a scene, your choice of camera angles will determine how prominently they appear on screen. To maximize texture emphasis, use low-angle shots that skim the surface, capturing intricate floor patterns and the interplay of materials. Overhead or bird’s-eye views reveal geometric layouts and repetitive designs, providing a clear visual of the floor’s structure. Tilted angles, like Dutch tilts, add dynamic tension, highlighting irregularities in texture and depth. Close-ups with shallow depth of field isolate specific areas, emphasizing grain and surface detail. By thoughtfully selecting angles, you control how the floor’s tactile qualities contribute to the narrative, inviting viewers to experience the space with freedom and intention, making the floor itself an active participant in storytelling.
Lighting Techniques to Enhance Floor Details
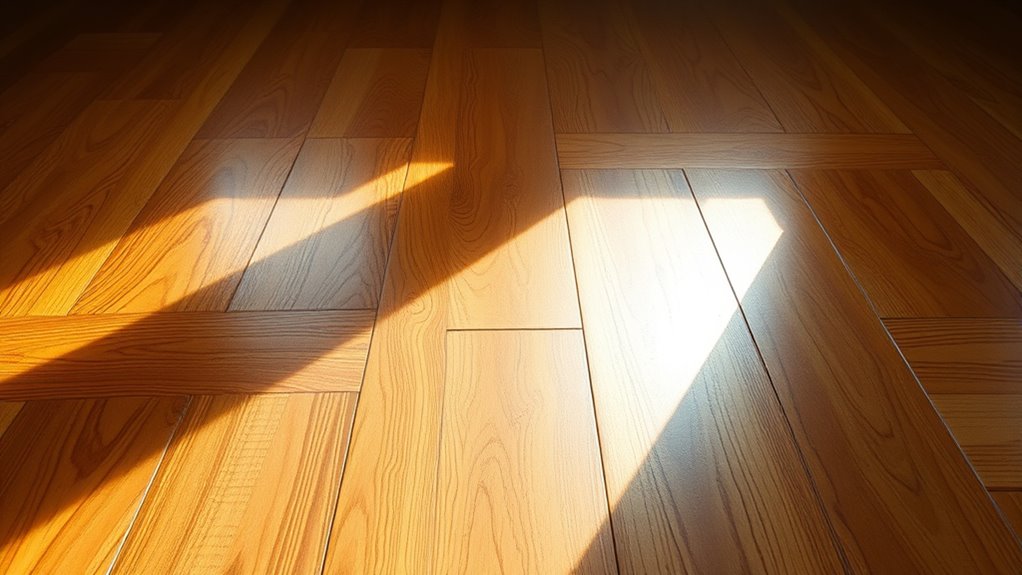
You’ll want to position your key lights at low angles to cast gentle shadows that reveal the floor’s texture without overpowering it. Balancing highlights and shadows is essential to avoid flattening the surface or creating harsh contrasts that distract from details. By carefully adjusting your lighting setup, you can make every grain and pattern on the floor stand out vividly on camera.
Key Lighting Angles
Since capturing the intricate textures and patterns of a floor requires precise illumination, key lighting angles play an essential role in revealing every detail. When you employ key lighting techniques, you want to position your light sources at shallow, oblique angles relative to the floor surface. This effective angle selection casts subtle shadows that accentuate the floor’s depth and texture without overwhelming glare. Avoid direct overhead lighting, as it tends to flatten visual interest and obscure fine details. Instead, experiment with side lighting or low-angle placement to create dimensionality and highlight the floor’s structural nuances. By mastering these angles, you gain control over how reflections and surface irregularities appear on camera, ensuring the floor’s character is faithfully rendered. Precision in angle choice directly impacts the visual freedom you have to showcase floor artistry.
Highlighting Textures Effectively
When aiming to highlight floor textures effectively, controlling light direction and intensity is essential to reveal every grain and groove without causing unwanted glare. Position your light sources at low angles to the floor, which accentuates surface patterns by casting subtle shadows along ridges and indentations. This technique enhances textural contrasts, making the details pop visually. Avoid harsh, direct lighting that flattens the texture and diminishes depth. Instead, use diffused light combined with focused highlights to balance clarity with softness, allowing the floor’s natural character to emerge. Adjust brightness carefully to prevent overexposure, which can wash out intricate textures. By mastering these lighting nuances, you gain the freedom to showcase floors with precision, emphasizing their unique textures and patterns in a visually compelling way.
Balancing Shadows and Highlights
A careful balance between shadows and highlights is essential for capturing the intricate details of a floor’s surface. You’ll want to master shadow interplay to avoid losing texture in either harsh darkness or blown-out highlights. Thoughtful highlight placement enhances depth, emphasizing grains, cracks, or patterns without overpowering the scene.
| Aspect | Tip |
|---|---|
| Shadow Interplay | Use soft, angled light sources to create subtle contrasts. |
| Highlight Placement | Position key lights to accentuate texture edges gently. |
| Light Intensity | Adjust brightness to prevent overexposure or murkiness. |
| Directionality | Combine multiple light angles to balance depth and detail. |
Use of Dolly Tracks and Floor-Level Shots
Although capturing smooth, dynamic movement at floor level poses challenges, dolly tracks provide the precise control needed for seamless shots. When you set up dolly tracks close to the floor, you enable fluid dolly movement that maintains camera stability, vital for avoiding jittery footage. The tracks guide the camera rig along a predetermined path, allowing you to achieve consistent speed and direction. Positioning the camera low on the dolly emphasizes texture and detail on the floor’s surface, immersing viewers in the scene. You’ll want to carefully align the track to avoid obstacles and guarantee a level trajectory, preserving the shot’s integrity. By mastering dolly movement and camera stability at floor level, you gain the freedom to explore creative, immersive perspectives that elevate your storytelling.
Creating Reflections and Shadows on the Floor
Since reflections and shadows add depth and dimension to floor shots, mastering their creation is essential for enhancing visual storytelling. You’ll want to control the angle and intensity of your light sources carefully to shape floor reflections precisely, ensuring they’re not overpowering but naturally integrated. Positioning lights low and at oblique angles helps emphasize shadow depth, giving the floor a tangible texture and spatial context. Using reflectors or diffusers can soften harsh highlights while preserving the crispness of shadows. Pay attention to the floor’s surface—whether polished or matte—as it influences how reflections behave and shadows appear. By thoughtfully balancing these elements, you reveal the freedom to craft compelling visuals where floor reflections and shadow depth work harmoniously, enriching your scene’s realism and emotional impact.
Post-Production Effects on Floor Appearance
You’ll find that color grading plays an essential role in setting the floor’s mood by adjusting hues, contrast, and saturation to match the scene’s tone. Digital texture enhancements can sharpen or soften surface details, adding depth or smoothing imperfections with pixel-level precision. These post-production steps guarantee the floor integrates seamlessly with the environment, enhancing realism without reshooting.
Color Grading Techniques
When you adjust the color grading in post-production, you can dramatically alter the floor’s appearance to match the scene’s mood or lighting conditions. Using grading software, you manipulate hue, saturation, and luminance values based on color theory principles to evoke specific emotions or enhance realism. For example, cooler tones can create a sterile, clinical floor effect, while warmer hues suggest coziness or nostalgia. You’ll often isolate the floor area with masks or tracking tools to apply precise adjustments without affecting the rest of the frame. Balancing shadows and highlights guarantees texture detail stays intact, preserving depth and material authenticity. Mastering these techniques lets you control the floor’s visual impact, seamlessly integrating it into the narrative and lighting framework of the shot.
Digital Texture Enhancements
Although the floor’s base texture is captured during filming, digital texture enhancements let you refine and amplify its surface details in post-production. By applying digital texture mapping, you can overlay high-resolution patterns that elevate the floor’s realism without reshooting. This process grants you freedom to simulate various materials—wood grain, stone roughness, or worn surfaces—with unmatched precision. For a truly realistic floor simulation, you’ll focus on:
- Enhancing micro-details like scratches and dents to add depth.
- Adjusting specular highlights to mimic light reflections accurately.
- Incorporating normal and bump maps for tactile surface variations.
- Blending multiple texture layers seamlessly for natural changes.
These techniques guarantee the floor’s appearance is both visually compelling and adaptable across different scenes or lighting conditions.
Challenges in Filming Different Floor Surfaces
Since floor surfaces vary widely in texture, reflectivity, and durability, filming them presents unique technical challenges that demand careful planning. You’ll notice that surface reflections can cause unwanted glare or hotspots, especially on polished floors like marble or hardwood. Managing these reflections requires precise lighting setups and often polarizing filters to control glare without dulling the image. Texture differences also affect how cameras capture detail; rough concrete floors scatter light unpredictably, demanding adjustments in exposure and focus to preserve depth. Meanwhile, delicate surfaces like vintage tiles require gentle handling to avoid damage while maintaining visual integrity. Balancing these factors means you must tailor your approach for each floor type, ensuring the final footage accurately conveys the floor’s character without technical distractions, allowing creative freedom to showcase diverse environments effectively.


