Are you staring at your outdated vinyl flooring, dreaming of a fresh new look for your home? Removing old vinyl flooring might seem like a daunting task, but with the right guidance, you can transform your space with ease.
Imagine the satisfaction of peeling away those layers and uncovering a blank canvas ready for your creative touch. You’ll save money, learn new skills, and gain the freedom to customize your floors exactly how you envision them. You’ll discover step-by-step instructions and insider tips that will make the process smooth and straightforward.
So, if you’re ready to roll up your sleeves and dive into a rewarding DIY project, keep reading to unlock the secrets of taking out vinyl flooring like a pro.
Tools And Materials Needed
To remove vinyl flooring, gather essential tools first. You’ll need a utility knife for cutting through the vinyl. A heat gun helps loosen adhesive. Have a couteau à mastic or scraper ready to lift the vinyl. Pliers are useful for pulling up stubborn pieces. Goggles protect your eyes from dust and debris. Use gants to keep your hands safe. A dust mask is important for clean breathing. Have a seau to hold discarded materials.
Trash bags are handy for easy cleanup. A vide removes small bits left behind. You might also need a marteau for tackling tough spots. Mètre à ruban can help with precise cuts. Marker or chalk is useful for marking areas. Adhesive remover aids in clearing sticky residue. These tools make the job easier and safer. Gather them before starting your project.
Preparation Steps
First, remove all furniture and items from the room. Make sure nothing is left on the floor. This helps you work faster and safer. If something is heavy, ask a friend for help. Store items safely away from the work area.
Wear gloves to protect your hands. Dust masks keep you safe from dust. Safety glasses protect your eyes from flying debris. Keep a first-aid kit nearby. Always ensure proper ventilation in the room.
Look for any damage or loose tiles. Identify any areas that may need special care. Check for signs of mold or water damage. Note any areas that feel soft or spongy. This will help you plan the removal process better.
Removing Baseboards And Trim
Start by carefully removing baseboards and trim to take out vinyl flooring. Use a pry bar to gently lift them. This step ensures easy access to the flooring edges for a smooth removal process.
Using A Pry Bar
Use a pry bar to remove baseboards gently. Place it behind the board. Push carefully to avoid breaking it. Wiggle the bar to loosen nails. Go slow to keep the wall safe. Watch out for any paint or wallpaper. It might peel off. Use a cloth to protect the wall.
Labeling For Reinstallation
Label each piece for later use. Use a pencil or tape. Write its location on it. This helps during reinstallation. Keep all nails and screws together. Put them in a safe box. This saves time and confusion later.
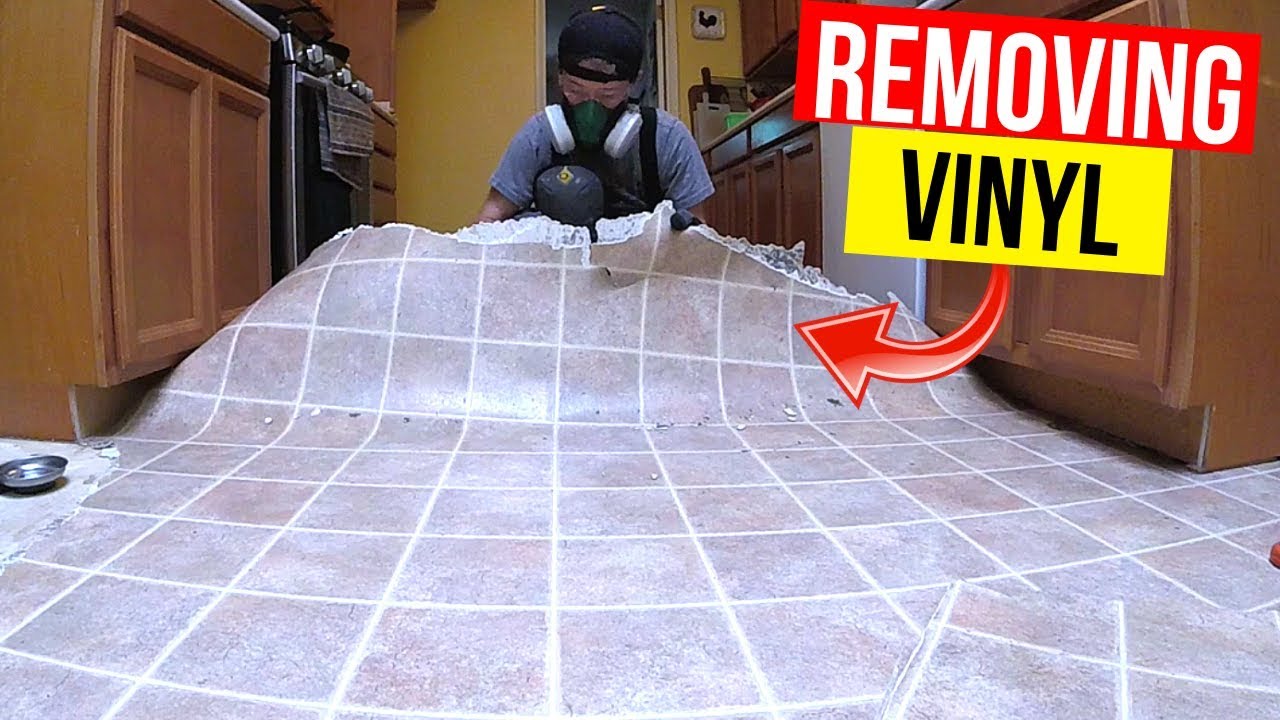
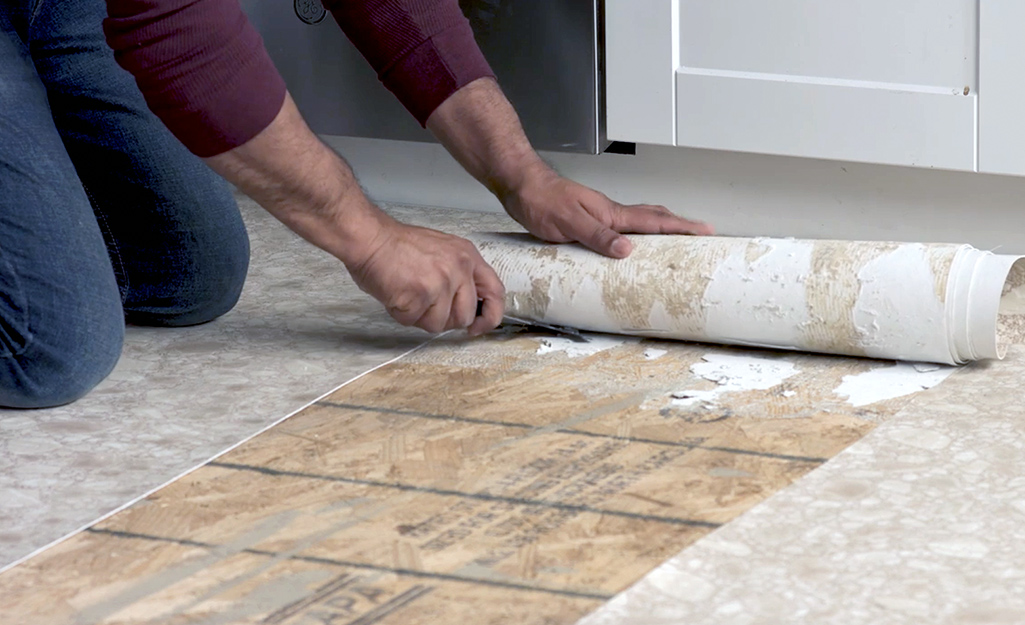
Peeling Back The Vinyl
Begin with the corner of the room. Use a couteau à mastic to lift the vinyl. Slide the knife under the edge. Pull gently and slowly. Patience is key here. Avoid tearing the vinyl. Move along the edge. Pull up a little at a time. This keeps the vinyl intact. Corners are often glued down tightly.
Adhésif can be tricky. It holds the vinyl firmly. Use a heat gun to soften it. Keep the gun moving. Don’t focus on one spot. This avoids damage. Once softened, peel the vinyl. Use the putty knife again. Remove leftover glue with warm soapy water. Scrub gently to avoid scratching the floor. Faire le ménage the surface well before laying new flooring.
Dealing With Stubborn Adhesive
Removing vinyl flooring involves dealing with stubborn adhesive. This sticky residue can be challenging to handle. Use a scraper or adhesive remover to ease the process and ensure a clean surface.
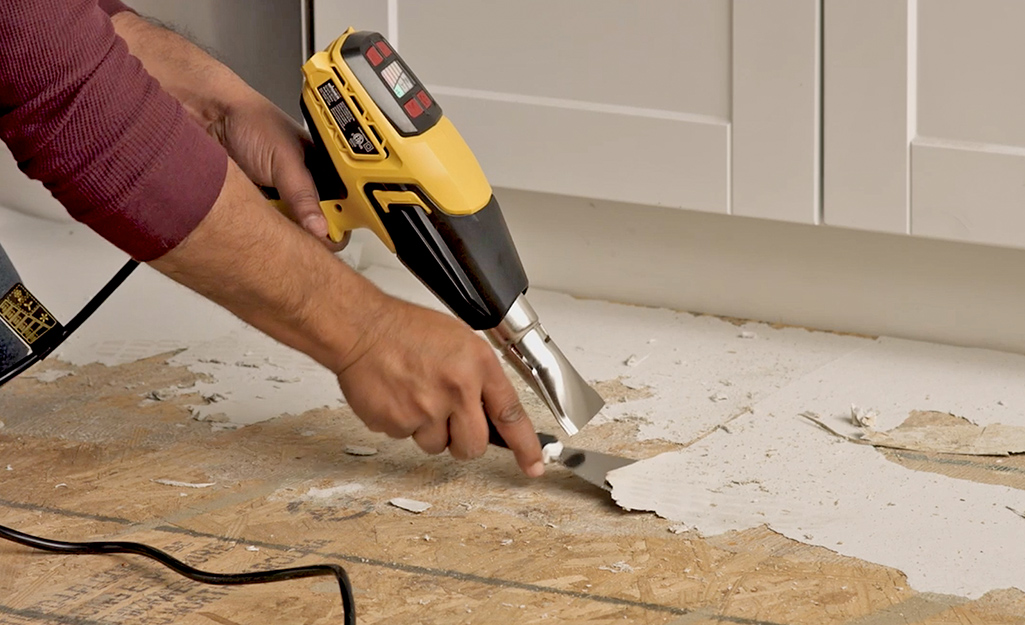
Using A Heat Gun
A heat gun can help remove tough adhesive. Plug in the heat gun and set it to medium heat. Hold it a few inches above the vinyl. Move it back and forth slowly. The heat softens the adhesive. Once it’s soft, use a putty knife to scrape the vinyl. Be careful not to burn the floor. Heat guns are strong, so handle them with care. Work in small sections for best results. This keeps the job manageable. Remember to wear gloves. They protect your hands from heat.
Applying Adhesive Remover
Adhesive remover can also help with sticky glue. Spread a layer of remover on the sticky spots. Allow it to sit for a few minutes. This breaks down the glue. Use a scraper to lift the vinyl. Be gentle to avoid scratching. Some removers have strong smells. Open windows for fresh air. Follow the instructions on the remover label. Safety comes first. Always wear gloves and goggles. They protect you from chemicals.
Cleaning The Subfloor
It’s important to remove all sticky glue. Use a scraper to get rid of it. A putty knife can work well too. Be gentle to avoid scratching the floor. Sometimes the glue is stubborn. In such cases, apply a little warm soapy water. Let it sit for a few minutes. This helps soften the glue. After that, scrape again. Ensure all glue is gone.
A smooth floor is key for new flooring. Check for bumps or holes. Use a leveling compound to fix uneven areas. Mix the compound according to instructions. Pour it on the bumpy spot. Spread evenly with a trowel. Wait for it to dry completely. Sand the area lightly if needed. This ensures the floor is smooth and ready.
Disposing Of Old Flooring
Vinyl flooring can be recycled. This helps the environment. Many centers accept old vinyl. Check online for nearby locations. Some cities have drop-off points. You can also call local centers. Ask if they take vinyl. Some might not accept it.
Rules for disposing vinyl differ. Contact local authorities for guidance. They give instructions on proper disposal. Some areas require special handling. This keeps the community safe. Follow these rules to avoid fines. Always stay informed.
:max_bytes(150000):strip_icc()/SPR-tools-to-remove-sheet-vinyl-flooring-1822807-hero_75933-94843cda2c9e4a4987a90caa9fbe97a2.jpg)
Questions fréquemment posées
What Tools Are Needed For Vinyl Flooring Removal?
To remove vinyl flooring, you’ll need a utility knife, floor scraper, and heat gun. A pry bar can help lift stubborn areas. Ensure you have gloves for safety. Having a vacuum handy will assist in cleaning debris. These tools make the job efficient and manageable.
How Can I Loosen Glued Vinyl Flooring?
Use a heat gun to soften the adhesive. Apply heat evenly to avoid damaging the subfloor. Once softened, use a floor scraper to lift the vinyl. Work slowly to ensure all glue is loosened. Repeat the process for stubborn sections until removed.
Is It Safe To Remove Vinyl Flooring Myself?
Yes, removing vinyl flooring yourself is generally safe. Wear protective gloves and a mask, especially when dealing with old adhesives. Ensure you have the right tools and follow proper techniques. If unsure, consult a professional for guidance or assistance.
How Do I Clean The Subfloor After Removal?
After vinyl removal, vacuum the subfloor to clear debris. Use a damp mop to remove dust and adhesive residue. Ensure the subfloor is dry before installing new flooring. This helps prevent future issues and ensures a smooth installation process.
Conclusion
Taking out vinyl flooring doesn’t have to be hard. With the right tools and steps, it can be simple. Start by gathering necessary equipment. Ensure safety with gloves and goggles. Cut the vinyl into manageable pieces. Gently peel it off, avoiding damage to the subfloor.
Dispose of the old flooring responsibly. Remember, patience is key. Rushing can lead to mistakes. Follow these steps, and you’ll succeed. Your floor will be ready for a fresh look. Enjoy your new project with confidence. Happy flooring removal!