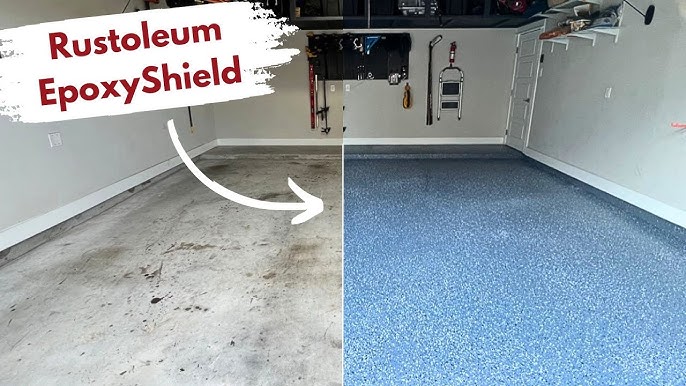
Imagine walking into your garage and seeing a sleek, shiny floor that not only enhances the look of the space but also protects it from wear and tear. That’s the power of epoxy paint.
If you’ve ever wondered how you can transform your garage floor into a durable and attractive surface, you’re in the right place. Painting your garage floor with epoxy is easier than you might think, and the results are truly stunning.
Why settle for a dull, dusty sol when you can have one that’s not only eye-catching but also resistant to oil stains, chemicals, and the inevitable scuffs and scratches? Plus, a well-painted garage floor can increase the value of your home and make cleanup a breeze. You might be asking yourself, “Is this something I can do on my own? ” Absolutely. With the right guidance, tools, and a bit of elbow grease, you can achieve professional-looking results without the hefty price tag. We’ll walk you through each step of the process, from preparing your floor to applying the final coat. By the end, you’ll have the confidence and knowledge to tackle this project and enjoy the benefits of a stunning epoxy garage floor. Ready to roll up your sleeves? Let’s dive in and get started!

Benefits Of Epoxy Flooring
Epoxy floors last a long time. They are very strong and can handle heavy loads. Cleaning is easy with epoxy. Dirt and spills wipe off quickly. The shiny surface makes your garage look new. It’s like a mirror on the floor. Epoxy floors are also safe. They don’t slip easily. This makes them good for garages. Many people like the smooth and bright look. It’s a favorite choice for many homes.
The colors are many. You can pick what you like. Some people like blue. Others like gray or white. You can even mix colors. This makes your garage unique. Epoxy floors protect against chemicals. They won’t damage easily. This keeps the floor looking good for years. It’s a smart choice for any garage.
Choosing The Right Epoxy
There are different epoxy coatings for garage floors. Water-based epoxy is easy to apply. It’s good for beginners. Solvent-based epoxy is stronger but may smell bad. Solid epoxy is very tough. It lasts a long time.
Think about floor usage. Busy garages need strong epoxy. The climate affects epoxy too. Cold places need special types. Budget matters as well. Some epoxies cost more. Choose wisely for the best result.
Preparing The Garage Floor
A clean surface is crucial. Sweep the floor to remove dust. Use a degreaser to clean oil stains. Rinse the floor with water. Dry the surface completely. Make sure no dirt remains.
Check the floor for fissures. Use a concrete patch to fill them. Smooth the patched areas. Let them dry fully. This step is important. It prevents further damage.
Etching helps the epoxy stick better. Mix etching solution with water. Apply it evenly. Scrub with a stiff brush. Rinse off the solution. Dry the floor thoroughly. This prepares the surface for painting.
Rassembler les outils et matériaux nécessaires
Gathering tools is key for a smooth project start. You need an epoxy kit to begin. The kit contains primer, color, and topcoat. Get a sturdy roller to apply the epoxy evenly. A paintbrush helps with edges and corners. Have a scraper for cleaning the floor. A seau is useful for mixing. Always wear gants to protect your hands. It’s smart to use a masque for safety. Lunettes de protection keep your eyes safe from splashes. Keep rags handy for spills.
Prepare the garage floor before painting. Remove dirt and grease with a degreaser. Use a vide to clear dust. A pressure washer helps with tough stains. Let the floor dry completely. Ensure it’s clean for the best results. Gather all tools before starting. This makes the task easier and faster.
Applying The Epoxy Primer
Start by pouring the primer into a clean container. Stir it well to combine all the ingredients. Ensure the mix is smooth. You might see bubbles. That’s okay. Let it sit for a few minutes. This helps the bubbles disappear. Check the label for any special instructions.
Use a roller for applying the primer. Choose a roller with a long handle. Dip the roller in the primer. Roll it onto the garage floor. Cover all areas evenly. Work in small sections. This prevents uneven application. Let the primer dry completely. Follow drying time on the label. Ensure the floor is smooth before the next step.

Applying The Epoxy Coating
Mix epoxy resin with the hardener in a clean bucket. Stir for two minutes. Use a wooden stick or drill mixer. Ensure all parts blend well. The mixture should look even and smooth. Any lumps can ruin your floor.
Pour a bit of the epoxy on the floor. Use a roller to spread it. Move the roller back and forth. Cover the whole surface. Be sure there are no gaps. Let it dry for 12 hours.
Check the floor for missed spots. Mix new epoxy if needed. Apply a thin second layer. This makes the floor strong and shiny. Let it dry again. Wait 24 hours before walking on it.
Adding Decorative Flakes Or Finish
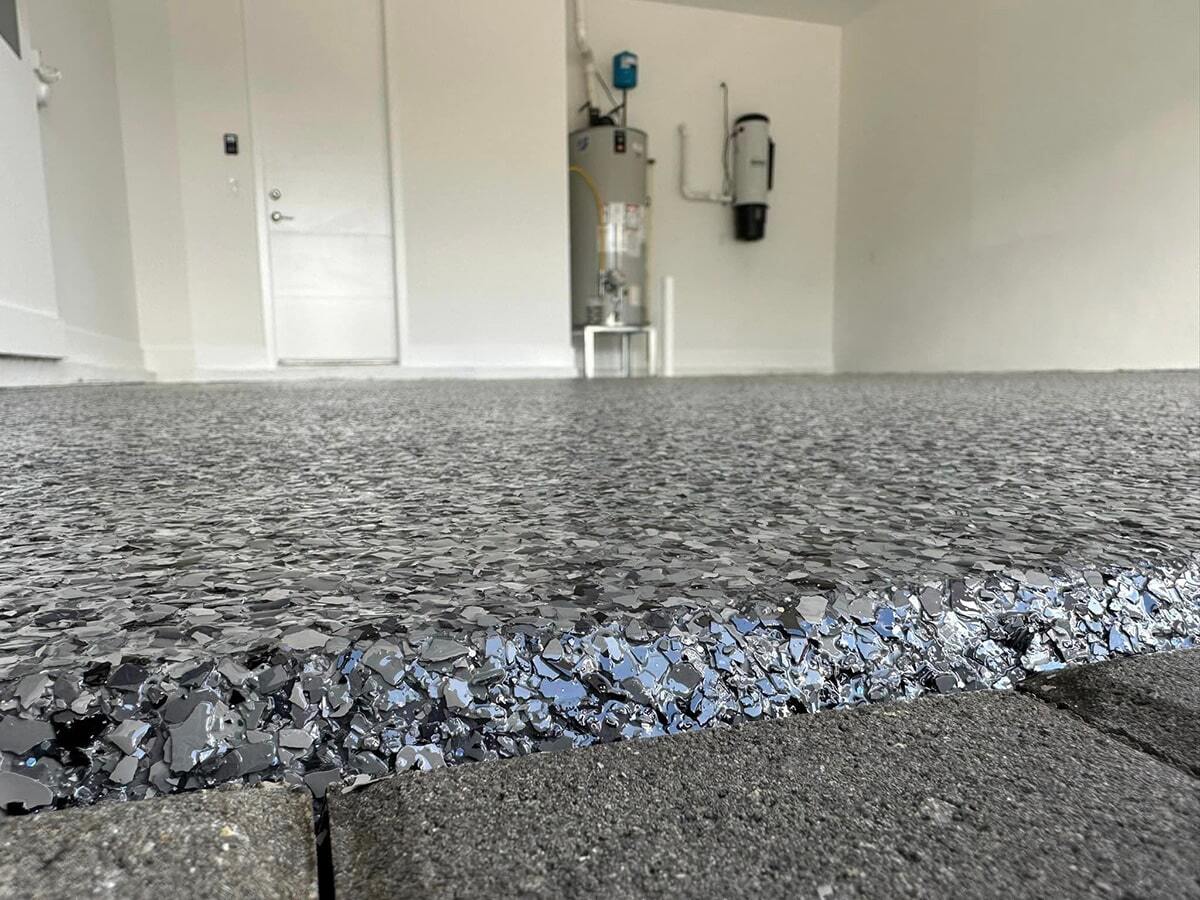
Adding decorative flakes makes the floor look pretty. These flakes come in many colors. Sprinkle them on the wet epoxy. Do it gently and evenly. This step adds a fun touch to your garage. Flakes can hide small flaws too. If you prefer a shiny look, use a clear finish. This finish protects the floor. Also, it makes it easy to clean. Be sure to choose a finish that suits your needs. Follow the instructions for the best results. Always wear gloves to protect your hands. Safety first!

Curing And Drying Process
Epoxy is strong. It needs time to cure and dry. This process is very important. Curing makes the floor tough. Drying is different from curing. It means the surface is not sticky. Wait for the epoxy to cure. This can take a few days. Temperature affects curing time. Warmer is faster. Cooler is slower. Humidity can also slow drying. Keep the area ventilated. This helps in drying.
Walking on the floor too soon is bad. It can ruin the paint. Patience is key. Follow instructions on the epoxy package. This ensures the best results. Vérifier the floor before using it. Make sure it’s dry and hard. Once cured, it will last long. Enjoy your new garage floor!
Maintenance Tips For Epoxy Floors
Clean spills quickly to keep the floor shiny. Use a soft broom or mop for daily cleaning. Évitez les produits chimiques agressifs; they can harm the epoxy. A mild detergent works well for regular cleaning. Ensure the floor is dry after mopping. Wet floors can be slippery and dangerous.
Place mats at entrances to catch dirt. This will help reduce scratches. Heavy objects can dent or scratch the surface. Use furniture pads to protect the floor. If you see any cracks or chips, repair them soon. This keeps the floor looking new and strong.
Questions fréquemment posées
What Is Epoxy Paint For Garage Floors?
Epoxy paint is a durable coating for garage floors. It provides a glossy finish and resists stains. This type of paint protects the concrete from wear and tear. It’s ideal for heavy-duty environments like garages. Epoxy paint also enhances the overall appearance of the floor.
How Do I Prepare My Garage Floor?
To prepare your garage floor, clean it thoroughly. Remove all dirt, grease, and old paint. Repair any cracks or damage. Ensure the surface is dry before applying epoxy. Proper preparation ensures better adhesion and a long-lasting finish. This step is crucial for a successful epoxy application.
How Long Does Epoxy Take To Dry?
Epoxy typically takes 24 to 72 hours to dry. The drying time depends on temperature and humidity. Ensure adequate ventilation during the drying process. Avoid walking or placing objects on the floor until it’s completely cured. Following manufacturer instructions is essential for optimal results.
Can I Paint Over Old Epoxy?
Yes, you can paint over old epoxy. First, clean and sand the existing surface. This ensures better adhesion of the new coat. Remove any loose or peeling areas. Apply the new epoxy following the manufacturer’s instructions. Proper preparation guarantees a smooth and durable finish.
Conclusion
Painting your garage floor with epoxy creates a durable surface. It enhances your space with a clean, polished look. Follow the steps carefully for best results. Choose quality materials for longevity. Proper preparation ensures strong adhesion. Take your time with each step.
The finished floor will withstand daily wear. Enjoy a fresh, neat garage that’s easy to maintain. Your efforts will bring a satisfying transformation. Ready for any vehicle or project. Transform your garage into a functional, attractive space. A smart choice for homeowners seeking durability and style.


