To fix scratches on your vinyl floor, first assess their depth by running your fingernail over them—if it catches, the damage is deep. Clean the area thoroughly with a mild detergent and allow it to dry. For minor scratches, apply a color-matched wax stick and buff gently. Use a repair kit or vinyl filler for deeper gouges, following precise application and drying instructions. Proper buffing restores the finish, and you’ll find useful preventative tips ahead to keep your sol pristine.
Identifying the Type of Scratch on Your Vinyl Floor
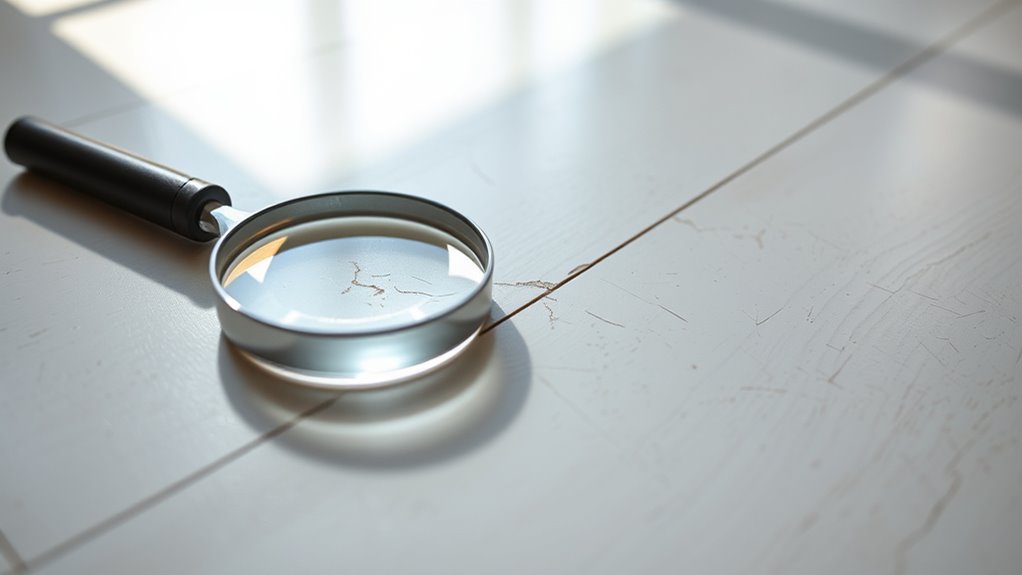
Before you start repairing, you need to identify the type of scratch on your vinyl floor. Examine the scratch characteristics carefully—note its length, depth, and visibility. Surface scratches are typically shallow and may only affect the wear layer, while deeper gouges penetrate the vinyl itself. Assess scratch severity by running your fingernail over the affected area; if it catches, the scratch is likely severe. Shallow scratches often appear as fine lines and can be less challenging to repair, whereas severe scratches may reveal underlying material or cause texture changes. Accurately categorizing the scratch guarantees you choose an appropriate repair method, preserving your floor’s durability and appearance. This precise evaluation empowers you to take effective action and maintain your vinyl floor’s freedom from damage.
Cleaning the Area Before Repair
To guarantee effective repair, start by thoroughly cleaning the scratched area on your vinyl floor. Proper surface preparation guarantees the repair materials adhere correctly, preventing further damage. Begin with basic cleaning techniques: sweep or vacuum to remove loose debris, then use a damp microfiber cloth with a mild detergent solution to eliminate dirt and oils. Avoid harsh chemicals that can degrade the vinyl. After wiping, let the area dry completely to prevent trapping moisture beneath repair compounds. Inspect the surface for residues or wax buildup; if present, use a gentle vinyl floor cleaner to remove them. This precise cleaning process creates an ideal surface, allowing your repair efforts to restore the floor’s appearance and durability efficiently and effectively.
Using a Vinyl Floor Repair Kit
One essential step in fixing scratches on your vinyl floor involves using a vinyl floor repair kit designed specifically for this purpose. Start by selecting a repair kit that matches your floor’s color and finish to guarantee seamless vinyl repair. Follow the kit’s instructions carefully, typically beginning with applying a filler compound into the scratch. Use a putty knife or applicator included to spread the filler evenly, pressing it firmly into the scratch for complete scratch removal. Allow the filler to dry thoroughly, as specified by the manufacturer, then gently sand the area with fine-grit sandpaper to smooth the surface. Finally, use the kit’s finishing solution or sealant to restore the floor’s shine and protect the repair. This method guarantees a durable, nearly invisible fix.
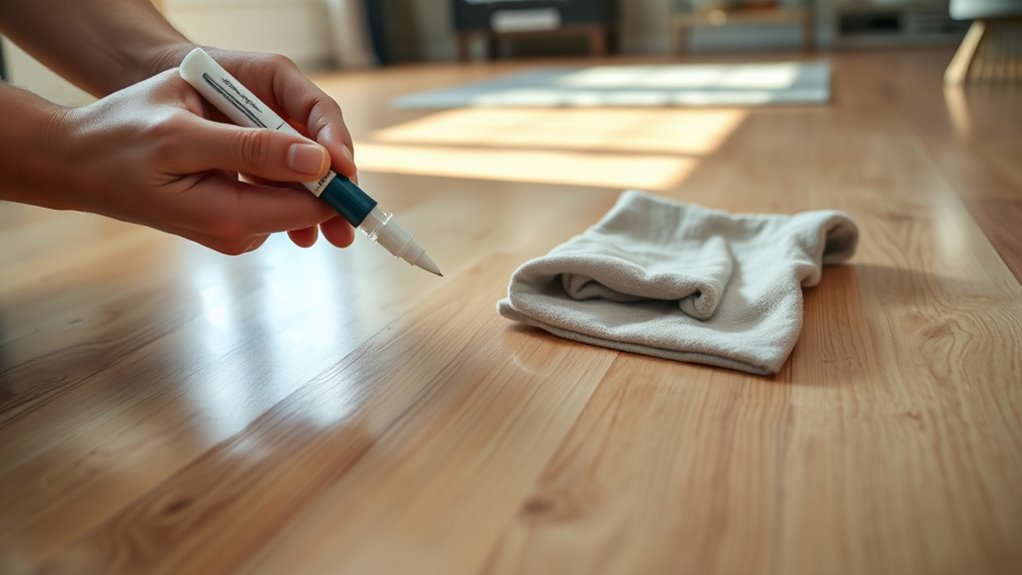
Applying a Wax Stick for Minor Scratches
To fix minor scratches, start by selecting a wax stick that closely matches your vinyl floor’s color. Clean and dry the scratched area thoroughly to guarantee proper adhesion. Then, apply the wax stick evenly, allow it to set, and buff the surface to restore a smooth finish.
Choosing the Right Wax
Although selecting the right wax may seem straightforward, it’s crucial to match the wax stick specifically to your vinyl floor’s color and finish to guarantee effective scratch repair. Different wax types—paste, liquid, or stick—offer varying ease of wax application and durability. For minor scratches, wax sticks are ideal due to their precision and minimal mess. Choose a wax stick with a color tint that closely aligns with your floor’s hue to facilitate seamless blending. Additionally, verify if your vinyl has a matte or glossy finish, as some waxes cater specifically to these surfaces. Applying the wrong wax type or shade can result in noticeable patches or ineffective scratch concealment. By carefully selecting the correct wax type and color, you maintain your floor’s appearance and extend its lifespan.
Preparing the Vinyl Surface
Before applying the wax stick, you’ll need to thoroughly clean the scratched area to confirm proper adhesion. Surface preparation involves removing dirt, oils, and debris using a mild detergent and water. After drying, perform a scratch assessment to determine if the wax stick is suitable for the damage extent.
| Étape | Detail |
|---|---|
| 1. Clean Surface | Use mild detergent and water |
| 2. Dry Thoroughly | Verify no moisture remains |
| 3. Inspect Scratch | Check depth and length |
| 4. Select Wax Stick | Match color and type |
| 5. Prepare Tools | Have clean cloths ready |
Proper surface preparation confirms the wax adheres well, providing a smooth, durable finish and restoring your vinyl floor’s appearance efficiently.
Applying and Buffing Wax
One critical step in fixing minor scratches on your vinyl floor is applying the wax stick evenly along the scratch line. Proper wax application techniques guarantee the scratch blends seamlessly with the surrounding surface, restoring your floor’s appearance. Follow these essential steps:
- Gently rub the wax stick along the scratch, filling it without excess buildup.
- Allow the wax to set for a few minutes to adhere properly.
- Buff the area with a soft cloth in circular motions to smooth and blend the wax.
These floor maintenance tips help maintain your vinyl’s finish and prevent further damage. By mastering this precise process, you’ll enjoy a scratch-free floor and the freedom to walk confidently on your vinyl surface.
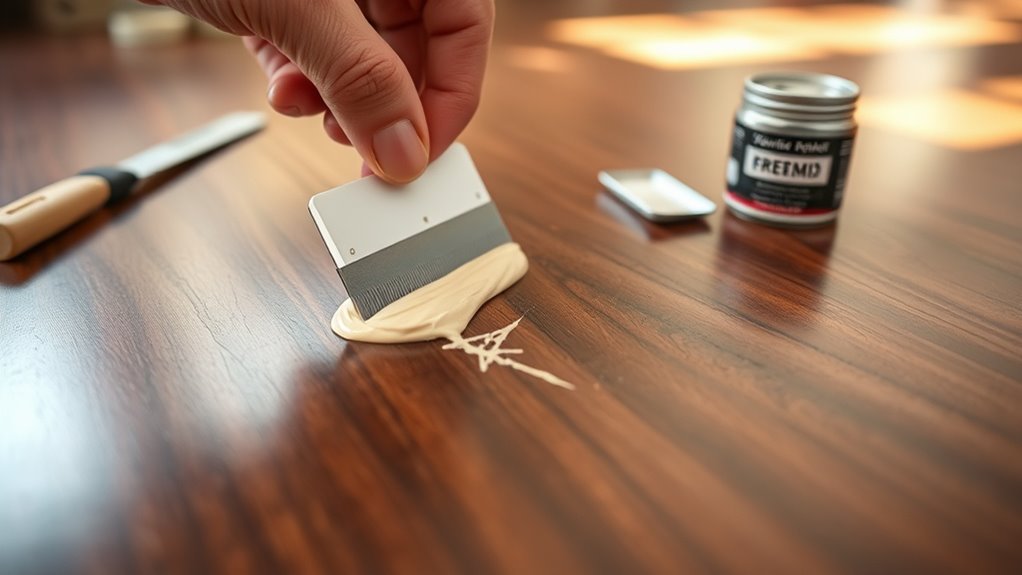
Fixing Deep Gouges With Vinyl Filler
To repair deep gouges, you’ll need a vinyl filler that matches your floor’s color and texture for a seamless finish. Apply the filler carefully, ensuring it fills the entire gouge without overflowing onto surrounding areas. Allow it to dry completely according to the manufacturer’s instructions before sanding or sealing.
Choosing the Right Filler
Although minor scratches on vinyl floors can often be buffed out, deep gouges require a specialized filler designed for vinyl surfaces. Choosing the right filler is vital for a seamless repair and lasting durability. Focus on these key factors:
- Filler Types: Select a vinyl-specific filler or putty that flexes with the floor, preventing cracks.
- Color Matching: Opt for a filler that closely matches your floor’s shade to avoid noticeable patches. Many brands offer customizable options or tints.
- Compatibility: Verify the filler bonds well with your vinyl material—consult product specifications to confirm.
Application and Drying Tips
After selecting the appropriate filler that matches your vinyl floor, you’ll need to focus on proper application and drying techniques to secure a durable repair. Start by cleaning the gouge thoroughly to remove debris. Use a putty knife or applicator to press the vinyl filler firmly into the scratch, making certain it fills the entire depth. Smooth the surface with consistent strokes to prevent air pockets. Avoid overfilling, as excess filler can cause unevenness. Allow the filler to cure undisturbed according to the manufacturer’s specified drying times—typically 24 to 48 hours. Maintain a controlled environment, avoiding humidity and temperature fluctuations that can affect drying. Following these application techniques and respecting drying times will secure the repair bonds well and restores your vinyl floor’s seamless appearance.
Buffing and Polishing the Floor for a Smooth Finish
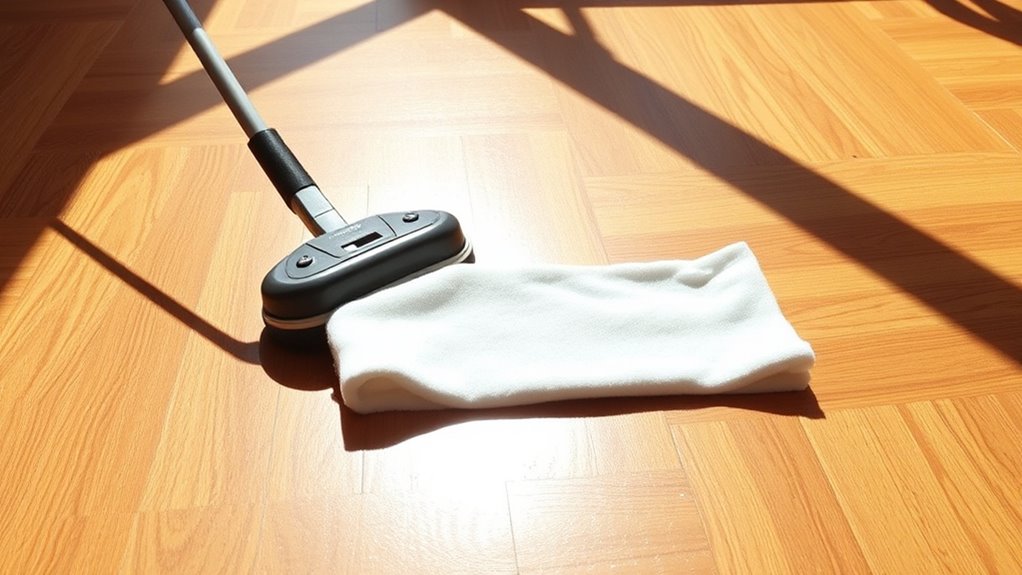
When you’ve repaired the scratches, buffing and polishing the vinyl floor is essential to restore its smooth finish. Using proper polishing techniques and buffing tools will enhance the floor’s appearance and durability. Follow these steps:
Buffing and polishing after scratch repair restores vinyl floors to a smooth, durable finish.
- Select a soft buffing pad compatible with vinyl to avoid damage during buffing.
- Apply a thin, even layer of polish formulated for vinyl floors to the scratched area.
- Use a low-speed buffer to evenly distribute the polish, moving in circular motions until the surface feels smooth and looks uniform.
This process removes residual imperfections and seals the repair, giving your floor a professional finish. Stick to manufacturer guidelines for polishing products and tools to maximize freedom in maintaining your vinyl floor’s pristine condition.
Preventative Tips to Avoid Future Scratches
Buffing and polishing help restore your vinyl floor’s smooth finish, but protecting it from future scratches will keep it looking its best longer. For effective scratch prevention, apply furniture pads under all legs of chairs, tables, and other movable objects. These pads reduce friction and prevent direct contact that causes abrasions. Regularly inspect and replace worn pads to maintain their protective function. Avoid dragging heavy items across the floor; instead, lift and carry them to prevent surface damage. Use area rugs in high-traffic zones to shield vulnerable sections. Additionally, clean your floor with a soft broom or vacuum designed for hard surfaces to eliminate grit that can scratch the vinyl. By implementing these measures, you preserve your floor’s integrity and enjoy unrestricted mobility without compromising its appearance.


