To fit vinyl floor tiles in 10 easy steps, start by gathering your tools and preparing a clean, level subfloor. Measure your room carefully and plan your tile layout, then acclimate the tiles to room temperature. Mark straight reference lines for alignment and apply adhesive or peel the backing. Begin laying tiles from the center, pressing each firmly into place. Finish by trimming edges and cleaning the sol for a polished look. Follow these basics, and you’ll be ready to explore each detail further.
Gather Your Tools and Materials

Before you begin fitting your vinyl floor tiles, you’ll need to gather all the necessary tools and materials to guarantee a smooth installation process. Start with a tools checklist that includes a utility knife, tape measure, straight edge, chalk line, notched trowel, and a rubber mallet. You’ll also want a roller to press the tiles firmly once laid. For material selection, choose high-quality vinyl tiles suitable for your room’s traffic and moisture levels. Don’t forget adhesive if your tiles aren’t peel-and-stick. Having everything ready avoids interruptions and keeps your project on track. By preparing this way, you facilitate freedom to focus on precise, efficient installation without scrambling for missing items. This initial step sets the foundation for a flawless vinyl floor fitting.
Préparer le sous-plancher
Before laying your vinyl tiles, make sure the subfloor is spotless by sweeping and mopping away all dust and debris. Next, use a level to spot any uneven areas that could cause problems down the line. Finally, fill in cracks or holes with a suitable filler to create a smooth, stable surface for your tiles.
Clean Thoroughly
Since a clean subfloor is essential for proper adhesion, you’ll want to remove all dust, dirt, and debris thoroughly. Start by sweeping the area with a stiff-bristle broom to clear loose particles. Next, vacuum the surface to pick up finer dust that sweeping might miss. For stubborn grime or grease, use a damp mop with a mild detergent, then rinse with clean water to avoid residue. Allow the floor to dry completely before proceeding. These cleaning techniques guarantee your surface preparation is solid, preventing bubbles or lifting later on. Taking the time to clean thoroughly gives you the freedom to enjoy a smooth, durable vinyl tile installation. Don’t rush this step—it’s key to a flawless finish that lasts.
Check for Levelness
Two key tools you’ll need to check your subfloor’s levelness are a long straightedge and a spirit level. Start by placing the straightedge across different sections of the floor. Use the spirit level on top to check for unevenness. To properly test floor stability and guarantee smooth vinyl tile installation, follow these steps:
- Lay the straightedge flat, spanning gaps or raised areas.
- Move it around, especially near walls and doorways where unevenness is common.
- Use the spirit level to measure any slopes or dips precisely.
Repair Surface Imperfections
Several common surface imperfections like cracks, holes, or bumps need fixing to confirm your vinyl floor tiles lay flat and last longer. Start your surface preparation by cleaning the subfloor thoroughly, removing dust and debris. For small cracks or holes, use a quality floor patching compound, applying it smoothly with a putty knife. Larger imperfections might require multiple layers—let each dry completely before adding the next. For bumps, sand down the area until it’s level with the surrounding floor. Proper patching techniques confirm a stable, even base, preventing tiles from lifting or peeling over time. Taking time on this step gives your floor the freedom to look flawless and perform well. Don’t rush—solid surface preparation is key to a successful vinyl tile installation.
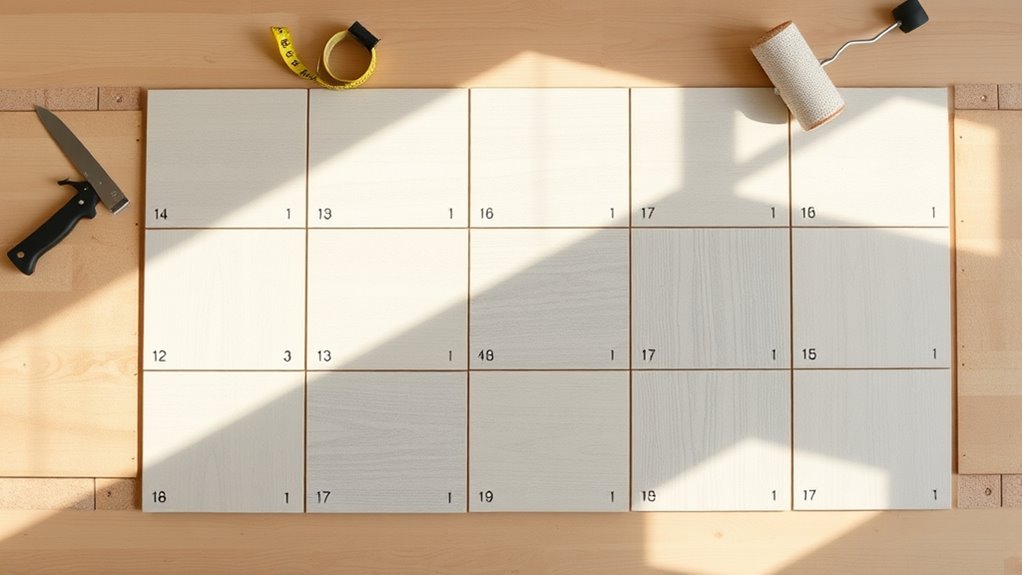
Measure and Plan Your Layout
Start by accurately measuring your room’s length and width to understand the total area you’ll cover. Next, decide on a starting point—usually the center or a prominent wall—to guarantee your layout looks balanced. Finally, sketch your tile placement to plan cuts and avoid awkward gaps along edges.
Assess Room Dimensions
Before laying down your vinyl floor tiles, you’ll need to carefully measure the room to guarantee an accurate fit and minimize waste. Accurate room measurement techniques are essential because understanding your space’s dimensions importance helps you plan your layout confidently. Here’s how to assess your room dimensions effectively:
- Measure the length and width of the room at multiple points to account for irregularities.
- Note any alcoves, doorways, or built-in features that affect tile placement.
- Calculate the total square footage by multiplying length by width, adjusting for any unique areas.
Identify Starting Point
Although it might seem straightforward, choosing the right starting point for your vinyl floor tiles is essential to achieving a balanced and professional-looking layout. The starting point significance lies in how it affects the entire floor’s symmetry and flow. Begin by measuring your room carefully, then find the center or a main focal wall—this often serves as the ideal starting point. Next, consider the tile’s pattern and how choosing orientation impacts the visual appeal and how tiles align with walls or fixtures. A well-chosen orientation guarantees fewer awkward cuts and a cleaner finish. Taking time here lets you plan confidently, avoiding last-minute adjustments. Remember, identifying your starting point is about setting yourself up for freedom in installation and a final result you’ll love.
Outline Tile Placement
Once you’ve pinpointed your starting point, you’ll want to measure and plan your tile layout carefully to verify even spacing and a balanced look. Begin by marking the room’s centerlines to help guide your tile orientation and pattern design. This step verifies your tiles flow naturally and avoid awkward cuts at edges. Follow these three steps:
- Measure the room’s length and width, then divide by the tile size to find the number of full tiles and partials needed.
- Dry-lay a row of tiles along the centerlines to visualize the pattern design and adjust as needed.
- Check that tile orientation aligns consistently throughout the space for a cohesive, polished finish.
Planning your layout upfront gives you freedom to create a stunning floor that fits perfectly.
Acclimate the Vinyl Tiles
Since vinyl tiles can expand or contract with temperature and humidity changes, you’ll want to acclimate them properly before installation. Start by bringing the tiles into the room where you’ll be laying them, leaving them flat and unopened for at least 48 hours. This allows the tile temperature to match the environment, preventing warping or gaps later. Keep an eye on humidity factors too—excess moisture can cause tiles to swell, so guarantee the room is dry and well-ventilated during acclimation. Avoid placing tiles near direct heat sources or drafts, as uneven temperatures can affect their stability. Taking these steps helps the vinyl adjust naturally, giving you the freedom to install a smooth, lasting floor without surprises caused by environmental changes.
Mark Reference Lines
Start by choosing a clear starting point in the center of the room or along a straight wall. Use a chalk line to snap straight, visible reference lines that will guide your tile placement. These lines guarantee your tiles stay aligned and the pattern looks professional.
Choose Starting Point
Where should you begin laying your vinyl floor tiles to guarantee a balanced and professional look? Choosing the right starting point is essential for an ideal layout and smooth installation. Consider these starting point considerations before you plunge into:
- Identify the room’s focal area—usually the center or the longest uninterrupted wall—to guarantee symmetry.
- Check for any irregularities like doorways or cabinets; starting near them may require smaller cuts and disrupt flow.
- Plan your layout so that you avoid narrow tile strips along walls, which can look awkward.
Use Chalk Lines
Two perpendicular chalk lines are essential for laying vinyl floor tiles accurately. Start by snapping a chalk line down the center of the room, parallel to your starting wall. Then, snap the second line at a perfect right angle, intersecting the first line at your chosen starting point. This grid acts as your anchor, ensuring every tile aligns and fits precisely. Mastering chalk line techniques means measuring twice, snapping once, and ensuring chalk line accuracy to avoid uneven gaps or crooked tiles. Use a reliable chalk line tool that produces a crisp, visible line for clear guidance. These reference lines free you from guesswork, letting you lay tiles confidently and keep your floor’s design crisp and professional-looking from edge to edge.
Cut the Vinyl Tiles to Size
Measure each tile carefully before cutting to guarantee a perfect fit along edges and corners. Accurate tile measurements are essential, so take your time and double-check dimensions. When you’re ready to cut, follow these cutting techniques to make the process smooth and precise:
- Use a straight edge or ruler to draw a clean cutting line on the tile’s backing.
- Score the vinyl tile gently with a utility knife along the line, applying steady pressure.
- Snap the tile along the scored line or finish the cut with scissors if needed.
Apply Adhesive or Peel Back Liner
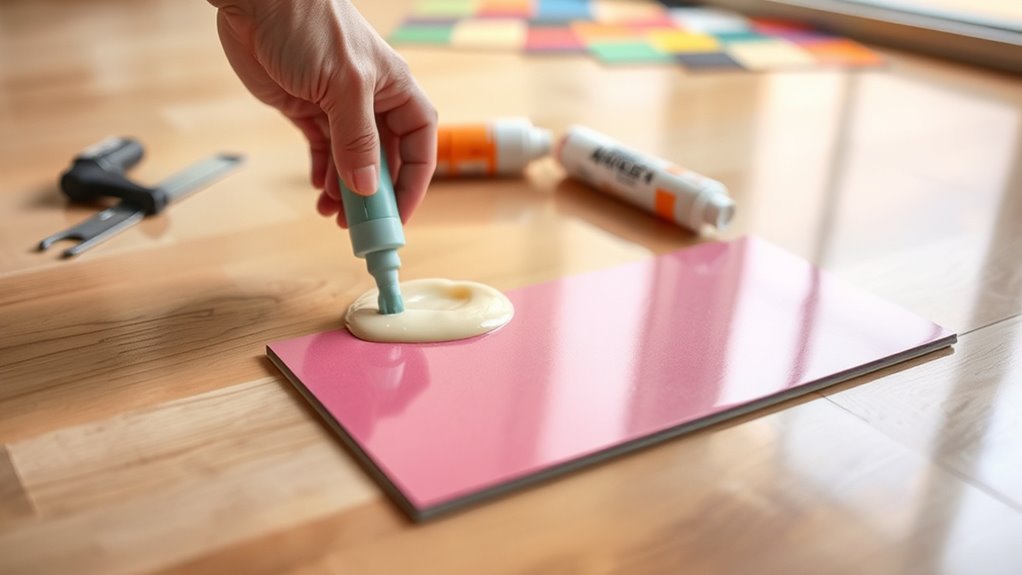
Once your vinyl tiles are cut to the right size, the next step is to secure them in place. You’ll choose between different adhesive types based on your floor and preference—pressure-sensitive adhesives offer flexibility, while wet adhesives provide a stronger, permanent bond. If your tiles come with a peel back liner, use peel back techniques carefully: start by peeling a small section of the liner and pressing the tile down to check alignment. Gradually peel back more liner while smoothing the tile to avoid bubbles or wrinkles. This method gives you control over placement, letting you adjust as you go. Whether applying adhesive or using peel back liners, take your time to guarantee a smooth, secure fit, setting the foundation for a professional-looking vinyl floor.
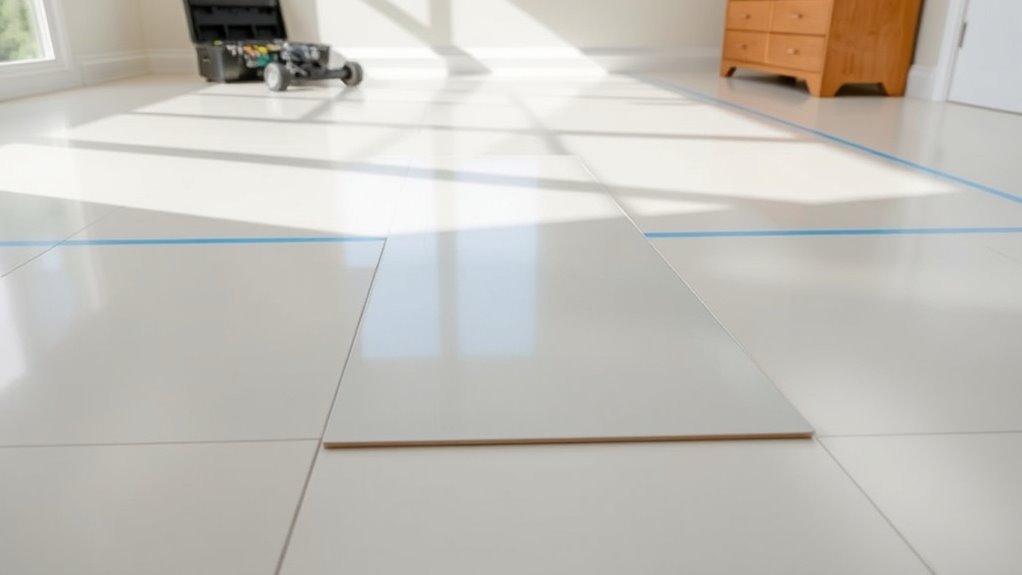
Lay the Vinyl Tiles Starting From the Center
Starting from the center of the room guarantees your vinyl tiles are laid out evenly and symmetrically, giving the floor a balanced, professional appearance. This center installation benefits you by avoiding awkward cuts along walls and ensuring tile alignment techniques keep patterns consistent. To lay tiles effectively:
- Mark the room’s exact center by measuring and snapping chalk lines intersecting at the midpoint.
- Begin placing tiles along these lines, working outward to maintain alignment and prevent shifting.
- Continuously check alignment against the chalk lines to keep tiles straight and avoid gaps.
Press and Secure the Tiles Firmly
After positioning your vinyl tiles along the center lines, you’ll want to press each tile down firmly to make certain it sticks well to the floor. Start by checking the tile alignment to make sure each piece fits snugly without gaps or overlaps. Applying even pressure is key—use your hands to press down from the center of the tile outward, eliminating air bubbles and securing the adhesive bond. For larger tiles, a roller can help distribute pressure evenly, enhancing adhesion. Avoid shifting the tile once it’s pressed; this could misalign the pattern. Taking the time to apply consistent pressure and confirm perfect tile alignment now will save you from issues later, making certain of a smooth, durable vinyl floor that stays put and looks great.
Finish Edges and Clean the Floor
Although the tiles are firmly in place, you’ll want to carefully finish the edges to secure a clean, professional look and prevent them from lifting over time. Start by applying edge sealing tape or a matching trim to protect exposed edges. This step not only secures your installation but also simplifies floor maintenance. Next, thoroughly clean the floor to remove dust and adhesive residue, using a damp mop or cloth. Finally, inspect the entire surface for any loose tiles or gaps and press down firmly to guarantee adhesion.
Follow these key steps for lasting results:
- Apply edge sealing to all perimeter tiles.
- Clean the floor gently but thoroughly.
- Double-check tile adhesion and fix any issues.
This approach keeps your vinyl floor looking great and free to enjoy.