To do an epoxy garage floor, start by gathering necessary materials, like epoxy resin, hardener, and a concrete grinder. Next, assess the floor for imperfections, clean it with a degreaser, and let it dry thoroughly. Once clean, repair any cracks with filler and sand the surface for smoothness. Etch the concrete to enhance adhesion, then mix and apply the epoxy coating using a roller. Allow it to cure for 24 to 48 hours, keeping traffic to a minimum. For lasting results, keep the floor clean and maintain the right conditions for curing. There's more to explore for perfecting your garage transformation.
Gather Necessary Materials
Before you plunge into the epoxy garage floor project, it's essential to gather all the necessary materials to guarantee a smooth process. Start by creating a material checklist that includes essential tools like a concrete grinder, vacuum, roller, and paintbrush. Don't forget safety gear, such as goggles and gloves, to protect yourself. You'll also need epoxy resin, hardener, and a primer for a strong bond. If you want to add color flakes or a topcoat, be sure to include those on your list too. By organizing everything beforehand, you'll save time and avoid frustration during the application. So, take a moment to check off each item, ensuring you're fully equipped for your epoxy garage floor transformation.
Prepare the Garage Floor
To guarantee a successful epoxy application, you'll need to thoroughly prepare the garage floor, as a clean and smooth surface is essential for the epoxy to adhere properly. Start with a floor assessment to identify any stains, cracks, or imperfections. Next, perform moisture testing to verify the substrate is dry enough for epoxy.
| Étape | Action Required | Outils nécessaires |
|---|---|---|
| Floor Assessment | Inspect for stains & damage | Flashlight, broom |
| Moisture Testing | Use a moisture meter | Humidimètre |
| Surface Cleaning | Degrease & scrub | Degreaser, scrub brush |
| Séchage | Allow adequate drying time | Fans or natural airflow |
Repair Damages and Imperfections
Repairing damages and imperfections in your garage floor is essential for ensuring a smooth and long-lasting epoxy finish. Start by inspecting your floor for cracks or uneven areas. For cracks, use a high-quality crack filler to fill in any gaps, ensuring you follow the manufacturer's instructions for application. Once the crack filler is dry, sand the surface lightly to create a smooth finish.
Next, focus on surface leveling. If you notice any dips or uneven spots, consider using a self-leveling compound to create a flat surface. Pour the compound, allowing it to flow into the low areas, and let it cure completely. This attention to detail will provide a solid foundation for your epoxy coating, enhancing its durability and appearance.
Clean and Etch the Surface
Cleaning and etching the surface of your garage floor is essential for ensuring proper adhesion of the epoxy coating. Start with thorough surface cleaning; sweep away dust and debris, followed by a wash using a degreaser to eliminate any oil stains. Rinse well and let it dry completely. Next, it's time for the etching process. Using a concrete etching compound or muriatic acid diluted with water, apply it to the surface. This helps create a rough texture, enhancing the bond. Make sure to follow the manufacturer's instructions for safety and effectiveness. After etching, rinse the floor thoroughly to remove any residue, and let it dry again. Your floor will be primed for that beautiful epoxy finish!
Mix the Epoxy Resin
Before you start mixing the epoxy resin, it's vital to choose the right type for your garage floor. Once you've selected your epoxy, follow the mixing process carefully to guarantee a strong bond and flawless finish. Pay close attention to the manufacturer's instructions, as the correct ratios and mixing time are essential for the best results.
Choosing the Right Epoxy
When you're ready to transform your garage floor, how do you choose the right epoxy? First, consider the epoxy types available. You'll find options like 100% solid, water-based, and solvent-based. Each type serves different needs, so think about durability, ease of application, and how resistant you want it to be against chemicals or abrasions. Next, explore color options. Epoxy comes in various colors and finishes, allowing you to personalize your space. You can opt for a solid color, a metallic finish, or even a flake system for added texture. Take your time to assess your garage's purpose and your aesthetic preferences. Choosing the right epoxy will guarantee a floor that not only looks great but stands the test of time.
Mixing Process Steps
As you prepare to apply your epoxy, mixing the resin correctly is vital for achieving a durable finish. Start by gathering your mixing tools, such as a clean bucket and a stir stick. Follow the manufacturer's instructions for the proper epoxy ratios, as this guarantees the chemical reaction occurs effectively. Pour the resin and hardener into the bucket, maintaining the specified ratios. Mix slowly but thoroughly for about 3-5 minutes, scraping the sides and bottom of the bucket to incorporate all components. Avoid air bubbles; a gentle mixing action is key. Once you've achieved a uniform, streak-free consistency, your epoxy is ready for application. Remember, working efficiently is important since the mixture has a limited pot life.
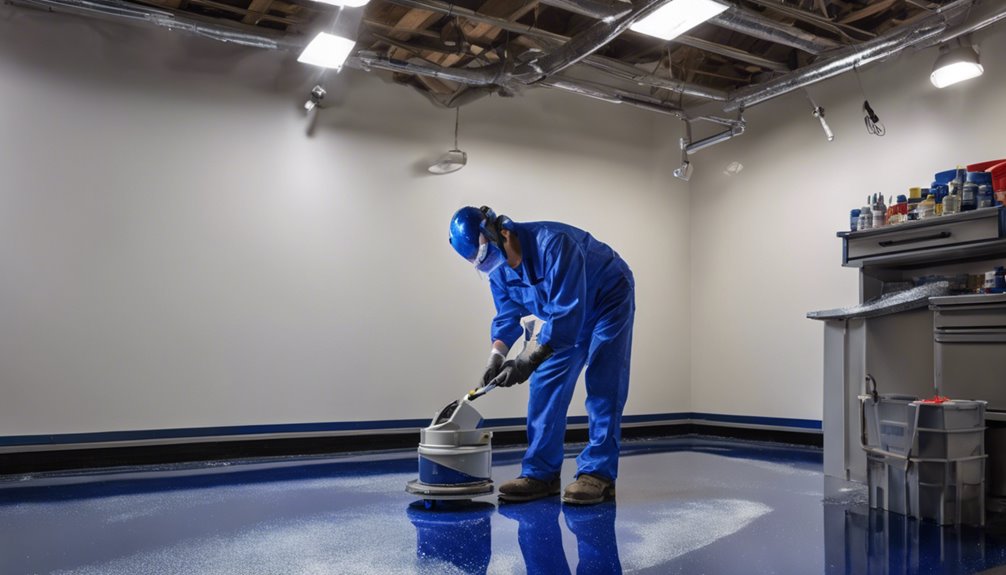
Apply the Epoxy Coating
Once you've mixed your epoxy resin, it's essential to focus on surface preparation to guarantee a strong bond. Clean the floor thoroughly, filling any cracks and making sure the surface is smooth before applying the coating. When you're ready to apply, use consistent techniques, like a roller or brush, to achieve an even finish.
Surface Preparation Steps
Applying the epoxy coating is an important step in achieving a durable and aesthetically pleasing garage floor. Before you start, it's vital to assess your surface types and moisture levels. Proper preparation guarantees the epoxy adheres well and lasts longer. Here's a quick guide to help you:
| Étape | Action | Remarques |
|---|---|---|
| Clean the surface | Remove dirt, grease, and debris | Use a degreaser if necessary |
| Vérifiez l'humidité | Test the floor using a moisture meter | Aim for below 4% moisture |
| Repair cracks | Fill in any cracks or holes with filler | Allow drying time |
| Etch the surface | Use an acid or mechanical method | Creates a better bond |
| Rinse and dry | Thoroughly rinse and dry the floor | Prevents trapping moisture |
With these steps, you're set to achieve an impressive finish!
Application Techniques Explained
Before you immerse yourself in applying the epoxy coating, it's crucial to understand the best techniques to guarantee a smooth and long-lasting finish. Start by mixing the epoxy thoroughly, following the manufacturer's instructions, to achieve the right consistency. For application methods, use a roller with a long handle for large areas, ensuring even coverage. A brush is perfect for corners and edges. Apply the first coat evenly, working in sections, and avoid overworking the material. Once the first coat dries, you can add decorative flakes or a second coat for extra durability. Always wear protective gear and maintain good ventilation. By mastering these coating techniques, you'll create a stunning garage floor that's built to last.
Cure and Maintain the Floor
As you complete the epoxy application, understanding how to properly cure and maintain your new garage floor is essential for its longevity and performance. Start by letting the epoxy cure for at least 24 to 48 hours, depending on the product instructions. Avoid heavy traffic during this time. Use curing techniques like maintaining a stable temperature and humidity level to enhance the hardening process. Once cured, regular floor maintenance is key; sweep or vacuum debris regularly, and mop with a gentle cleaner to prevent buildup. Avoid harsh chemicals that can damage the surface. With these simple steps, you'll guarantee your epoxy garage floor stays beautiful and functional for years to come, allowing you the freedom to enjoy your space.
Questions fréquemment posées
How Long Does an Epoxy Garage Floor Last?
Imagine rolling out your car onto a stunning epoxy floor after a long day, only to find it still looks brand new years later. That's the beauty of epoxy durability; with proper installation, it can last 10-20 years. To maximize longevity, follow maintenance tips like regular cleaning and avoiding harsh chemicals. This way, you'll enjoy a pristine garage that adds value to your home and freedom from constant upkeep.
Can I Apply Epoxy Over an Existing Floor?
Yes, you can apply epoxy over an existing floor, but it's essential to prepare the sol properly. Start by cleaning the surface to remove dirt and grease, then repair any cracks or imperfections. A thorough sanding or grinding may be necessary to create a rough texture for better epoxy adhesion. If the existing floor has a coating, you'll need to strip it away first. Proper preparation guarantees a durable and long-lasting epoxy application.
Is Epoxy Flooring Slippery When Wet?
Imagine gliding effortlessly across a dance floor—epoxy flooring can feel that smooth, but when it's wet, you might face unexpected slips. Epoxy safety is vital; while many epoxy products offer slip resistance, it's important to choose one designed for wet areas. You don't want to compromise your freedom of movement, so check for anti-slip additives or textures that can help maintain your grip even in slippery conditions. Stay safe and enjoy your space!
What Temperature Is Best for Applying Epoxy?
When applying epoxy, it's essential to take into account the ideal conditions for the best results. The temperature range for application should typically be between 60°F and 90°F. If it's too cold, the epoxy might not cure properly, while high temperatures can lead to quick curing, making it hard to work with. Ensuring your working environment falls within this range will help you achieve a smooth, durable finish and enhance the longevity of your project.
How Can I Remove Epoxy Stains From My Skin?
If you've gotten epoxy stains on your skin, don't panic! Start by using soap and warm water to wash the affected area; it often helps lift the epoxy. For tougher stains, you can try rubbing alcohol or acetone, but make sure to test a small area first. Always remember to wear gloves when working with epoxy in the future for skin protection. Following these epoxy removal tips can save you from frustration!