Are you staring at your floor tiles, wondering how to remove them without turning your home into a chaotic mess? You’re not alone.
Many homeowners face the same challenge when deciding to change their flooring. Whether you’re updating your style or dealing with damaged tiles, the thought of tearing them out can be daunting. But here’s the good news: with the right guidance, you can tackle this task smoothly and efficiently.
You’ll discover simple, step-by-step methods to remove floor tiles without breaking a sweat. You’ll learn how to avoid common pitfalls and make the process as stress-free as possible. Get ready to transform your space and uncover the secrets to a hassle-free tile removal. Dive in, and let’s get started!
Herramientas y materiales necesarios
Having the right tools is important. Martillo y chisel are basic ones. A scraper helps too. Use a heat gun to loosen tiles. Power drill with a chisel bit works faster. A balde for debris is handy. Cuchillo multiusos is used for cutting grout.
Safety is very important. Guantes protect your hands. gafas de seguridad keep eyes safe. A mascarilla antipolvo helps you breathe better. Knee pads protect your knees. Wear boots to keep feet safe.
Some materials help. Trash bags for debris disposal. Tape can mark areas. Agua is needed to clean the floor. Rags help wipe dust. Plastic sheets cover areas not being worked on.
Preparing The Work Area
First, move all muebles out of the room. This makes it easier to work. Next, take away rugs or carpets. Make sure nothing is left on the floor. This helps avoid tripping. Now, you have more space to work safely.
Wear gafas de seguridad to protect your eyes. Also, use gloves to keep your hands safe. Dust masks help you breathe clean air. Wear them to avoid dust problems. Lastly, wear strong boots. This keeps your feet safe from heavy tiles.
Find all water pipes and electric wires. Use a detector to locate them. Mark the spots on the floor. This helps avoid damage. If you are unsure, ask an adult for help. Safety is the most important thing.
Removing Tile Grout
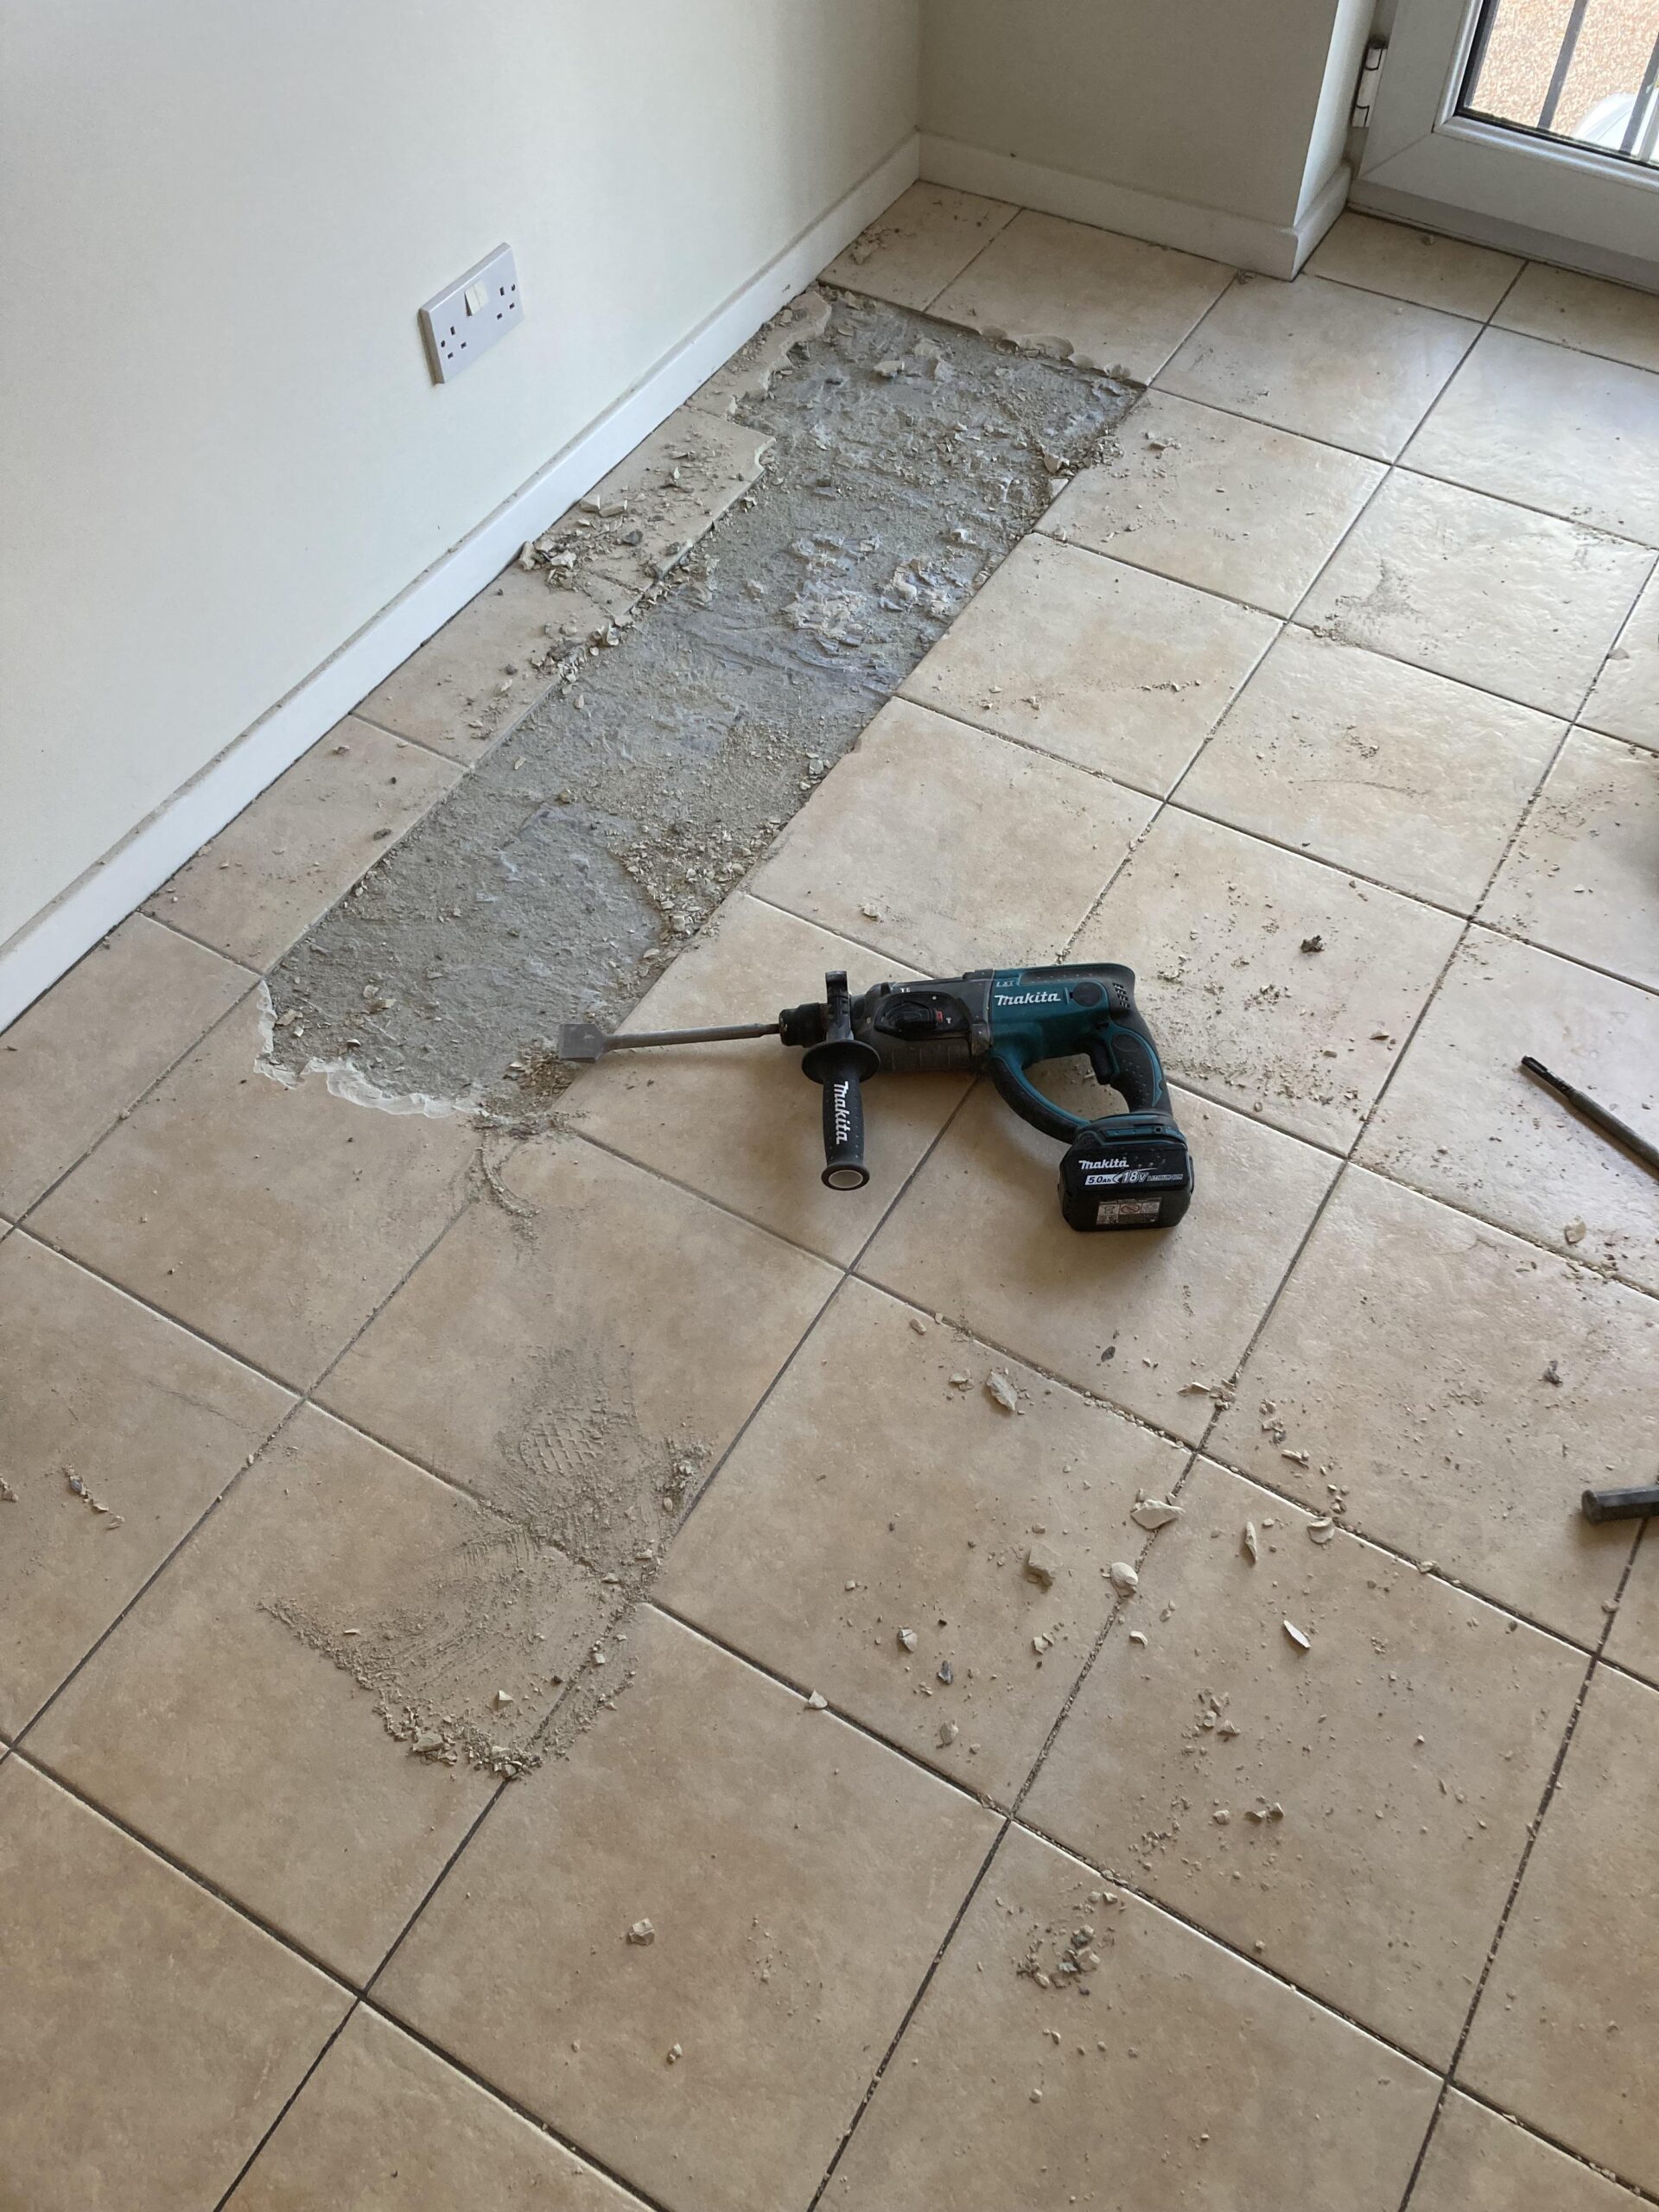
Removing tile grout can be challenging. First, loosen the grout with a utility knife or grout saw. Then, carefully lift tiles using a chisel and hammer. This method helps in effectively removing tiles from floors without causing damage.
Tools For Grout Removal
Grout removal needs the right tools. Grout saw y cuchillo multiusos are common choices. A multi-tool with a grout blade helps too. Safety is key. Wear gafas de protección y guantes to protect yourself. You might need a vacío to clean the dust. These tools make the task easier and safer.
Grout Removal Techniques
Start with a grout saw. Cut along the grout lines slowly. Be careful not to damage tiles. Use a utility knife for tight spots. Scrape gently. A multi-tool works faster. Attach a grout blade. Move it along the grout. Vacuum the dust often. This keeps the area clean. Each tool has its use. Choose what suits your needs best.
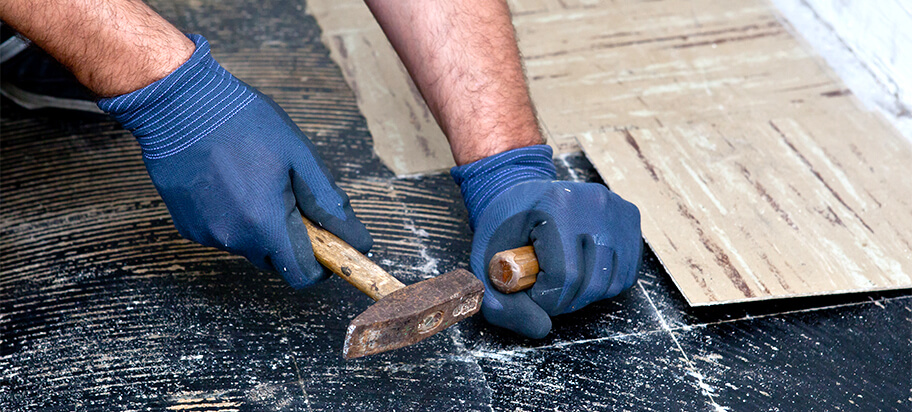
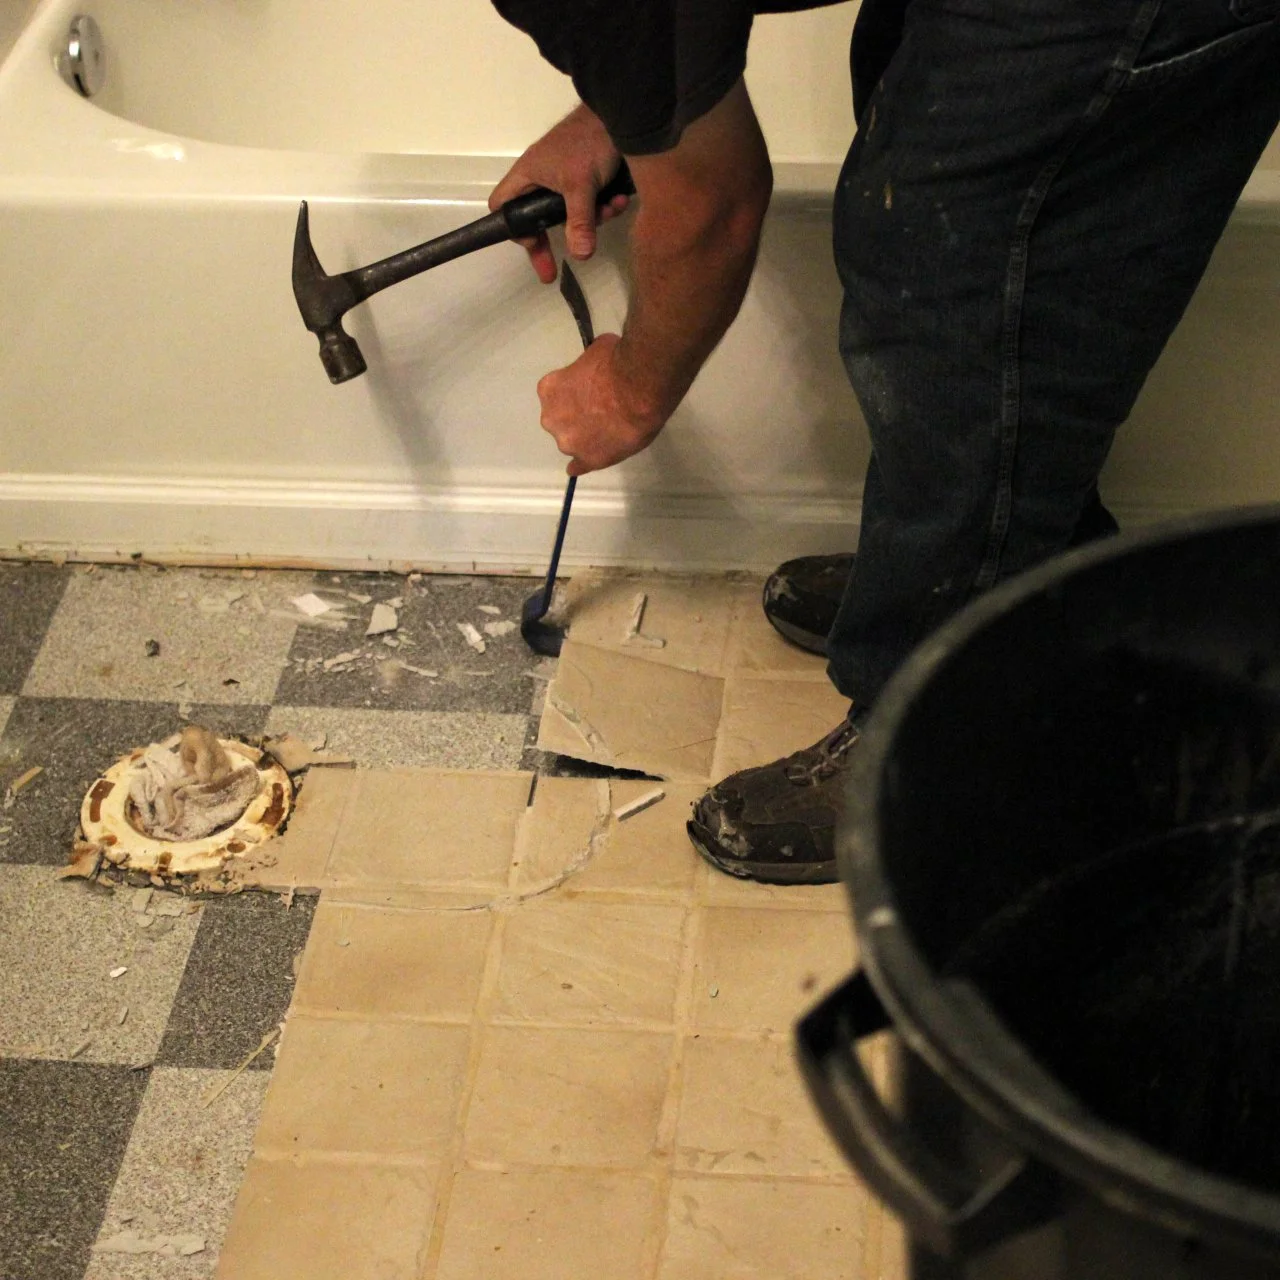
Lifting The Tiles
Begin your tile removal at the edges of the room. It’s easier to start here. Use a flat tool to slip under the tile. Carefully lift it up. This avoids breaking the tile. Repeat this process for all edge tiles.
A chisel and hammer are great tools for tile removal. Place the chisel at the edge of the tile. Tap the chisel with the hammer. This loosens the tile. Continue tapping until the tile comes off. Wear gloves for safety.
There are other ways to remove tiles. Use a tile removal machine. It’s faster but noisy. A heat gun can soften the tile glue. This makes tiles easier to lift. Remember, safety first when using these tools.
Dealing With Stubborn Tiles
Use a heat gun to soften the tile adhesive. Hold the heat gun about 6 inches away. Move it back and forth slowly. This will make the tiles easier to remove. Always wear gloves for safety. Heat helps break down sticky glue. It makes the job less hard. Be careful not to burn yourself or the tiles.
A power chisel can help remove tiles. It is faster than manual tools. Plug it in and turn it on. Hold it against the tile edge. Press the button to start. The tool will chip away the tile. Always wear eye protection. Power tools can make the work quicker. Keep the tool steady to avoid damage. Safety first, always.
Removing Adhesive Residue
Removing adhesive residue is key when taking tiles off the floor. Use a putty knife to gently scrape away the sticky layer. For stubborn spots, apply a bit of acetone or rubbing alcohol to dissolve the residue.
Chemical Solvents
Some strong chemical solvents can help remove sticky glue. Apply the solvent on a clean cloth. Rub the cloth over the sticky spots. Watch the glue dissolve. Always wear guantes to protect your hands. Make sure the room is airy. Open windows for fresh air. Follow the instructions on the product. This ensures safety and best results.
Mechanical Methods
Use a scraper to peel off dried glue. Hold the scraper at an angle. Push it gently under the glue. Be careful not to scratch the floor. A heat gun can also help. Heat softens the glue, making it easier to scrape. Use these tools carefully. Safety goggles protect your eyes. Work slowly and check your progress.
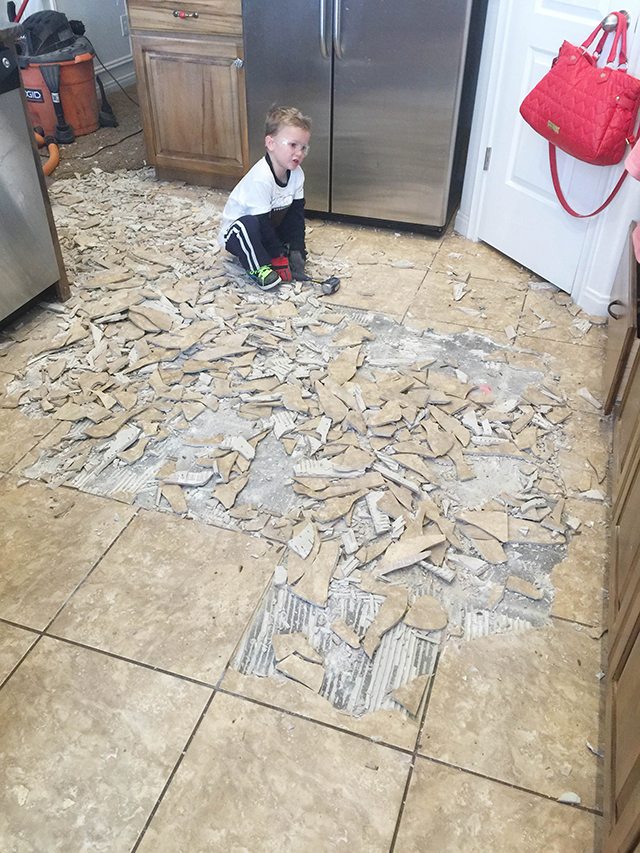
Cleaning Up After Tile Removal
Collect all the broken tiles and place them in strong bags. Wear gloves to protect your hands from sharp edges. Dispose of the bags at a local waste center. Some centers may charge a small fee. Check if your area allows curbside pickup for construction waste. If yes, schedule it in advance. Recycling options might be available for old tiles. Always check local rules for tile disposal. This keeps your area tidy and safe.
Use a broom to sweep away all small particles. Vacuum the area to remove dust and dirt. A damp mop will catch the remaining bits. Add a little soap to the water for a deep clean. Let the floor dry completely before walking on it. This ensures no one slips or falls. Check the floor for any missed debris. A clean floor is safe and looks nice.
Repairing The Subfloor
Removing tile from the floor involves careful steps to protect the subfloor. Begin by breaking the tile using a chisel and hammer. After clearing debris, inspect for damage and repair the subfloor as needed. This ensures a smooth base for new piso.
Inspecting For Damage
Check the subfloor for any signs of damage. Look for cracks and water stains. Use a flashlight to see clearly. Wood rot can be a big problem. Press the wood with a screwdriver. It should not feel soft. Soft spots mean trouble. Mark these spots for repair. Safety first. Wear gloves to avoid splinters.
Patching And Leveling
Fill holes with relleno de madera. Use a putty knife for this. Smooth the surface evenly. Wait for it to dry. Sand the area with sandpaper. Make it smooth and level. Check with a level tool. The subfloor should be flat. Pisos irregulares can cause issues. Fix all bumps and dips. You are now ready for new tiles.
Tips For Safety And Efficiency
Wear strong gloves to protect your hands. Use goggles to guard your eyes from dust. A mask helps keep dust out of your lungs. Work slowly to avoid accidents. Keep your work area clean and organized. Watch for sharp edges on broken tiles. Never rush the process. Use tools properly to prevent injuries. Lift tiles carefully to avoid strain. Be aware of others in the area. Communicate if someone needs to pass by. Always stay focused on the task at hand.
Gather all tools before starting. Organize tiles in a neat pile. Use a tile cutter for clean edges. Plan your moves to work faster. Keep a trash bag handy for broken pieces. Make a checklist of steps needed. Start from one corner and work outward. Have a helper for big tasks. Avoid unnecessary breaks to save time. Focus on one area at a time. Finish one task before starting another. Use a vacuum to clear dust quickly.
Preguntas frecuentes
How Do I Prepare The Floor For Tile Removal?
Start by removing all furniture and appliances. Wear safety gear like gloves and goggles. Cover nearby surfaces with plastic sheets to protect them from debris. Ensure the floor is clean and dry. This preparation will help make the tile removal process smoother and safer.
What Tools Do I Need To Remove Floor Tiles?
To remove floor tiles, you’ll need a chisel, hammer, and scraper. A pry bar can also be helpful for stubborn tiles. For larger areas, consider renting a power scraper. Safety equipment like goggles and gloves is essential to protect yourself during the process.
Can I Remove Floor Tiles Myself?
Yes, you can remove floor tiles yourself. It’s a labor-intensive task but manageable with the right tools. Ensure you follow safety precautions and take your time. For large areas or complex situations, consulting a professional might be beneficial.
How Do I Dispose Of Old Floor Tiles?
First, check local regulations for disposal guidelines. Some areas require tiles to be taken to a recycling facility. Use heavy-duty trash bags or containers for collection. Avoid overloading bags to prevent breakage. Proper disposal is crucial for environmental responsibility.
Conclusión
Removing tile from the floor can be a rewarding task. It enhances your space with a fresh look. Use the right tools to make the job easier. Remember, safety is crucial. Protect your eyes and hands during the process. Start with patience and take breaks when needed.
Clean the surface well after removal. It prepares the floor for new tiles or another finish. This DIY project saves money and gives you control. With practice, you’ll gain confidence. So, grab your tools and start transforming your floor today.