To grout your shower floor, first gather quality tools and materials like grout, a float, sponge, and mixing bucket. Thoroughly clean and dry the tiles before mixing grout to a peanut butter consistency. Apply grout diagonally into joints, then carefully remove excess with a damp sponge. Let it cure at least 24 hours without water, then seal to protect from moisture. Proper technique guarantees durability and a clean finish—explore the full process for detailed guidance.
Reúne tus herramientas y materiales
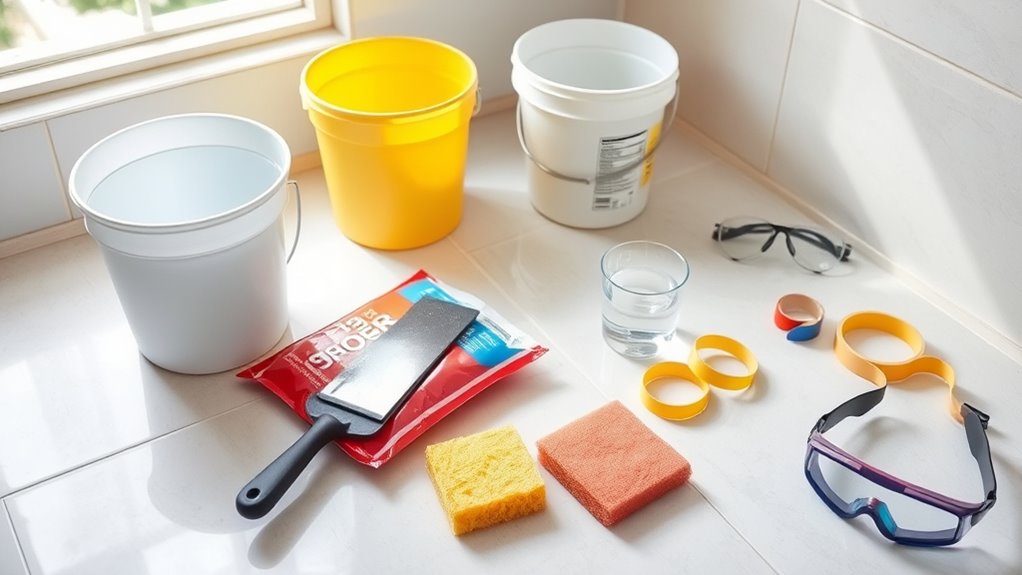
Before you begin grouting your shower piso, you’ll need to gather five essential tools and materials: grout, a grout float, a bucket, a sponge, and a mixing tool. For tool selection, choose a grout float with a comfortable grip and durable rubber to guarantee precise application. The mixing tool should allow you to blend grout smoothly without lumps. Material quality is vital; opt for high-quality grout designed for wet areas, preferably mildew-resistant and waterproof. Use a clean bucket dedicated solely to grout mixing to maintain consistency. A sponge with a firm but gentle texture will help you clean excess grout without damaging tiles. By carefully selecting tools and materials, you’ll guarantee a professional finish and maintain the freedom to work efficiently and confidently in your shower project.
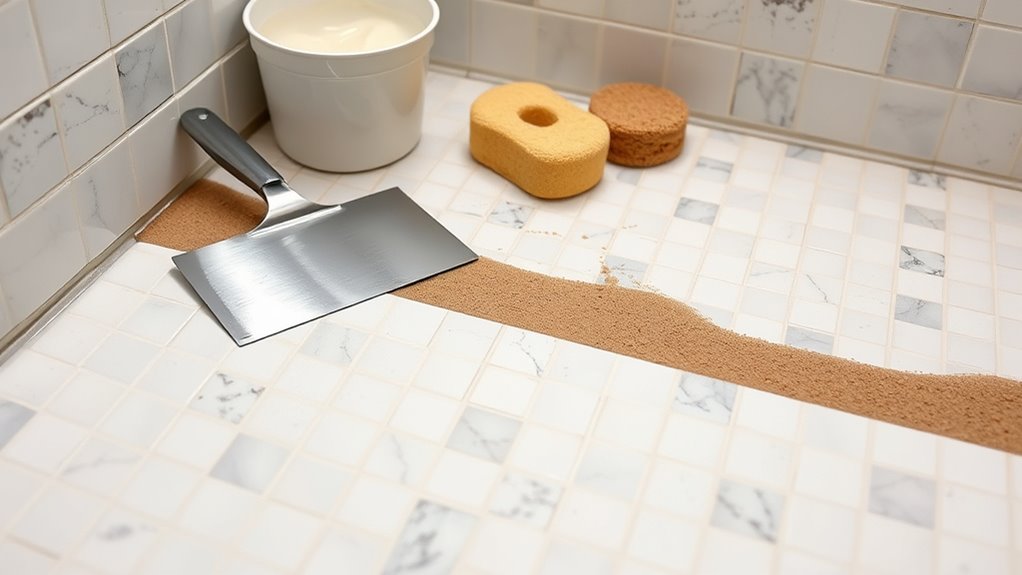
Prepare the Shower Floor Surface
Start by thoroughly cleaning the shower floor to remove any dirt, soap scum, or grease that could prevent the grout from adhering properly. Use a non-abrasive cleaner and a scrub brush to guarantee every tile and grout line is spotless. Rinse the surface well with water, then dry it with a clean cloth to avoid moisture interfering with grout adhesion. Inspect the floor closely for any loose tiles or damaged grout, and repair these before proceeding. This shower floor preparation is essential to achieving a durable, professional finish. Proper surface cleaning not only improves grout bonding but also prevents future issues like mold or cracking. Taking these careful steps now gives you the freedom to grout confidently, guaranteeing a long-lasting, beautiful shower floor.
Mix the Grout Properly
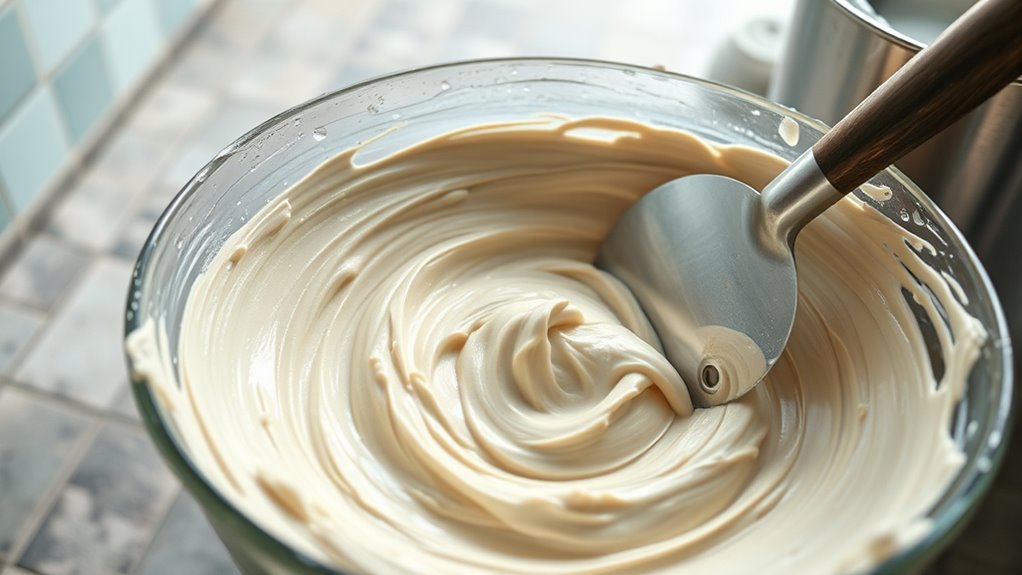
First, select the grout type suitable for your shower floor, typically unsanded for narrow joints. Measure the water exactly as specified on the package to guarantee proper consistency. Stir the mixture thoroughly until it becomes smooth and free of lumps.
Choose Grout Type
Although selecting the right grout type is crucial, mixing it properly guarantees a strong, durable bond that resists cracking and staining. Start by choosing between cementitious, epoxy, or urethane grout types, each offering different strengths and water resistance. Cementitious grout is common but less water-resistant, while epoxy grout provides superior durability and stain resistance—ideal for shower floors. Next, consider grout colors carefully to complement your tile and overall design. Lighter grout brightens the space but shows stains more easily; darker grout hides dirt but may alter tile appearance. Once you pick the grout type and color, follow the manufacturer’s instructions precisely when mixing. Proper mixing guarantees the grout is consistent, free of lumps, and workable, empowering you to achieve a professional, lasting finish that lets you enjoy your shower floor freely.
Measure Water Precisely
Two key measurements you need to get right when mixing grout are the water amount and powder ratio—both directly impact the grout’s consistency and performance. Start by using a clean measuring cup or container marked with clear increments for water measurement. Avoid guessing; even slight deviations can weaken the grout or make it too stiff to work with. Follow the grout manufacturer’s instructions precisely, noting the exact water-to-powder ratio. Pour the measured water into your mixing container before adding grout powder, ensuring you maintain control over the liquid quantity. This precise mixing approach prevents excess water, which can cause shrinkage or cracking, and guarantees a durable, workable grout. By mastering water measurement, you set the foundation for a strong, lasting shower floor.
Stir Until Smooth
Once you’ve measured your water and powder accurately, it’s time to mix the grout to the right consistency. Start by combining the powder and water in a clean bucket, then use a margin trowel or mixing paddle to stir. Employ steady mixing techniques, moving the tool in circular and scraping motions to avoid lumps. Aim for a smooth, peanut butter-like grout consistency—neither too runny nor dry. If it’s too thick, add small amounts of water gradually; if too thin, mix in more powder cautiously. Proper mixing guarantees the grout will spread evenly and adhere well, granting you the freedom to work efficiently. Don’t rush this step; a well-mixed grout is essential for a durable, professional-looking shower floor finish.
Apply the Grout to the Tiles
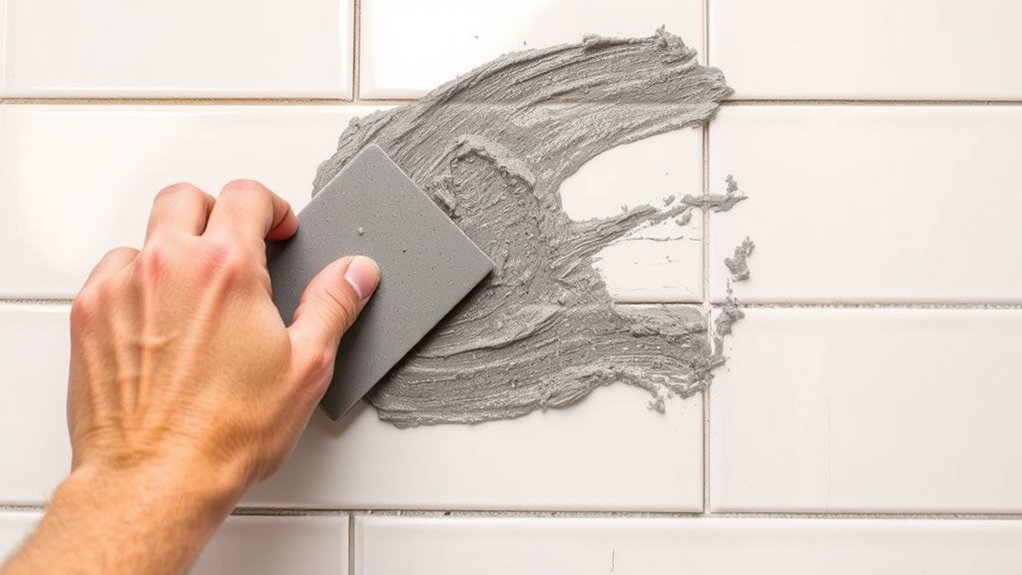
Start by scooping a small amount of grout onto a rubber float, holding it at a 45-degree angle. Use firm pressure to spread the grout diagonally across the tiles, forcing it into the joints. This grout application technique guarantees even filling without air pockets. Pay close attention to tile spacing considerations; wider gaps require more grout, so adjust your pressure accordingly to fill every crevice completely. Move systematically across the floor, working in small sections for better control. Keep the float’s edge clean to avoid dragging excess grout over unfilled joints. By mastering these precise grout application techniques, you maintain freedom to work efficiently while achieving a professional finish. Remember, consistent grout coverage is key to durable, water-resistant results on your shower floor.
Remove Excess Grout From the Surface
Wipe off the excess grout from the tile surface promptly using a damp sponge, applying gentle pressure to avoid disturbing the grout lines. Use grout removal techniques that focus on circular motions to lift grout haze without pushing grout out of the joints. Rinse and wring the sponge frequently to maintain effective surface cleaning methods. Avoid soaking the sponge too much, as excess water can weaken the grout. After the initial wipe, wait about 15 to 30 minutes, then perform a final cleaning with a slightly damp sponge to remove any remaining haze. For stubborn spots, use a soft brush or nylon scrub pad carefully. Staying precise with these grout removal techniques guarantees a clean, smooth finish on your shower floor, giving you the freedom to enjoy a flawless grout job.
Allow the Grout to Set and Cure
Once you’ve removed the excess grout, let it set undisturbed for about 24 hours to achieve initial hardness. During this time, don’t expose the shower floor to water, as moisture can weaken the grout’s bond. Full curing usually takes up to 72 hours, so avoid heavy use until then to guarantee a durable finish.
Initial Setting Time
Although you’ve just finished applying the grout, you’ll need to let it set undisturbed for at least 24 hours to confirm proper curing. Understanding the initial setting time benefits is essential, as this period greatly impacts the grout’s strength and durability. The initial setting time impact on your shower floor guarantees the grout bonds well and resists cracking.
To optimize this phase:
- Keep the area free from vibrations and disturbances to maintain grout integrity.
- Avoid any pressure or weight on the floor, preventing premature grout failure.
- Confirm consistent temperature and humidity, so the grout cures evenly.
Respecting these steps will maximize your grout’s performance, granting you a reliable, long-lasting shower floor that supports your freedom to enjoy daily routines worry-free.
Avoid Water Exposure
Since grout needs time to cure properly, you shouldn’t expose your shower floor to water during this critical phase. Water can weaken the grout’s bond, causing cracking or deterioration. To protect your work, rely on effective waterproofing techniques and guarantee moisture barriers are intact before grouting. These barriers prevent moisture from seeping underneath, safeguarding the subfloor. Avoid using the shower or allowing any standing water for at least 24 hours after applying grout. Also, keep humidity low in the bathroom to facilitate proper curing. By strictly controlling water exposure now, you preserve the grout’s strength and longevity, granting you the freedom to enjoy a durable, clean shower floor without premature repairs. Remember, patience here pays off in lasting results.
Full Cure Duration
While grout may seem dry to the touch within a few hours, you’ll need to allow a full cure duration of at least 72 hours to confirm maximum strength and durability. During this time, the grout undergoes critical chemical changes that prevent grout shrinkage and enhance moisture resistance. To guarantee ideal curing:
- Keep the shower area dry and well-ventilated, avoiding any water exposure.
- Resist any pressure or movement on the grout lines to prevent cracks or weakening.
- Maintain a consistent room temperature, ideally between 65°F and 75°F, to facilitate proper setting.
Seal the Grout to Protect Against Moisture
Before moisture can seep into your grout and cause damage, you’ll need to apply a high-quality grout sealer. Start by ensuring the grout is fully cured and clean. Use a small brush or applicator to evenly coat the grout lines, avoiding excess on tiles. Let the sealer penetrate for 5-10 minutes, then wipe off any residue with a clean cloth to prevent surface haze. Allow the first coat to dry completely before applying a second coat for enhanced moisture prevention. Proper sealing is essential for grout longevity, protecting against water infiltration that leads to mold and deterioration. By sealing your grout correctly, you maintain the shower floor’s integrity and enjoy the freedom of a durable, low-maintenance surface. Repeat sealing every 6-12 months for ideal protection.