
To cut thick vinyl plank flooring, first measure twice and mark your cut lines clearly using a fine-tip pencil and straightedge. Use a sharp utility knife to score multiple shallow passes along the mark, then snap the plank cleanly. For detailed or curved cuts, secure the plank and use a fine-tooth blade on a jigsaw or circular saw, cutting slowly to avoid splintering. Finish edges by sanding and sealing for durability and a polished look. Following proper prep and technique guarantees precise results and safer installation.
Tools Needed for Cutting Thick Vinyl Plank Flooring
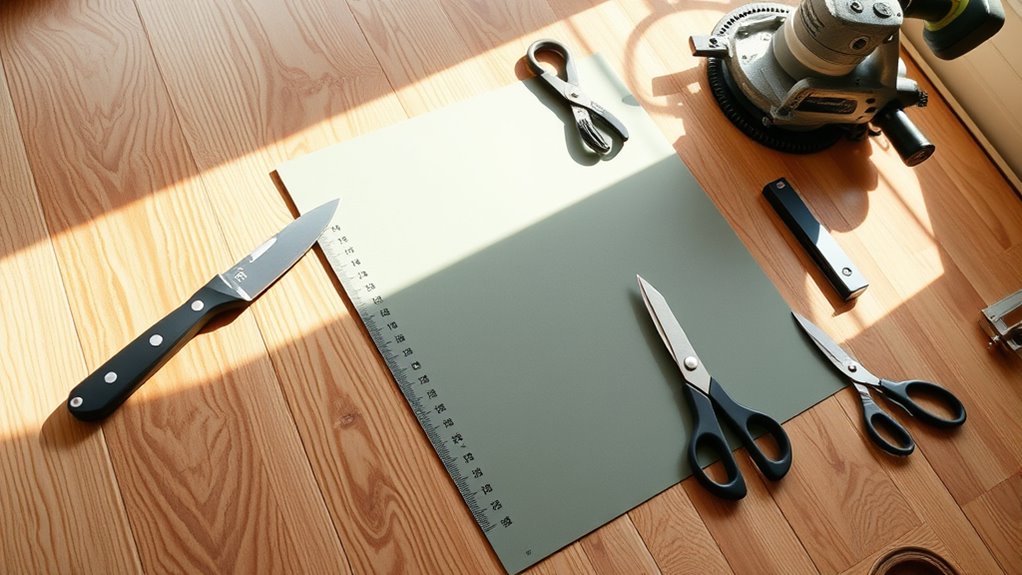
To cut thick vinyl plank piso accurately, you’ll need specific tools designed for durability and precision. A fine-toothed utility knife is essential for scoring the surface before snapping the plank along the score. For more intricate cuts or thicker flooring thickness, a powered jigsaw with a fine-tooth blade offers clean, controlled cuts following your cutting techniques. A straightedge or metal ruler guarantees straight lines and accurate measurements. Additionally, a measuring tape and pencil help mark your cut lines precisely. Clamps can secure planks during cutting, preventing movement and guaranteeing safety. Selecting tools that accommodate the flooring thickness and your preferred cutting techniques will give you freedom to work efficiently and achieve professional results without damage or waste.
Preparing Your Workspace and Materials
Start by clearing and cleaning your workspace to verify safety and accuracy. Next, gather all essential tools within easy reach to streamline the cutting process. Finally, measure and mark your vinyl planks precisely to assure clean, accurate cuts.
Clear and Clean Area
Before you begin cutting thick vinyl plank flooring, make certain your workspace is completely clear and clean to avoid any obstructions or debris that could interfere with accurate measurements and cuts. Proper floor preparation is essential; start by removing all loose items and sweeping the area thoroughly. Employ effective cleaning methods such as using a vacuum or damp mop to eliminate fine dust and particles. Ensuring a dust-free environment not only improves visibility but also prevents damage to your tools and flooring. A clean, organized workspace grants you the freedom to maneuver planks precisely, reducing errors. Take time to inspect the surface for any imperfections that may affect your cuts, addressing them before proceeding. Maintaining a clear and clean area sets a solid foundation for efficient, accurate vinyl plank flooring installation.
Gather Essential Tools
With a clean and organized workspace, you’ll find it easier to gather the tools necessary for cutting thick vinyl plank flooring accurately. Essential tools include a utility knife with a sharp blade, a straightedge or metal ruler, a measuring tape, and a pencil for marking. Depending on your preferred cutting techniques, you might also need a jigsaw or circular saw with a fine-toothed blade designed for vinyl. Prioritize tool maintenance by ensuring blades are sharp and free of debris to achieve clean, precise cuts without damaging the planks. Keep your workspace well-lit and stable, providing freedom of movement and reducing errors. Proper preparation of tools and environment will streamline your workflow, enabling you to execute cuts confidently and efficiently.
Measure and Mark Precisely
Accurately measuring and marking your vinyl planks is critical to ensuring clean cuts and a professional finish. Start by using a reliable tape measure to record exact plank dimensions, factoring in expansion gaps. Mark your cut lines clearly with a fine-tip pencil or a carpenter’s chalk, ensuring the marks are visible but thin to avoid confusion during cutting. Employ straightedges or T-squares to draw precise, straight lines perpendicular to the plank edges. This level of measurement accuracy directly supports effective cutting techniques, minimizing errors and material waste. Take your time to double-check measurements before cutting. By preparing your workspace with proper lighting and a stable surface, you’ll maintain control and freedom throughout the cutting process, resulting in a seamless vinyl plank installation.
Measuring and Marking Your Vinyl Planks
You’ll want to measure each vinyl plank carefully using a reliable tape measure to guarantee accuracy. Use a pencil or fine-tip marker to make precise, visible marks where cuts are needed. Keep your markings straight and consistent by employing a ruler or straight edge for guidance.
Accurate Measurements Techniques
Before cutting your vinyl planks, make sure you’ve taken precise measurements to avoid costly mistakes. Employ reliable measuring techniques using precision tools like a metal tape measure or a digital laser measure for accuracy. Always measure twice, especially in irregular spaces or near walls, to guarantee your cuts fit perfectly. Position the plank firmly on a flat surface and measure from the edge where it will be installed, accounting for expansion gaps if needed. Using a square or straightedge helps maintain straight, accurate reference lines aligned with your measurements. Avoid assumptions or quick estimates; precise measurements allow you to maintain freedom in your design and installation while preventing waste and rework. Mastering these measurement techniques sets a solid foundation for clean, accurate cuts on thick vinyl plank flooring.
Marking Tools and Tips
Choosing the right marking tools is essential for transferring your measurements onto vinyl planks with precision. For thick vinyl plank flooring, a fine-tip pencil or a mechanical pencil works best, as it offers sharp, clear lines without damaging the surface. You can also use a non-permanent marker designed for flooring materials, which can be wiped off if needed. Employing proper marking techniques, such as marking on the plank’s backside or edge, helps maintain clean visible lines on the installation surface. Always double-check your measurements before marking to guarantee measurement accuracy. Use a reliable straightedge or ruler to guide your markings, preventing uneven cuts. These practical steps empower you to achieve clean, precise cuts, giving you the freedom to install your flooring confidently and efficiently.
Cutting Thick Vinyl Planks With a Utility Knife
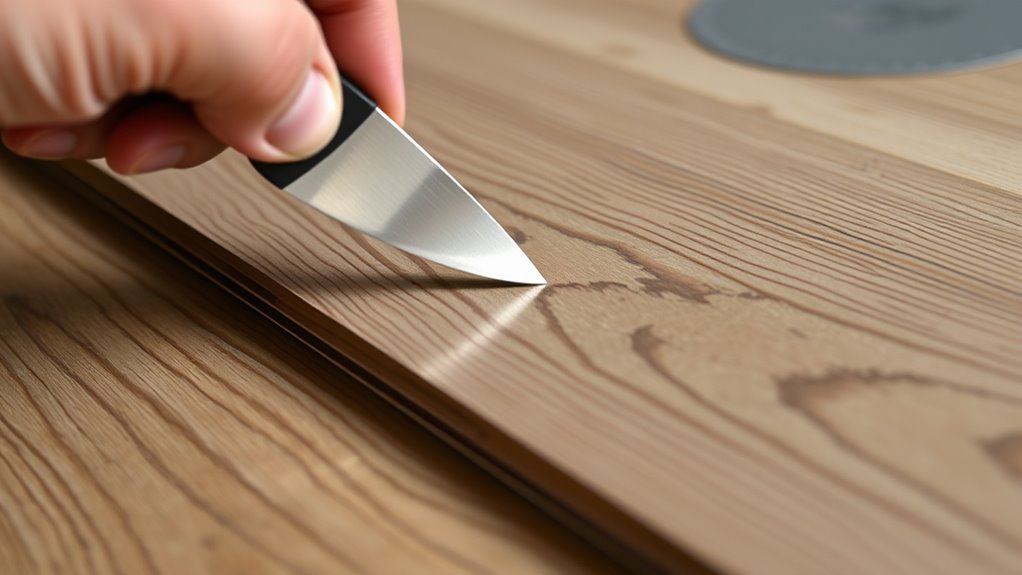
Mastering the technique of cutting thick vinyl planks with a utility knife requires steady hands and the right approach. First, score the plank firmly along your marked line using sharp utility knife techniques. Multiple shallow passes are safer and more precise than one deep cut. Always wear gloves and cut away from your body to follow essential safety precautions. Once scored, snap the plank cleanly along the line.
| Paso | Detail |
|---|---|
| Score | Use firm, repeated cuts along the line |
| Snap | Apply pressure to break the plank cleanly |
| Seguridad | Wear gloves, cut away from body |
This method gives you control and accuracy while maximizing your freedom to shape planks without power tools.
Using a Jigsaw or Circular Saw for Complex Cuts
While scoring and snapping work well for straight cuts, complex shapes and intricate edges require more versatile tools. Using jigsaw techniques or circular saws gives you the freedom to tackle curves and detailed cuts with precision. When employing these tools, consider:
- Choose a fine-tooth blade designed for vinyl to avoid chipping.
- Secure the plank firmly to your work surface to prevent movement.
- Use slow, steady motions for jigsaw cuts to maintain control.
- For circular saws, set the cutting depth slightly deeper than plank thickness.
- Follow your marked lines closely, adjusting speed to reduce splintering.
Mastering these approaches with jigsaw techniques and circular saws lets you achieve the exact shapes you need, expanding your installation possibilities without sacrificing accuracy or finish quality.
Finishing Touches and Safety Tips for Cutting Vinyl Flooring
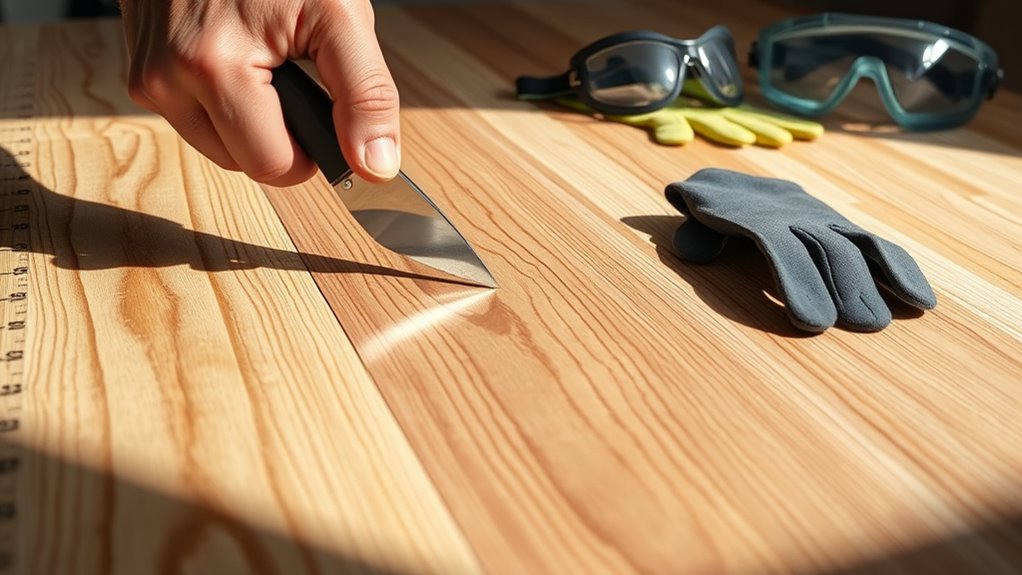
After completing your cuts, it’s essential to focus on finishing touches and safety to guarantee a professional result and protect yourself during the process. First, inspect all edges for roughness; use fine-grit sandpaper to smooth any burrs, ensuring a clean fit and preventing injury. Apply a matching vinyl filler or edge sealer to cover exposed layers, enhancing durability and appearance. Always wear appropriate safety gear—gloves, eye protection, and a dust mask—especially when sanding or using power tools. Maintain sharp blades and employ steady cutting techniques to reduce splintering and uneven edges. By adhering to these precise finishing steps and safety guidelines, you’ll achieve a flawless installation while minimizing risks, giving you the freedom to work confidently and efficiently with thick vinyl plank flooring.


