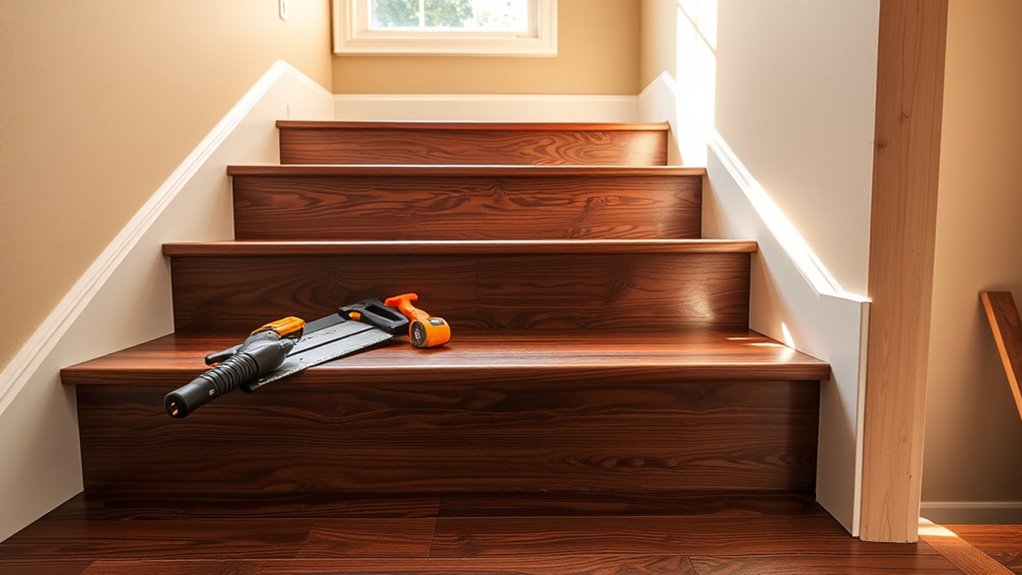
To do wood flooring on stairs, start by gathering tools like a miter saw, tape measure, adhesive, and finishing nails. Thoroughly clean and sand the stairs to guarantee a smooth surface. Measure each stair tread and riser precisely, then cut wood pieces for a perfect fit. Install risers and treads securely with adhesive and nails, then apply stair nosing for safety. Finish with a durable sealant, allowing proper drying time. Following exact steps guarantees long-lasting results, and you’ll find helpful tips to perfect every phase ahead.
Tools and Materials Needed for Wood Flooring on Stairs
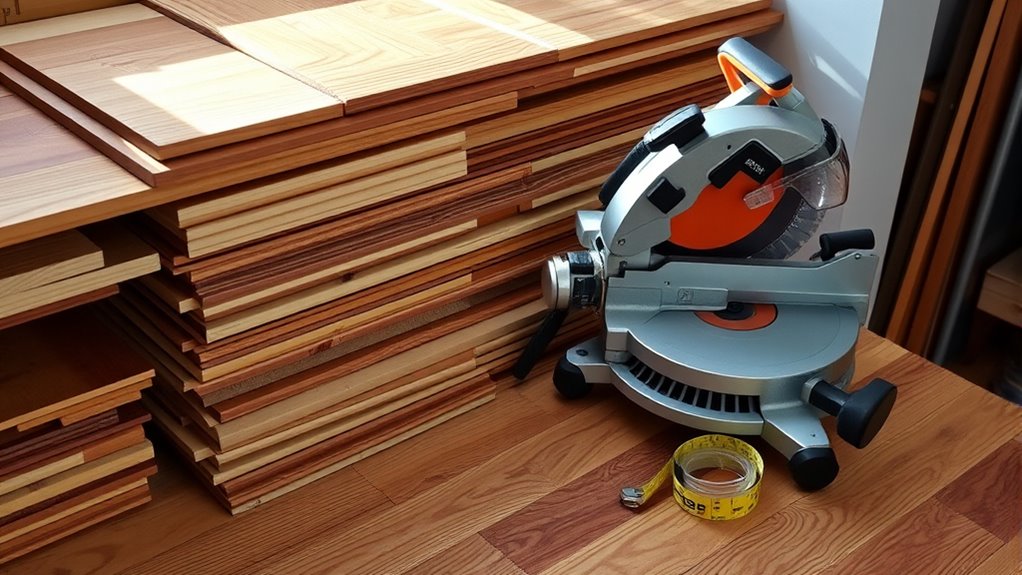
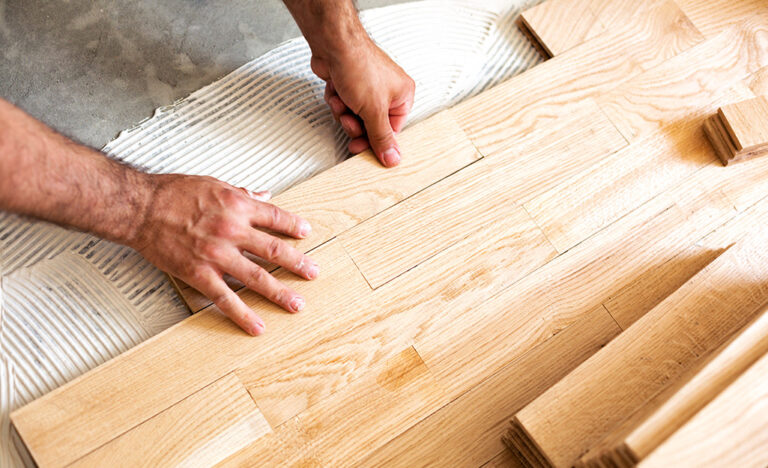
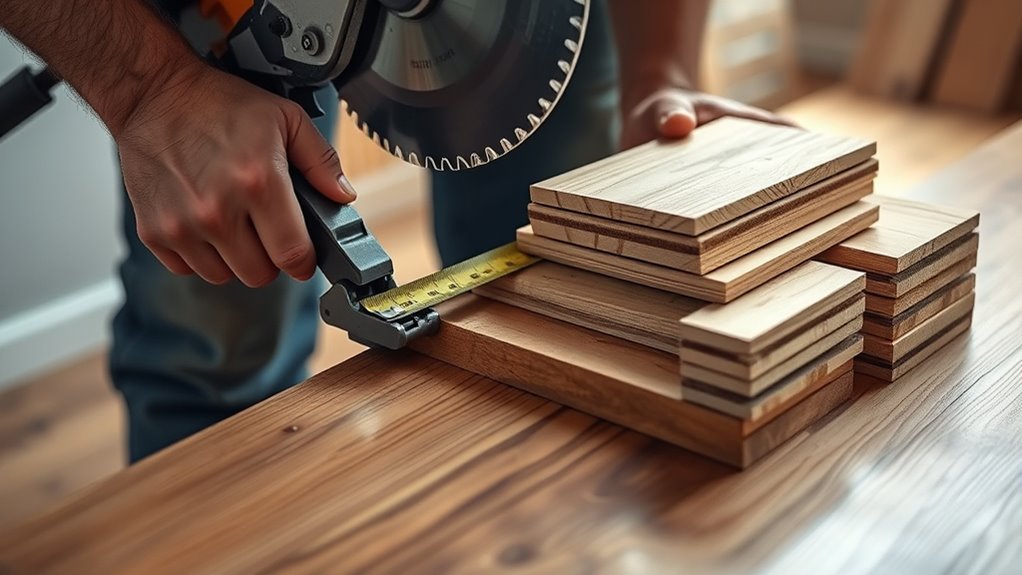
Before you begin installing wood Bodenbelag on stairs, you’ll need to gather specific tools and materials to guarantee a smooth and secure application. Essential tools include a miter saw for precise cuts, a pneumatic nailer for secure fastening, a tape measure, and a chalk line for accurate layout. Materials consist of hardwood planks, stair nosing, adhesive, and finishing nails. Prioritize safety precautions by wearing protective eyewear, gloves, and a dust mask. Maintain your tools regularly: clean saw blades and lubricate moving parts to confirm efficiency and avoid malfunctions. Proper tool maintenance not only extends tool life but also contributes to a safer workspace. By assembling the right equipment and observing safety protocols, you’re set to work confidently and independently on your stair flooring project.
Preparing the Staircase Surface
Although it may seem straightforward, preparing the staircase surface is a critical step that guarantees proper adhesion and a level installation of your wood flooring. Start by thoroughly cleaning the stairs, removing dust, debris, and any old adhesive residues. Assess the surface for imperfections like bumps or loose boards; secure or replace them as needed. Employ precise sanding techniques using a belt sander or orbital sander to smooth the surface evenly, focusing on edges and corners to assure uniformity. Proper surface preparation prevents future issues such as uneven wear or bonding failure. Pay close attention to stair nosings and risers, making sure all surfaces are flat and stable. This meticulous groundwork sets the foundation for a flawless, durable wood floor on your stairs.
Measuring and Planning Your Stair Layout

You’ll need to measure each stair’s tread and riser accurately to guarantee a precise fit. Calculate the total material required by accounting for all steps plus extra for cuts and waste. Finally, choose a layout pattern that complements your stairs and minimizes complex cuts.
Accurate Stair Dimensions
Accurately measuring each stair component is essential for a flawless wood flooring installation on stairs. Begin by determining the stair width at the widest point to guarantee your flooring materials will fit without gaps or overlaps. Next, measure the stair height—the vertical distance from the tread to the next step’s tread—to confirm uniformity across all steps. Use a reliable tape measure and record each measurement meticulously. Check for variations in stair height or width, as uneven dimensions demand precise cutting and adjustment of flooring pieces. Document these measurements clearly; they form the foundation of your layout plan. By working with exact stair width and stair height data, you gain the freedom to customize your installation confidently, avoiding costly mistakes and guaranteeing each step is perfectly covered.
Material Quantity Calculation
Calculating the exact amount of wood flooring material needed for your stairs is a critical step that guarantees efficiency and minimizes waste. Applying precise material estimation methods lets you confidently plan your purchase and reduce excess costs. To accurately measure and plan your stair layout:
- Measure each stair tread and riser individually, noting width and depth.
- Calculate total square footage by adding all measured areas.
- Factor in a 10-15% allowance for flooring waste reduction due to cuts and fitting.
- Use these figures to finalize the quantity of wood flooring to order.
Layout Pattern Selection
How should you arrange the wood flooring on your stairs to guarantee both aesthetic appeal and structural integrity? Start by measuring each tread and riser precisely, noting variations in size. This data informs your stair design, making sure cuts and joints align perfectly. Choose a layout pattern that complements your space—straight, diagonal, or herringbone—balancing wood aesthetics with functional considerations like slip resistance. Plan the direction of the wood grain to enhance visual flow and highlight the staircase’s natural lines. Use graph paper or digital tools to map the pattern, accounting for changes and nosing. By meticulously planning your stair layout, you guarantee a cohesive look that respects the wood’s character while maintaining durability and safety, granting you both creative freedom and a professional finish.
Cutting Stair Treads and Risers to Size
Before cutting, you’ll need to measure each stair tread and riser carefully to guarantee a perfect fit. Variations in stair tread materials and riser height adjustments demand precise measurements tailored to each step. Follow these steps for accuracy:
- Measure the width and depth of each stair tread precisely.
- Record the riser height, noting any necessary height adjustments.
- Transfer these measurements to your chosen stair tread materials.
- Use a fine-toothed saw to cut each piece, ensuring clean, straight edges.
Installing the Stair Risers
Start by preparing each stair riser for installation, making certain the surface is clean and free of debris to promote strong adhesion. Select appropriate stair riser materials, such as hardwood, MDF, or plywood, based on durability and finish requirements. Measure and cut each riser accurately to fit snugly between stair stringers. Apply a high-quality construction adhesive evenly on the back of the riser to establish a secure bond. Position the riser carefully, aligning it flush with adjacent surfaces. Use finishing nails or brads driven into the stringers for added stability, employing riser installation techniques that prevent splitting or warping. Finally, fill nail holes and seams with wood filler, sanding smooth for a seamless finish. This precise approach guarantees durable, professional stair riser installation that complements your wood flooring project.
Attaching the Stair Treads
Secure the stair treads firmly to guarantee stability and safety. Proper stair tread installation guarantees your freedom to move confidently without worry. Start by selecting the right tread adhesive types—polyurethane or construction adhesive work best for strong bonding. Follow these steps:
- Clean the surface thoroughly to remove dust and debris for peak adhesion.
- Apply adhesive evenly on the stair stringer or riser, avoiding excess that could seep out.
- Position the tread carefully, aligning edges precisely to maintain a uniform look and fit.
- Press down firmly and secure with finishing nails if necessary, countersinking them for a smooth finish.
Securing the Stair Nosing
With the stair treads firmly in place, the next step is to attach the stair nosing to guarantee a safe, finished edge. Proper nosing installation guarantees durability and reduces slip hazards. Choose your adhesive options carefully; construction adhesive or wood glue both work effectively. Additionally, mechanical fastening with finishing nails adds strength.
| Schritt | Detail |
|---|---|
| Measure & Cut | Precisely fit nosing to tread width |
| Klebstoff auftragen | Spread evenly on tread front edge |
| Position Nosing | Align carefully before pressing |
| Secure Nosing | Nail or clamp until adhesive sets |
Follow these steps exactly to maintain structural integrity while allowing freedom in your stair design.
Finishing Touches and Sealing the Wood
You’ll need to select a finish that matches the stair traffic and desired appearance, whether it’s oil-based, water-based, or polyurethane. Applying the sealant evenly and in thin coats is essential to avoid bubbles and guarantee proper adhesion. Allow sufficient drying and curing time between coats to achieve a durable, long-lasting surface.
Die Wahl des richtigen Finishs
Although selecting the right finish might seem straightforward, it requires careful consideration of durability, appearance, and maintenance. You’ll want to evaluate various finish types—polyurethane, varnish, or oil-based options—each offering distinct protection and aesthetic qualities. Gloss levels, ranging from matte to high gloss, influence both style and slip resistance on stairs.
Consider these factors to choose wisely:
- Durability needed for foot traffic and wear resistance.
- Desired gloss level to complement your stair design and safety.
- Maintenance frequency and ease to fit your lifestyle.
- Compatibility with the wood species and previous treatments.
Choosing the right finish guarantees your stairs remain both beautiful and safe, granting you the freedom to enjoy your space confidently.
Applying Sealant Properly
Applying sealant properly involves several critical steps to assure a durable and even protective layer on your stair wood. First, verify the surface is clean and dust-free to promote adhesion. When applying varnish, use a high-quality brush or applicator, moving with consistent strokes along the wood grain to avoid bubbles and streaks. Employ sealing techniques like thin, even coats—multiple layers build resilience without trapping moisture. Pay close attention to edges and corners, sealing them meticulously to prevent water infiltration. Avoid over-application; excess sealant can cause uneven drying and compromise finish integrity. Maintain ideal temperature and ventilation during application to support proper curing. By following these precise steps, you’ll protect your stairs effectively while preserving wood’s natural beauty and granting yourself freedom from frequent maintenance.
Drying and Curing Times
Two to four hours is typically the minimum drying time between sealant coats on stair wood, but full curing often requires up to 72 hours under ideal conditions. Understanding drying methods and curing time is essential to guarantee your wood flooring on stairs achieves maximum durability and finish quality. You want freedom from worry about damage or stickiness.
- Use proper ventilation to accelerate drying methods without compromising finish integrity.
- Maintain consistent temperature and humidity to optimize curing time.
- Avoid heavy foot traffic until the sealant is fully cured to prevent marks or dents.
- Test dryness by lightly touching an inconspicuous area before applying additional coats.
Following these steps guarantees your stairs will look flawless and last longer, freeing you to enjoy your space confidently.
Maintenance Tips for Wood Stair Flooring
Proper maintenance is essential to preserve the durability and appearance of your wood stair flooring. You should regularly apply effective cleaning techniques such as dry dusting and damp mopping with pH-neutral cleaners to avoid surface damage. Address minor scratches and dents swiftly using appropriate repair methods like wood fillers or touch-up markers. Avoid excessive moisture and harsh chemicals to maintain finish integrity.
| Aufgabe | Recommended Frequency | Tools/Materials Needed |
|---|---|---|
| Dusting | Täglich | Microfiber cloth, broom |
| Feuchtes Wischen | Wöchentlich | pH-neutral cleaner, mop |
| Scratch Repair | Nach Bedarf | Wood filler, touch-up marker |
| Inspektion | Monatlich | Flashlight, magnifying glass |
| Refinishing | Every 3-5 years | Sandpaper, sealant, varnish |
Following these steps guarantees your stairs stay robust and visually appealing.