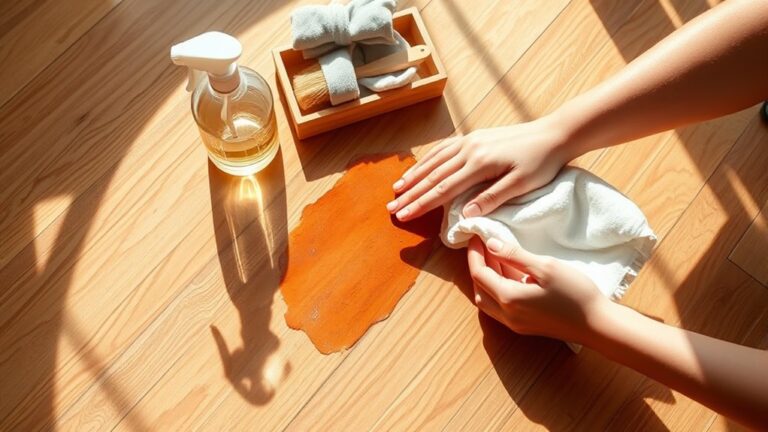
To fix a gouge in your wood floor, start by evaluating the damage and gathering materials like matching wood filler, putty knife, and fine-grit sandpaper. Clean the gouge thoroughly, then lightly sand its edges for a smooth surface. Apply filler, slightly overfilling to allow for shrinkage, and let it dry completely. Sand the repaired area smoothly, then stain to match your floor color. Finally, seal it with a compatible protective finish. Following these steps guarantees a seamless and durable repair—explore next how to achieve perfect results.
Assess the Damage

Before you begin any repairs, carefully examine the gouge to determine its depth, width, and length. This initial damage assessment is critical to selecting the right repair method. Start by cleaning the area to remove debris, then use a ruler or caliper for precise gouge identification. Note whether the gouge penetrates the finish only or extends into the wood substrate. Check if the surrounding wood is splintered or loose, as this affects your approach. Documenting these measurements and characteristics will guide your repair strategy, ensuring you address the gouge effectively without unnecessary work. Taking this disciplined, technical approach lets you handle the repair confidently and maintain control over your wood floor’s integrity and appearance.
Gather Necessary Materials
Once you’ve thoroughly evaluated the gouge’s dimensions and condition, you’ll need to gather the appropriate tools and materials to execute the repair accurately. Essential items include a wood filler or putty matching your floor’s stain, a putty knife for precise application, fine-grit sandpaper to smooth the surface, and a clean cloth. Depending on the depth, you might require wood glue or a small piece of matching wood for more severe gouges. For finishing, have a stain or finish compatible with your existing Bodenbelag materials to guarantee seamless integration. Proper wood floor maintenance demands using quality products designed specifically for hardwood. Organizing these materials beforehand streamlines the repair process, giving you freedom to restore your floor efficiently and effectively without unnecessary delays or complications.
Clean the Gouge Area

Before repairing the gouge, you need to remove any loose debris from the damaged area to guarantee proper adhesion. Use a soft brush or vacuum attachment designed for delicate surfaces to avoid further damage. Selecting the right cleaning tool helps prepare the gouge for effective filling and finishing.
Lose Ablagerungen entfernen
Start by thoroughly clearing out any loose debris and dust from the gouge using a vacuum with a narrow nozzle or a soft brush. This step is essential to remove all debris types—such as wood splinters, dirt particles, and old finish flakes—that could interfere with repair adhesion. Employ precise cleaning techniques to guarantee the gouge’s interior is free from contaminants. Avoid pushing debris deeper into the gouge by using gentle, controlled motions. Once vacuumed, inspect the area under strong light to confirm complete debris removal. Clearing the gouge properly prepares the surface for ideal filler bonding, preventing future repair failures. By mastering this initial step, you maintain control over the process and increase the longevity of your wood floor restoration.
Choose Proper Cleaning Tools
After thoroughly removing debris from the gouge, selecting the right cleaning tools guarantees the area is prepared for filler application. Using appropriate cleaning products and techniques ensures the surface is free of dust, oils, and residues that could compromise adhesion. You’ll want to gather these essentials:
- Soft-bristled brush for delicate dust removal
- Lint-free microfiber cloths to avoid fiber deposits
- Isopropyl alcohol or a mild wood-safe cleaner for degreasing
- Small vacuum with a narrow nozzle to extract fine particles
- Cotton swabs to reach tight corners within the gouge
Apply cleaning products sparingly to avoid oversaturation. Employ gentle, controlled cleaning techniques focused on the gouged area to maintain surrounding wood integrity. Proper preparation enables you with the freedom to achieve a seamless, durable repair.
Sand the Edges of the Gouge
Focus on gently sanding the edges of the gouge to smooth the shift between the damaged area and the surrounding wood. Proper edge preparation guarantees the repair blends seamlessly, preserving your floor’s natural look. Use fine-grit sandpaper (180-220 grit) and apply light pressure in a circular motion to avoid further damage. Control your sanding techniques carefully to prevent over-sanding.
| Sanding Technique | Zweck |
|---|---|
| Light circular | Smooth edge shift |
| Fine-grit paper | Minimize surface scratches |
| Controlled pressure | Preserve surrounding wood |
Precision in this step grants you the freedom to continue repairs confidently, achieving a flawless finish that restores both function and beauty.
Apply Wood Filler

With the edges of the gouge smoothly sanded, you’re ready to apply wood filler to restore the surface integrity. Choose the appropriate wood filler types—water-based for easy cleanup or epoxy-based for durability. Use these application techniques for best results:
- Press filler firmly into the gouge with a putty knife
- Overfill slightly to compensate for shrinkage
- Smooth the surface to minimize sanding later
- Let it dry fully according to manufacturer instructions
- Clean tools immediately to prevent hardening
Applying wood filler correctly guarantees the gouge is sealed and structurally sound, freeing you from worries about further damage. Selecting the right filler and mastering these techniques gives you control over the repair’s longevity and appearance.
Glätten Sie die Oberfläche
You’ll want to select fine-grit sandpaper to avoid damaging the surrounding wood. Sand gently and evenly to level the filler with the floor surface. After sanding, thoroughly clean all dust to guarantee proper adhesion of any finish applied afterward.
Choose the Right Sandpaper
Selecting the right sandpaper grit is essential for effectively smoothing the gouged area without damaging the surrounding wood. You’ll want to choose sandpaper types and grits that balance abrasion with control. Start coarse to level deeper gouges, then progress to finer grits for a seamless finish.
Consider these sandpaper options:
- 80-grit: removes rough edges quickly
- 120-grit: refines surface, removes scratches
- 180-grit: smooths wood texture further
- 220-grit: prepares surface for finishing
- Aluminum oxide or garnet types: durable, effective for hardwood
Sand Gently and Evenly
After choosing the appropriate sandpaper grit, begin sanding the gouged area gently and evenly to avoid creating uneven surfaces or further damage. Use controlled, circular motions or follow the wood grain, depending on the wood type, to maintain surface integrity. Applying consistent pressure guarantees you don’t remove too much material, preserving the floor’s natural contours. Different wood types react uniquely to sanding techniques—hardwoods require lighter sanding, while softwoods may tolerate slightly more aggressive smoothing. Avoid back-and-forth scrubbing that can cause scratches or dips. Regularly check your progress and adjust your technique to achieve a uniformly smooth surface that seamlessly blends with the surrounding floor. This careful sanding step is essential for a flawless repair and prepares the area for finishing touches.
Clean Dust Thoroughly
Remove all sanding dust thoroughly to guarantee a clean surface for finishing. Effective dust removal guarantees your repair adheres perfectly and looks seamless. Start by vacuuming the gouged area with a brush attachment to lift fine particles. Follow with a tack cloth dampened slightly with appropriate cleaning products designed for wood surfaces. Avoid saturating the wood, as excess moisture can cause damage. Check for residual dust by running your hand lightly over the surface; it should feel smooth and clean.
Keep these essentials in mind for ideal dust removal:
- Use a high-efficiency vacuum to capture fine dust
- Select non-abrasive, residue-free cleaning products
- Employ lint-free microfiber cloths or tack cloths
- Avoid harsh chemicals that may affect finish adhesion
- Guarantee complete drying before applying filler or finish
This thorough cleaning will set you free to finish your floor flawlessly.
Let the Filler Dry Completely
While the filler sets, you’ll want to confirm it remains undisturbed to achieve a solid, even cure. This waiting period is critical for proper filler drying and confirms maximum adhesion and durability. Depending on the product, curing time can vary, so always follow manufacturer recommendations closely.
| Filler Type | Typical Drying Time | Recommended Curing Time |
|---|---|---|
| Water-based | 30 minutes | 24 Stunden |
| Epoxy-based | 1-2 hours | 48 hours |
| Solvent-based | 15-30 minutes | 12-24 hours |
| Latex | 20-40 minutes | 24 Stunden |
| Polyurethan | 1 hour | 24-72 hours |
Avoid walking on or applying pressure until curing is complete to maintain repair integrity and your freedom to enjoy flawless wood flooring.
Sand the Repaired Area
Begin by gently sanding the repaired area with fine-grit sandpaper to level the filler flush with the surrounding wood surface. Employ proper sanding techniques to avoid unevenness or damage. Choose sanding tools suited for precision:
- Use a sanding block for uniform pressure
- Select 220-grit sandpaper for a smooth finish
- Sand in the direction of the wood grain
- Frequently check progress by touch and sight
- Remove all dust with a vacuum or tack cloth before finishing
Maintain controlled, even strokes to blend the repair seamlessly. Avoid aggressive sanding that may gouge the wood further. Proper sanding tools and techniques guarantee the repaired area is indistinguishable, restoring your wood floor’s natural beauty and granting you the freedom to proceed confidently to the next step.
Apply Stain or Paint to Match
How do you guarantee the repaired area blends seamlessly with the rest of your wood floor? Start by selecting a stain or paint that matches your floor’s original color. Use color matching techniques—test small amounts on scrap wood or an inconspicuous spot until you find the perfect hue. Once matched, apply stain evenly over the repaired gouge using a fine brush or cloth. Allow the stain to penetrate for the manufacturer’s recommended time, then wipe off excess to prevent blotching. For paint, use thin, controlled coats to avoid buildup. Let each coat dry fully before evaluating color accuracy. Accurate color matching and precise stain application are essential for a seamless repair that preserves your floor’s natural look and your freedom to enjoy it without visible flaws.
Seal the Repair With a Protective Finish
You’ll want to select a protective finish compatible with your floor’s existing coating, such as polyurethane or varnish. Apply the finish evenly over the repaired area to guarantee a consistent seal and durability. Allow adequate drying time between coats to achieve maximum protection.
Die Wahl des richtigen Finishs
A protective finish is essential to seal the repaired gouge and restore the floor’s durability and appearance. When choosing the right finish, consider finish types that best match your floor’s original look and wear resistance. Options include:
- Polyurethane (oil- or water-based) for strong, clear protection
- Shellac for a natural, warm glow
- Varnish for durable, glossy coverage
- Wax for a soft, matte finish
- Penetrating oil for enhancing wood grain and flexibility
Each finish type demands specific finish application techniques, affecting drying time, durability, and ease of maintenance. Pick a finish that suits your lifestyle and floor traffic. By selecting the proper finish, you guarantee the repair blends seamlessly and your wood floor remains robust and visually appealing for years to come.
Applying Protective Coating
Once you’ve selected the appropriate finish, start by thoroughly cleaning the repaired area to remove dust and debris that could interfere with adhesion. Use a lint-free cloth dampened with mineral spirits or a recommended cleaner for your floor type. Next, apply a thin, even layer of protective sealants with a high-quality brush or applicator, following the wood grain. Be precise to avoid pooling or uneven spots. Allow the first coat to dry completely, as per manufacturer instructions, before lightly sanding with fine-grit sandpaper to promote adhesion of subsequent layers. Repeat the finish application until the repair blends seamlessly with the surrounding floor, enhancing durability and protection. Proper application of protective sealants guarantees your repair withstands foot traffic while preserving the wood’s natural beauty and your freedom to enjoy your space.


