To fix a soft spot in your camper floor, first locate and mark the damaged area by pressing to detect sponginess and using a moisture meter. Cut and remove the compromised flooring, then inspect and repair any rotted subfloor or joists. Replace with marine-grade plywood or composite boards secured with corrosion-resistant screws. Finish by sealing all seams with waterproof sealant to prevent future moisture issues. If you want to guarantee lasting durability and prevent recurrence, it helps to understand proper material choices and installation techniques.
Identifying the Location of the Soft Spot
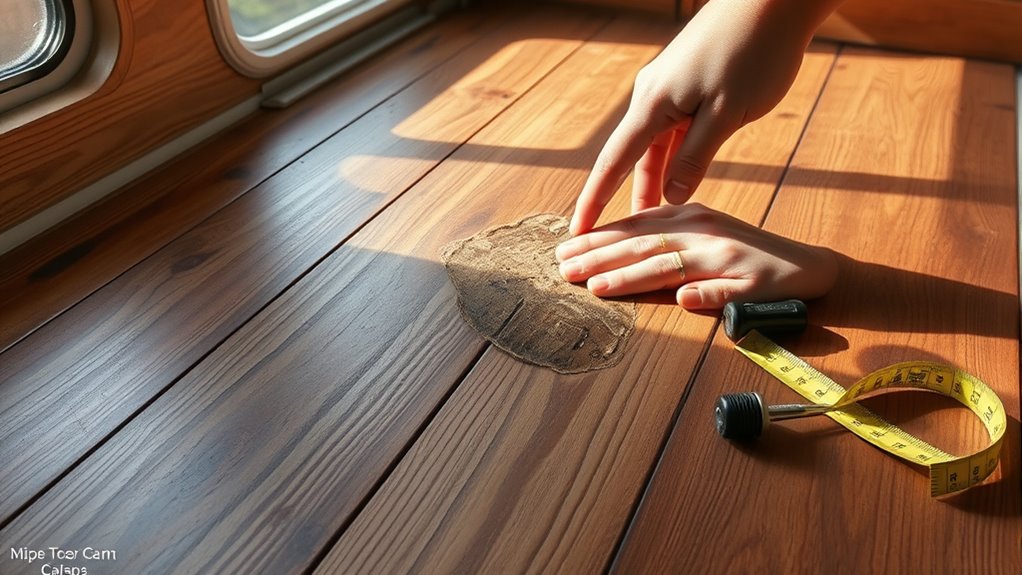
Where exactly is the soft spot in your camper floor? Precise soft spot identification starts with systematic floor inspection techniques. Begin by visually scanning the floor for discoloration or sagging areas. Then, apply gentle pressure with your foot or a flat tool, noting any noticeable give or sponginess. Use a flashlight at a low angle to highlight uneven surfaces or depressions. Tapping the floor with a small hammer or screwdriver handle can help detect hollow sounds indicating compromised sections. Mark suspected spots for further evaluation. Consistently apply these inspection methods across the entire floor area, paying close attention to corners and near fixtures where damage often initiates. Accurate identification is essential to target repairs effectively, ensuring you maintain your camper’s structural integrity and freedom on the road.
Common Causes of Soft Spots in Camper Floors
You’ll often find soft spots caused by water damage, which weakens the floor’s structural integrity over time. Pay close attention to signs of structural weakness, such as sagging or creaking areas, as they indicate compromised support. Additionally, material wear and tear from regular use can degrade the floor, leading to these vulnerable areas.
Water Damage Effects
Although water damage may not always be immediately visible, it’s one of the primary causes of soft spots in camper floors. When moisture infiltrates the Bodenbelag material, it compromises its structural integrity, leading to deterioration you’ll want to address promptly. Understanding the effects helps you apply effective repair techniques and maintain your camper’s freedom on the road.
Common water damage effects include:
- Delamination of plywood layers, weakening the floor’s core.
- Mold and mildew growth, which degrade materials and pose health risks.
- Swelling and warping of wood, causing uneven surfaces.
- Rusting of metal fasteners, reducing overall floor stability.
Detecting these signs early allows you to execute precise repairs, restoring your camper’s floor strength and durability.
Structural Weakness Signs
Water damage often triggers structural weaknesses that manifest as soft spots in camper floors. When inspecting your camper, focus on identifying leaks around seams, windows, and plumbing fixtures, as these are primary entry points for moisture. Soft spots typically indicate compromised subflooring or joists, so carefully step on suspicious areas to detect instability. Inspecting insulation beneath the floor can also reveal moisture retention, which accelerates wood rot and weakens structural integrity. Look for discoloration, mold, or dampness within insulation materials, as these signs confirm hidden damage. Addressing these issues early preserves your camper’s frame and maintains freedom to travel safely. Precise identification of leaks and thorough inspection of insulation are critical steps to prevent further degradation and restore floor strength effectively.
Material Wear and Tear
When frequent use and exposure to varying conditions take their toll, the materials in your camper floor begin to degrade, leading to soft spots. Proper material maintenance is vital to prevent this deterioration and guarantee flooring longevity. Common causes include:
- Moisture Infiltration – Water seeps through seams or damaged seals, weakening the subfloor.
- UV Exposure – Prolonged sunlight breaks down surface materials, reducing structural integrity.
- Abrasion – Constant foot traffic and moving furniture wear down the protective layers.
- Temperature Fluctuations – Expansion and contraction cause material fatigue and microfractures.
Addressing these factors promptly helps preserve the floor’s strength and extends your camper’s freedom to roam without worry. Regular inspections and timely repairs are essential for peak material maintenance.
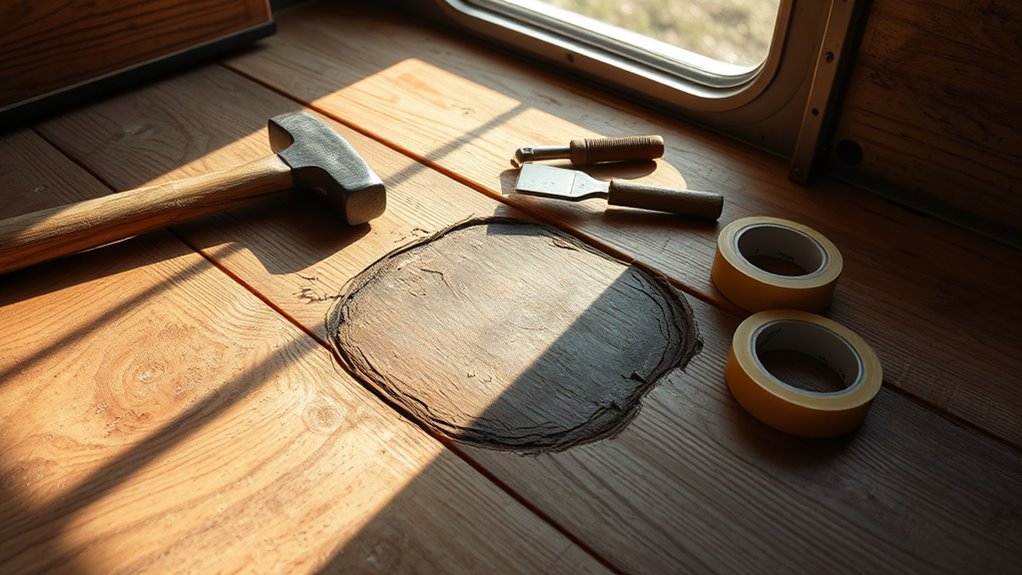
Tools and Materials Needed for Repair
To effectively repair a soft spot in your camper floor, you’ll need a specific set of tools and materials that guarantee a durable and secure fix. Gather a cordless drill, circular saw, pry bar, measuring tape, and safety gear like gloves and goggles. For floor materials, use marine-grade plywood or exterior-grade hardwood, making sure they match the thickness of your existing floor. You’ll also need wood screws, waterproof wood glue, and a high-quality sealant to protect against future moisture damage. Sandpaper and a chisel help refine edges for precise fitting. These tools and materials align with proven repair techniques focused on restoring structural integrity while maintaining the camper’s freedom of movement. Having the right equipment guarantees your repair is efficient, long-lasting, and resistant to recurring soft spots caused by material degradation.
Removing the Damaged Flooring Section
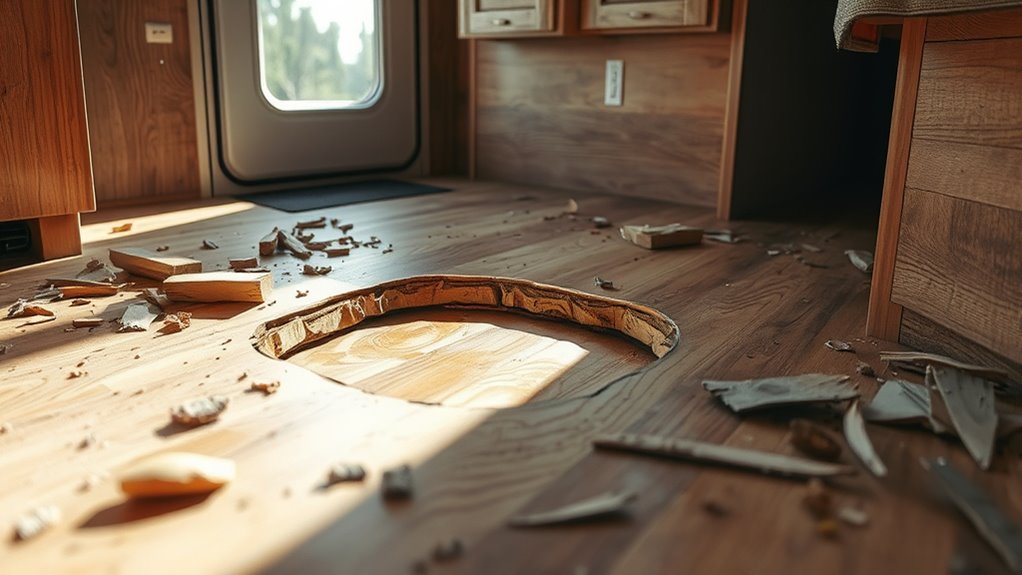
Start by clearly marking the boundaries of the damaged area on your camper floor using a measuring tape and pencil, guaranteeing you extend beyond any visible soft spots to remove all compromised material. Proper removal techniques are critical to maintain flooring safety and prevent further damage. Follow these steps:
- Use a circular saw set to the flooring thickness to cut along the marked lines carefully.
- Remove screws or nails securing the damaged section with a drill or pry bar.
- Gently pry up the damaged flooring, avoiding excessive force that may damage adjacent areas.
- Dispose of the removed section safely to prevent contamination or injury.
This precise removal guarantees you’re ready for the next repair stage, maintaining your camper’s structural integrity and your freedom to explore without worry.
Inspecting the Subfloor and Structural Components
Although removing the damaged flooring section is vital, your next step is to thoroughly inspect the subfloor and structural components beneath. Begin your subfloor assessment by probing for softness or sponginess, which signals compromised material. Use a moisture meter to detect hidden dampness that undermines structural integrity. Examine joists and supports for cracks, rot, or warping—any weakness here can jeopardize the entire floor’s stability. Pay close attention to fasteners and seams, making sure they remain secure. Document all findings to plan effective repairs and replacements. This detailed inspection not only safeguards your camper’s foundation but also guarantees your freedom to travel safely without unexpected failures. Precision in this step is vital to restoring lasting strength and confidence in your camper’s floor system.
Drying and Treating Moisture Damage
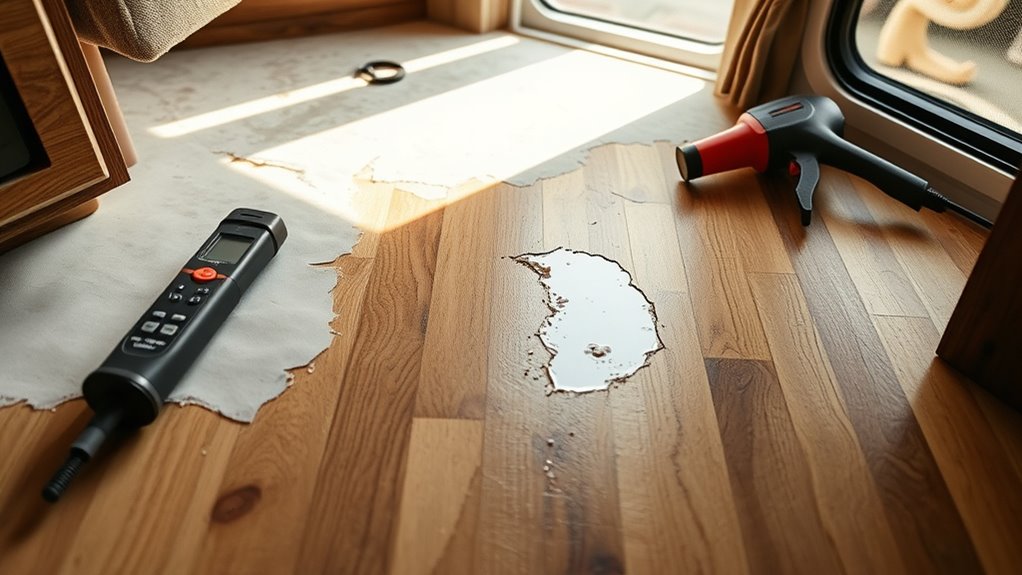
When moisture has compromised your camper floor, thoroughly drying the affected areas is essential before any repair work can proceed. Effective moisture detection guides your drying process, guaranteeing no hidden dampness remains. Use these steps to dry and treat moisture damage:
- Remove all wet materials and increase ventilation using fans or dehumidifiers.
- Apply moisture meters regularly to confirm the subfloor is completely dry.
- Treat the area with a fungicidal solution to prevent mold and wood rot.
- Seal exposed wood with a moisture-resistant primer to inhibit future damage.
Following these precise repair techniques guarantees your camper floor regains structural integrity and longevity, giving you the freedom to travel worry-free.
Choosing the Right Replacement Materials
When selecting replacement materials for your camper floor, focus on options that offer high durability and excellent moisture resistance to prevent future damage. You’ll also want to take into account the weight and flexibility of the materials, as these affect both structural integrity and ease of installation. Prioritizing these factors guarantees a long-lasting repair that maintains your camper’s performance.
Material Durability Options
Selecting the right replacement materials is critical to guaranteeing your camper floor remains durable and resistant to future damage. When evaluating options, rely on material comparisons and durability ratings to make informed decisions. Here are four durable material choices to take into account:
- Marine-grade plywood – High durability rating; resists warping under stress.
- Composite panels – Excellent strength-to-weight ratio; low maintenance.
- Aluminum sheets – Corrosion-resistant; ideal for structural reinforcement.
- High-density fiberboard (HDF) – Cost-effective; suitable when sealed properly.
Each option offers distinct advantages depending on your camper’s use and exposure. By selecting materials with proven durability ratings, you guarantee longevity and maintain freedom from frequent repairs. Prioritize materials that balance strength, weight, and ease of installation to achieve a resilient camper floor.
Moisture Resistance Importance
Durability alone won’t protect your camper floor if moisture seeps in and causes deterioration. Choosing materials with effective moisture barriers and proper floor insulation is critical for long-term performance. You want replacement materials that resist water infiltration while maintaining structural integrity.
| Materialtyp | Feuchtigkeitsbeständigkeit | Floor Insulation Compatibility |
|---|---|---|
| Marine Plywood | Hoch | Exzellent |
| Closed-Cell Foam | N / A | Superior |
| Pressure-Treated OSB | Mäßig | Gut |
Marine plywood offers excellent moisture resistance and pairs well with insulation. Closed-cell foam provides top insulation but no structural support. Pressure-treated OSB is budget-friendly with moderate resistance. Select materials that balance moisture barriers and insulation to keep your floor dry and durable, ensuring freedom to roam without worry.
Weight and Flexibility
Two key factors you need to contemplate for your camper floor replacement are weight and flexibility. Proper weight distribution guarantees your floor supports loads without sagging, while flexibility factors allow it to absorb stresses from movement and terrain. Choosing materials that balance these aspects preserves structural integrity and freedom on the road.
Consider these when selecting replacement materials:
- Density and weight: Lighter materials reduce overall load but must retain strength.
- Modulus of elasticity: Determines how much a material bends under stress.
- Layer composition: Combining rigid and flexible layers optimizes performance.
- Durability under cyclic loads: Assures longevity despite constant motion.
Installing the New Subfloor and Flooring
Before installing the new subfloor, make sure the camper’s frame is clean, dry, and free of any debris or damage that could compromise the installation. Measure the area precisely and cut your plywood or composite board to fit snugly. During subfloor installation, secure the panels with corrosion-resistant screws to the frame, ensuring no movement or flex. Choose flooring options that match your camper’s use—lightweight vinyl or laminate are durable and easy to maintain. Lay an underlayment if needed for moisture protection and added comfort. Align the flooring carefully, leaving slight expansion gaps. Fasten or glue the flooring according to the manufacturer’s guidelines to prevent shifting. This precise approach guarantees a stable foundation, extending your camper’s freedom to roam without floor issues.
Sealing and Waterproofing the Repaired Area
To protect your repaired camper floor, you’ll need to select a waterproof sealant suited for both wood and the specific conditions inside your camper. Apply the sealant evenly, ensuring all edges and seams are fully covered to prevent moisture infiltration. Proper sealing not only extends the repair’s lifespan but also maintains the floor’s structural integrity over time.
Choosing Waterproof Sealants
How do you confirm the repaired camper floor remains protected against moisture over time? Selecting the best sealants is essential. You’ll want to understand the sealant types available and their specific properties to guarantee lasting waterproofing.
- Silicone Sealants – Flexible, durable, and excellent for preventing water infiltration.
- Polyurethane Sealants – Strong adhesion and resistance to wear, ideal for high-traffic areas.
- Butyl Sealants – Great for gaps and joints, offering a waterproof barrier with moderate flexibility.
- Epoxy Sealants – Hard, durable finish but less flexible; best for structural repairs.
Choosing the right waterproof sealant balances flexibility, adhesion, and durability—giving you dependable protection and the freedom to explore without worry.
Applying Sealant Properly
Although selecting the right sealant is critical, applying it correctly guarantees a watertight bond that lasts. Start by thoroughly cleaning and drying the repaired area to guarantee proper adhesion. When it comes to sealant application, use a high-quality caulking gun for even, controlled dispensing. Apply sealant types suited for exterior use, such as polyurethane or silicone, which offer flexibility and durability. Maintain a consistent bead thickness, avoiding gaps or air bubbles that compromise sealing. Smooth the bead with a wet finger or tool to enhance contact with surfaces and remove excess material. Allow the sealant to cure fully under recommended conditions before exposing it to moisture. Proper application not only seals but reinforces your camper floor’s protection, keeping your freedom on the road worry-free.
Ensuring Long-Term Protection
Since moisture is the primary cause of camper floor deterioration, ensuring thorough sealing and waterproofing after repairs is essential for long-term protection. To achieve ideal floor maintenance strategies and guarantee long term durability, follow these steps:
- Apply a high-quality marine-grade sealant evenly over the repaired area to block all moisture entry points.
- Use waterproofing membranes or coatings designed specifically for camper floors to add a durable barrier.
- Inspect and reseal joints and seams annually to prevent water infiltration before it compromises the structure.
- Maintain proper ventilation inside the camper to minimize humidity buildup, complementing your sealing efforts.
Preventative Measures to Avoid Future Soft Spots
To prevent future soft spots in your camper floor, you’ll need to regularly inspect and maintain key areas prone to moisture intrusion. Focus on preventative maintenance by checking seals around windows, doors, and plumbing fixtures for cracks or gaps. Implement effective moisture management by ensuring proper drainage and ventilation inside the camper to reduce humidity buildup. Use high-quality sealants and replace worn weather stripping promptly. Routinely clean and dry the floor to avoid mold growth or wood rot. Consider applying a waterproof membrane beneath flooring materials for added protection. By adhering to these precise steps, you’ll extend your camper’s floor lifespan and maintain structural integrity, allowing you the freedom to explore without worrying about costly repairs caused by hidden water damage.


