To stop creaking floors, start by identifying the source of the noise. Check for loose boards, gaps, or worn-out nails. Tighten any loose floorboards with screws, and consider applying wood glue to stabilize them further. Lubricants like silicone spray can reduce squeaks by filling gaps. Inspect your Boden joists for stability and add support if needed. If the creaks persist, replacing damaged boards might be necessary. Finally, utilizing soundproofing techniques like area rugs or acoustic panels can help reduce noise. Keep exploring these tips to discover more effective solutions for quieter floors.
Identify the Source of Creaks

Creaking floors can be a real nuisance, but identifying the source is the first step toward a solution. Start by walking around the affected area, paying attention to where the sound comes from. Common creak causes include loose floorboards, gaps between the flooring materials, or worn-out nail connections. If you have hardwood floors, check for any movement in the boards. For carpeted areas, you might need to lift the carpet to inspect the underlying subfloor. Also, consider the age and type of flooring materials; older installations may be more prone to creaking. By pinpointing the specific issue, you'll gain the freedom to address it effectively, ensuring a quieter and more comfortable living space.
Inspect Floor Joists and Beams
When addressing floor creaks, it's essential to inspect the floor joists and beams that support your flooring. A solid floor structure relies on well-aligned joists, so check for any signs of warping or misalignment. Here's a quick reference table to help guide your inspection:
| Inspektionsaspekt | What to Look For |
|---|---|
| Joist Condition | Cracks, rot, or sagging |
| Beam Stability | Signs of bowing or bending |
| Joist Alignment | Gaps between joists & beams |
| Fasteners | Loose screws or nails |
Ensuring proper joist alignment and addressing any issues found can greatly reduce creaking, giving you the freedom to move about your home without distraction.
Tighten Loose Floorboards
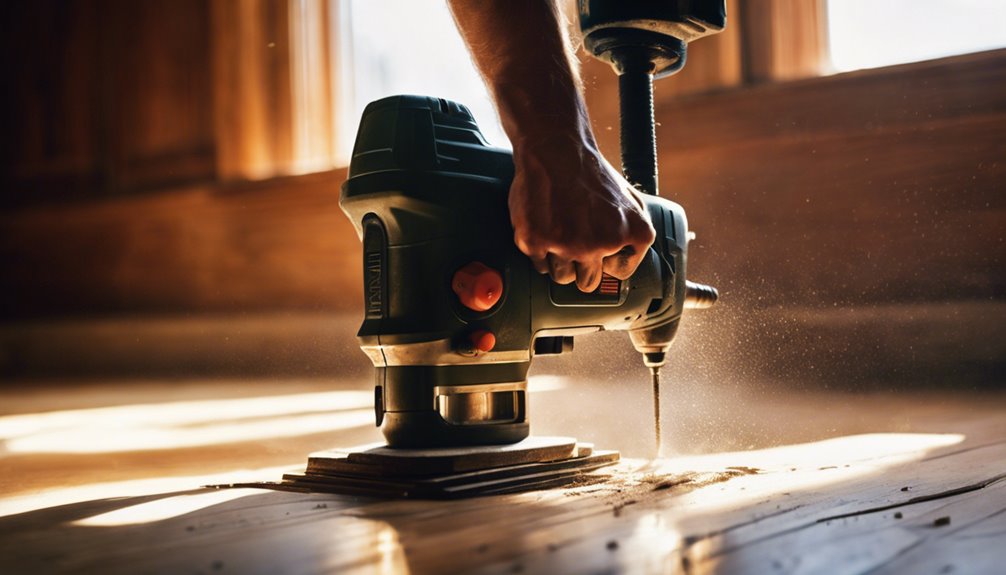
After ensuring your floor joists and beams are in good condition, the next step is to tighten any loose floorboards. Start by locating the squeaky boards; walk on them to identify which ones move. Use a drill or screwdriver to secure them back in place. If you notice significant gaps, consider adding wood screws to improve floorboard alignment. Aim for at least two screws per board, spaced evenly to maximize stability. This method not only tightens the boards but also aids in squeak reduction. If the boards still creak after tightening, you may need to explore additional solutions, but focusing on securing loose boards is your first line of defense against unwanted noise. Enjoy the peace of a quieter home!
Use Lubricants for Squeaks
If you're dealing with squeaky floors, using lubricants can be an effective solution. There are various types of lubricants you can choose from, and knowing how to apply them properly is key to achieving the best results. Additionally, incorporating preventative maintenance tips can help keep your floors quiet for longer.
Types of Lubricants
To effectively tackle those annoying floor squeaks, you need to choose the right type of lubricant. Silicone spray is a popular choice because it penetrates easily and creates a slippery surface, helping to reduce friction between floorboards. It's also water-resistant, making it durable for long-term use. On the other hand, graphite powder is a great option for those who prefer a dry lubricant. It won't attract dust or dirt, which keeps your floor clean while effectively minimizing squeaks. Both options are easy to apply and can be found at most hardware stores, giving you the freedom to choose what fits your needs best. Consider your floor type and environment, and select the lubricant that suits your situation.
Anwendungstechniken
When it comes to applying lubricants to stop those pesky floor squeaks, there are a few effective techniques you can use. First, identify the squeaky spot by walking on the floor and pinpointing the noise. Once found, use a syringe or a spray bottle to apply your chosen lubricant directly into the gap between the floorboards. For dry lubricants, sprinkle the powder liberally, ensuring it seeps into the cracks. You might also consider using a small brush to work it into the joints. After applying, walk on the area to distribute the lubricant evenly, enhancing its effectiveness. This method not only aids in squeak prevention but also contributes to overall floor repair, ensuring your floors remain quiet and comfortable for years to come.
Tipps zur vorbeugenden Wartung
Although squeaky floors can be annoying, regular preventative maintenance can keep them at bay. One effective method is using lubricants to treat those troublesome spots. Apply a suitable lubricant between floorboards or on squeaky nails to minimize friction. Here's a quick reference table for various lubricants:
| Lubricant Type | Application Method | Frequency of Use |
|---|---|---|
| Talcum Powder | Sprinkle between boards | Every 6 months |
| WD-40 | Spray on squeaky areas | As needed |
| Silikonspray | Apply with a cloth | Every year |
| Beeswax | Rub on joints | Every 6 months |
| Graphitpulver | Dust into crevices | Every year |
Incorporating these simple floor maintenance tips can lead you to effective squeaky solutions, allowing you to enjoy your space without distractions.
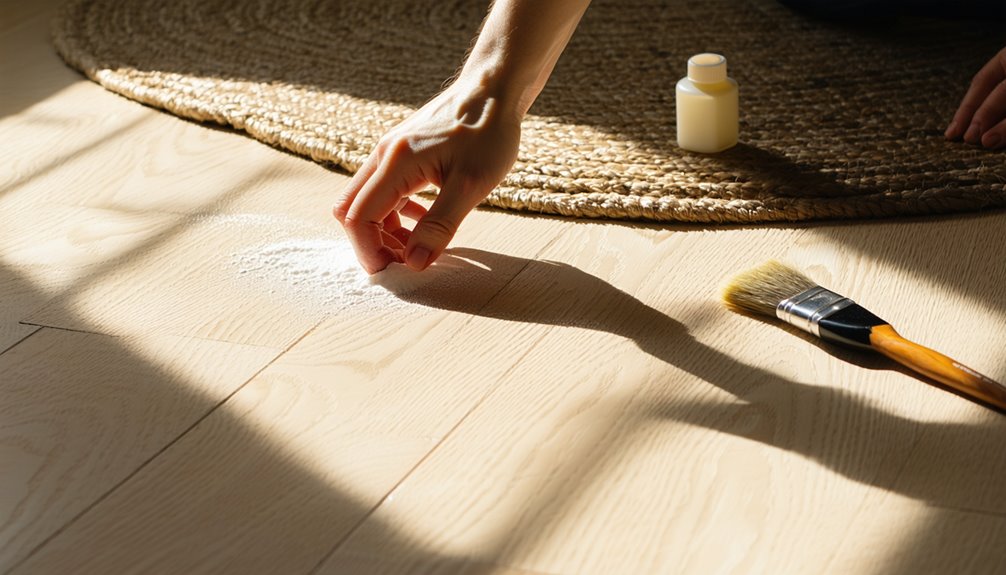
Apply Wood Glue for Stability
To stop those annoying creaks, you'll first need to pinpoint the areas of your floor that are making the noise. Once you've identified the creaky spots, carefully apply wood glue between the floorboards and the subfloor to create a more stable connection. This simple step can greatly reduce movement and quiet those pesky sounds.
Identify Creaky Areas
Creaky floors can be a nuisance, disrupting the peace of your home and drawing unwanted attention. To tackle this issue, you first need to identify the creaky areas. Start by walking around your home, listening for those annoying creaky noises. Pay close attention to high-traffic zones, as they're often where floor materials shift the most. When you locate a creak, mark it with a piece of tape for easy reference. You may also want to check the joints and edges where different materials meet, as these can be common trouble spots. Once you've pinpointed the problem areas, you'll be ready to apply wood glue for stability, addressing the root cause of those pesky sounds.
Apply Glue Carefully
Once you've marked the creaky areas, it's time to apply wood glue for stability. Choose the right wood glue types—PVA (polyvinyl acetate) is great for general repairs, while polyurethane glue offers strong bonding for damp conditions. For application methods, squeeze the glue into the gap between the floorboards, ensuring it penetrates well. You can use a small brush or a syringe for precise application. After applying, press the boards together firmly and wipe away any excess glue with a damp cloth. Allow the glue to cure fully, typically 24 hours, before walking on the floor. This simple step can greatly reduce creaks and provide lasting support, giving you the freedom to enjoy your home without those pesky noises.
Consider Adding Support
If you've tried various methods to silence your creaking floors without success, it might be time to reflect on adding support to your flooring structure. Structural reinforcements can considerably reduce noise by providing stability. Here are a few options to evaluate:
- Install additional bracing between joists to enhance support.
- Add blocking to prevent movement and reduce creaking.
- Use a sistering technique where you attach another joist alongside existing ones for extra strength.
These adjustments can make a noticeable difference in your floor's firmness. By implementing additional support, you'll not only silence those pesky creaks but also extend the life of your flooring. Embrace the freedom of a quiet home by taking this practical step towards a more peaceful living space.
Replace Damaged Floorboards

Adding support to your flooring can greatly reduce creaking, but damaged floorboards may still contribute to the noise. If you've noticed warping, cracks, or decay, it's time to replace those problematic floorboards. Start by selecting the right floorboard materials, like hardwood, plywood, or laminate, based on your aesthetic and budget. Then, use appropriate installation methods—either tongue-and-groove or butt joints, depending on your existing layout. Before installation, verify the subfloor is secured and free of debris. Measure each board carefully, cutting them to fit snugly. Secure the new floorboards with screws, which can help mitigate future creaking. By replacing damaged boards, you not only enhance your flooring's appearance but also reclaim your space from annoying noises.
Utilize Soundproofing Techniques
While creaking floors can be a nuisance, utilizing soundproofing techniques can greatly reduce the noise. By incorporating effective soundproofing materials and methods, you can achieve a quieter living environment. Here are some practical solutions:
- Acoustic panels: These can absorb sound and minimize echo, making your space feel more serene.
- Unterlage: Installing soundproof underlayment beneath your flooring can dampen vibrations and reduce creaking considerably.
- Weatherstripping: Sealing gaps around doors and windows can prevent sound from traveling, enhancing overall noise reduction.
Experimenting with these techniques not only helps in combating creaks but also cultivates a more peaceful home. With a little effort, you can reclaim your space from unwanted noise and enjoy the freedom of tranquility.
Consult a Professional if Needed

Sometimes, despite your best efforts with soundproofing techniques, creaking floors persist. When DIY methods don't cut it, it might be time to consult a professional. A skilled contractor can provide a thorough professional assessment of your flooring situation. They'll identify the root cause of the creaks—be it loose boards, inadequate support, or moisture issues—and recommend appropriate floor repair solutions.
Professionals not only have the experience to tackle complex problems, but they also possess the right tools to guarantee your floors are fixed effectively. By seeking expert help, you can reclaim the peace and freedom of a quiet home without the stress of trial and error. Don't hesitate to reach out; sometimes, a little expert guidance goes a long way.
Häufig gestellte Fragen
Can Creaking Floors Indicate Structural Damage?
Creaking floors can be more than just an annoyance; they might indicate issues with the structural integrity of your home. If you notice persistent creaks, it's wise to investigate further. While some noises are normal, significant creaking could signal loose boards or weakened supports. Repair methods can include reinforcing joists or adding shims. Always prioritize safety—if you're unsure, consulting a professional can help guarantee your home remains safe and sound.
How Much Does It Cost to Repair Creaking Floors?
Think of your home as a symphony; when creaking floors disrupt the melody, it's time to tune the instruments. Floor repair costs can vary widely, typically ranging from $200 to $1,000 based on the severity and method. For effective creaking floor solutions, consider hiring a professional to assess the problem, ensuring your home's rhythm returns. Investing in repairs not only enhances comfort but also protects your space, allowing you to enjoy freedom from distractions.
Are Certain Types of Flooring More Prone to Creaking?
Yes, certain types of flooring are more prone to creaking. Hardwood floors, while beautiful, can develop creaks over time due to natural expansion and contraction. Similarly, laminate flooring can also creak, especially if it's not installed properly or if the subfloor isn't level. To minimize these noises, guarantee proper installation and allow for adequate expansion space. Understanding the characteristics of your flooring can help you maintain a quieter, more enjoyable living space.
Will Humidity Levels Affect Floor Creaking?
Humidity levels can greatly impact your floors' creaking. When humidity control isn't maintained, wood expands and contracts, leading to those annoying sounds. For effective floor maintenance, consider using a dehumidifier in damp areas and ensuring proper ventilation. By keeping humidity at an ideal level, you can minimize the risk of creaks and protect your flooring investment. Ultimately, being proactive about humidity will help you enjoy a quieter, more comfortable home.
Can Pets Contribute to Floor Creaking Sounds?
Yes, pets can definitely contribute to floor creaking sounds. Their weight can put additional stress on various floor materials, like hardwood or laminate, leading to movement and noise. When your furry friend jumps or runs, it can exacerbate any existing loose boards or nails. If you're looking for a quieter space, consider reinforcing the flooring or using rugs to help absorb some of the sound caused by your beloved pet's activities.