
First, gather tools like a hammer, chisel, safety gear, and prepare your workspace by clearing and protecting the area. Score grout lines carefully to weaken bonds, then gently loosen tiles using a chisel and hammer. Remove leftover adhesive with appropriate methods, clean the floor thoroughly, and inspect for cracks or damage. Taking these steps guarantees you protect the concrete and prepare it well for new flooring. Follow these steps closely to master the process from start to finish.
Gather the Necessary Tools and Safety Gear
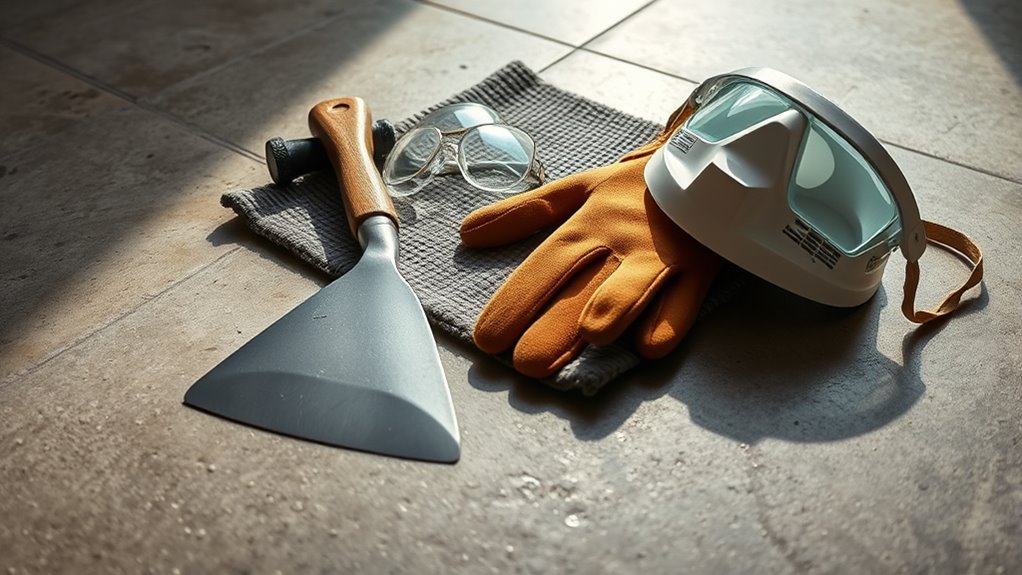
Before you begin removing ceramic tile from your concrete floor, you’ll need to gather the right tools and safety gear to guarantee the job proceeds smoothly and safely. Prioritize tool selection: a sturdy hammer, chisel, pry bar, and an electric hammer or rotary hammer with a chisel attachment will make the process efficient. For safety equipment, select heavy-duty gloves to protect your hands, safety goggles to shield your eyes from flying debris, and a dust mask or respirator to avoid inhaling fine particles. Knee pads will help you work comfortably on the hard surface. Ensuring you have the correct tools and safety equipment upfront empowers you to maintain control throughout the project, minimizing risks and maximizing your freedom to work confidently and effectively.
Prepare the Work Area
Once you’ve gathered your tools and safety gear, focus on preparing the work area to assure efficiency and safety. Start by clearing the space of all furniture and obstacles to create an open, clutter-free zone. This workspace organization minimizes trip hazards and allows unrestricted movement. Next, lay down plastic sheeting or drop cloths to catch debris and protect surrounding surfaces. Confirm adequate ventilation by opening windows or using fans, as tile removal can generate dust. Before you begin, double-check that your protective equipment—gloves, safety glasses, knee pads, and a dust mask—is on and properly fitted. Taking these methodical steps not only safeguards your health but also streamlines the tile removal process, freeing you from unnecessary interruptions and allowing you to work confidently toward a clean, bare concrete floor.
Score the Grout Lines Around the Tiles
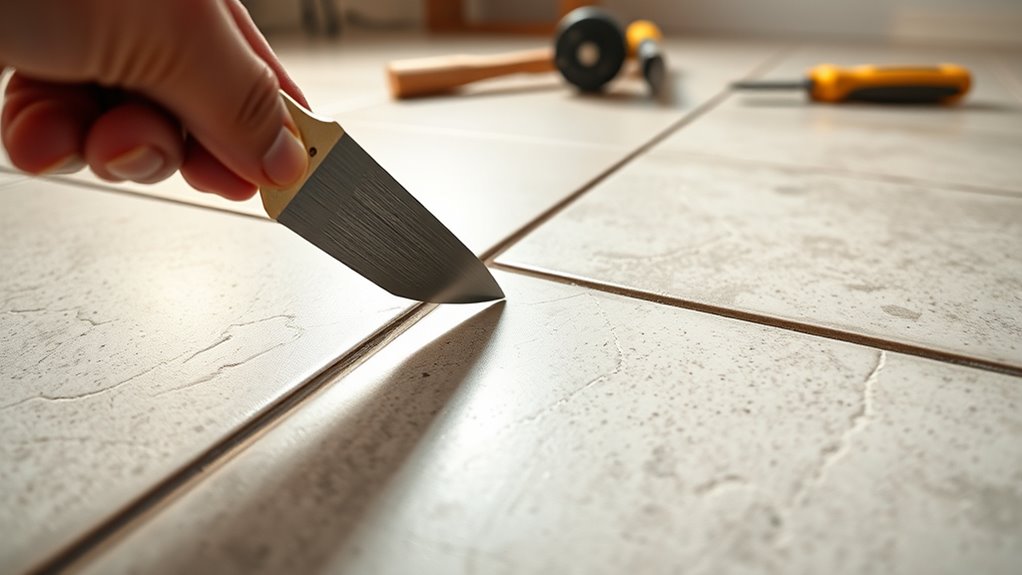
Before you begin removing the tiles, use a grout saw or an oscillating tool with a grout removal blade to score the grout lines around each tile. Carefully follow the grout lines to weaken the bond without damaging the surrounding tiles or concrete. This technique helps make tile removal more controlled and reduces the risk of chipping.
Tools for Scoring Grout
Typically, you’ll need a few specialized tools to score the grout lines effectively without damaging the tiles. Proper grout removal relies on precise scoring techniques, and having the right tools is vital to maintain control and protect the surrounding tiles. Here are three vital tools you’ll want to have:
- Grout saw – A handheld tool with a serrated blade designed specifically for scraping out grout.
- Oscillating multi-tool – Equipped with a grout removal blade, it offers speed and accuracy for longer grout lines.
- Utility knife with a carbide tip – Useful for scoring narrow or delicate grout lines where precision is essential.
Using these tools methodically guarantees you can efficiently score grout lines, making tile removal smoother and preserving the floor’s integrity.
Techniques to Score Lines
Having the right tools at hand sets the foundation, but how you apply them makes all the difference. When scoring the grout lines around your tiles, start by using a carbide-tipped scoring tool or an angle grinder with a diamond blade for precision. Begin at one edge, applying steady, even pressure to avoid slipping or damaging surrounding tiles. Follow the grout lines methodically, ensuring each line is scored deeply enough to weaken the grout but not so aggressively that it damages the concrete beneath. These scoring techniques create controlled fracture points, making tile removal more efficient and less labor-intensive. Take your time to maintain straight, clean lines; this disciplined approach to scoring is essential for freeing tiles with minimal effort and preserving the integrity of your concrete floor beneath.
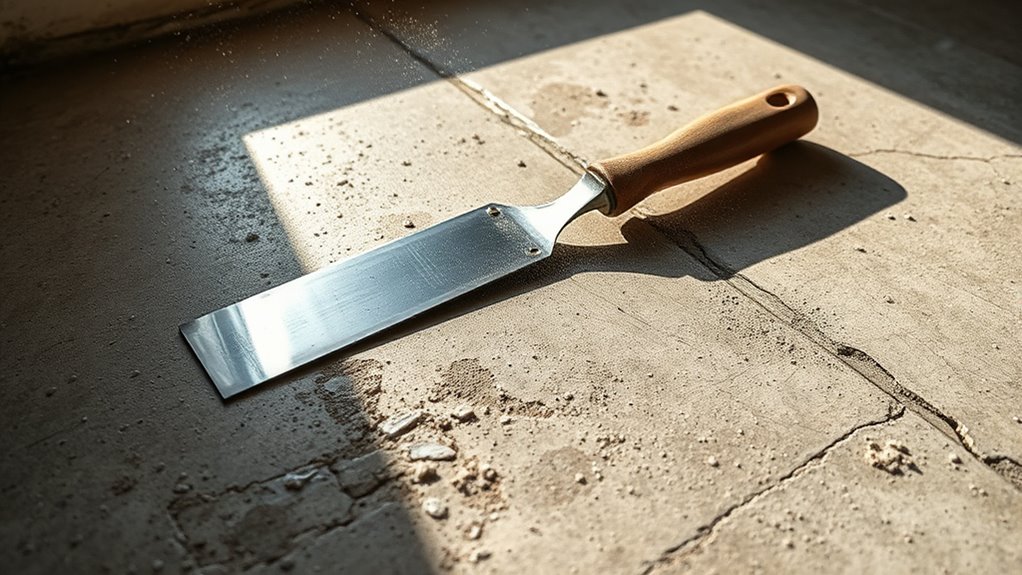
Loosen the Tiles Using a Hammer and Chisel
Start by positioning the chisel at a low angle against the edge of a tile. Using a hammer and chisel effectively is a cornerstone of tile removal techniques that free you from unwanted flooring. Follow these steps:
Begin by placing the chisel low against the tile edge to master effective tile removal.
- Tap the hammer gently on the chisel handle to wedge it under the tile edge without cracking the concrete.
- Work your way along the tile’s perimeter, loosening it gradually to avoid excessive force.
- Once loosened, pry the tile up carefully, maintaining the chisel’s low angle to prevent damage.
This methodical approach lets you maintain control and minimizes surface damage, making the removal smoother and more efficient. By mastering the hammer chisel technique, you reclaim your floor and open the door to new design possibilities.
Remove Residual Adhesive From the Concrete Floor
Once you’ve removed the tiles, you’ll often find different types of adhesive residue left on the concrete. Identifying the adhesive will help you choose the most effective removal method, whether mechanical scraping or chemical solvents. Remember to wear protective gear to avoid exposure to dust and fumes during cleanup.
Types of Adhesive Residue
There are several types of adhesive residues you might encounter when removing ceramic tile from a concrete floor, each requiring a specific approach for effective removal. Understanding adhesive types helps you choose the right removal methods, saving time and effort.
- Thinset Mortar: A cement-based adhesive that bonds tiles firmly; it hardens into a rough, concrete-like residue.
- Mastic Adhesive: A sticky, tar-like substance that remains softer and more pliable than thinset.
- Epoxy Adhesive: A strong, chemical-based adhesive that cures into a tough, durable layer.
Recognizing these adhesive types is essential before you start removal. Each demands different tools and techniques, ensuring you restore the concrete floor cleanly and efficiently.
Effective Removal Techniques
Tackle adhesive removal by selecting tools and methods tailored to the specific residue type on your concrete floor. Effective tile removal techniques focus on thorough concrete floor preparation, ensuring a clean, smooth surface for your next project. Mechanical methods like scraping or grinding work well for thick adhesives, while chemical solvents dissolve stubborn residues without damaging concrete. Here’s a quick guide:
| Adhesive Type | Recommended Technique |
|---|---|
| Thin-set mortar | Floor grinder |
| Mastic | Chemical adhesive remover |
| Epoxy | Scraper + solvent |
Start with less aggressive methods to preserve the concrete integrity. Use floor grinders for thin-set, apply solvent for mastic, and combine scraping with chemicals for epoxy. These precise techniques free you from old adhesive, streamlining concrete floor preparation for your next phase.
Safety Precautions During Cleanup
Three key safety measures should guide your cleanup process when removing residual adhesive from a concrete floor. First, always wear appropriate personal protective equipment—gloves, eye protection, and a respirator—to shield yourself from harmful dust and chemicals. Second, choose cleanup methods that minimize dust generation; wet scraping or using chemical adhesive removers can reduce airborne particles and exposure risks. Third, guarantee proper ventilation in your workspace to disperse fumes and maintain air quality. By following these steps, you protect your health while efficiently restoring the concrete surface. Remember, using the right personal protective gear combined with safe, effective cleanup methods not only safeguards your well-being but also allows you the freedom to complete your project confidently and safely.
Clean the Floor Thoroughly
Although the tiles are removed, your work isn’t done until the floor is spotless. Effective floor cleaning is essential to prepare the concrete for any future finishes or tile maintenance. Start by sweeping away loose debris, then use a stiff-bristle brush and a mixture of warm water with a mild detergent to scrub the surface thoroughly. Rinse the floor with clean water to remove any soap residue, which can interfere with adhesion later. Be certain to dry the floor completely using fans or dehumidifiers to prevent moisture-related issues. By methodically cleaning the concrete, you’ll guarantee a smooth, debris-free surface that promotes longevity and stability for whatever project you choose next. Taking these steps assures your freedom to customize your space without hidden surprises beneath.
Inspect the Concrete Surface for Damage
Before proceeding with any new flooring, you should carefully inspect the concrete surface for damage. Maintaining concrete integrity is essential for a durable foundation. Start your surface evaluation by:
- Checking for cracks or chips that could compromise stability.
- Evaluating any uneven areas or depressions that might affect tile adhesion.
- Looking for signs of moisture or efflorescence, which could indicate water damage.
If you find any issues, address them promptly to avoid future problems. Repair cracks with appropriate filler and level uneven spots with a self-leveling compound. Ensuring a solid, damage-free base gives you the freedom to install new flooring confidently, knowing it will last. This methodical inspection safeguards your investment and keeps your project on track without surprises.


