To make a shower pan on a concrete floor, start by inspecting the surface for levelness and moisture. Install the drain at the precise plumbing rough-in and secure it flush with the concrete. Next, apply a sloped mortar bed, ensuring a consistent 1/4 inch per foot slope toward the drain. Add a waterproof membrane over the mortar for leak prevention. After curing, test for leaks by filling the pan with water. Follow these steps carefully to create a durable base, and you’ll want to explore how to finish for tile installation.
Assessing the Concrete Floor Condition
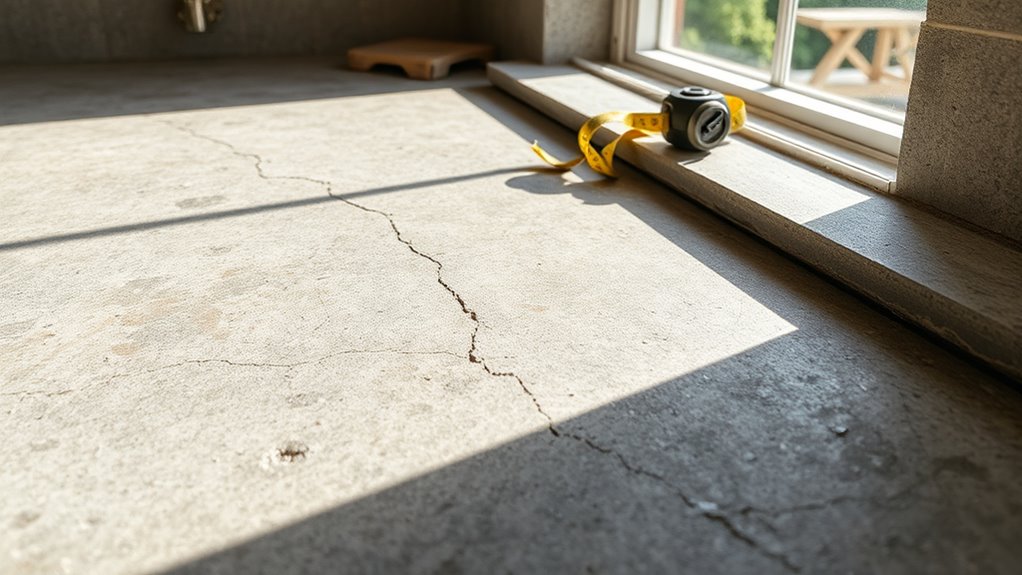
Before you begin installing a shower pan on a concrete floor, you need to thoroughly assess the floor’s condition. Start with a detailed floor inspection, checking for cracks, unevenness, or moisture issues that could compromise the pan’s integrity. Use a level to perform a precise surface evaluation, guaranteeing the concrete is flat and stable. Any dips or high spots must be addressed to guarantee proper drainage and pan adhesion. Additionally, test for moisture by taping a plastic sheet to the floor overnight; condensation indicates a moisture problem that needs correction. This step is essential because a solid, dry foundation assures the shower pan will last without leaks or damage. Taking time here grants you the freedom to install with confidence and avoid costly repairs later.
Gathering Necessary Tools and Materials
Before starting your shower pan installation, you’ll need to gather essential tools like a trowel, level, utility knife, and drill. Make certain you have all required materials on hand, including a pre-slope mortar mix, waterproof membrane, drain assembly, and thin-set mortar. Having everything ready guarantees a smooth, efficient workflow without interruptions.
Essential Tools Checklist
To create a reliable shower pan on a concrete floor, you’ll need a specific set of tools and materials that guarantee accuracy and durability. Essential tools include a tape measure for precise dimensions, a level to verify proper slope, and a utility knife for cutting shower pan materials like waterproof liners. A mixing drill with paddle attachment helps you blend mortar or thin-set consistently for the base layer. You’ll also need a trowel to spread mortar evenly and a caulking gun for applying waterproofing sealants. Safety gear such as gloves and goggles protect you during installation. Having these tools ready supports effective waterproofing techniques, ensuring the shower pan prevents leaks and stands up to moisture over time, granting you freedom from costly repairs and maintenance.
Required Materials Overview
Alongside the tools, gathering the right materials is key to building a durable shower pan on a concrete floor. Start with quality shower pan materials like a pre-sloped mortar bed or a shower pan liner system designed to fit your space. Waterproofing membranes are essential; choose a reliable membrane compatible with your mortar and concrete substrate to prevent water penetration effectively. You’ll also need a waterproof bonding agent and thin-set mortar to secure tiles if you’re tiling over the pan. Don’t forget a drain assembly compatible with your pan design to guarantee proper water flow. Selecting these materials carefully grants you the freedom to create a reliable, long-lasting shower base that withstands moisture without compromising structural integrity or your peace of mind.
Planning the Shower Pan Dimensions and Slope
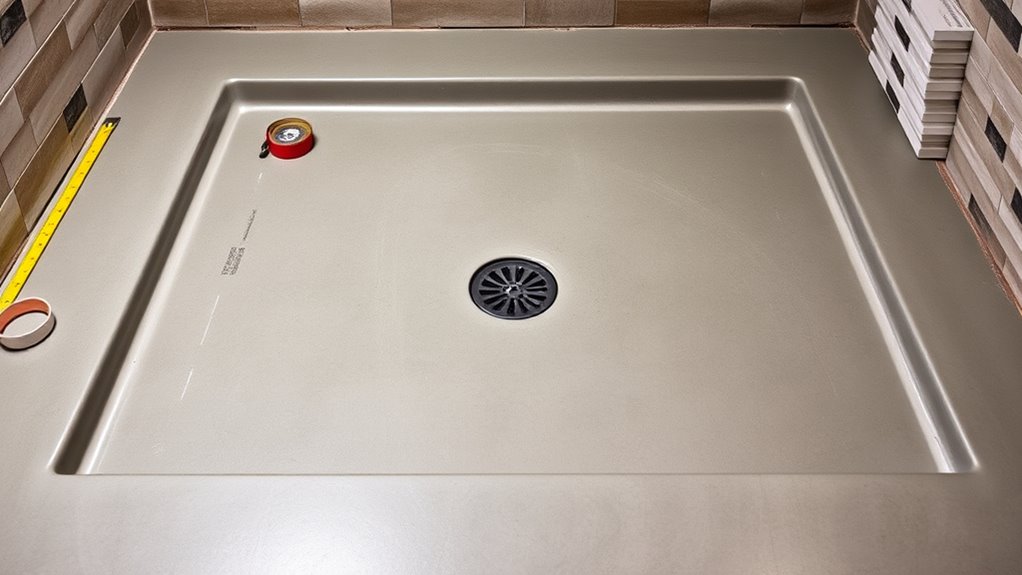
Start by accurately measuring the shower pan area to fit your space and guarantee proper water containment. Next, calculate the slope, maintaining a consistent 1/4 inch per foot gradient toward the drain for efficient drainage. Finally, mark the exact drain location on the concrete floor to guide your installation.
Measuring Shower Pan Area
Accurately measuring the shower pan area is essential for ensuring proper fit and drainage on your concrete floor. Start by determining dimensions: measure the length and width of the intended pan space. Use a level to confirm flatness before calculating area. Precision here prevents costly rework.
| Step | Description |
|---|---|
| Measure Length | Record the longest side in feet. |
| Measure Width | Record the perpendicular side. |
| Confirm Flatness | Use a level to check surface. |
| Calculate Area | Multiply length by width (sq ft). |
With these measurements, you’ll confidently proceed to create a shower pan that fits perfectly and supports proper drainage without guesswork.
Determining Proper Slope
With the shower pan area measured and confirmed level, the next step is to plan the proper slope for effective drainage. You’ll need to perform accurate slope calculations to guarantee water flows toward the drain without pooling. The industry standard slope is 1/4 inch per foot, which balances efficient drainage with user comfort. Using slope materials like pre-sloped mortar beds or specialized foam panels can simplify this process, providing a consistent incline. When calculating, measure the distance from the drain to the furthest edge and apply the 1/4 inch per foot rule to determine the total height difference. This precision prevents water stagnation and potential leaks. Proper slope planning is essential to maintain durability and functionality in your shower pan installation.
Marking Drain Location
One critical step in planning your shower pan is marking the exact drain location, as it directly impacts the slope and overall dimensions. Accurate drain placement guarantees effective water flow and prevents pooling. Use precise measurement techniques, starting with the center point relative to your shower base. Mark this spot clearly on the concrete floor before proceeding. This step defines your slope angles and pan boundaries, giving you control and freedom over the design.
| Aspect | Importance |
|---|---|
| Drain Placement | Controls water flow efficiency |
| Measurement | Guarantees accuracy and slope integrity |
| Dimensions | Dictates pan size and fit |
| Slope Planning | Prevents leaks and water damage |
Installing the Shower Drain Assembly
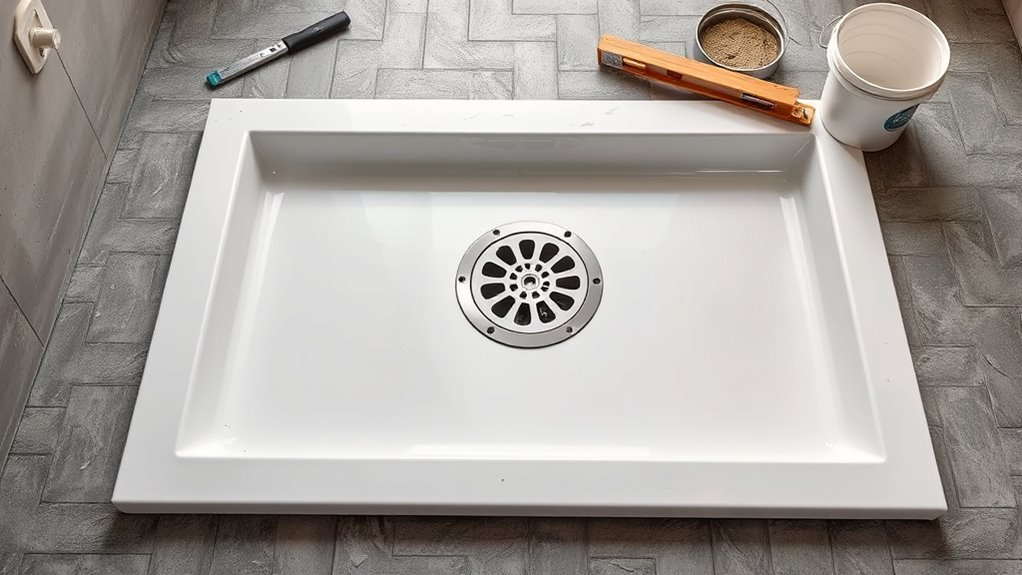
Before you begin installing the shower drain assembly, verify the drain location aligns perfectly with your plumbing rough-in. Choose the appropriate shower drain type—whether clamping, compression, or threaded—to match your pipe system. Start by securing the drain flange flush with the concrete floor; guarantee a watertight seal using a rubber gasket or drain assembly putty. When connecting the drain body to the waste pipe, use primer and solvent cement for PVC or a proper sealant for ABS pipes. Tighten all connections firmly but avoid overtightening, which can damage components. Double-check the drain’s vertical alignment to prevent water pooling. Following these drain assembly tips guarantees a reliable, leak-proof installation, setting a solid foundation for your shower pan build while maintaining freedom in design choices.
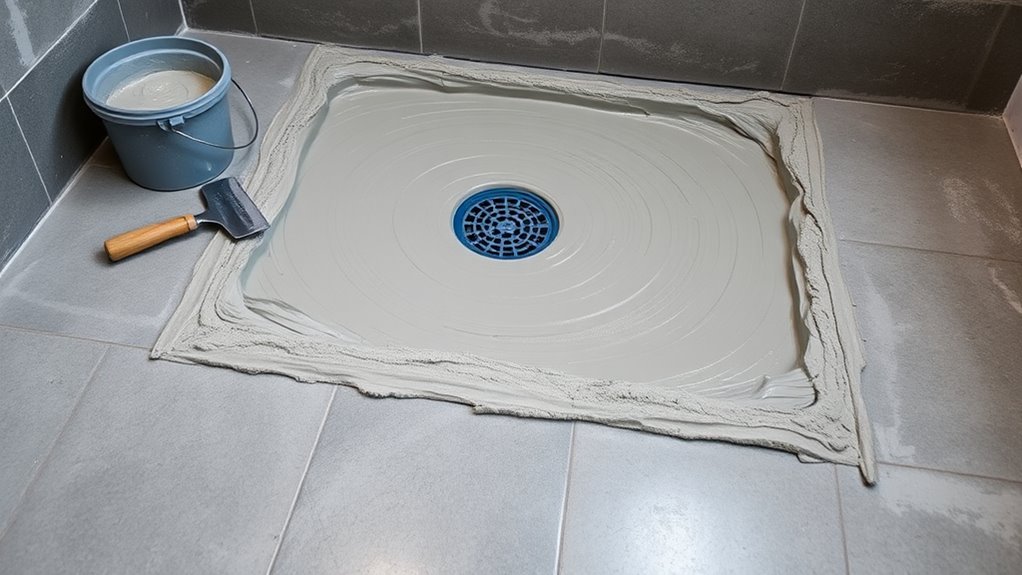
Applying the Mortar Bed Base
Before applying the mortar bed base, make certain the concrete surface is clean and slightly damp to assure proper adhesion. Mix the mortar to a firm, workable consistency following the manufacturer’s instructions. Then, shape the mortar bed with a gradual slope toward the drain to guarantee efficient water drainage.
Preparing the Concrete Surface
Although the concrete floor provides a solid foundation, you’ll need to apply a properly mixed mortar bed base to guarantee a level, stable surface for your shower pan. Start by cleaning debris thoroughly; any dust or loose particles will compromise adhesion. Next, check the concrete for uneven spots or cracks, as these must be addressed before proceeding. To prepare the surface effectively, follow these steps:
- Remove all debris and contaminants using a broom and vacuum to guarantee a clean base.
- Inspect and repair any surface imperfections with a patching compound.
- Use a leveling tool to confirm the surface is flat, adjusting as needed.
This preparation guarantees your mortar bed will bond properly, providing the freedom to build a durable, waterproof shower pan.
Mixing the Mortar Properly
Since the mortar bed base is critical for stability and waterproofing, you’ll need to mix the mortar to the exact consistency specified by the manufacturer. Start by combining the dry mortar mix with clean water in a clean bucket or mixing tub. Use proper mixing techniques—either a drill with a paddle attachment or a hand trowel—to achieve a uniform blend free of lumps. The mortar consistency should be firm yet workable, resembling damp sand that holds its shape when squeezed but doesn’t crumble. Avoid adding excess water, which weakens the bed, or too little, which makes it unworkable. Consistently check the mortar’s texture throughout mixing to maintain ideal consistency. Proper mixing guarantees a durable, stable base, essential for a reliable shower pan on your concrete floor.
Shaping the Mortar Bed
Once you’ve achieved the proper mortar consistency, you can begin shaping the mortar bed base directly on the concrete floor. Employ precise mortar bed techniques to guarantee proper slope and drainage. Use these shaping methods to maintain control:
- Start by spreading the mortar evenly, building thickness gradually from the drain outward.
- Use a trowel to create a consistent slope of about 1/4 inch per foot towards the drain.
- Check slopes frequently with a level or straightedge, adjusting as needed before the mortar sets.
These steps assure water flows efficiently, preventing pooling. By mastering these shaping methods, you maintain freedom in your work, guaranteeing a durable, functional shower pan base. Stay methodical and precise for the best results.
Waterproofing the Shower Pan With a Membrane
Before applying any tile or mortar, you need to install a waterproof membrane to guarantee the shower pan stays watertight. Choose from common membrane types like PVC liners, liquid-applied membranes, or sheet membranes, each offering distinct advantages in flexibility and durability. For installation, start by cleaning the concrete surface thoroughly, ensuring it’s dry and free of debris. If using a sheet membrane, cut it to size and press it firmly into the mortar bed, extending up the walls at least 6 inches to prevent leaks. For liquid membranes, apply evenly with a brush or roller in multiple coats, allowing each layer to cure fully. Proper seams and corner detailing are critical; use waterproof tape or sealants to reinforce these areas, securing a reliable barrier against moisture intrusion.
Creating the Proper Drainage Slope
Although waterproofing is essential, creating the proper drainage slope is equally critical to guarantee water flows efficiently toward the drain. The drainage importance cannot be overstated, as improper slope leads to standing water and potential leaks. To calculate the slope, you’ll use the standard 1/4 inch per foot rule, ensuring water moves downhill consistently.
Follow these steps for accurate slope calculation:
- Measure the distance from the furthest point of the shower pan to the drain.
- Multiply this distance by 0.25 inches to determine the total drop needed.
- Adjust the subfloor or mortar bed to create a consistent slope matching this drop.
Installing Cement Backer Board Around the Pan
After establishing the proper drainage slope, you’ll need to install cement backer board around the shower pan to provide a stable, moisture-resistant surface for tile installation. Begin by cutting the backer board to fit snugly around the pan, guaranteeing no gaps that could compromise waterproofing. Secure the board with corrosion-resistant screws, spaced every 6 to 8 inches, maintaining a small gap between sheets for expansion. The cement board benefits include superior durability and resistance to mold compared to traditional drywall. Proper backer board installation guarantees a solid foundation that prevents tile movement and water damage. Take care to seal joints with alkali-resistant mesh tape and thin-set mortar, reinforcing the waterproof barrier and promoting long-term freedom from leaks and structural issues in your shower assembly.
Testing the Waterproofing for Leaks
Once you’ve installed the cement backer board and sealed all joints, you’ll need to verify the waterproofing integrity of the shower pan. Proper leak detection is critical to avoid costly water damage. Here’s how to conduct waterproof testing effectively:
- Fill the Pan with Water: Use a hose or bucket to fill the shower pan up to 2 inches below the curb.
- Observe for Leaks: Check all seams and adjacent concrete for visible signs of water seepage.
- Wait and Monitor: Allow the water to sit for at least 24 hours, continuously inspecting for moisture or dampness underneath or around the pan.
This controlled waterproof testing guarantees your membrane is fully sealed, giving you confidence before proceeding with tile installation. Don’t skip this essential step to assure lasting protection.
Preparing the Shower Pan for Tile Installation
Before you begin tiling, you’ll need to verify the shower pan surface is clean, dry, and properly primed to promote strong adhesion. Start by thoroughly cleaning the substrate to remove any dust, debris, or contaminants that could impair bonding. Once dry, apply a suitable primer designed for cementitious surfaces; this step is essential for preparing substrates and confirming adhesion of the thin-set mortar. Inspect the surface for any imperfections or loose material and repair as needed to create a uniform, stable base. Avoid excess moisture by ensuring complete dryness—moisture can compromise adhesion and lead to tile failure. By meticulously preparing substrates and following these steps, you verify the shower pan provides a reliable foundation for your tile installation, achieving both durability and a professional finish.


