
To install molding on the floor, first prepare a clean workspace and gather compatible materials. Measure wall segments accurately, marking the molding for precise cuts using a miter saw set to 90 or 45 degrees depending on corners. Dry-fit pieces to guarantee snug joints; secure them with finishing nails and optional adhesive. Handle inside corners by coping and outside corners with mitered angles. Finish by filling gaps, sanding smooth, and cleaning dust. Following these steps guarantees a professional result, with deeper details available for your project.
Preparing Your Workspace and Materials
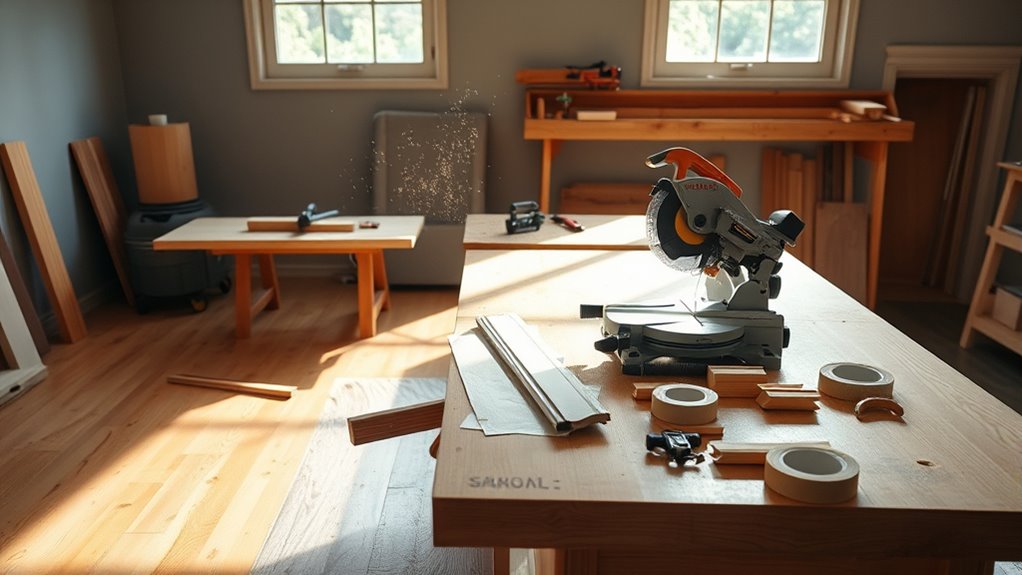
Before you begin installing molding on the floor, make certain your workspace is clean and free of debris to guarantee accurate measurements and safe handling of materials. Effective workspace organization is essential; arrange tools and materials within easy reach to maintain efficiency and minimize interruptions. Prioritize clear floor space to maneuver molding pieces without risk of damage. When it comes to material selection, choose molding with consistent grain and quality that suits your floor type and room environment. Opt for durable materials resistant to moisture and wear, ensuring long-term performance and minimal maintenance. Verify that adhesives, nails, or screws are compatible with both the molding and flooring materials. By preparing your workspace and carefully selecting materials, you set a solid foundation for a precise, streamlined installation process that respects your autonomy and control over the project.
Measuring and Cutting the Molding
Although accurate measurements are essential for a seamless fit, you’ll need to carefully measure each wall segment and mark your molding accordingly before making any cuts. Start by identifying the molding types you’re working with—baseboard, quarter round, or shoe molding—since each requires specific cutting techniques. Use a tape measure to record lengths precisely, and transfer these measurements onto the molding with a sharp pencil. For straight cuts, a miter saw set to 90 degrees works best, while coping saws are ideal for inside corners. When dealing with outside corners, set the miter saw to 45 degrees for clean angled cuts. Always double-check your measurements and angles before cutting to prevent waste and guarantee your molding fits flawlessly along the floor edges.
Fitting and Securing the Molding
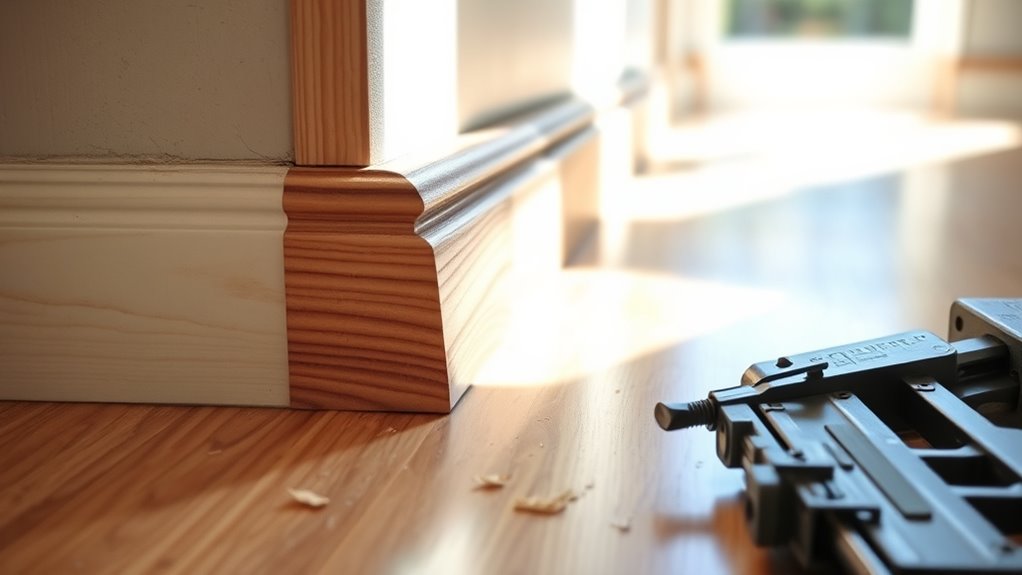
Begin by dry-fitting each piece of molding along the wall to confirm it aligns perfectly with your measurements and cuts. Use fitting techniques like slight adjustments with a sanding block or utility knife to assure snug placement without gaps. Once the fit is precise, apply securing methods such as finishing nails or a nail gun to fasten the molding firmly to the wall studs or baseboard. Countersink nails slightly below the surface to allow for putty filling later. For extra hold, consider using construction adhesive on the back side before nailing. Always check for level and flush edges during installation to maintain a professional finish. These fitting techniques and securing methods offer you control and freedom to achieve a clean, durable molding installation.
Handling Inside and Outside Corners
After securing the molding along the straight sections, you’ll need to focus on handling inside and outside corners, which require careful cutting and fitting to maintain clean lines. For inside corners, corner coping is your best bet—it involves cutting the profile of one molding piece to fit snugly over the face of the adjoining piece, ensuring a tight joint even if walls aren’t perfectly square. Outside corners, on the other hand, usually call for precise miter cuts at 45-degree angles on both molding pieces to form a clean, seamless corner. Use a miter saw for accuracy, and check each fit before nailing. Mastering corner coping and miter cuts lets you achieve professional results while maintaining the freedom to adapt to your space’s unique angles.
Finishing Touches and Cleanup
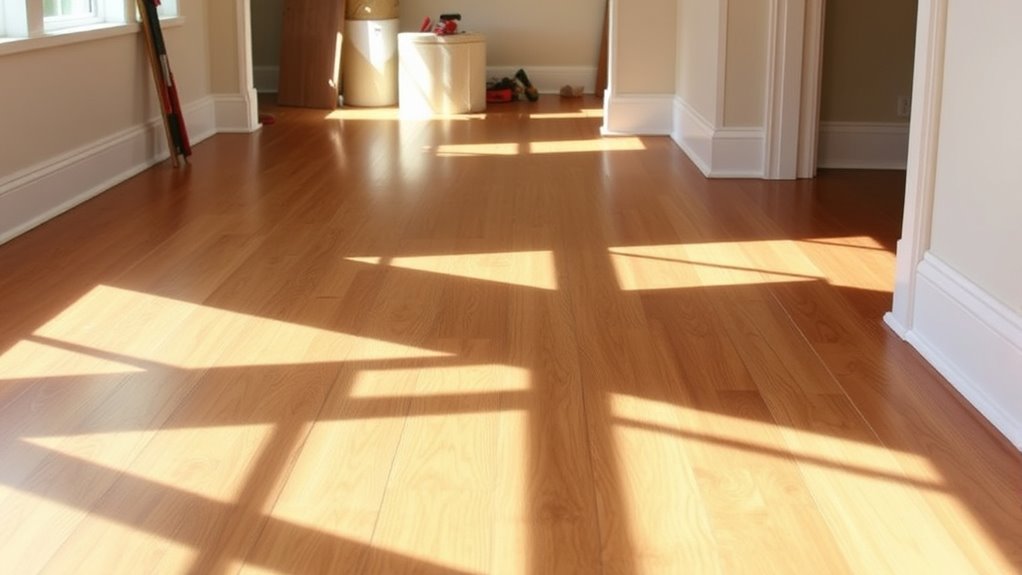
Once you’ve securely installed all the molding and confirmed proper fitting at corners, it’s crucial to focus on finishing touches and cleanup to achieve a polished look. Begin by conducting a final inspection, checking for gaps, uneven edges, or loose sections. Use caulk or wood filler to address any imperfections, smoothing surfaces for seamless changes. After repairs dry, lightly sand rough areas to guarantee uniformity. Next, employ appropriate cleaning tools—such as a soft brush, vacuum, or microfiber cloth—to remove dust, debris, and adhesive residues from the molding and surrounding floor. Don’t forget to clean any tools used during installation to maintain their condition. Completing these steps guarantees your molding installation is both visually appealing and durable, giving you the freedom to enjoy a flawless finish without lingering construction mess.


