
To fix a hole in your floor, start by evaluating the damage and identifying your floor type. Gather tools like a saw, hammer, adhesive, and safety gear. Carefully cut around the damaged area and remove the broken piece. Measure and cut a replacement patch that fits snugly. Secure it with construction adhesive, then fill gaps with appropriate filler. Sand, stain, and seal the repair for a smooth, lasting finish. Keep following these steps to guarantee a professional result.
Assessing the Damage and Identifying the Floor Type
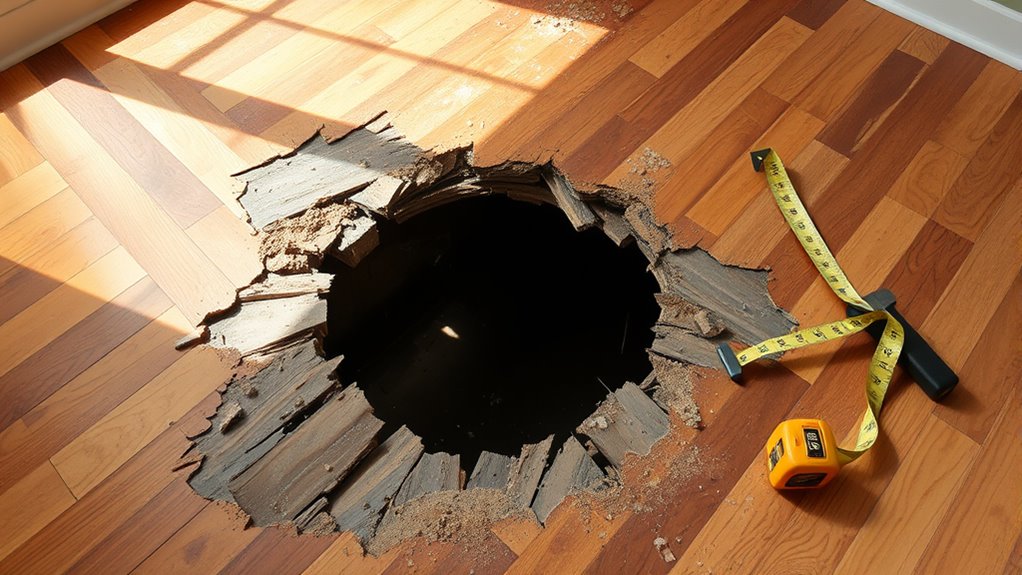
Before you begin repairing the hole in your floor, you’ll need to carefully assess the damage and identify the type of flooring you have. Start by using floor inspection techniques such as visual checks and gentle probing around the hole to determine the extent of damage. Look for signs of rot, moisture, or structural weakening. Next, apply damage assessment methods like measuring the hole’s size and checking for loose or cracked surrounding materials. Identifying your floor type—whether it’s hardwood, laminate, tile, or vinyl—is essential, as it influences repair steps and materials. Knowing this guarantees you choose the right approach, preserving your floor’s integrity and freeing you from costly mistakes. Accurate assessment sets the foundation for a successful, lasting fix.
Gathering the Necessary Tools and Materials
Before you start fixing the hole, make sure you have the essential tools like a saw, hammer, and measuring tape ready. You’ll also need to pick materials that match your floor type, such as plywood or floor patches. Don’t forget safety gear like gloves and goggles to protect yourself during the repair.
Essential Repair Tools
To fix a hole in your floor effectively, you’ll need a specific set of tools and materials ready at hand. These tools support precise repair techniques and work well with various floor materials. Make certain you have everything before you start—this saves time and frustration.
| Tool | Purpose |
|---|---|
| Hammer | Remove damaged boards, nails |
| Saw | Cut replacement floor materials |
| Measuring Tape | Accurate measurements |
| Wood Glue | Secure patch pieces |
Each of these items plays an essential role in your repair process. The hammer and saw help you prepare the hole and replacement, while measuring tape guarantees a perfect fit. Wood glue bonds new materials firmly, letting you restore your floor with confidence and freedom.
Choosing the Right Materials
Selecting the right materials is essential for a durable and seamless floor repair. You’ll want to choose materials that offer strong material durability to guarantee your fix lasts over time without sagging or cracking. Start by evaluating the type of flooring you have—hardwood, laminate, or plywood—all require different patching materials. For hardwood floors, opt for matching wood planks or wood filler with similar grain and finish. Laminate floors call for replacement panels or epoxy fillers designed for synthetic surfaces. Don’t overlook aesthetic considerations; the repaired area should blend naturally with surrounding flooring to maintain your space’s visual freedom. Picking materials that balance durability and appearance will give you a repair that’s both sturdy and discreet, letting you enjoy your floor without restrictions or constant worry.
Safety Equipment Checklist
Although fixing a hole in the floor might seem straightforward, having the right safety equipment on hand is crucial to protect yourself throughout the repair process. Start by grabbing safety goggles to shield your eyes from flying debris and dust. A dust mask is equally important, especially when sanding or cutting wood, to prevent inhaling harmful particles. Gloves will protect your hands from splinters and sharp edges. Consider knee pads to reduce strain when working low to the ground. Make sure your workspace is well-ventilated and keep a first aid kit nearby for unexpected scrapes or cuts. Gathering these essentials before beginning guarantees you stay safe and focused, giving you the freedom to complete your floor repair efficiently and confidently.
Preparing the Area Around the Hole
Start by clearing away all debris and loose material from around the hole to create a clean workspace. Next, carefully measure the hole’s length and width to guarantee your patch will fit perfectly. Finally, gather any additional tools you’ll need for the repair before you begin.
Clear Debris Thoroughly
Before you begin repairing the hole, make certain to clear away all debris from the damaged area. Proper debris removal is essential for a smooth floor cleaning process and guarantees the repair material adheres well. Start by sweeping loose particles, then vacuum remaining dust. Use a damp cloth to wipe the edges, removing any stubborn dirt.
| Step | Tool Needed | Purpose |
|---|---|---|
| Sweep | Broom | Remove large debris |
| Vacuum | Vacuum cleaner | Eliminate fine dust |
| Wipe | Damp cloth | Clean edges and surface |
Thorough debris removal gives you the freedom to work confidently, setting a solid foundation for an effective floor patch.
Measure Hole Dimensions
To accurately repair the hole, you’ll need to measure its length, width, and depth precisely. Getting the hole size right guarantees your patch fits perfectly, avoiding wasted materials or extra work. Use these measurement techniques:
- Use a tape measure to record the longest length and widest width of the hole.
- For depth, insert a thin ruler or stick to measure from the surface to the bottom.
- Double-check your measurements by measuring twice or from different angles to confirm accuracy.
Gather Necessary Tools
Once you’ve measured the hole precisely, the next step is to gather the tools you’ll need to prepare the area around it. Proper preparation depends on the repair techniques and the type of floor materials involved. You’ll want to clear debris, smooth edges, and guarantee a clean surface for a strong patch.
| Tool | Purpose |
|---|---|
| Utility Knife | Trim loose floor materials |
| Sandpaper | Smooth rough edges |
| Vacuum or Brush | Remove dust and debris |
Having these tools ready lets you work confidently and efficiently. The right preparation will help the repair adhere better and last longer, giving you the freedom to enjoy a flawless floor again.
Cutting and Removing Damaged Flooring
Although the process may seem intimidating, cutting and removing damaged flooring is straightforward if you have the right tools and plan your cuts carefully. Different flooring types require specific repair techniques, so tailor your approach accordingly.
Cutting and removing damaged flooring is simple with proper tools and careful planning tailored to your flooring type.
- Identify the damaged area and mark a clean, square or rectangular outline around it to simplify replacement.
- Use a suitable cutting tool—such as a circular saw for hardwood or a utility knife for vinyl—to carefully follow your markings without damaging surrounding flooring.
- Pry up the cut section gently with a crowbar or chisel, loosening it from the subfloor.
Measuring and Cutting the Replacement Piece
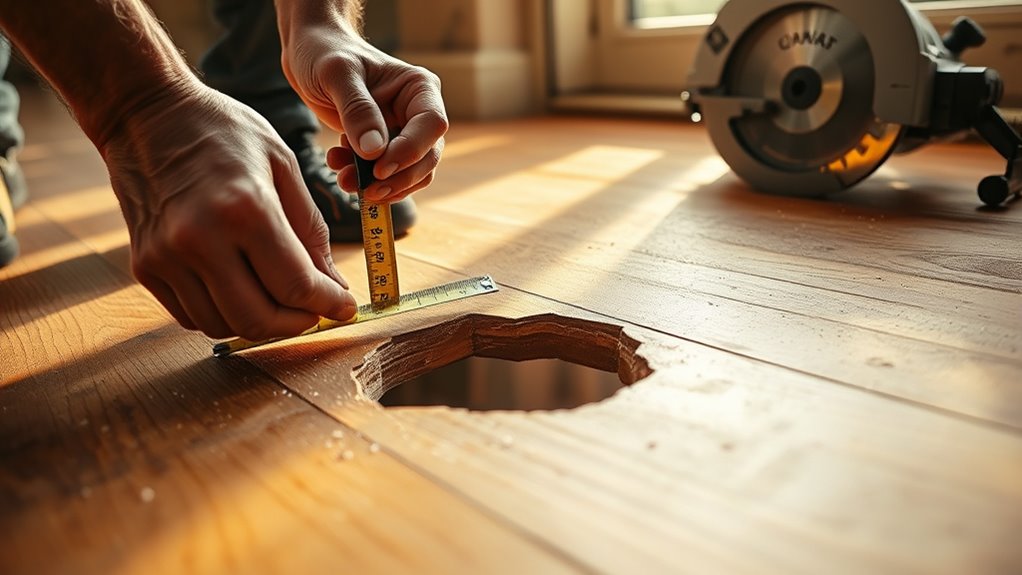
Before you cut the replacement piece, make certain you measure the damaged area accurately, including the length, width, and thickness of the removed section. Precise measurements guarantee that your replacement size fits seamlessly, preserving your floor’s integrity and your freedom to move without worry. Use reliable cutting techniques like a circular saw or jigsaw for clean edges.
| Measurement Aspect | Importance |
|---|---|
| Length & Width | Ensures exact fit |
| Thickness | Matches floor height |
| Edge Condition | Guides cutting approach |
Mark your replacement piece carefully, double-check measurements, and cut slowly for accuracy. Taking these steps empowers you to restore your floor efficiently, maintaining your space’s freedom and safety.
Securing the Replacement Piece in Place
Secure the replacement piece firmly to prevent movement and guarantee a level surface. Start by choosing the right adhesive options; construction adhesive is strong and quick-setting, ideal for wooden floors. Next, apply effective securing techniques to hold the patch in place while it sets. Here’s how to do it:
- Apply adhesive evenly on the subfloor edges and underside of the replacement piece.
- Press the patch into place, making sure it’s flush with surrounding flooring.
- Use weights or clamps to maintain pressure until the adhesive cures completely.
These steps ascertain your repair stays put, providing a sturdy and smooth finish. With the right adhesive options and securing techniques, you’ll enjoy a durable fix that lets you reclaim your floor—and your freedom to move without worry.
Filling Gaps and Seams for a Smooth Finish

Once the replacement piece is firmly in place, you’ll need to fill any gaps and seams to guarantee a smooth, seamless finish. Start by choosing the right gap fillers designed for your floor type. Apply the filler evenly using a putty knife, pressing it firmly into gaps. For seam sealing, use a flexible sealant to prevent cracks from forming later.
| Step | Material Needed | Tip |
|---|---|---|
| 1. Choose filler | Wood filler or epoxy | Match filler color to floor |
| 2. Apply filler | Putty knife | Press firmly into gaps |
| 3. Seal seams | Flexible sealant | Smooth with a damp finger |
| 4. Let dry | – | Follow manufacturer’s drying time |
Sanding, Staining, and Sealing the Repair Area
Although the filler and sealant have dried, you’ll need to sand the repair area thoroughly to confirm it’s level with the surrounding floor. Proper sanding techniques prevent uneven surfaces and create a smooth base for staining. Here’s how you proceed:
- Start with medium-grit sandpaper to remove excess filler, then switch to fine-grit for a smooth finish.
- Choose staining options that match your floor’s color—test a small area first to confirm a perfect blend.
- Once stained and dry, seal the repair with a clear polyurethane coat to protect against wear and moisture.
Following these steps gives your floor a seamless, durable finish, letting you enjoy your space freely without worrying about visible repairs.


