Are you tired of your old laminate flooring and ready for a fresh new look? Removing laminate flooring might seem like a daunting task, but with the right guidance, you can tackle it with confidence.
Imagine transforming your space into something you love, with each step bringing you closer to the home of your dreams. In this guide, we’ll walk you through the process step-by-step, ensuring you know exactly what to do and what to avoid.
By the end, you’ll not only have a clear floor but also a clear path to your next exciting renovation project. Stick around, and let’s make your vision a reality!
Tools And Materials Needed
A few basic tools will help you remove laminate flooring. Start with a utility knife for cutting edges. A crowbar or pry bar will lift the planks easily. A hammer is useful for loosening stubborn pieces. You’ll need a measuring tape to measure the floor area. A putty knife helps in scraping adhesive residue. A screwdriver is essential for removing screws. Finally, have a trash bag ready for debris.
Safety gear is also important. Wear gloves to protect your hands. Use safety goggles to shield your eyes. A dust mask will keep dust away from your nose and mouth. These tools and gear ensure a smooth process. Always work carefully and safely.
Preparation Steps
Start by removing all furniture and items from the room. This makes the floor space clear and open. Ensure nothing is left on the floor. Check under tables and in corners. A clear room helps to work freely and safely.
Wear protective gear to stay safe. Use gloves to protect your hands. Goggles keep your eyes safe from dust. A dust mask helps you breathe clean air. Safety shoes keep your feet protected. Always wear your gear before starting work.
Removing Baseboards And Trim
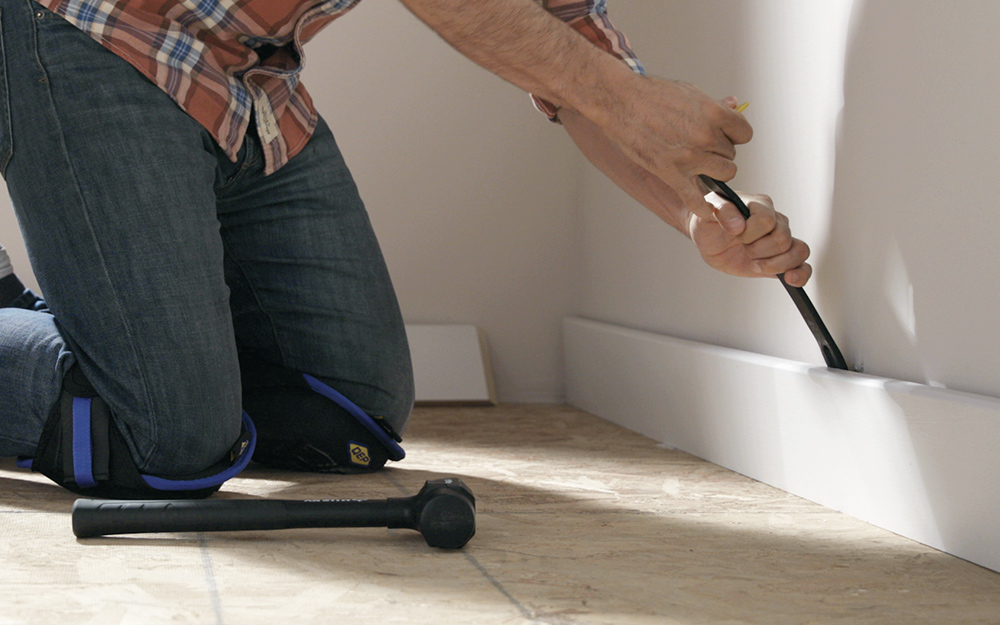
A pry bar is useful to remove baseboards. Slide the bar between the wall and trim. Apply gentle pressure to lift the trim. Work slowly to avoid damage. The goal is to loosen without breaking the wood. Moving the pry bar along the length helps in even removal.
Nails often hold the trim in place. Use a hammer to pull them out. Be careful not to chip the wood. Adhesive might be used instead. Scrape it off using a putty knife. Soft motions prevent wall damage. A clean surface is ideal for new installations.
Lifting The Laminate Flooring
Removing laminate flooring involves careful steps. Begin by clearing the room and removing baseboards gently. Next, lift the planks starting from the corner, ensuring minimal damage to the underfloor. This process requires patience and the right tools for effective removal.
Starting At The Edge
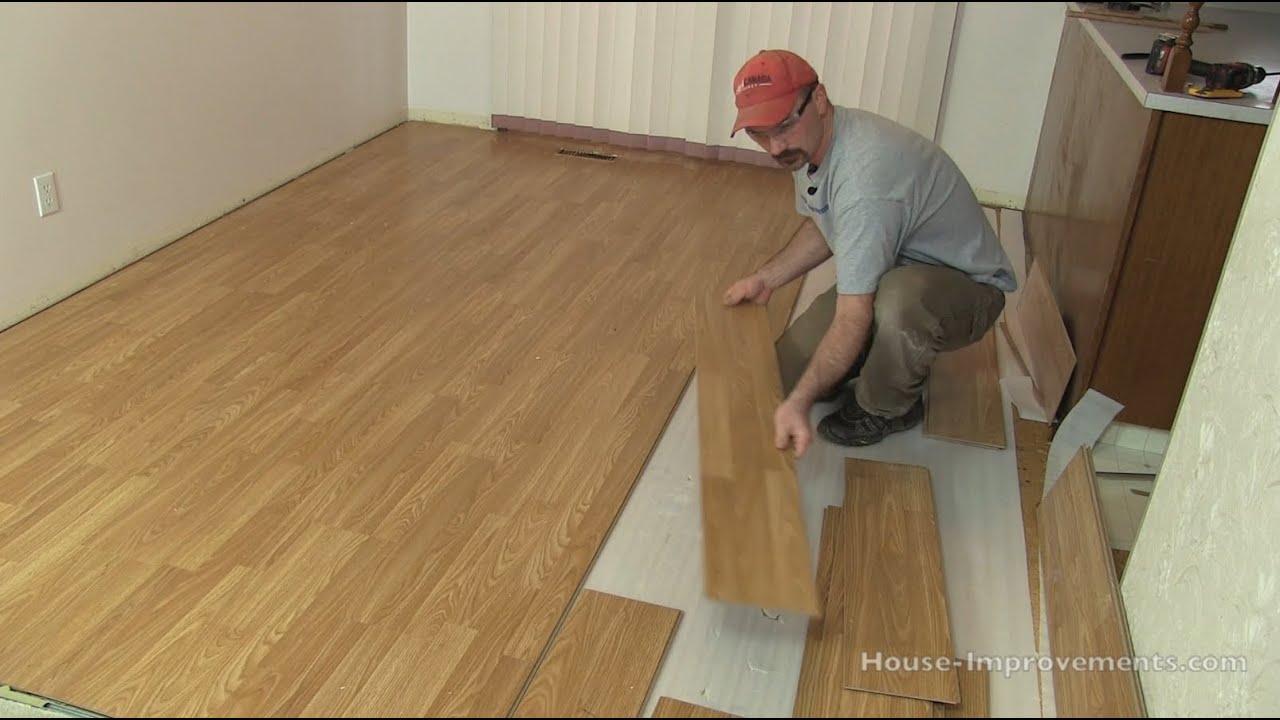
Begin by finding the edge piece of the laminate flooring. Carefully lift it using a pry bar or flat tool. Gently wiggle the tool under the edge. This helps to loosen the adhesive or clips holding the laminate. Take your time to avoid damaging the floor or the tool. Continue this process along the edge until the first piece is free.
Working In Sections
After lifting the edge, focus on small sections at a time. Move your tool along the seams between each piece. Ease each piece up slowly. Check for any obstructions or hidden nails. Remove them carefully to prevent damage. Repeat this process until all laminate is lifted. Dispose of removed pieces properly. This keeps the area clean and safe.
Handling Stubborn Boards
Heat can help loosen laminate boards. Use a hairdryer or heat gun. Keep it on low to avoid damage. Move it slowly over the board. The heat softens the glue. Pull the board gently with a pry bar. Be careful not to damage the floor underneath. Heat is a useful tool for stubborn boards.
Solvents can help remove sticky glue. Choose a safe solvent for floors. Apply it with a cloth or sponge. Let it sit for a few minutes. The solvent breaks down the glue. Use a scraper to lift the board. Be gentle to avoid scratches. Clean the area with water after removal. Solvents are helpful for tough glue spots.
Cleaning The Subfloor
Sticky residue can be a problem. Use a damp cloth to wipe it away. A gentle cleaner helps too. Be sure to avoid harsh chemicals. They can damage the subfloor. Patience is important here. Clean small sections at a time. This ensures all residue is gone.
Check the subfloor for any damage. Look for cracks or holes. These need fixing before new flooring. A smooth subfloor is crucial. It helps the new floor last longer. Use a flashlight for better inspection. Small damages can hide easily. Mark any problem areas for repair. This makes the process easier later on.
Disposing Of Old Flooring
Many places offer recycling options for old laminate flooring. Check if your city has a recycling center. Some centers take flooring materials. It’s important to remove nails or glue first. This makes recycling easier. Some companies also offer pick-up services. You can call them to ask. This way, old flooring can be reused. It helps the planet by reducing waste.
Every area has its own disposal regulations. It’s good to know these rules. Some places allow you to throw flooring in the trash. Others require special disposal methods. Contact local waste services for guidance. They can explain the rules to you. This ensures you dispose of flooring correctly. Following rules avoids fines and keeps the environment clean.

Preparing For New Flooring
Removing laminate flooring involves a few straightforward steps. First, gather necessary tools like a pry bar and hammer. Carefully lift the planks, starting at the edges, to prevent damage.
Checking Subfloor Conditions
The subfloor must be clean and dry before new flooring. Look for any cracks or damage. A damaged subfloor might need repair. This ensures your new floor will last longer. Also, check for any moisture problems. Too much moisture can ruin new flooring. Use a moisture meter to check. Fix any moisture issues you find.
Choosing Underlayment
Underlayment is like a cushion for your floor. It helps with noise and keeps floors warm. Pick the right underlayment for your flooring type. Some floors need thick underlayment. Others need thin ones. Ask at the store if unsure. Make sure it fits your budget too. Good underlayment can make floors feel nicer.
Frequently Asked Questions
What Tools Are Needed To Remove Laminate Flooring?
To remove laminate flooring, you’ll need a utility knife, pry bar, pliers, and a hammer. Additionally, consider using a floor scraper to help remove adhesive residues. Always wear safety gloves and goggles to protect yourself from sharp edges and debris.
Can I Remove Laminate Flooring Myself?
Yes, you can remove laminate flooring yourself with the right tools and patience. Start by clearing the room and carefully removing the baseboards. Work slowly to avoid damaging the subfloor. This DIY project can save you money on professional labor costs.
How Long Does It Take To Remove Laminate Flooring?
Removing laminate flooring typically takes a day for a standard-sized room. The time can vary depending on the room size and your experience level. Take breaks as needed to ensure a safe and efficient removal process.
What Precautions Should I Take When Removing Laminate Flooring?
Wear protective gear like gloves and goggles when removing laminate flooring. Be mindful of sharp edges and nails. Ensure proper ventilation if using adhesives or cleaning chemicals. Keep children and pets away from the work area for safety.
Conclusion
Laminate flooring removal doesn’t have to be complicated. Follow the steps carefully. Gather your tools first, ensuring everything is within reach. Start with one corner, lifting gently. Pry each piece slowly, preventing damage. Dispose of old planks responsibly. Clean the subfloor thoroughly.
Check for any needed repairs. Preparing the area saves time later. Consider your new flooring options. Enjoy your refreshed space, feeling proud of your hard work. With patience and care, your home transformation is achievable. Always prioritize safety, keeping the process smooth.
Your efforts will shine through in the final result.


