Building a floor might seem like a daunting task, but with the right guidance, you can transform it into a rewarding project. Imagine stepping onto a sturdy, well-crafted floor that you built with your own hands.
It’s not just about creating a foundation; it’s about crafting a space that resonates with you. Whether you’re renovating a room or starting from scratch, this guide will demystify the process, helping you to make informed decisions and avoid common pitfalls.
Ready to gain confidence and tackle this project with ease? Let’s dive into the essential steps to build a floor that’s not only functional but also adds value and beauty to your home.
Materials And Tools Needed
Building a floor needs a few key materials. Wood planks or tiles are common choices. They form the main surface. You also need nails or glue. These keep everything in place. For a strong base, use concrete. It helps the floor last long.
Tools are important too. A hammer is needed for nails. If using glue, get a glue gun. A saw helps cut wood to size. A measuring tape ensures everything fits well. Don’t forget a level. It makes sure your floor is flat.

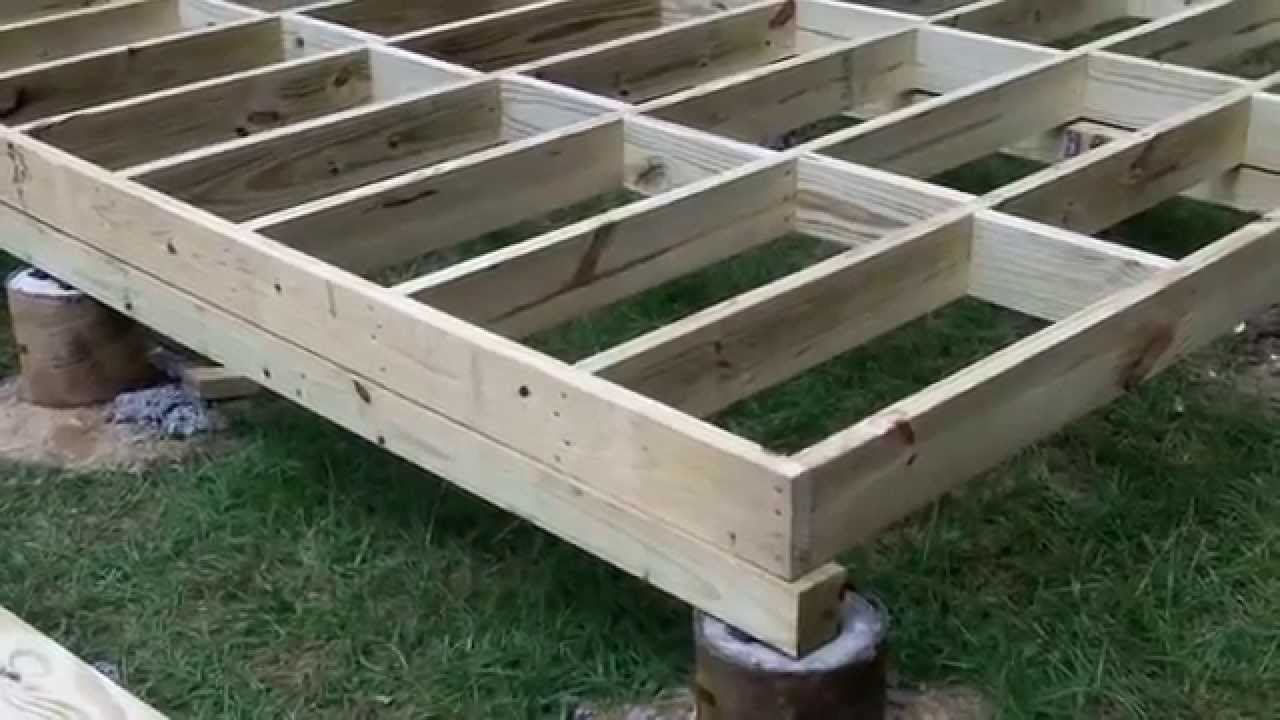
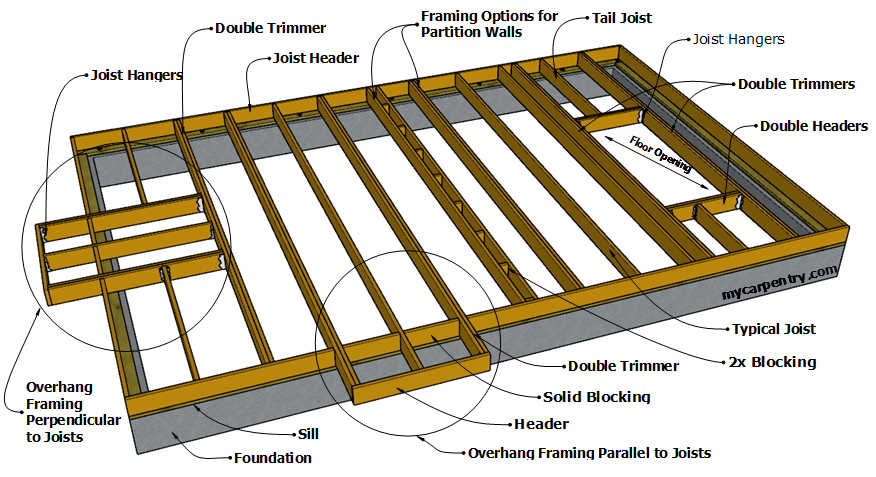
Preparing The Subfloor
The surface must be flat and clean. Look for any bumps or holes. Cracks and uneven areas can cause problems later. Use a level to check flatness. If needed, mark spots that need fixing. Good preparation will help the floor last longer.
Start by sweeping the surface to remove dust. Next, use a damp mop to clean it well. Fill any holes with a filler and sand it smooth. Check for any remaining dirt. Clean again if necessary. This ensures a strong foundation for your new floor.
Choosing The Right Flooring Type
Hardwood floors are very strong and last long. They are made from real wood. These floors look beautiful and add warmth. But they can be scratched easily. Hardwood is good for living rooms and bedrooms. It is not good for places with water like bathrooms.
Laminate floors look like wood but are not real wood. They are cheaper than hardwood. Laminate is easy to clean and does not scratch easily. It is great for families with kids or pets. But it can feel cold and hard underfoot. Avoid using it in wet areas.
Vinyl floors are soft and comfortable. They are water-resistant and good for bathrooms and kitchens. Vinyl is easy to clean and comes in many colors. It is cheaper than hardwood and laminate. But it can be damaged by sharp objects.
Tile floors are very durable and water-resistant. They are perfect for kitchens and bathrooms. Tiles come in many designs and colors. They are easy to clean but can be cold and hard. A rug can make tile floors feel warmer.
Measuring And Planning
Start by measuring the room. Use a tape measure for accuracy. Write down the length and width. Multiply these numbers. This gives the square footage. You need this to buy materials. Consider buying extra. Mistakes happen. Extra material can save time.
Think about the layout. Sketch a plan on paper. Use graph paper if you have it. This helps with scale. Start from one corner. Move outwards. Leave some space for doors. This helps with floor flow. Make sure the plan is clear. This will guide the work.
Acclimating Flooring Materials
Flooring materials need time to adjust to the room. This process is called acclimating. It helps the flooring fit better. Wood and laminate floors must adjust for at least 48 hours. Keep them in the room where you will install them. This helps them get used to the room’s temperature and humidity.
Place the boxes flat on the floor. Open the boxes but do not remove the planks. Air will flow around them. This step stops the floor from bending or shrinking later. Ensure the room is at normal living conditions. This means the room should not be too hot or too cold.
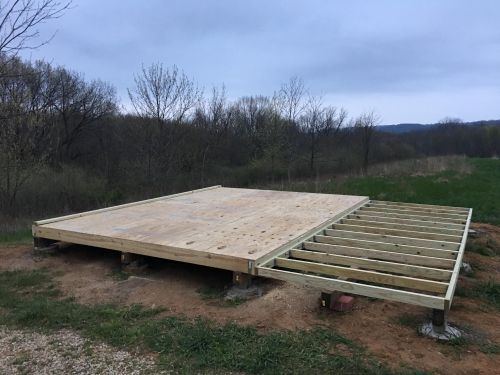
Installing The Underlayment
Choose the right underlayment for your floor type. Foam is good for wood or laminate. Cork works well for soundproofing. Rubber is strong and lasts long. Each material has its own benefits. Foam is soft and easy to cut. Cork is natural and reduces noise. Rubber is waterproof and durable.
Start by cleaning the floor. Dirt can cause bumps later. Roll out the underlayment sheet. Make sure it fits the room. Cut it with a sharp knife if needed. Tape the seams to keep it in place. Avoid overlapping sheets as it can make the floor uneven. Check that the underlayment is flat and smooth before adding the top flooring.
Laying The Floorboards
Begin by placing the first row of floorboards along the longest wall. Align them carefully for a straight start. Use a saw to cut boards to fit the space. Make sure each piece fits snugly against the wall. This creates a strong base. Double-check for gaps between boards.
Keep seams staggered for a neat look. Avoid lining up seams from one row to the next. It helps the floor stay stable. Cut boards in different lengths. This will ensure the seams are staggered. Use a measuring tape for accurate cuts.
Place spacers between the boards and the wall. This allows the wood to expand. Without spacers, floors can buckle. Use small, even spacers for the best results. Leave them until the floor is complete. This keeps your floor smooth.
Cutting And Fitting Boards
A saw is useful for cutting boards. Always measure before cutting. This helps in getting the right size. Use a pencil to mark the board. Follow the line with the saw. Keep your hand steady. This gives you a smooth and straight cut. Safety is important. Wear goggles to protect your eyes. Use gloves to protect your hands.
Sometimes floors have obstacles. Obstacle means something in the way. Walls, pipes, or corners can be obstacles. Measure around the obstacle first. Cut the board to fit snugly. Use a jigsaw for tricky cuts. Make sure the board fits well. The goal is a neat finish. Check your work as you go. This ensures everything fits just right.
Securing The Flooring
Nailing the floor is a strong choice. It keeps the wood in place. Use a hammer and nails. Make sure the nails are close but not too close. This helps the floor stay flat and strong.
Gluing the floor is another way. It sticks the wood to the ground. Use a good glue. Spread it evenly. Press the wood down hard. This helps the wood stick well.
A stable floor is safe. Check if the floor is even. Use a level tool. Fix any bumps or dips. This keeps the floor strong. Keep the floor dry. Water can make it weak. Wipe spills fast. This helps the floor last longer.
Finishing Touches
Baseboards make the floor look neat. They hide the gaps by the wall. Measure the wall length. Cut the baseboards to match. Use a saw for this. Nail them in place carefully. Keep them straight. Fill any gaps with wood filler. Smooth it out. Paint them to match the wall. This makes the room look complete.
Clean the new floor gently. Use a soft broom first. Sweep away any dust. Next, mop with warm water. Add a little soap to the water. Avoid soaking the floor. Too much water can hurt it. Dry the floor with a soft cloth. This keeps it shiny. Regular cleaning helps keep the floor looking new.
Maintenance Tips
Floors need regular cleaning to stay nice. Use a soft broom or vacuum for dust. For sticky spots, a damp mop works well. Never use too much water. Water can harm the floor. Dry the floor after cleaning. This stops water damage.
Keep floors safe from damage. Place mats at doors to catch dirt. Heavy furniture can scratch floors. Use pads under furniture legs. Do not drag heavy items. Always lift them.
Shoes with sharp heels can hurt floors. Encourage guests to remove shoes. This keeps floors looking new.
Frequently Asked Questions
What Materials Do I Need To Build A Floor?
To build a floor, you’ll need materials like timber, concrete, nails, and screws. Depending on the type of floor, you may also need insulation, plywood, or tiles. It’s important to select quality materials to ensure durability and strength. Always consider the specific requirements of your project.
How Do I Prepare The Subfloor?
Preparing the subfloor involves cleaning and leveling the surface. Remove debris and ensure it’s dry. Use leveling compounds to smooth uneven areas. Check for moisture issues and make necessary repairs. Proper preparation prevents future floor problems and ensures a smooth installation process.
Can I Build A Floor Myself?
Yes, you can build a floor yourself with the right tools and instructions. It’s crucial to plan carefully and follow safety guidelines. For complex projects, consider consulting professionals. DIY can be rewarding, but ensure you have the necessary skills and knowledge before starting.
What Tools Are Essential For Floor Construction?
Essential tools for floor construction include a tape measure, saw, hammer, and level. You’ll also need a drill, nail gun, and safety gear. Depending on the flooring type, specialized tools may be required. Having the right tools makes the process efficient and ensures precise work.
Conclusion
Building a floor requires patience and careful planning. Start by gathering all necessary tools. Follow safety guidelines to avoid accidents. Prepare the surface properly for a smooth finish. Measure everything twice to ensure accuracy. Use quality materials for durability and strength.
Each step is important, so take your time. Your effort will result in a sturdy and attractive floor. Feel proud of your achievement. Share your experience and tips with friends. Encourage them to try it too. A well-built floor enhances any space beautifully.
Now, enjoy the satisfaction of a job well done.


