Is your garage floor uneven? Are you tired of dealing with puddles or that annoying tilt every time you park your car?
You’re not alone. An uneven garage floor isn’t just a nuisance; it can lead to bigger problems like water damage or even impact the value of your home. Imagine walking into your garage and seeing a perfectly flat, smooth surface.
No more tripping hazards, no more pooling water. Just a clean, level floor that makes every project easier. You’ll discover simple, effective steps to level your garage floor, transforming it from a frustrating space into a functional, enjoyable part of your home. Keep reading, and you’ll find out how easy it can be to achieve a professional look without the professional cost.
Understanding Floor Leveling
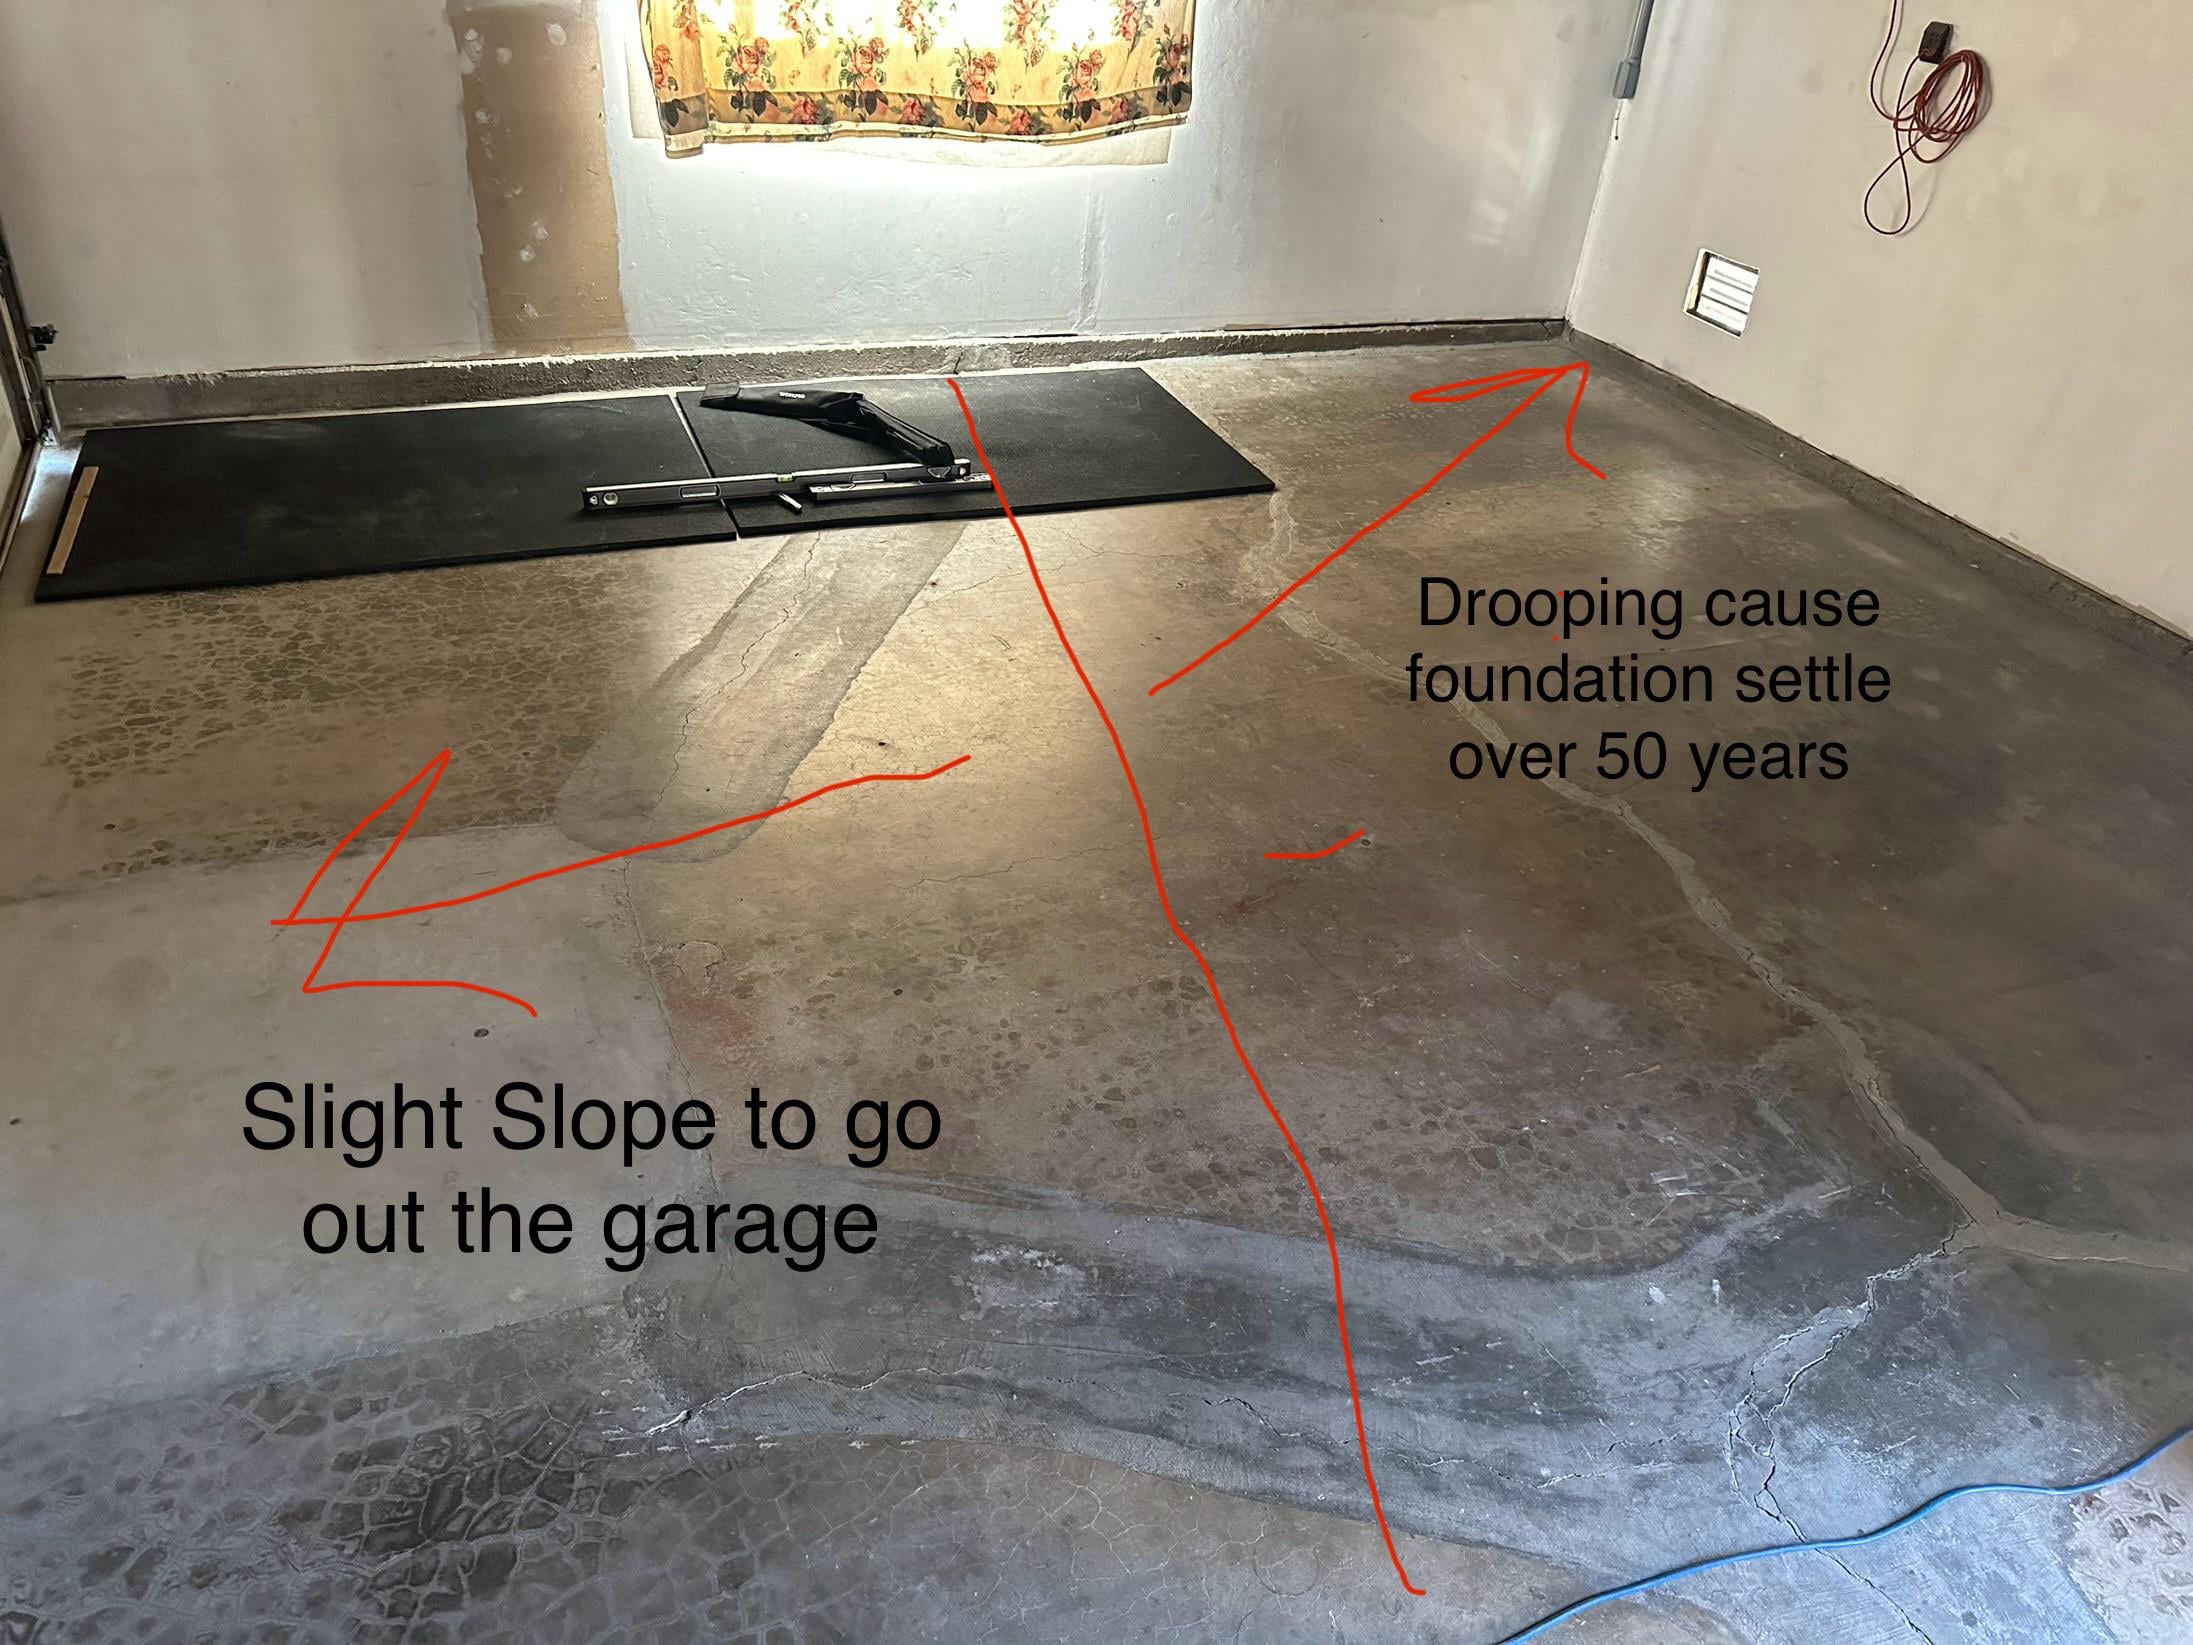
Leveling a garage floor is important. A flat floor is safe and strong. It helps with garage work and storage. First, check the floor. Look for cracks or uneven spots. Use a level tool to see if the floor tilts. This tool tells you where the floor is not even.
Clean the floor before starting. Remove dirt and oil. These things make the floor slippery. They also stop the leveling material from sticking. Use a broom and a cleaner for this job. A clean floor helps the leveling go smoothly.
Signs Your Garage Floor Needs Leveling
Cracks in the garage floor can mean trouble. They make the surface uneven. This can cause trips and falls. An uneven floor can also damage cars. It puts extra wear on tires. This is not safe.
Water does not drain well on an uneven floor. It makes puddles. These puddles can make the floor slippery. They can also lead to mold. Mold is bad for health. It can also damage the garage.
Garage doors should open and close easily. Sometimes they get stuck. This can happen if the floor is not level. A misaligned door can be a big problem. It lets in water and pests. It also reduces security.
Preparing For The Leveling Process
Start by collecting all the important tools. A level is needed to check the floor. Use a trowel for spreading materials. Get a mixing paddle for mixing compounds. A bucket will help hold the mixture. Wear gloves to keep hands safe. Don’t forget a dust mask to avoid breathing dust.
Safety comes first. Always wear protective gear. Use gloves and a mask for safety. Keep tools away from kids. Work in a well-ventilated area. Have a first aid kit nearby. Make sure to follow the instructions on all products.
Clear out all items from the garage. Move cars and bikes outside. Sweep the floor to remove dust. Use a vacuum for small particles. Check the floor for cracks. Wash the floor with water and soap. Let it dry before starting the work.

Choosing The Right Leveling Method
Self-leveling compound is a favorite choice. It is easy to use. Pour it on the floor. Spread it with a trowel. It flows nicely and dries smooth. This method is fast. It covers cracks and small holes well.
Concrete resurfacer is like a new skin. It gives a fresh look. Mix it with water. Spread it thin. It is good for big areas. It makes the floor strong.
Patching is for fixing small spots. Use patching mix for cracks. Apply it with a putty knife. Repairing helps damaged areas. Clean the surface first. Then apply the repair mix.
Step-by-step Leveling Guide
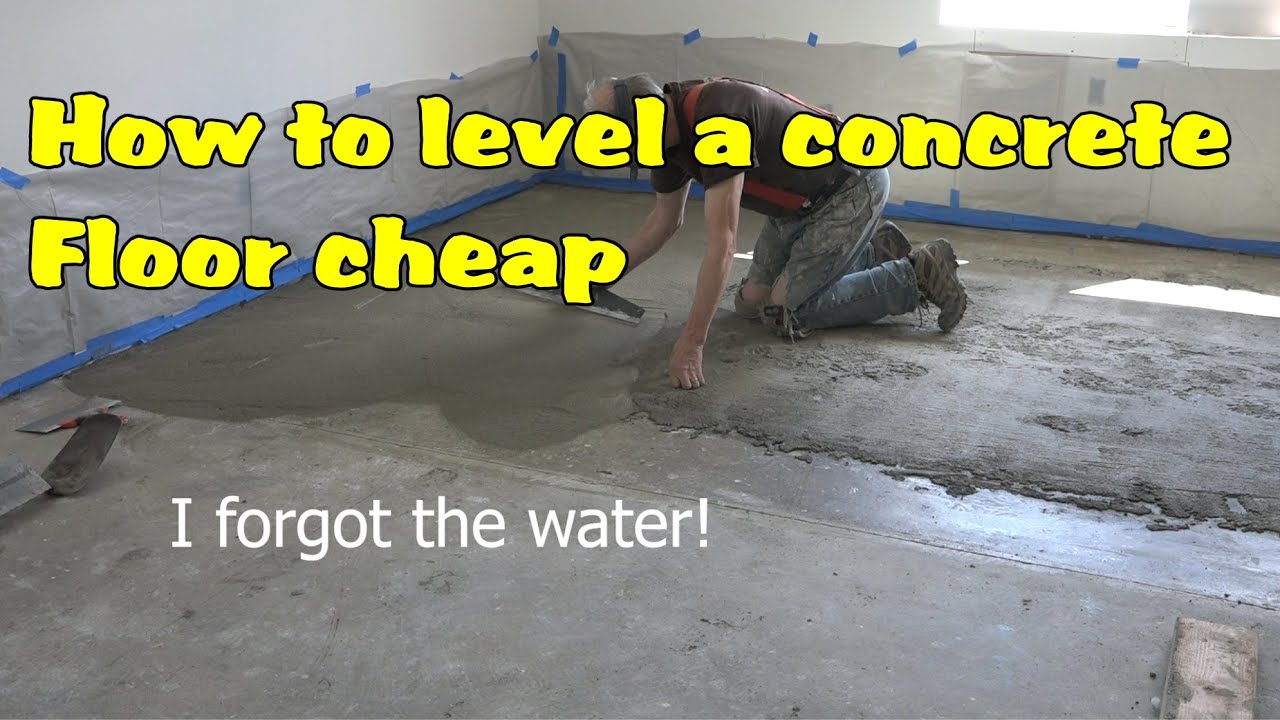
Use a large bucket for mixing. Add water first, then the leveling compound. Stir well to avoid lumps. The mixture should be smooth and easy to pour. Follow the instructions on the bag for best results. Proper mixing ensures a flat floor.
Pour the compound on the garage floor. Start at one corner and work across. Use a trowel to spread the mixture evenly. Make sure all low spots are filled. Quick application is key as the compound sets fast. Keep the surface wet for better results.
Use a long board to smooth the surface. Drag it across the floor to level it. Fill any gaps you see. Let the compound dry completely before using the garage. This might take a day or two. A smooth finish makes the garage look neat.
Common Mistakes To Avoid
Moisture can cause big problems for garage floors. It makes the floor weak and uneven. Water can seep through cracks and damage the surface. This leads to costly repairs later. Always check for moisture before starting. A simple test can help find these issues. Fix any leaks or damp spots first. This saves time and money.
Mixing ratios are very important in leveling a floor. Too much water makes the mixture weak. Too little water makes it hard to spread. Follow the instructions on the product carefully. Use the right tools to mix well. A proper mixture ensures a smooth and even surface.
Drying time is crucial for a strong floor. Rushing this step can lead to cracks. Always give the floor enough time to dry. Follow the manufacturer’s guidelines for drying. Check the weather too. Cold or wet conditions can slow down drying. Be patient. This makes the floor last longer.
Maintaining A Leveled Garage Floor
Inspect the garage floor every month. Look for any uneven surfaces. Use a level tool to check the floor. A level tool helps find dips and high spots. Early detection prevents big problems. Fix small issues quickly to save money.
Cracks may appear over time. Fill new cracks with a sealant. A sealant keeps the floor smooth. It also stops cracks from growing. Check cracks once a month. Repair them as soon as possible. This keeps the garage floor safe and strong.
Water can damage the garage floor. Use a waterproof coating for protection. A coating stops water from soaking in. Apply it at least once a year. This will keep the floor dry and prevent mold. A dry floor is a safe floor.
When To Seek Professional Help
Severe structural issues need expert care. Cracks or big holes can be dangerous. Experts can fix them safely. They have the right tools. They know the right steps.
Some jobs are complex leveling projects. These can be very hard to do. Professionals handle them better. They have the experience. They can finish the job fast and right.
A lack of DIY experience can lead to mistakes. Mistakes can cost more to fix. Professionals have the skills. They make fewer mistakes. This can save time and money in the end.
Frequently Asked Questions
What Tools Do I Need To Level A Garage Floor?
To level a garage floor, you’ll need tools like a concrete grinder, leveling compound, trowel, and a mixing bucket. A straightedge and a broom for cleaning are also essential. These tools help in achieving a smooth, even surface, ensuring your garage floor is perfectly leveled.
How Long Does It Take To Level A Garage Floor?
The time to level a garage floor varies based on its size and condition. Typically, it takes about one to two days. This includes preparation, application of leveling compound, and drying time. Proper planning and execution can help expedite the process.
Can I Level A Garage Floor Myself?
Yes, you can level a garage floor yourself with the right tools and materials. It’s a DIY-friendly task if you have basic skills. Ensure you follow instructions carefully for best results. However, for complex issues, consider hiring a professional for assistance.
What Are Common Mistakes When Leveling A Garage Floor?
Common mistakes include inadequate surface preparation, using the wrong leveling compound, and not allowing sufficient drying time. Skipping these steps can lead to uneven surfaces. Always follow the manufacturer’s instructions and use the right tools for a successful leveling project.
Conclusion
Leveling your garage floor is easier than you think. Follow the steps for a smooth surface. This task ensures a safe and stable foundation. Start with cleaning and measuring. Use the right materials for a perfect finish. Regular maintenance keeps your floor in great shape.
These simple steps transform your garage into a functional space. Enjoy a flat, safe area for your projects. Your garage deserves a solid, even floor. Explore more tips and keep improving your space. Happy renovating!


