Are you looking to give your concrete floor a stunning makeover? Installing tile is a fantastic way to transform any space, adding elegance and durability.
But how do you ensure the tiles are laid perfectly on concrete? You might be worried about the complexity, but fear not! With the right guidance, you can achieve a professional finish without breaking a sweat. Imagine walking across a floor that not only looks beautiful but feels solid and secure underfoot.
You have the power to turn that vision into reality. Dive into this article to discover the secrets of installing tile on a concrete floor with ease and precision. By the end, you’ll have the confidence and know-how to tackle this project like a pro. Ready to get started?
Preparing The Concrete Surface
Start by sweeping the floor. Remove all dust and dirt. Use a vacuum for deep cleaning. A clean floor helps tiles stick better. Use a mop with warm water. Add some mild soap. Scrub the floor gently. Ensure the floor is dry before moving on.
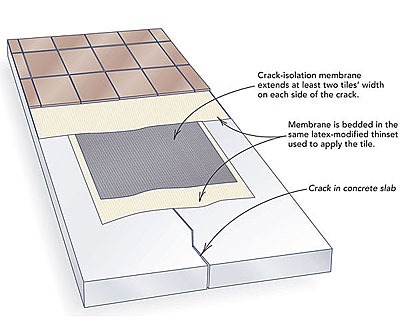
Inspect the concrete surface carefully. Look for any cracks or holes. Fill these with a concrete patching compound. Smooth the surface with a trowel. Let it dry completely. A smooth surface is important for tile installation.
Moisture can cause tiles to loosen. Check for moisture using a plastic sheet test. Tape a plastic sheet to the floor. Leave it for 24 hours. If there is water under the sheet, the floor is damp. Consider using a moisture barrier.
Gathering Necessary Tools And Materials
You need some basic tools. A measuring tape is important. Use a tile cutter for cutting tiles. A trowel helps spread adhesive. Spacers keep tiles even. Get a rubber mallet for tapping tiles. A level ensures tiles are flat. Don’t forget safety goggles. Knee pads protect your knees. You’ll need a bucket for mixing grout. A sponge is useful for cleaning.
Choose tiles that fit your space. Ceramic tiles are great for indoors. Porcelain tiles work well in wet areas. Natural stone offers a classic look. Check the size and color. Make sure the tiles are durable. Slip-resistant tiles are safer. Consider the room’s use. Look for tiles that are easy to clean.
Use a thin-set mortar for bonding tiles. Make sure it’s suitable for concrete. Epoxy grout is strong and stain-resistant. Sanded grout is for wide joints. Unsanded grout is for narrow joints. Check the color of the grout. It should match your tiles. Flexible adhesives are good for areas with movement. Read the instructions on the package. Mix the grout as directed.
Planning The Layout
Measure the floor with a tape. Find out the length and width. Multiply them to get the total floor area. This helps in buying the right amount of tiles. Write these numbers down. Remember, accurate measurements save time and money.
Decide on a tile pattern. Patterns can be simple or complex. Some like checkerboard. Others prefer a diagonal style. Think about the room’s style. Choose a pattern that fits well. This choice changes the room’s look.
Place tiles on the floor without glue. This is called dry laying. Start in the center. Work towards the edges. Adjust as needed to avoid cutting tiles at edges. This step shows how the final floor will look. It helps in making sure patterns align well.
Cutting And Fitting Tiles
A tile cutter is handy for straight cuts. Place the tile on the cutter. Line it up carefully. Apply firm pressure. Score the tile surface with the cutter. Snap the tile along the scored line. Always wear safety goggles. Keep fingers clear of the blade.
Corners need special attention. Use small tiles for tight spots. Trim tiles carefully. A tile saw helps with curved cuts. Tiles should fit snugly. Avoid gaps at edges. Check alignment often. Ensure tiles are flush with the floor.
Measure twice before cutting. Use a ruler for precision. Mark tiles with a pencil. Cut slowly for clean edges. Test fit before final placement. Adjust as needed. Accuracy prevents wasted tiles. Ensure cuts are straight and even.
Applying Adhesive
Mixing the Adhesive is a crucial step. Pour the adhesive into a bucket. Add water slowly. Stir with a stick until smooth. The mixture should not be too thick or too thin. It should be like thick cream. Test by lifting the stick. The adhesive should stick but not drip.
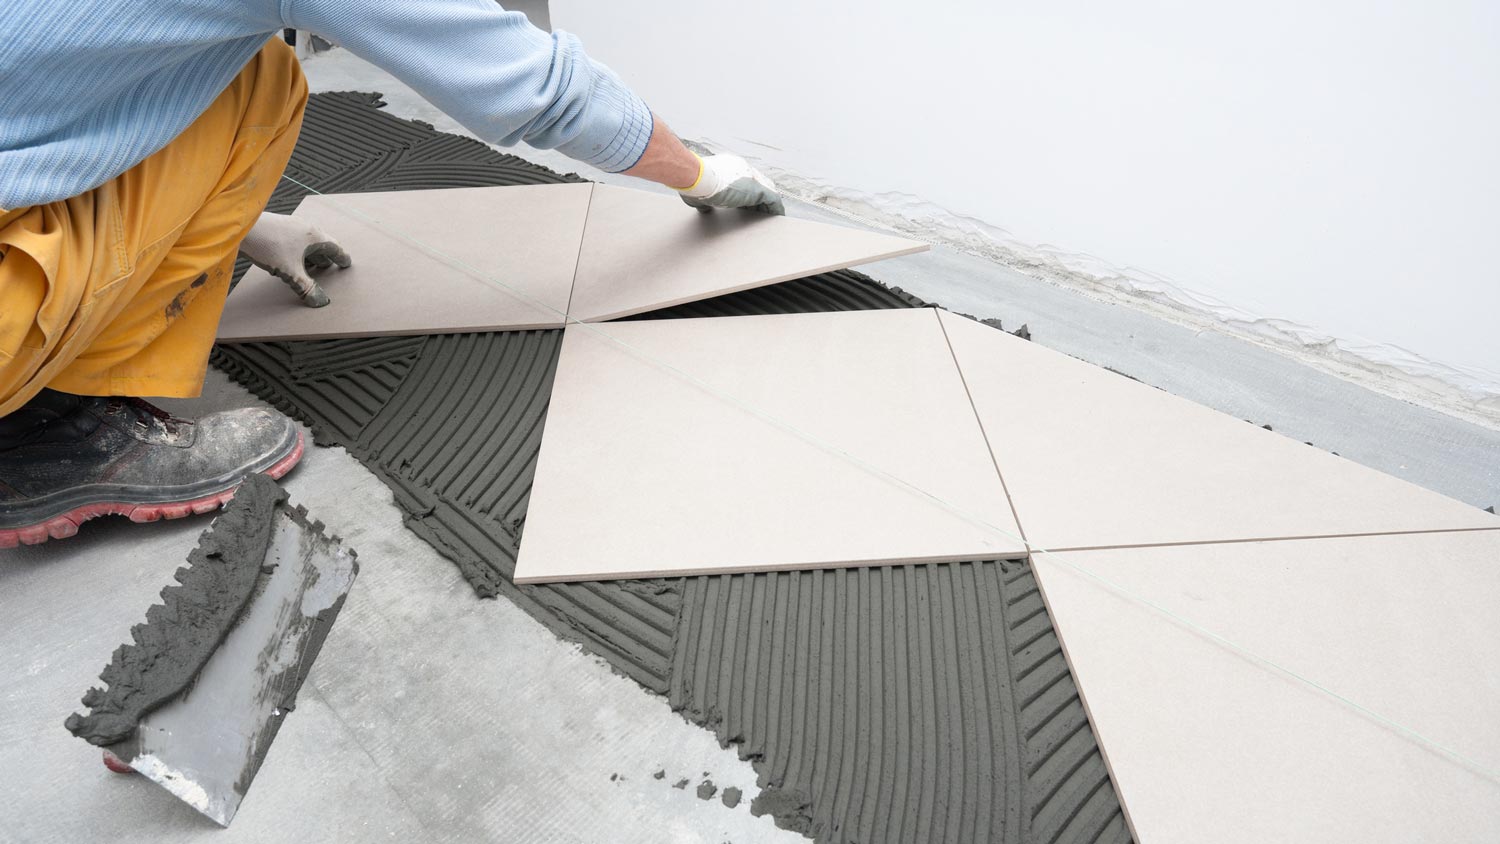
Spreading Adhesive Evenly is important. Use a trowel for this. Scoop some adhesive. Spread it on the concrete floor. Make sure it’s even. No lumps or gaps. Smooth it out with the trowel. Cover all areas.
Setting Tiles in Place requires care. Pick up a tile. Press it onto the adhesive gently. Wiggle a bit to settle. Make sure it is level. Use a spacer for gaps between tiles. Repeat for each tile. Check alignment often.
Grouting The Tiles
Use a clean bucket to mix the grout. Add water to the grout powder. Stir until you get a smooth paste. The paste should be thick, like peanut butter. This helps it stay in place. Ensure no lumps remain. Let it sit for a few minutes. This is called slaking. Stir again before using.
Use a rubber float to spread the grout. Hold it at a 45-degree angle. Press the grout into the tile gaps. Move diagonally across the tiles. This helps fill the gaps well. Cover a small area at a time. Work quickly so the grout does not dry. Check each gap is full.
Wipe tiles with a damp sponge. Clean off extra grout. Use gentle strokes. Rinse the sponge often. This keeps it clean. Do not press too hard. You might remove grout from the gaps. Let the grout dry a bit. Then polish tiles with a soft cloth. This makes them shine.
Sealing The Tile Surface
Choosing the Right Sealant is important for protecting your tiles. There are many types of sealants. Some are for glossy finishes, others are matte. Make sure the sealant matches your tile type. You can ask a store helper for advice. A good sealant keeps tiles looking new and strong.
Applying Sealant Evenly helps tiles stay safe from water. Use a brush or roller to apply. Make sure to cover every part. Avoid leaving spaces without sealant. Start from one corner and move to another. This way, you will not miss any spot. Apply thin and even layers for best results.
Allowing Proper Drying Time is needed after applying sealant. Wait for the sealant to dry completely. Check the instructions on the sealant package. Most sealants take a few hours to dry. Keep the area free from dust and water during this time. This helps the sealant to work well and last long.
Final Touches And Maintenance
Check every tile for cracks or chips. Even small ones. Make sure the tiles are even. Use a level to check. Ensure grout is filled and smooth. Look for gaps or holes. Fix any issues quickly. This keeps your floor strong.
Sweep the floor every day. Dirt can scratch tiles. Mop with warm water weekly. Use a mild cleaner for tough stains. Avoid harsh chemicals. They can harm the tiles. Dry the floor after mopping. Water spots can form otherwise.
Place mats at entrances. They catch dirt from shoes. Use felt pads under furniture. This stops scratches. Avoid dropping heavy items. Tiles can crack easily. Sealing grout every year helps. It keeps out moisture and stains.
Frequently Asked Questions
How To Prepare Concrete For Tile Installation?
Ensure the concrete is clean, dry, and level before tiling. Remove any debris or old adhesives. Repair cracks with a concrete patching compound. Use a primer if the surface is porous. This preparation ensures a durable and smooth tile installation.
Can You Tile Directly On Concrete?
Yes, you can tile directly on concrete. Ensure the surface is clean, level, and free of moisture. Use a suitable thin-set mortar for concrete surfaces. This ensures proper adhesion and durability of your tile installation.
What Adhesive Is Best For Concrete Floors?
For concrete floors, use a polymer-modified thin-set mortar. It provides excellent adhesion and flexibility. Ensure it’s suitable for your specific tile type. This choice enhances the longevity and stability of your tiled floor.
How Long Should Concrete Cure Before Tiling?
Concrete should cure for at least 28 days before tiling. This ensures the surface is stable and moisture-free. Proper curing prevents future tile issues. Always check moisture levels with a moisture meter before starting the tiling process.
Conclusion
Installing tile on a concrete floor can be simple. Start with a clean surface. Gather your tools and materials. Follow each step carefully. Measure twice, cut once. Apply adhesive evenly. Place tiles gently. Check alignment often. Let the tiles set properly.
Finish with grout. Make sure it’s smooth. Clean the tiles once dry. Enjoy your new floor. Remember, patience is key. You can achieve a great result with practice. Now, your floor is ready to impress. Celebrate your hard work. Share your success with friends and family.


