Imagine transforming your space with a sleek, modern look that’s not only stylish but practical too. Vinyl flooring offers you the perfect blend of durability, affordability, and aesthetic appeal.
But installing vinyl flooring on concrete might seem daunting, right? Don’t worry; this guide is here to make it simple and stress-free for you. Whether you’re sprucing up your living room or adding a fresh touch to your basement, knowing how to install vinyl flooring on concrete will empower you to take control of your home renovation projects.
You’ll discover how easy it is to achieve the look you’ve always wanted, and the best part? You can do it yourself without breaking the bank or hiring a professional. Ready to roll up your sleeves and dive into the world of vinyl flooring? Let’s get started!
Choosing The Right Vinyl Flooring
Vinyl flooring comes in different types. Each type has unique features. Sheet vinyl is one large piece. It covers a big area. Vinyl tiles look like ceramic tiles. They are easy to replace if one breaks. Luxury vinyl planks mimic wood. They have a realistic appearance. Pick what fits your space best.
Consider the style you want. Think about your room’s size. Sheets work well for large rooms. Tiles suit smaller spaces. Planks are perfect for a wood look. They are durable and stylish. Make a choice based on your needs.
Concrete floors need care before installation. They must be clean and dry. Check for cracks or holes. Fix them before laying vinyl. Use a leveling compound if needed. This ensures a smooth surface. Proper prep makes installation easy.
Preparing The Concrete Surface
The floor must be free of dirt and dust. Use a broom or vacuum to clean it. Then, mop the floor with water. Make sure it is fully dry. Moisture can ruin the flooring. So, check for damp spots. If the floor is wet, wait until it dries.
Inspect the floor for cracks and holes. Fill any cracks with a patching compound. Use a trowel for even application. Let it dry completely. This makes the floor smooth and ready for vinyl.
The surface must be level. Uneven floors can cause problems later. Use a level tool to check. If needed, apply a self-leveling compound. Spread it evenly. Let it dry as per instructions. Now, the floor is ready for vinyl.
Measuring And Planning The Layout
Start with a tape measure. Measure the length and width of the room. Write down the measurements. Check twice to make sure they are right. This helps you buy the right amount of vinyl. Don’t forget to measure any nooks or corners. Every inch counts.
Lay the planks on the floor. Try different styles. Straight lines look neat. Diagonal lines look fancy. Pick the style you like best. Measure the planks. Make sure they fit the room size. Sometimes you need to cut planks. Use a sharp cutter. Be careful with the edges. Smooth edges look better.
Gathering Necessary Tools And Materials
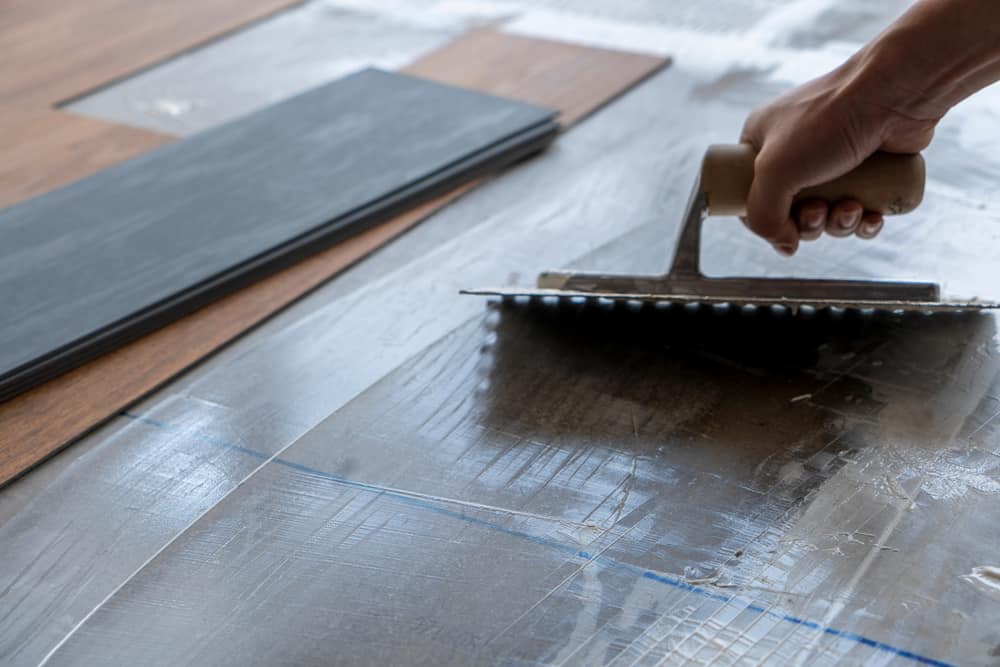
Gather the tape measure. It’s key for checking room size. Get a utility knife. It cuts vinyl easily. You need a straight edge. It helps in making straight cuts. Have a notched trowel. It spreads adhesive well. A floor roller smooths vinyl nicely.
You need vinyl adhesive. It sticks the vinyl to concrete. Buy vinyl planks. They are the main floor material. Underlayment reduces noise and protects vinyl. Get spacers. They keep gaps even between planks. Have clean rags ready. They clean excess adhesive fast.
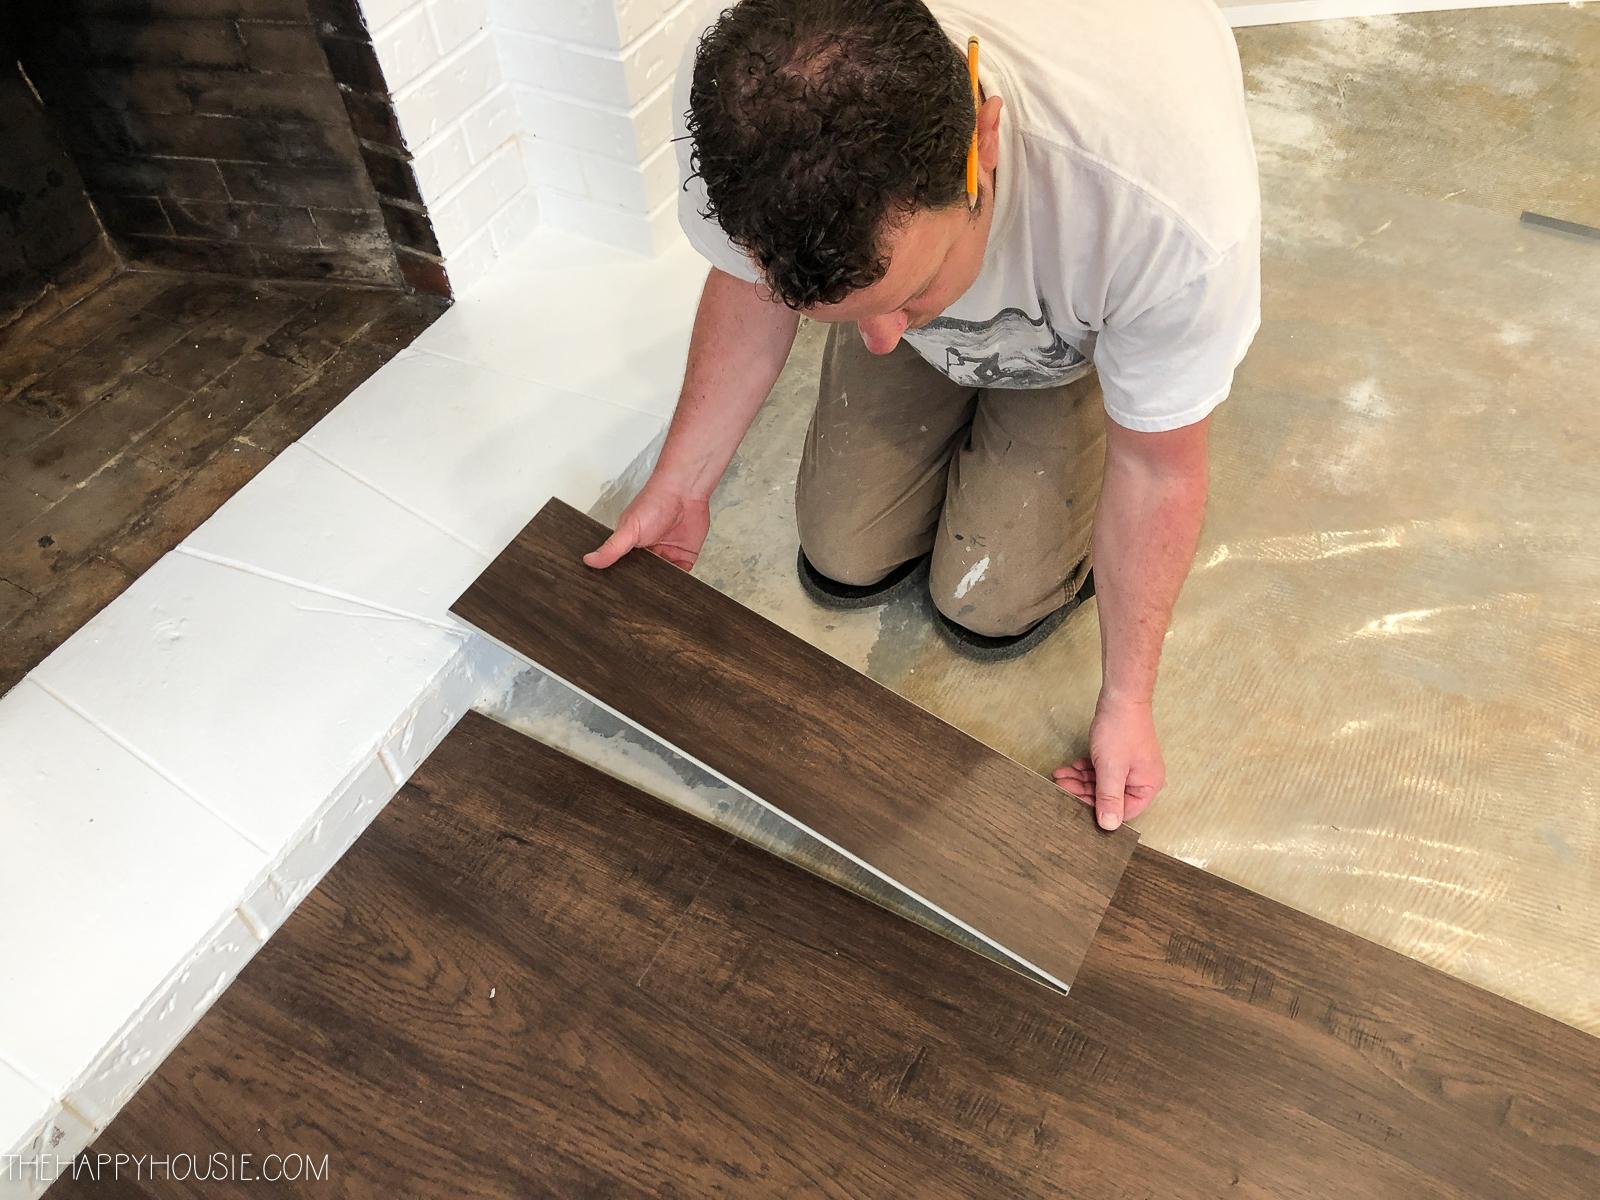
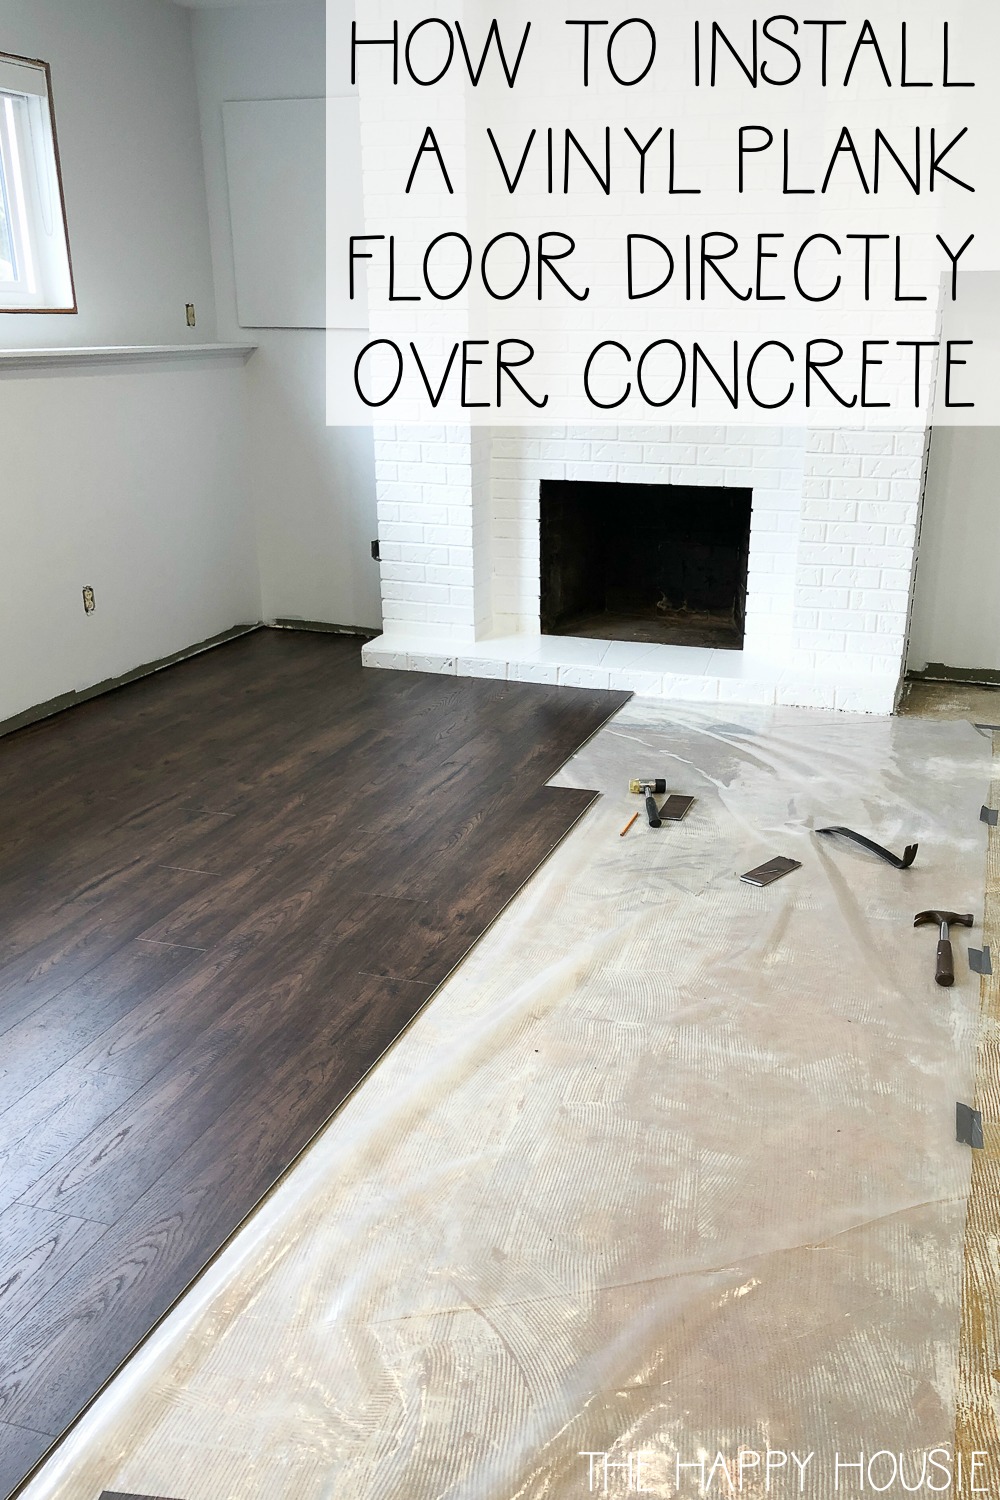
Installing The Vinyl Flooring
Start with a clean concrete floor. Remove any dirt or dust. Roll out the underlayment. Make sure it covers the entire area. Cut the underlayment to fit the space. Use a utility knife for clean edges. Tape the seams together. This keeps the underlayment in place. The underlayment makes the floor smooth. It also reduces noise.
Unroll the vinyl on the floor. Let it sit for a while. This helps it adjust to the room. Use a sharp knife to cut the vinyl. Cut it to fit around corners and edges. Be careful and take your time. Fit the vinyl snugly against the walls. Leave a small gap for expansion. This prevents buckling later.
Apply adhesive to the floor. Use a trowel for even spreading. Press the vinyl onto the adhesive. Start from the center. Work your way outwards. Smooth out any air bubbles. Use a floor roller for this. Ensure the edges are well secured. Let the adhesive dry completely. This will keep the vinyl in place.
Finishing Touches
Begin by preparing the concrete surface, ensuring it’s clean and level for optimal vinyl flooring installation. Next, measure and cut the vinyl pieces to fit seamlessly, using adhesive for secure placement. Finish by smoothing out air bubbles and trimming edges for a polished look.
Trimming Excess Material
Cut extra vinyl with a sharp knife. Keep cuts straight and neat. Use a straightedge for help. This prevents uneven edges. Trim carefully around corners. Make sure no gaps are visible.
Installing Baseboards And Moldings
Put baseboards along the wall edges. Use nails or glue to attach them. Choose moldings that match your room. These cover gaps between the floor and wall. Moldings give a clean look. They protect walls from damage. Make sure they fit snugly.
Maintenance And Care Tips
Vinyl flooring installation on concrete requires careful preparation. Ensure the concrete surface is clean and dry. Use a leveling compound to smooth any uneven areas before laying the vinyl.
Cleaning And Upkeep
Keep your vinyl floor clean. Use a soft broom to remove dirt. A vacuum with a soft brush works well too. For stains, use a damp cloth. Warm water helps in removing them. Avoid using harsh chemicals. They can damage the floor.
Preventing Damage
Prevent scratches by placing mats at entrances. Use furniture pads under heavy items. Keep sharp objects away from the floor. Don’t drag furniture across the floor.
Frequently Asked Questions
How Do I Prepare Concrete For Vinyl Flooring?
Start by cleaning the concrete surface thoroughly. Remove any dust, debris, or grease. Fill in any cracks or holes with concrete patching compound. Ensure the surface is level and dry. Use a concrete primer to enhance adhesion. Proper preparation ensures a smooth installation and longevity of vinyl flooring.
Can I Install Vinyl Flooring Directly On Concrete?
Yes, you can install vinyl flooring directly on concrete. Ensure the concrete is clean, dry, and level before installation. Use a moisture barrier to prevent water damage. Vinyl flooring is durable and works well on concrete surfaces when installed correctly.
Do I Need Underlayment For Vinyl On Concrete?
Underlayment is not always necessary for vinyl on concrete. However, it can provide additional cushioning and insulation. It helps with noise reduction and provides moisture protection. Consider underlayment if the concrete surface is uneven or if extra insulation is needed.
How Long Does Vinyl Flooring Installation Take?
Vinyl flooring installation typically takes one to two days. Preparation of the concrete surface is crucial and may take additional time. The complexity of the room layout can affect installation time. Proper preparation and planning ensure a smooth and efficient installation process.
Conclusion
Vinyl flooring is a great choice for concrete surfaces. It is durable, easy to clean, and stylish. Installing it yourself saves money and allows customization. First, prepare the concrete by cleaning and leveling it. Next, measure and cut the vinyl pieces.
Make sure they fit well. Apply adhesive carefully. Smooth each piece down. Check for bubbles or gaps. Patience is key. Take your time to achieve a polished look. With these steps, your floor will look amazing. Enjoy the new space.
Vinyl flooring makes rooms feel fresh and inviting.


