Are you dreaming of transforming your space with sleek, stylish, and durable vinyl flooring? You’re not alone!
Vinyl floors are a popular choice for homeowners looking to upgrade their interiors without breaking the bank. But here’s the catch: installing vinyl flooring can be a breeze if you know the right steps. Imagine walking into your room and feeling that sense of pride in knowing you did it yourself.
You can achieve that! In this guide, we’ll walk you through the straightforward process of installing vinyl floor, ensuring you get the perfect finish every time. Whether you’re a seasoned DIY enthusiast or just starting out, you’ll find the tips and techniques shared here invaluable. Ready to roll up your sleeves and get started? Let’s dive in!
Preparation
Careful preparation ensures a smooth vinyl floor installation. Start by clearing the room completely, removing furniture and obstacles. Check the subfloor for any signs of damage or unevenness, fixing issues before laying the vinyl. Proper planning saves time and avoids future problems.
Gather Tools And Materials
Collect all necessary tools before starting. You’ll need a utility knife, measuring tape, and a straightedge. Get a vinyl flooring adhesive and a roller. A chalk line helps with straight cuts. Keep cleaning supplies ready. Prepare a dust mask for safety.
Measure The Area
Measure the space carefully. Use a measuring tape to get the length and width. Write down numbers. Double-check measurements to avoid mistakes. Accurate measurements help with buying the right amount of flooring. Measure twice to ensure precision.
Choose The Right Vinyl Flooring
Select the vinyl type you want. Consider the style and color. Think about the room’s use and traffic. Choose durable options for busy areas. Pick a design that matches your home. Look for easy-to-clean surfaces for convenience.
Surface Cleaning
Start by removing the old flooring carefully. Use tools like a scraper or pry bar. Wear gloves to protect your hands. Dispose of the old flooring safely. Make sure no sharp edges are left behind. This will help in preventing injuries.
After removal, clean the subfloor thoroughly. Use a broom to sweep away dust and debris. Ensure the subfloor is smooth and level. If there are bumps, sand them down. Fill in any holes with a floor patch. This ensures a stable base for your vinyl floor.
Acclimate The Vinyl
Carefully unpack the vinyl rolls. Spread them out on the floor. Make sure they lie flat. This helps them adjust to the room’s temperature. It also prevents curling edges. Leave the vinyl for at least 48 hours. This is important for best results. The vinyl will settle in properly. Ensure the room has a stable temperature. Keep it between 65°F and 85°F. Avoid placing heavy objects on the vinyl. This could cause dents or marks. Let the vinyl breathe and relax.
The vinyl needs time to settle. This helps avoid future problems. Skipping this step is risky. It might cause bubbling or gaps. Be patient during this phase. Your floor will be better for it. Proper adjustment ensures a smooth fit. The vinyl will look great and last longer. Make sure to give it enough time. This simple step saves future headaches. Enjoy a beautiful, even floor.
Cutting Vinyl Sheets
Measure and mark the vinyl sheet carefully. Use a measuring tape for accuracy. Make sure your measurements are exact. Mark the lines with a pencil or marker. This helps in cutting straight lines. Keep the vinyl flat when marking. Avoid wrinkles or folds. Check your marks twice before cutting. Precision is key for perfect installation.
Use the right cutting tools for vinyl sheets. A utility knife is ideal. Make sure it’s sharp for clean cuts. Scissors can be useful for small adjustments. Use a straightedge as a guide while cutting. This helps in maintaining straight lines. Keep your fingers safe and clear from the blade. Cut slowly to avoid mistakes. Practice makes perfect when cutting vinyl.
Adhesive Application
Choosing the right adhesive is very important. Vinyl flooring needs a strong bond. Floor type affects adhesive choice. Consult experts if unsure. Water-based adhesives are popular. They dry fast. Solvent-based adhesives are durable. Environment matters too. Some adhesives work best indoors. Others suit outdoor settings.
Spread the adhesive with care. Use a trowel for even application. Avoid puddles. They cause bumps. Thin layers work best. They dry faster. Start at one corner. Move across the floor. Check coverage regularly. Ensure no missed spots. Let adhesive sit for a few minutes. It helps secure the vinyl.
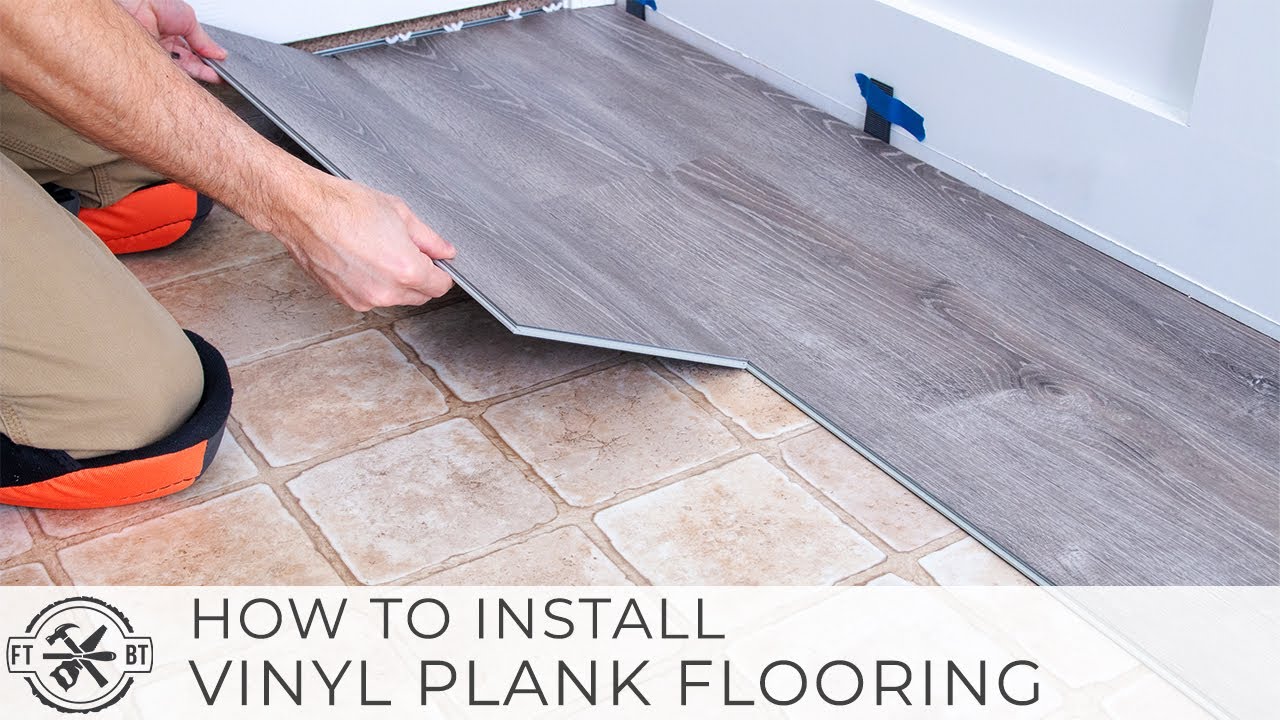
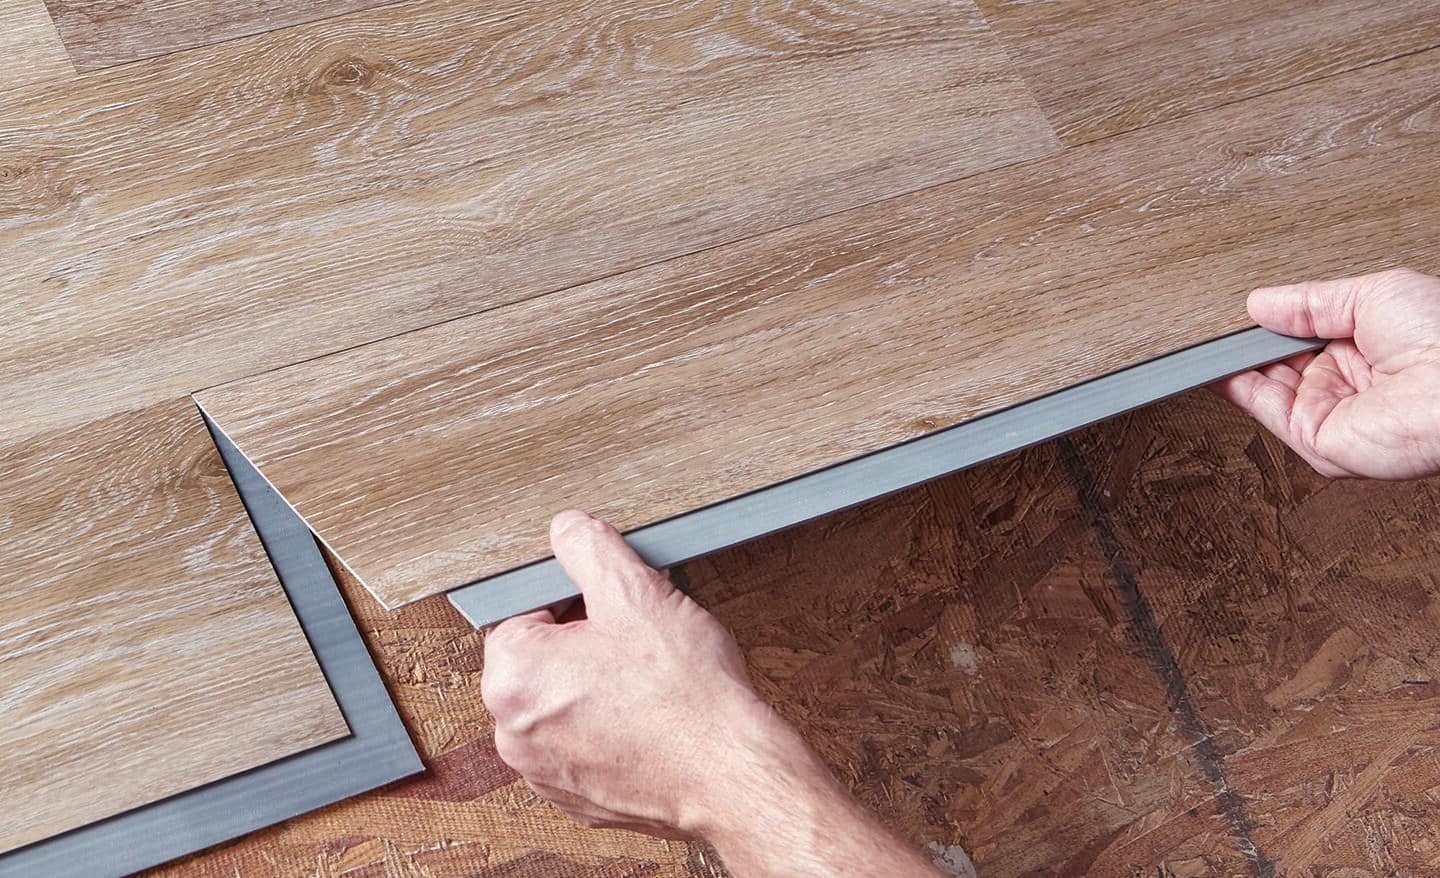
Laying Vinyl Flooring
Start by cleaning the floor. Make sure it is dust-free. Unroll the vinyl sheets. Let them rest for 24 hours. This helps them relax and fit better. Measure the room carefully. Cut the sheets to fit each space. Leave a small gap at the edges. This allows for expansion.
Place the sheets on the floor. Align them with the walls. Use a rolling pin or a floor roller. Press down on the vinyl. This helps stick it to the floor. Push out any air bubbles. Start from the center and move to the edges. This ensures a smooth finish. Check for any loose spots. Press them down firmly. This gives a clean look.
Trimming And Finishing
Use a sharp knife to trim extra vinyl. Be careful with the edges. Cut slowly for a clean finish. Always keep your hand steady. This helps avoid mistakes. Check the corners. Make sure they fit perfectly. Rushing can lead to errors.
Start with the baseboards. Nail them into place securely. Use a hammer with care. Follow the wall lines closely. Add molding for a polished look. This hides gaps nicely. Choose molding that matches. It should fit well. A snug fit looks best. Double-check your work for neatness.
Cleaning And Maintenance
After installing vinyl floors, clean them gently. Use a soft broom to remove dust. A damp mop helps in cleaning the surface. Avoid soaking the floor with water. Too much water can damage it. Use a mild cleaner for better results. Always read the cleaner’s instructions.
Regular care keeps vinyl floors shiny. Sweep daily to remove dirt. Dirt can cause scratches. Use a vacuum without a beater bar. Spills must be cleaned quickly. Use a damp cloth for this. Do not use harsh chemicals. They can harm the floor. Place mats at entrances. Mats reduce dirt spread.
Frequently Asked Questions
What Tools Are Needed To Install Vinyl Flooring?
To install vinyl flooring, you need a utility knife, measuring tape, straightedge, adhesive, and a roller. A seam roller is also helpful for pressing seams. Ensure you have a clean and dry surface before starting. Having all tools ready will streamline the installation process and ensure a professional finish.
How Do I Prepare The Subfloor For Vinyl?
Start by cleaning the subfloor thoroughly to remove dust and debris. Ensure it is dry, level, and smooth. Repair any cracks or holes before installation. A clean and level subfloor is crucial for a successful vinyl floor installation. Proper preparation prevents future issues and ensures longevity.
Can Vinyl Flooring Be Installed Over Tiles?
Yes, vinyl flooring can be installed over tiles if the tiles are in good condition. Ensure the tiles are clean and level before installation. Filling grout lines will help achieve a smooth surface. Proper preparation ensures the vinyl adheres well and prevents visible imperfections.
How Long Does Vinyl Floor Installation Take?
Vinyl floor installation can take one to two days, depending on room size and complexity. Preparation and drying times are crucial for a successful installation. Small rooms may take less time, while larger or intricate spaces could extend the process.
Ensure you allocate enough time for proper installation.
Conclusion
Vinyl flooring installation is simpler than you might think. With the right tools, you can achieve a professional look. Start with clean, level floors. Measure carefully to avoid mistakes. Follow the manufacturer’s instructions closely. Take your time with cutting and fitting.
Ensure each piece locks securely in place. Consider room humidity and temperature for best results. Regular maintenance will keep your vinyl floor looking new. Enjoy the durability and style of your new flooring. It’s a practical choice for any home.
You’ve got this! Your space will soon look fresh and modern.


