Are you struggling with the sticky residue left behind after removing vinyl flooring? You’re not alone.
Many homeowners find themselves puzzled by the stubborn glue that seems impossible to clean. You might be worried about damaging your floor or spending hours on end scrubbing away without results. But don’t worry; you’re about to discover simple and effective methods to tackle this challenge.
Imagine the satisfaction of seeing your floor spotless and ready for a fresh start. Stick around to learn how you can easily remove vinyl flooring glue and restore the beauty of your space without the hassle.
Preparation Steps
Start with gathering the right tools. You’ll need a scraper, a heat gun, and glue remover. A bucket is also helpful. Collect some old rags or towels. You’ll also need a mask and gloves for safety. Find a sturdy broom or brush. Make sure you have a vacuum cleaner nearby. These tools make the job easier.
Safety is very important. Wear a mask to protect your nose. Gloves keep your hands safe. Check the room’s ventilation. Open windows and doors for fresh air. Keep a fire extinguisher nearby. Heat guns can be risky. Avoid electric hazards. Stay alert while working. Safety first, always.
Identify Glue Type
Vinyl flooring glue comes in different types. Some are easy to remove. Others are sticky and tough. Knowing the type helps in removal.
- Acrylic glue: Clear and strong.
- Urethane glue: Used for tiles.
- Pressure-sensitive glue: Sticks with weight.
Start by testing a small area. Use a damp cloth to rub. Check if the glue softens. If it does, it’s likely pressure-sensitive. If not, try a stronger solvent. Always wear gloves and safety glasses. Protect your hands and eyes.
Mechanical Removal Methods
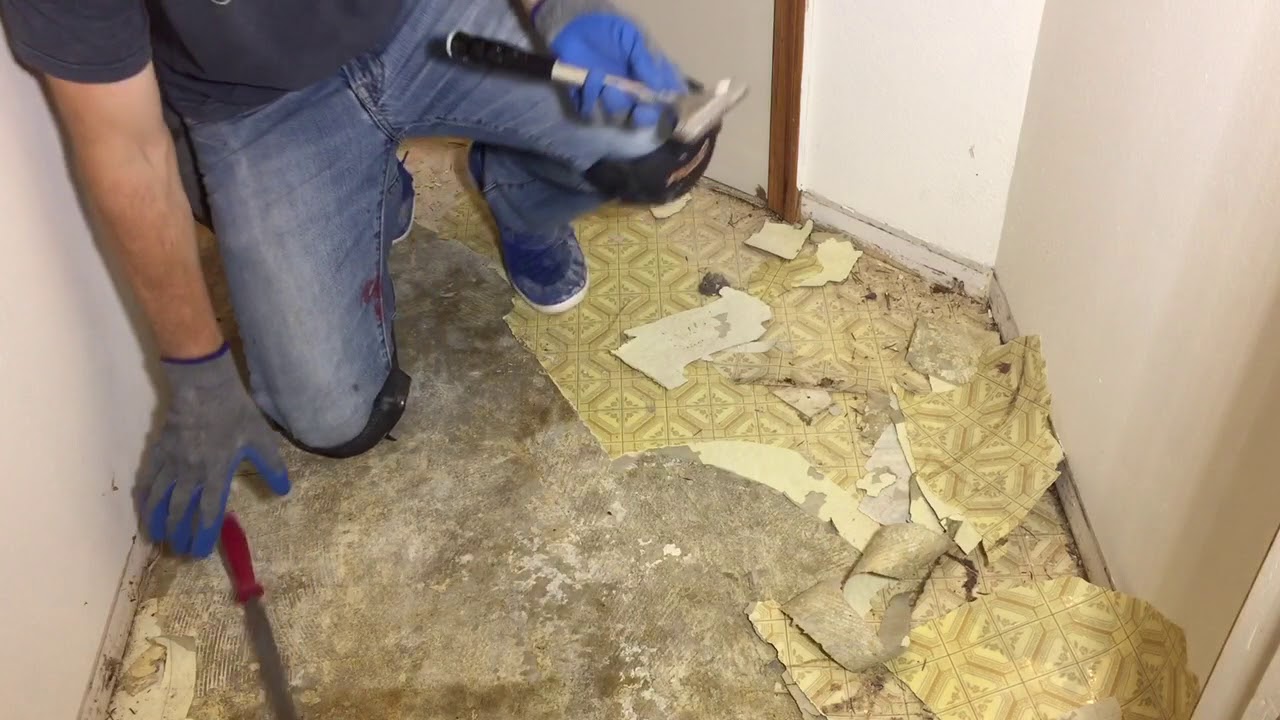
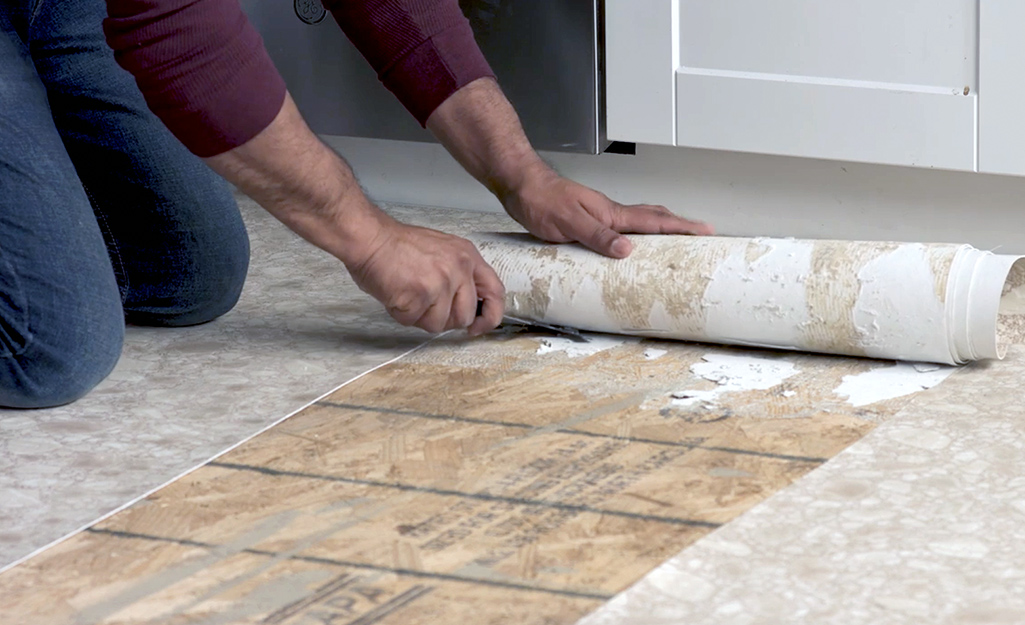
Using scrapers and blades is a common way to remove vinyl flooring glue. A scraper can help lift the glue. Make sure to apply pressure evenly. Blades can slice through the sticky glue. Be careful not to damage the floor beneath. Choose the right tool for your floor type. This method requires patience. Some areas might need extra effort. Always wear safety gloves to protect your hands. Scraping can be hard work but is effective. Scrape the glue until the surface is clean.
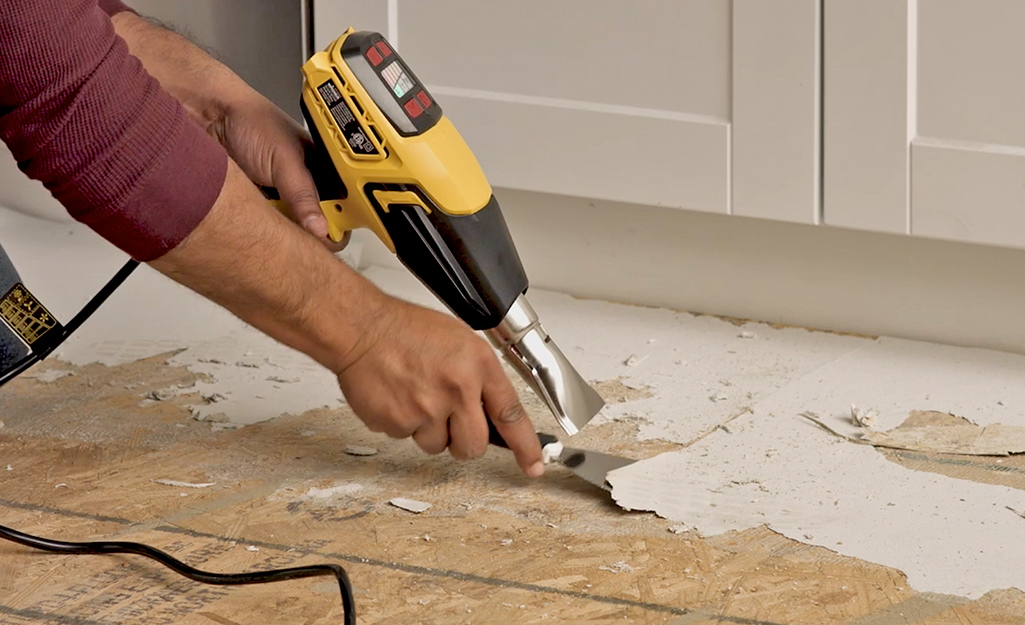
Employing heat techniques helps soften the glue. A heat gun or hairdryer can be used. Heat makes the glue easier to scrape off. Move the heat source slowly over the glue. Avoid overheating to prevent damage. Heat can speed up the removal process. It’s important to keep a safe distance. Test a small area first. Use heat with scrapers for best results. Safety goggles can protect your eyes from heat. Combining heat and scraping makes glue removal easier.
Chemical Solvents
Removing vinyl flooring glue can be challenging. Chemical solvents help break down the adhesive effectively. Use a cloth to apply, and gently scrub the residue away.
Choosing The Right Solvent
Selecting a solvent is crucial. Not all solvents work for vinyl glue. Check the glue type first. Use acetone or mineral spirits for most glues. These are common choices. Test a small area before using. This avoids damage. Always read labels on products. Follow instructions carefully. Some solvents are strong. They can harm surfaces.
Application And Safety Tips
Wear gloves when using solvents. Protect your skin. Ventilate the area well. Open windows for fresh air. Solvents can smell bad. They might make you dizzy. Keep away from fire. Solvents can be flammable. Use a brush or cloth to apply. Work slowly. Remove glue bit by bit. Check progress often. This keeps your floor safe. Dispose of solvent waste properly. Follow local guidelines. Safety first!
Natural And Eco-friendly Solutions
Vinegar is a great tool for cleaning. Mix vinegar with warm water. Spray it on the glue. Wait for 15 minutes. The glue will soften. Use a scraper to remove the glue. Baking soda can be added for tough spots. Sprinkle baking soda on the glue. Scrub with a damp cloth. Rinse with water. This method is safe and cheap.
Citrus-based cleaners are powerful. They smell good too. Apply the cleaner to the glue. Wait a few minutes. The acids will break down the glue. Use a cloth to wipe it away. These cleaners are natural. They do not harm the environment. Use them for an eco-friendly solution.
Advanced Removal Techniques
Removing vinyl flooring glue can be hard. Some adhesives stick really well. Using power tools can make this task easier. A heat gun can soften the glue. A scraper can then peel it off. A multi-tool with a scraper blade is also helpful. It vibrates quickly to help remove the glue. Always wear safety gear like goggles and gloves. This keeps you safe while working.
Sometimes, glue is just too tough. Professional help might be needed. Experts have special equipment for these tasks. They can remove glue without damaging the floor. Hiring a service can save time and effort. It might cost more, but ensures the job is done well. Check reviews before hiring a service. This helps find the best option.
Post-removal Cleaning
Small bits of glue may stick to the floor. Use a putty knife to scrape them. Be gentle to avoid scratches. A vinegar and water mix helps. Spray it on the glue spots. Wait for a few minutes. Scrub with a soft brush. If glue stays, try a commercial cleaner. Always read the cleaner’s instructions.
Ensure the floor is smooth. Remove all bumps and lumps. This helps the new floor stick well. Check for moisture. The floor must be dry. Use a moisture meter if needed. Fill any holes or cracks. Use a floor patching compound. Let it dry completely. Sand the patched areas. Make them even with the rest of the floor. Clean the floor one last time. Remove any dust or debris.
Maintenance Tips
Regular checks can help avoid sticky problems. Ensure floors are dry and clean. Moisture can weaken the glue. Use a mop with water and a small amount of soap. Avoid soaking the floor. A dry cloth can help absorb any extra water. Wax can make glue removal harder. Try to keep wax away from the vinyl. Use protective mats in high-traffic areas. This reduces wear and tear.
Keeping the floor tidy is simple. Sweep or vacuum weekly. This prevents dirt build-up. Dirt can scratch the surface. Use a soft broom or vacuum. Hard bristles can damage vinyl. A gentle cleaner keeps the floor shiny. Avoid harsh chemicals. They can harm the vinyl. With care, floors stay beautiful and last longer.
Frequently Asked Questions
How Do I Soften Vinyl Flooring Glue?
To soften vinyl flooring glue, use a heat gun or hairdryer. This makes the glue pliable and easier to remove. Keep the heat source moving to avoid damaging the floor. Once softened, gently scrape off the glue using a putty knife.
What Tools Do I Need To Remove Glue?
You’ll need a putty knife, heat gun or hairdryer, and adhesive remover. These tools help in softening and scraping off the glue. Safety gloves and goggles are recommended to protect your hands and eyes during the process.
Can Vinegar Remove Vinyl Flooring Glue?
Yes, vinegar can help remove vinyl flooring glue. Mix equal parts of vinegar and warm water. Apply the solution to the glue and let it sit for a few minutes. Scrape off the softened glue using a putty knife.
Is It Necessary To Remove All Glue Residue?
Yes, it’s necessary to remove all glue residue for a smooth surface. Leftover glue can affect new flooring installation. It may cause bumps or uneven surfaces. Use adhesive remover for stubborn residues to ensure a clean surface.
Conclusion
Removing vinyl flooring glue is a manageable task. It requires patience and the right tools. Start with scraping, then apply adhesive remover. Let it sit, then scrub. Repeat as needed for stubborn spots. Always work in a well-ventilated area. Wear gloves to protect your hands.
Check the progress regularly. A clean floor waits at the end. Keep your workspace tidy throughout. Take breaks to rest if needed. You’ll achieve a smooth, glue-free surface. Ready for fresh flooring or a new look. Remember, safety first, and take your time.
Enjoy your project and the results.


