Are you tired of your old, worn-out floors and dreaming of a fresh, modern look for your home? Vinyl flooring might be the perfect solution for you.
It’s stylish, durable, and surprisingly easy to install. Imagine transforming your space without the hassle and expense of hiring professionals. In this guide, you’ll discover the simple steps to put down vinyl flooring yourself, saving money and gaining the satisfaction of a job well done.
Don’t let the fear of DIY projects hold you back; with the right guidance, you can achieve stunning results and enjoy a beautiful new floor. Keep reading to learn how you can make your home makeover dreams a reality.
Choosing The Right Vinyl Flooring
There are three main types of vinyl flooring: sheet vinyl, vinyl tiles, and luxury vinyl planks. Each type has its own special features. Sheet vinyl is great for covering large areas. It is water-resistant and easy to clean. Vinyl tiles look like ceramic or stone tiles. They are easy to replace if damaged. Luxury vinyl planks mimic real wood. They are durable and look beautiful.
| Type | Pros | Cons |
|---|---|---|
| Sheet Vinyl | Water-resistant, Easy to clean | Can be hard to install |
| Vinyl Tiles | Easy to replace, Affordable | Seams can trap dirt |
| Luxury Vinyl Planks | Durable, Looks like wood | More expensive than tiles |
Gathering Necessary Tools And Materials
To start, gather a few important tools. You will need a tape measure to check the room size. A utility knife is needed for cutting the vinyl. Get a straightedge to guide your cuts. Use a notched trowel for spreading glue. A seam roller is useful for pressing down seams.
Have some extra vinyl planks on hand. You might make mistakes. Keep a pencil and chalk line to mark cutting lines. Adhesive is needed for sticking the vinyl. A floor roller helps make the vinyl flat. Safety goggles protect your eyes while cutting.
Preparing The Subfloor
Start by removing all dust and dirt. Use a broom or vacuum. Check every corner. It’s important for the vinyl to stick well. Sticky floors are not good for vinyl. A clean surface helps the vinyl last long.
Look for any cracks or holes. These can cause problems. Fill them with a good floor filler. Let it dry completely. This step makes the floor smooth. A smooth floor is key for vinyl. It helps the vinyl lay flat.
Check if the floor is level. Use a level tool. If it’s uneven, sand the high spots. Add filler to low spots. This step is important. It stops bumps under the vinyl. A flat floor makes walking safe and easy.
Measuring And Planning Layout
Accurate measurements ensure a perfect fit for vinyl flooring. Start by determining room dimensions and marking guidelines. This careful planning helps in laying the vinyl smoothly, avoiding gaps and overlaps.
Accurate Room Measurements
Measure each wall carefully. Use a tape measure for accuracy. Record each measurement. Make sure to measure in feet and inches. This helps avoid mistakes. Check corners and odd angles. Write down these measurements. Double-check to ensure correctness.
Creating A Layout Plan
Draw a simple sketch of the room. Use a pencil and paper. Mark doors and windows on the plan. Include all room features. Decide the direction of the vinyl planks. This affects the look of the floor. Plan starting point near a wall. Ensure even spacing of planks. Consider any cuts needed. Prepare for any obstacles or fixtures.
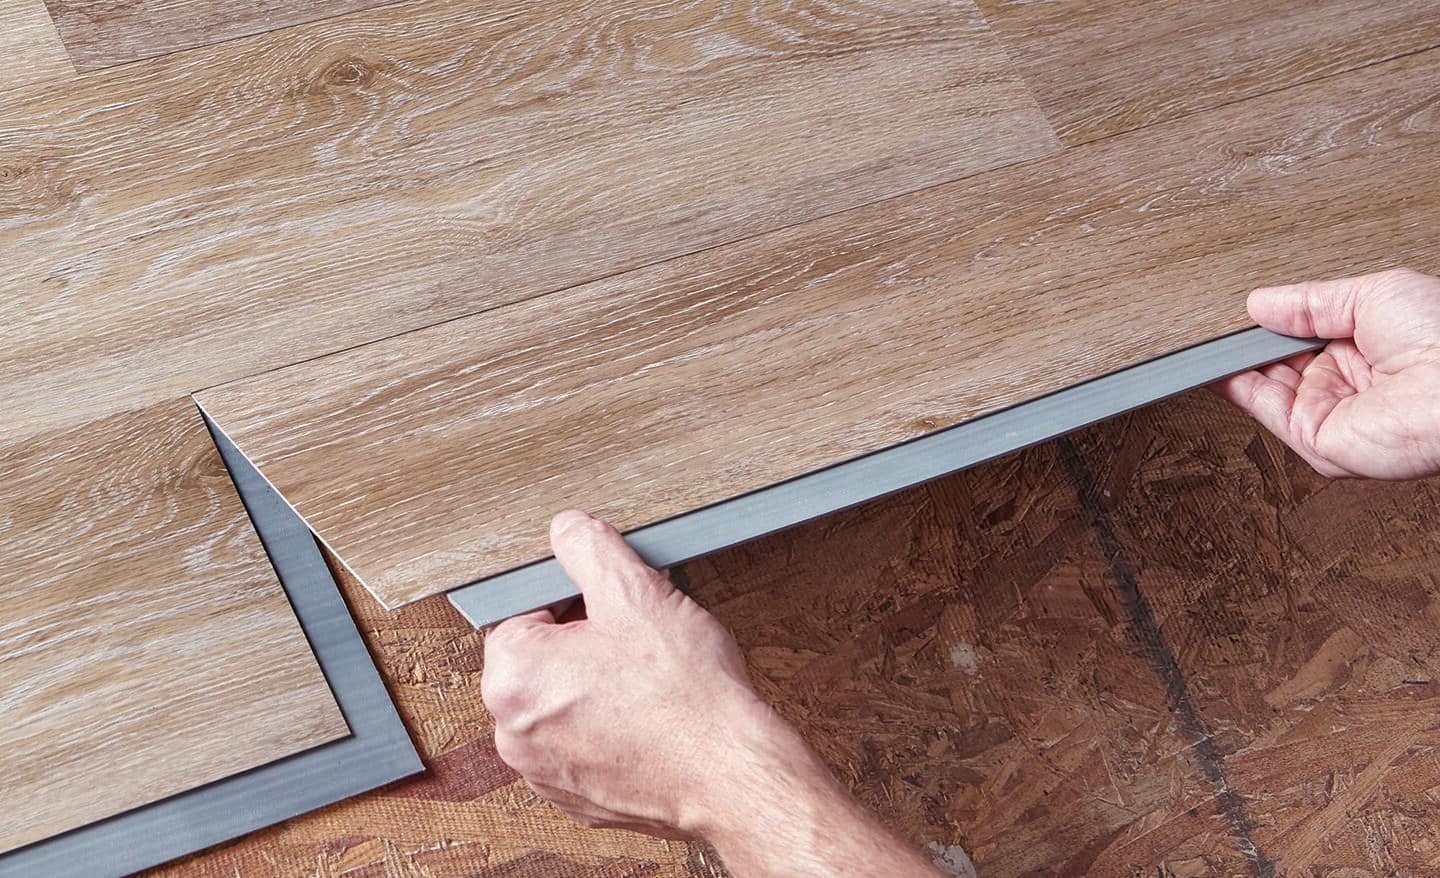
Cutting Vinyl Flooring
Cutting vinyl needs the right tools. The most important tool is the utility knife. It is sharp and perfect for precise cuts. A straight edge helps guide your knife. It keeps the lines straight. Scissors are useful for small trims. They are handy for detailed work. A tape measure ensures correct size. It helps measure before cutting. Pencil marks guide your cut. They are easy to erase if wrong.
Cutting vinyl requires care. Always measure twice. Cut once. This saves time and mistakes. Use a straight edge. It helps keep cuts straight. Press the knife gently. Avoid cutting too deep. Deep cuts can damage floors. Move the knife slowly. Fast cuts can slip. Slip cuts are bad. Keep hands steady. Shaky hands make crooked lines. Double check before cutting. Correct any mistakes first.
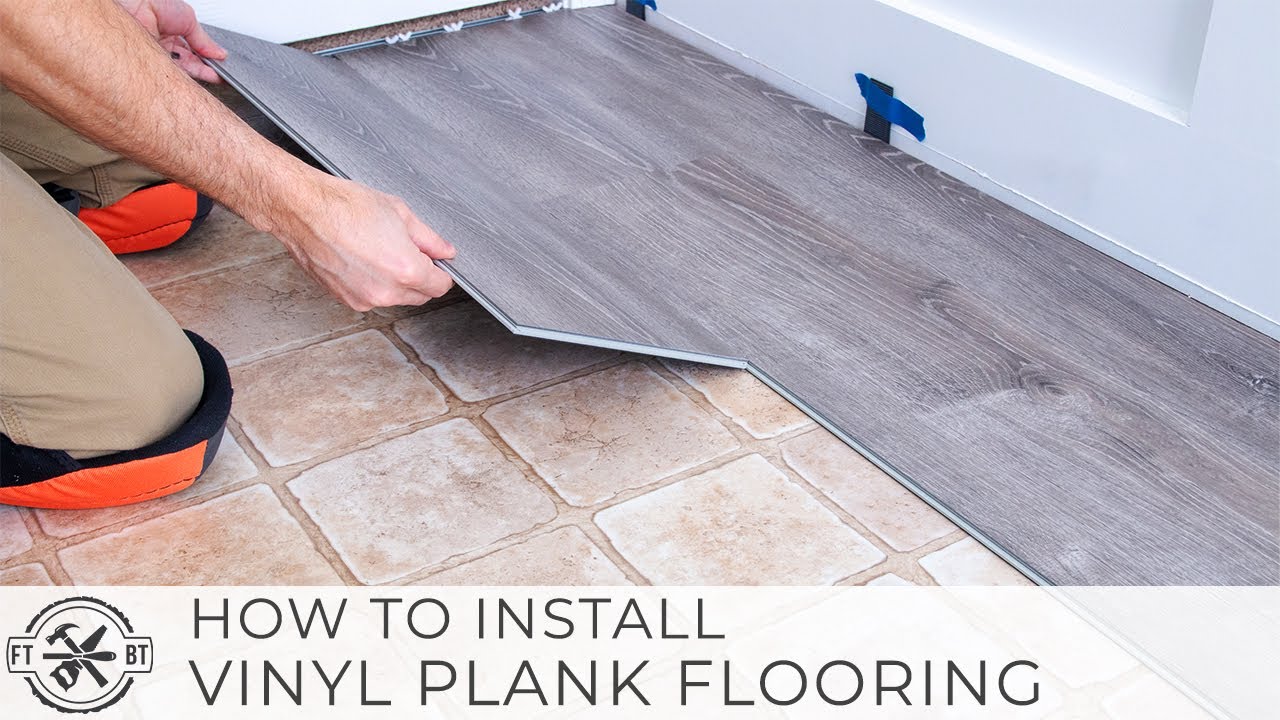
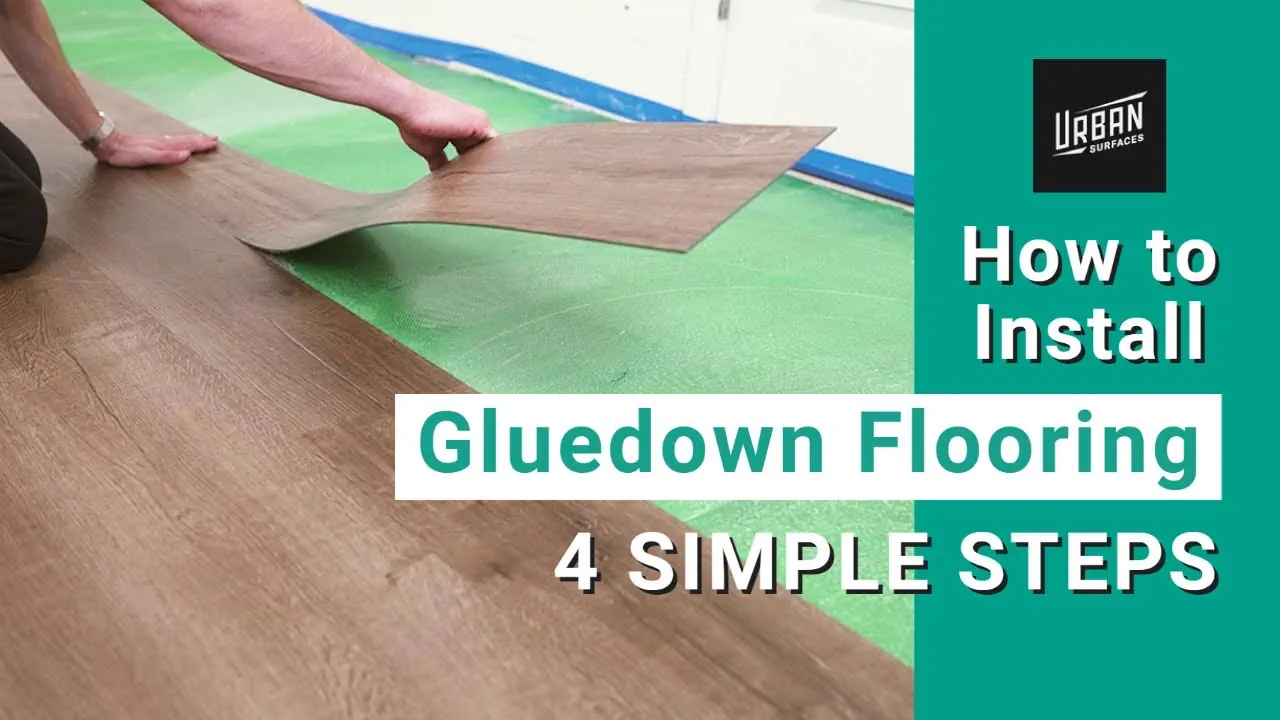
Installing The Vinyl Flooring
Begin in the room’s center. This ensures even edges. Measure the room’s length and width. Find the middle point. Mark it with chalk. This will be your starting point. Align the first plank or sheet here. Work outwards from the center.
Lay each plank or sheet carefully. Press them firmly against the floor. Use a roller to smooth them out. This removes air bubbles. Check that each piece fits snugly. Avoid gaps between them.
Cut vinyl to fit around pipes or corners. Use a sharp knife for clean edges. Measure before cutting to avoid mistakes. Fit the vinyl around obstacles carefully. Ensure it lies flat. Secure with adhesive if needed. This keeps the vinyl in place.
Finishing Touches
Adding the final touches to vinyl flooring ensures a polished look. Trim any excess material and secure edges. Use a roller to smooth out bubbles for a seamless finish.
Trimming Excess Material
Cut the extra vinyl along the edges. Use a sharp cutter for this. Keep a steady hand while trimming. This ensures a neat look. The edges should align with the walls perfectly. Be careful not to cut too much. Always measure twice before cutting. It helps in avoiding mistakes.
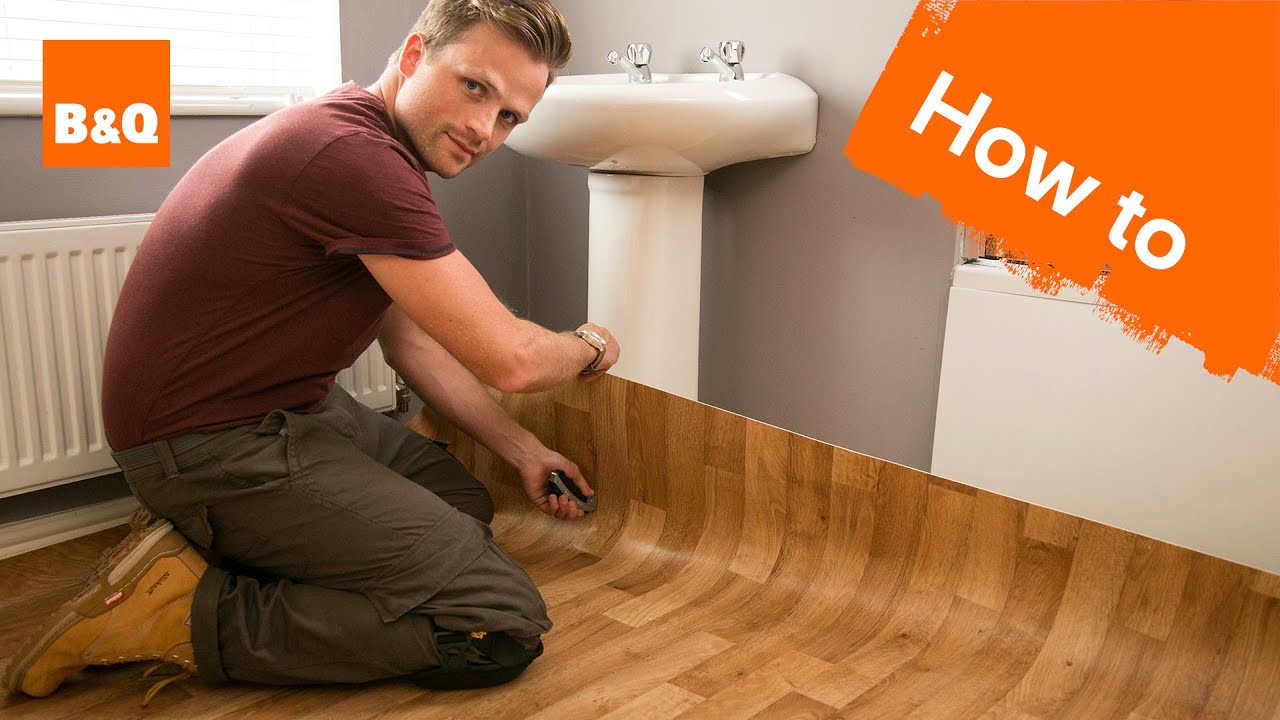
Installing Baseboards
Baseboards give a clean finish. They cover gaps between the floor and wall. Choose a style that matches your room. Use nails or glue to fix them. Ensure they are straight and even. This enhances the room’s appearance. Baseboards protect walls from damage.
Cleaning And Maintenance Tips
Keep your vinyl floor clean for a longer life. Sweep daily to remove dust. Use a damp mop for deeper cleaning. Avoid harsh chemicals on the floor. They can damage the surface. Use mild soap for stains. Dry the floor after mopping. This prevents slips and falls.
Frequently Asked Questions
What Tools Do I Need For Vinyl Flooring?
To install vinyl flooring, you’ll need a utility knife, measuring tape, straightedge, and a roller. A notched trowel is essential for adhesive application. Keep a chalk line handy for accurate layout. Ensure you have safety gear like gloves and knee pads for protection.
Proper tools make installation efficient and precise.
How Do I Prepare The Subfloor?
Ensure your subfloor is clean, dry, and smooth before installation. Remove debris and repair any imperfections. Use a moisture barrier if necessary. Ensure the subfloor is level, as uneven surfaces can affect vinyl placement. A well-prepared subfloor ensures a smooth, long-lasting vinyl floor installation.
Can I Install Vinyl Over Existing Flooring?
Yes, you can install vinyl over existing flooring if it’s smooth and in good condition. Ensure the surface is level and free of damage. Remove any loose tiles or repair imperfections. Use an appropriate underlayment if required. Proper preparation ensures a successful vinyl flooring installation over existing floors.
How Do I Cut Vinyl Flooring?
To cut vinyl flooring, use a sharp utility knife and a straightedge. Score the vinyl with firm pressure. Bend the material to snap along the scored line. For detailed cuts, use scissors or a jigsaw. Always measure twice to ensure accuracy.
Proper cutting techniques ensure clean and precise vinyl flooring installation.
Conclusion
Vinyl flooring is a practical choice for any home. It’s affordable and durable. Installation can be simple with the right tools and steps. Start by preparing your floor surface. Ensure it’s clean and smooth. Measure the room carefully. Cut your vinyl pieces to fit snugly.
Use adhesive wisely. Press down firmly to secure each piece. Trim edges for a polished look. Allow time for the floor to settle. With patience and attention to detail, vinyl flooring can transform your space beautifully. A rewarding DIY project, indeed! Enjoy your new, stylish floor.


