Have you been staring at your worn-out hardwood floors, wondering how to bring them back to life? Whether it’s scratches, dullness, or stains, these imperfections can make your living space feel less inviting.
But there’s good news: you don’t need to live with tired flooring. Redoing your hardwood floors is an achievable project that can transform your home and elevate its charm. Imagine walking across a gleaming surface that revitalizes the look of your entire room.
We’ll guide you through simple steps and smart tips that can help you achieve this transformation. Dive in to discover how you can easily breathe new life into your hardwood floors and create a stunning space that you’ll love.
Preparing The Workspace
Move all furniture and decor out of the room. This makes space for your work. Use a vacuum to clean the floor. Ensure no dust or debris is left behind. A clean room is a safe room.
Wear a mask to keep dust away from your nose. Put on gloves to protect your hands. Wear goggles to keep your eyes safe. These items keep you safe while working.
Assessing The Floor Condition
Look for scratches and dents. These can harm the floor. Water can also cause stains. Mold may grow in damp spots. Check edges and corners closely. They might hide damage.
Some floors may have faded areas. These spots need attention. Look for warped or buckled boards. They can be dangerous. Listen for creaks. They can mean loose boards.
Hardwood comes in many types. There is oak, maple, and cherry. Each has a unique look. Identify the grain pattern. It helps in knowing the type. Check the floor’s color. Some woods are dark. Others are light.
Use a magnifying glass if needed. This helps see the wood better. Ask an expert if unsure. Proper identification is important. It affects how you redo the floor.
Gathering Essential Tools
Gathering essential tools ensures your hardwood floor redo is smooth and efficient. Basic tools include a sander, scraper, and safety gear. Equip yourself with these to transform your floors with ease.
Sanding Equipment
Choosing the right sanding equipment is important. Use a drum sander for large areas. It helps in removing old finish fast. A belt sander works well for smaller spaces. It reaches corners and edges easily. Always have sandpaper of different grits. Start with coarse, move to medium, finish with fine. This ensures a smooth floor.
Finishing Supplies
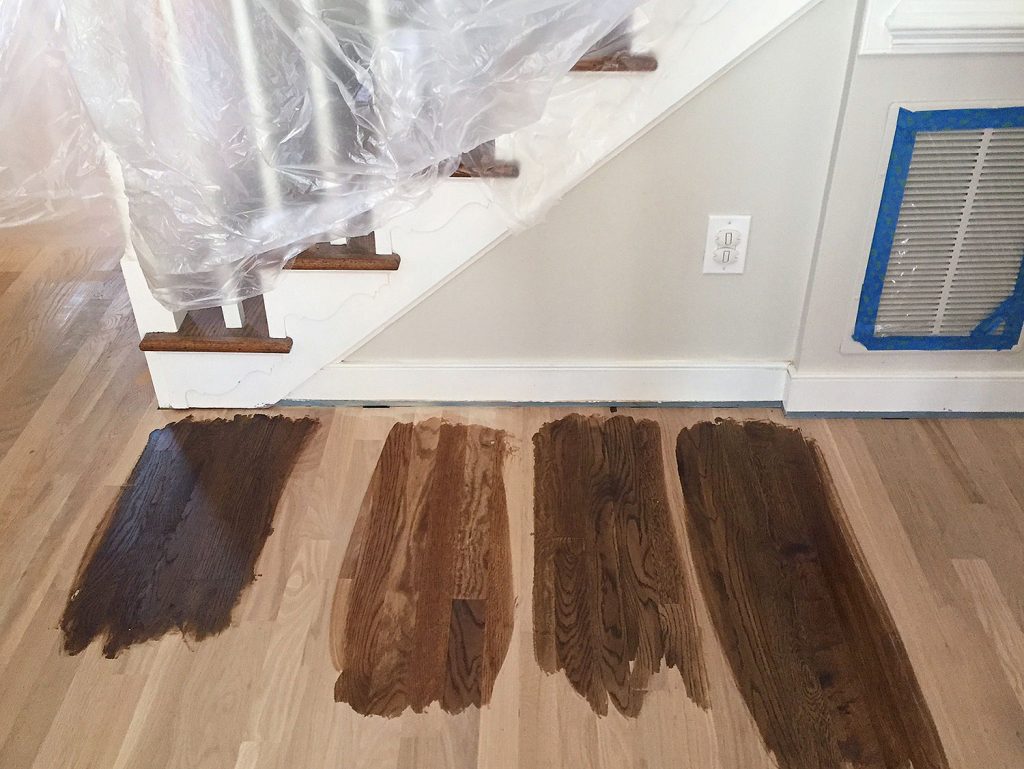
Finishing supplies make floors look new and shiny. Get a quality wood stain. It adds color and enhances the wood’s look. Use a polyurethane finish for protection. It makes the floor last longer. Brushes and rollers are needed for applying the finish. Always have a clean cloth to wipe excess stain.
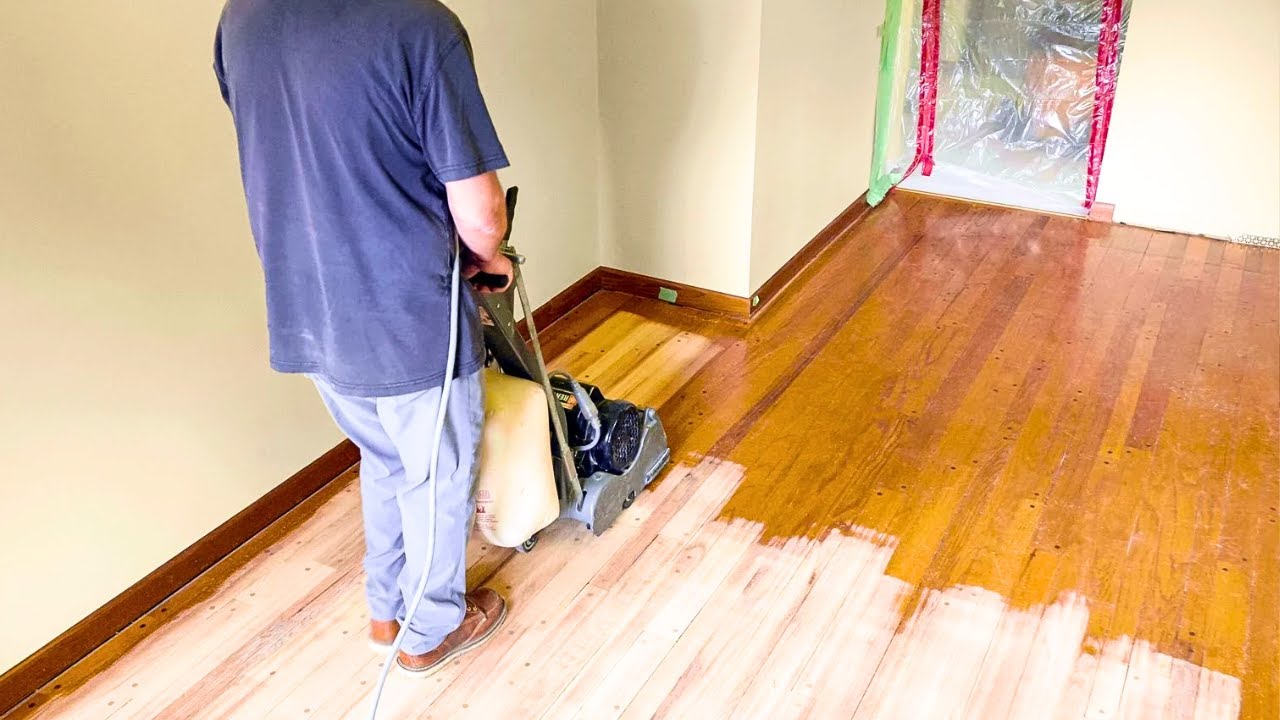
Sanding The Floors
Refreshing hardwood floors starts with sanding. This process removes old stains and smooths the surface. The result? A clean base ready for a new finish.
Choosing The Right Sandpaper
Picking the correct sandpaper is crucial. Different grits serve different purposes. Coarse grits remove old finishes. Medium grits smooth surfaces. Fine grits give a polished look. Start with coarse sandpaper. Work your way to fine. This method ensures a smooth finish. Sandpaper quality also matters. Invest in good quality sandpaper for better results. Cheap sandpaper can tear easily. It may not work well on hardwood. Choose wisely for best results.
Techniques For Even Sanding
Sanding evenly is important. Uneven sanding can ruin floors. Use a sanding machine for large areas. Move it steadily over the surface. Hand sanding is good for corners. Keep pressure even. Don’t press too hard. This avoids scratches. Check your progress often. Look for smoothness. Feel the surface with your hand. Make sure it’s even. Repeat if needed. A smooth floor looks beautiful.
Cleaning Up Dust And Debris
Start with a strong vacuum. Make sure it has a soft brush. Go over each section slowly. This helps remove all dust. Pay attention to corners and edges. They often hide dirt. Empty the vacuum when full. This keeps it working well. Repeat the process if needed. Clean floors are important.
Use a damp cloth for the next step. Make sure it’s not too wet. Water can damage wood. Wipe the floor gently. This removes leftover dust. Rinse the cloth often. This keeps it clean. Let the floor air dry after wiping. This step keeps your floor spotless.
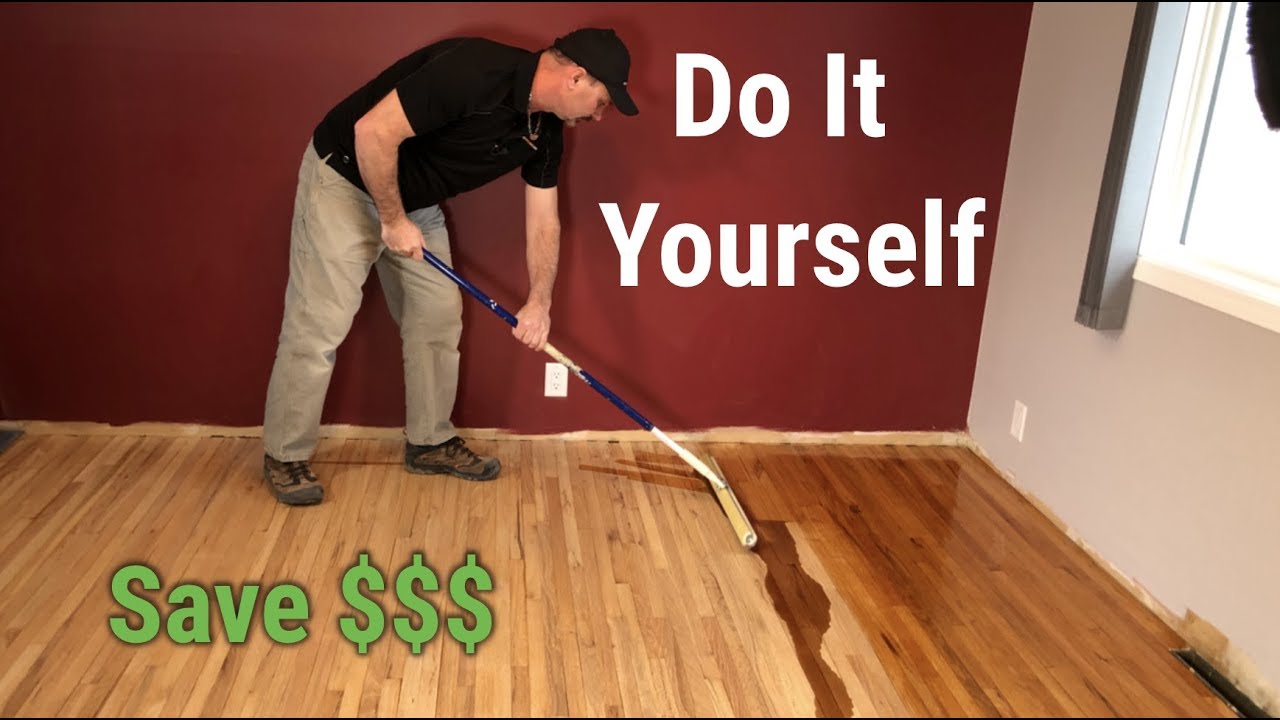
Applying The Finish
Picking the best finish is important. It protects your hardwood floors. Oil-based finishes are durable and give a warm look. They dry slowly, so be patient. Water-based finishes dry fast and have low odor. They keep the natural color of the wood. For a shiny look, choose a polyurethane finish. It is strong and lasts long. Wax finishes offer a soft glow but need regular care. Always read labels for safe use.
Use a brush or roller for the finish. Brushes work well for corners. Rollers are better for large areas. Apply the finish in thin coats. This helps it dry evenly. Wait for each coat to dry. Sand lightly between coats. It makes the surface smooth. Clean the floor before applying the next coat. This removes dust and dirt. Follow the instructions on the finish for best results.
Drying And Curing
Ventilation is key for drying floors. Open windows and doors. Use fans to move air. This helps the floors dry well. It stops mold and bad smells. Fresh air is very important. It keeps the room healthy.
Floors need time to dry. Be patient. Wait at least 24 hours. Sometimes, it takes longer. Weather can change drying time. Don’t rush the process. Proper drying makes floors last longer.
Final Touches
Refining the final touches brings new life to hardwood floors. Sanding removes scratches, revealing fresh wood underneath. Applying a protective finish adds shine and guards against wear, ensuring a beautiful, durable surface.
Inspecting The Finished Floor
After finishing, check every part of the floor. Look for any scratches or uneven spots. Make sure the floor is smooth and shiny. Use a flashlight to see better. This helps spot tiny flaws. Fix any issues you find right away. This keeps the floor looking its best. A careful inspection ensures your hard work pays off. A perfect floor is the goal.
Reinstalling Furniture
Before moving furniture back, clean each piece. This prevents dirt from scratching the floor. Use pads under furniture legs. This protects the floor from marks. Place rugs in high-traffic areas. Rugs help keep the floor nice. Move furniture gently to avoid damage. Arrange the room as you like. Enjoy the fresh look of your redone floors. Your space feels new and inviting.
Maintenance Tips
Clean floors with a soft broom. Dust every day to keep them shiny. Use a damp mop weekly. Dry the floor well after mopping. Avoid harsh cleaners that can damage floors. Use a gentle cleaner safe for wood. Sweep up crumbs and dirt quickly. Protect the finish.
Place rugs in high traffic areas. Furniture pads help prevent scratches. Trim pet nails to avoid floor marks. Wipe spills right away to stop stains. Avoid dragging heavy items across the floor. Direct sunlight can fade wood. Use curtains to block sun.

Frequently Asked Questions
How Do I Prepare Hardwood Floors For Refinishing?
Start by clearing the room of furniture and rugs. Clean the floor thoroughly to remove dust and debris. Sand the floor using a drum sander, ensuring an even surface. Vacuum the dust and wipe the floor with a damp cloth.
Apply a wood stain or finish as desired.
What Tools Are Needed To Redo Hardwood Floors?
You’ll need a drum sander, edge sander, and sandpaper. A vacuum and damp cloth are essential for cleaning. A paintbrush or roller will help apply stain or finish. Safety gear like goggles and masks are also important. Gather these tools before starting the refinishing process.
How Long Does It Take To Refinish Hardwood Floors?
The refinishing process typically takes three to five days. Sanding the floor is usually the most time-consuming step. Applying stain or finish requires drying time, which varies based on product instructions. Ensure good ventilation to speed up drying. Plan accordingly to avoid disruptions.
Can I Refinish Hardwood Floors Without Sanding?
Yes, it’s possible to refinish without sanding by using a chemical etcher. Clean the floor thoroughly before applying the etcher. This method is quicker and less messy. However, it may not remove deep scratches or stains. Consider this option for lightly worn floors.
Conclusion
Redoing hardwood floors brings new life to your home. The process can be simple with careful steps. Sanding removes old finish, revealing fresh wood. Staining adds color, enhancing natural beauty. Sealing protects against wear and tear. DIY saves money, but experts ensure precision.
Regular care keeps floors looking great longer. Avoid heavy furniture dragging to prevent scratches. Proper maintenance extends the floor’s lifespan. Enjoy the transformation. Your home feels refreshed. A space you truly love. Remember to follow safety guidelines for best results.
Embrace the satisfaction of a job well done. Happy flooring renovation!


