Imagine walking across your beautiful wooden floor, feeling proud of its elegance and charm. But then, you notice those pesky gaps.
They can be quite distracting, can’t they? These gaps not only disrupt the seamless look of your flooring but can also become a trap for dust and dirt. Luckily, you’ve come to the right place to find a solution. You’ll discover simple, effective methods to fill those gaps and restore the beauty of your floors.
Whether you’re a seasoned DIY enthusiast or a beginner looking to tackle this task for the first time, you’ll find tips tailored just for you. Ready to transform your floors from flawed to flawless? Keep reading to learn how to bring back the smooth, polished look you love.
 Flooring: Expert Tips”/>
Common Causes Of Gaps
Wooden floors can have gaps. One cause is temperature changes. Wood expands in heat. It shrinks in cold. This movement makes gaps. Another reason is moisture levels. High moisture causes wood to swell. Low moisture makes it shrink. Gaps appear when wood moves. Poor installation is another cause. If the floor is not installed well, gaps form. It’s important to maintain wooden floors. Regular care can help prevent gaps. Gaps may also occur with age. Older floors are more likely to have gaps. They have seen many seasons and changes. Understanding these causes helps in fixing gaps.

Tools And Materials Needed
First, gather all the needed tools. You’ll need a putty knife. It’s for applying filler. A sander is important too. It smoothens the floor after filling. A good quality wood filler is crucial. Choose one that matches your floor color. Keep a damp cloth handy. It helps in cleaning excess filler. You also need sandpaper. It helps in smoothing small areas.
Don’t forget a vacuum cleaner. It removes dust and debris. Also, have a protective mask. It keeps you safe from dust. Gloves protect your hands while working. Lastly, a bucket of water is useful. It’s for cleaning tools.
Preparing The Floor
Filling gaps in wooden flooring enhances durability and appearance. Start by cleaning the floor thoroughly. Use wood filler or rope for larger gaps to ensure a seamless look.
Cleaning The Surface
Dust and dirt hide in gaps. Sweep the floor with a broom. Use a vacuum for deeper cleaning. Mop the floor to remove sticky dirt. Use a gentle cleaner. Let the floor dry completely before moving on.
Inspecting For Damage
Check for broken wood pieces. Look for scratches or dents. Feel the surface with your hand. Mark damaged spots with tape. These need special care. Repair them first before filling gaps.
Filling Small Gaps
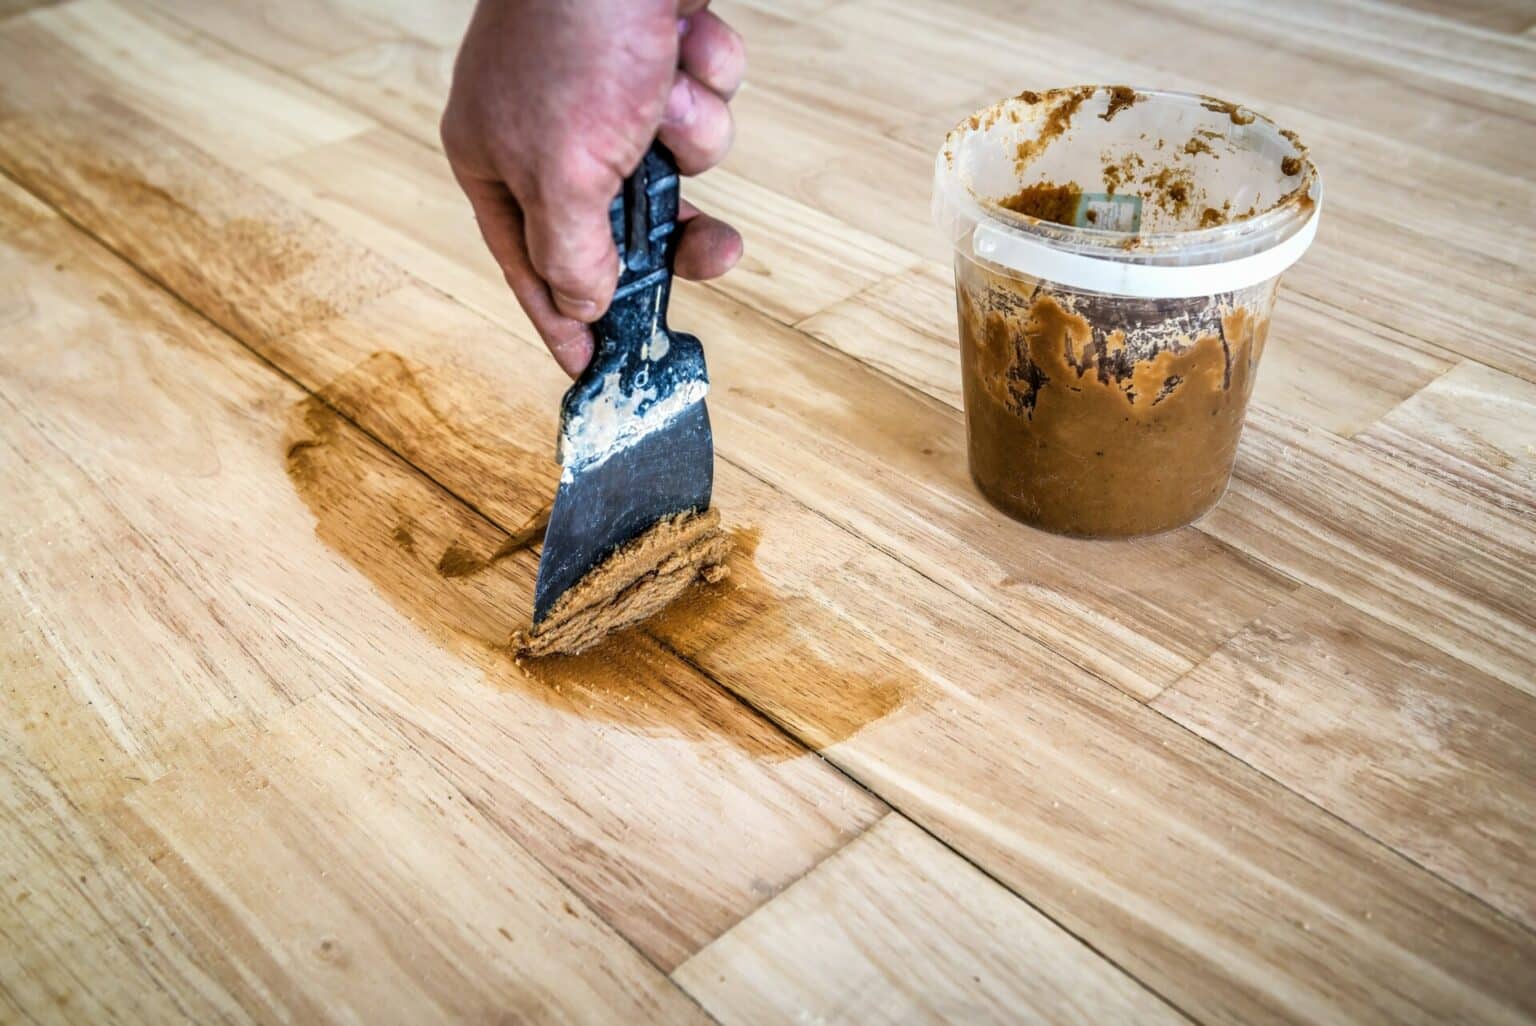
Wood filler helps in covering small gaps. It comes in different colors. Choose a color that matches your floor. Clean the gap first. Make sure no dirt is inside. Apply the filler with a putty knife. Press it down to fill the gap. Smooth the surface with the knife. Let it dry completely. Sand the area lightly. This makes the surface even. Finally, clean the dust away.
Rope filler is good for bigger gaps. Measure the gap’s width. Cut the rope to fit the gap. Push the rope into the gap. Use a tool to make it tight. Ensure the rope is level with the floor. Apply wood glue on top. This holds the rope in place. Let the glue dry fully. This method is simple and effective.
Addressing Large Gaps
Large gaps in wooden floors can be tricky. But wood strips can help. First, measure the gap width. Cut wood strips to fit the gap. They should be a little bigger. This helps them fit tight. Apply wood glue to the strip. Then, place it in the gap. Make sure it fits snug. Let the glue dry well. Finally, sand the strip. This makes it smooth. Your floor will look better now.
Epoxy and sawdust can fill gaps too. Mix sawdust with epoxy. Use sawdust from your floor. This matches the color. Stir until it looks like paste. Use a putty knife to fill the gaps. Press the mix into the gap. Smooth the surface with the knife. Let it dry completely. Sand the area once dry. This makes it even with the floor. Your floor will now look seamless.

Finishing Touches
Use a sander to make the floor smooth. Move the sander over the floor gently. Make sure to cover all areas. Check the floor for bumps or rough spots. Sand these spots again if needed. Wear a mask to avoid breathing in dust.
First, clean the floor with a soft cloth. Make sure there is no dust. Next, use a brush to apply the sealant. Spread it evenly on the floor. Let it dry for a few hours. Check if another coat is needed. Sealant helps protect the wood and keeps it shiny.
Preventing Future Gaps
Wood needs proper care. Keeping a constant level of humidity is key. Wood floors love 45% to 55% humidity. Use a humidifier in dry months. A dehumidifier helps in wet months. Check humidity with a simple tool. It’s called a hygrometer. You can buy it online or in stores. Healthy wood stays beautiful and strong.
Inspect your floors every few months. Look for any gaps or cracks. Small gaps can get bigger over time. Fixing small issues early saves money. Walk on your floor and listen. Any strange sounds? That could be a sign. Use a flashlight to see better. A careful look keeps your floor in good shape.
When To Seek Professional Help
Gaps in wooden flooring can be tricky. Some gaps are too wide. Others keep appearing after fixing. These signs might mean it’s time for a pro. Professionals know how to handle big problems. They have special tools. They use high-quality materials. This ensures a perfect fit.
Sometimes, the floor is uneven. This is hard to fix alone. Experts can smooth it out. Water damage is another issue. It can cause wood to warp. Professionals know how to treat it. Their help saves time and stress. They make sure your floor looks great. Their work lasts longer.
Frequently Asked Questions
What Are Common Causes Of Gaps In Wooden Flooring?
Gaps in wooden flooring often result from humidity changes, causing wood to expand or contract. Seasonal temperature fluctuations can also lead to gaps. Poor installation or subfloor issues might contribute to these spaces. Addressing the root cause is vital for effective repair.
Regular maintenance can help prevent future gaps.
How Can I Fill Gaps In Wood Floors?
To fill gaps, use wood filler or wood strips. Clean the gaps before application. Choose a filler that matches your floor’s color. Apply the filler with a putty knife, smoothing it out. Allow it to dry completely before sanding lightly.
Finish with a sealant for durability.
Is It Necessary To Sand After Filling Gaps?
Yes, sanding is necessary after filling gaps to achieve a smooth finish. It helps level the surface and removes excess filler. Sanding ensures the filled gaps blend seamlessly with the rest of the floor. Use fine-grit sandpaper for best results, followed by a protective sealant.
Can Humidity Control Prevent Flooring Gaps?
Yes, controlling humidity can significantly prevent wooden floor gaps. Use a humidifier during dry months to maintain optimal moisture levels. In humid seasons, a dehumidifier helps reduce excess moisture. Consistent temperature and humidity levels help keep wooden floors stable, minimizing the risk of gaps over time.
Conclusion
Filling gaps in wooden flooring isn’t hard. Anyone can do it. Follow steps for a smooth result. Use quality materials for long-lasting effects. Ensure your floor remains strong and appealing. Regular checks prevent future damage. Wooden floors need care. Filling gaps restores beauty and function.
Don’t rush the process. Take your time. Enjoy the refreshed look of your wooden floor. Consistent maintenance keeps floors looking new. A little effort goes a long way. Keep your home warm and elegant. Wooden floors add charm and value.
Make them last with proper care.


