Are you ready to transform your shower space without the hassle of installing a shower pan? Tiling a shower floor without a pan might sound daunting, but it can be a rewarding project that adds a sleek, modern touch to your bathroom.
Imagine stepping into a beautifully tiled shower that you designed yourself. With the right guidance, you can achieve this look without the need for professional intervention, saving both time and money. This blog post will walk you through the process, breaking it down into simple steps that anyone can follow.
You’ll learn the essential tools and techniques to ensure your tiles are laid perfectly, giving you a durable and stunning shower floor. Picture the satisfaction of admiring your handiwork every day, knowing that you tackled a project many shy away from. Keep reading to discover how you can turn your bathroom into a personal oasis, impressing yourself and everyone who sees it. Let’s dive in and uncover the secrets to tiling a shower floor without a pan!
Essential Tools And Materials
Tiling a shower floor needs specific tools. A trowel is vital for spreading mortar. Tile spacers help keep tiles evenly spaced. A tile cutter allows precise cutting. A level ensures the floor is even. A rubber mallet is necessary to tap tiles gently. Safety goggles protect your eyes while cutting tiles. Knee pads keep your knees comfortable.
Materials are crucial too. Tiles are the main material. Mortar acts like glue for tiles. Grout fills gaps between tiles. Sealer protects tiles and grout. Underlayment supports tiles and prevents cracks. Waterproof membrane keeps water away. Backer board provides a stable base. Tape measure helps check tile distances.
Preparing The Shower Base
First, remove any old tiles and debris. Use a broom to sweep the area. Check the surface for any cracks or holes. Fix these with a patching compound. Make sure the area is dry and smooth. This helps the tiles stick better. Clean the surface with soap and water. Let it dry completely before moving on.
Apply a waterproof membrane to the base. This stops water from leaking. Roll out the membrane carefully. Smooth out any bubbles with a flat tool. Use a waterproof tape on the edges. Seal all corners and seams tightly. Let the membrane dry for at least 24 hours. This ensures a strong waterproof layer.
Choosing The Right Tiles
Pick tiles that are water-resistant and durable. Ceramic and porcelain tiles are good choices. Natural stone tiles look nice but need more care. Think about the tile size. Smaller tiles may fit better on a shower floor. Large tiles might need more cuts.
Choose a design that fits the bathroom look. Simple designs can make the space feel calm. Bright colors can make it look lively. Textured tiles help prevent slipping. Make sure the tiles have non-slip surfaces. Patterns can add a unique touch. But, they might be harder to install.

Creating A Slope For Drainage
Proper drainage keeps the shower floor safe. Water can flow easily with a slope. It stops water from pooling. Standing water can cause problems. Tiles may crack. Mold can grow. The shower may smell bad. A good slope keeps water moving. This helps the shower stay clean and fresh.
Different methods create a slope. Use a cement base. Shape it with a trowel. Make sure it’s smooth. Fiberglass mesh can help. Lay it on the cement. It adds strength. Another way is using a pre-slope kit. These kits are easy to use. Follow the instructions carefully. They can help make a perfect slope.
Tile Layout Planning
Begin by measuring the shower floor carefully. This helps you know how many tiles you will need. Use a measuring tape to check the length and width. Mark these measurements with a pencil on the floor. This shows where each tile will go. Check your lines twice to be sure they are straight. Straight lines keep tiles even. Uneven tiles look messy.
Lay tiles on the floor without glue. This is called dry laying. It shows how tiles will look when finished. Adjust tiles to fit the space. Leave a small gap between tiles for grout. This helps water flow away. If a tile is too big, cut it to fit. Use a tile cutter for smooth edges. Dry laying helps you see if all tiles fit well.
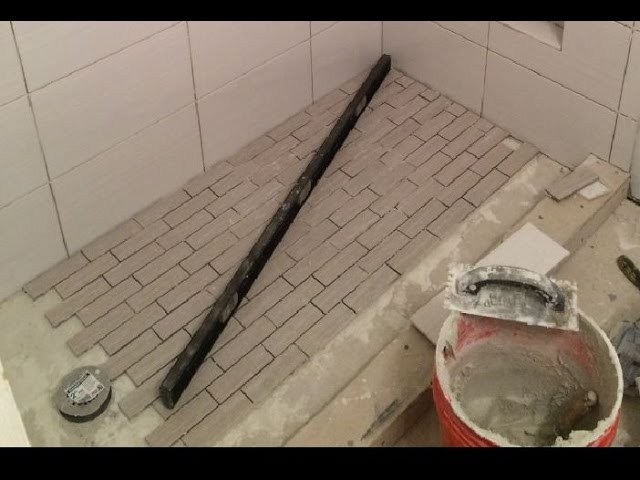
Installing The Tiles
Tiling a shower floor directly without a pan involves careful preparation. Ensure the surface is clean and level. Apply waterproof membrane before laying tiles, securing each one firmly. Use spacers for even grout lines and finish with grout to seal gaps.
Mixing And Applying Thinset
Thinset holds tiles in place. Start by mixing it correctly. Use a bucket and a mixing tool. Add water slowly to the thinset powder. Stir until it’s smooth and thick. Avoid lumps for a strong hold. Once mixed, apply it to the shower floor. Use a trowel for even spreading. Cover only small sections at a time. This prevents drying before placing tiles. Ensure a consistent layer for best results. Thinset should be about 1/4 inch thick. Too much or too little can cause problems.
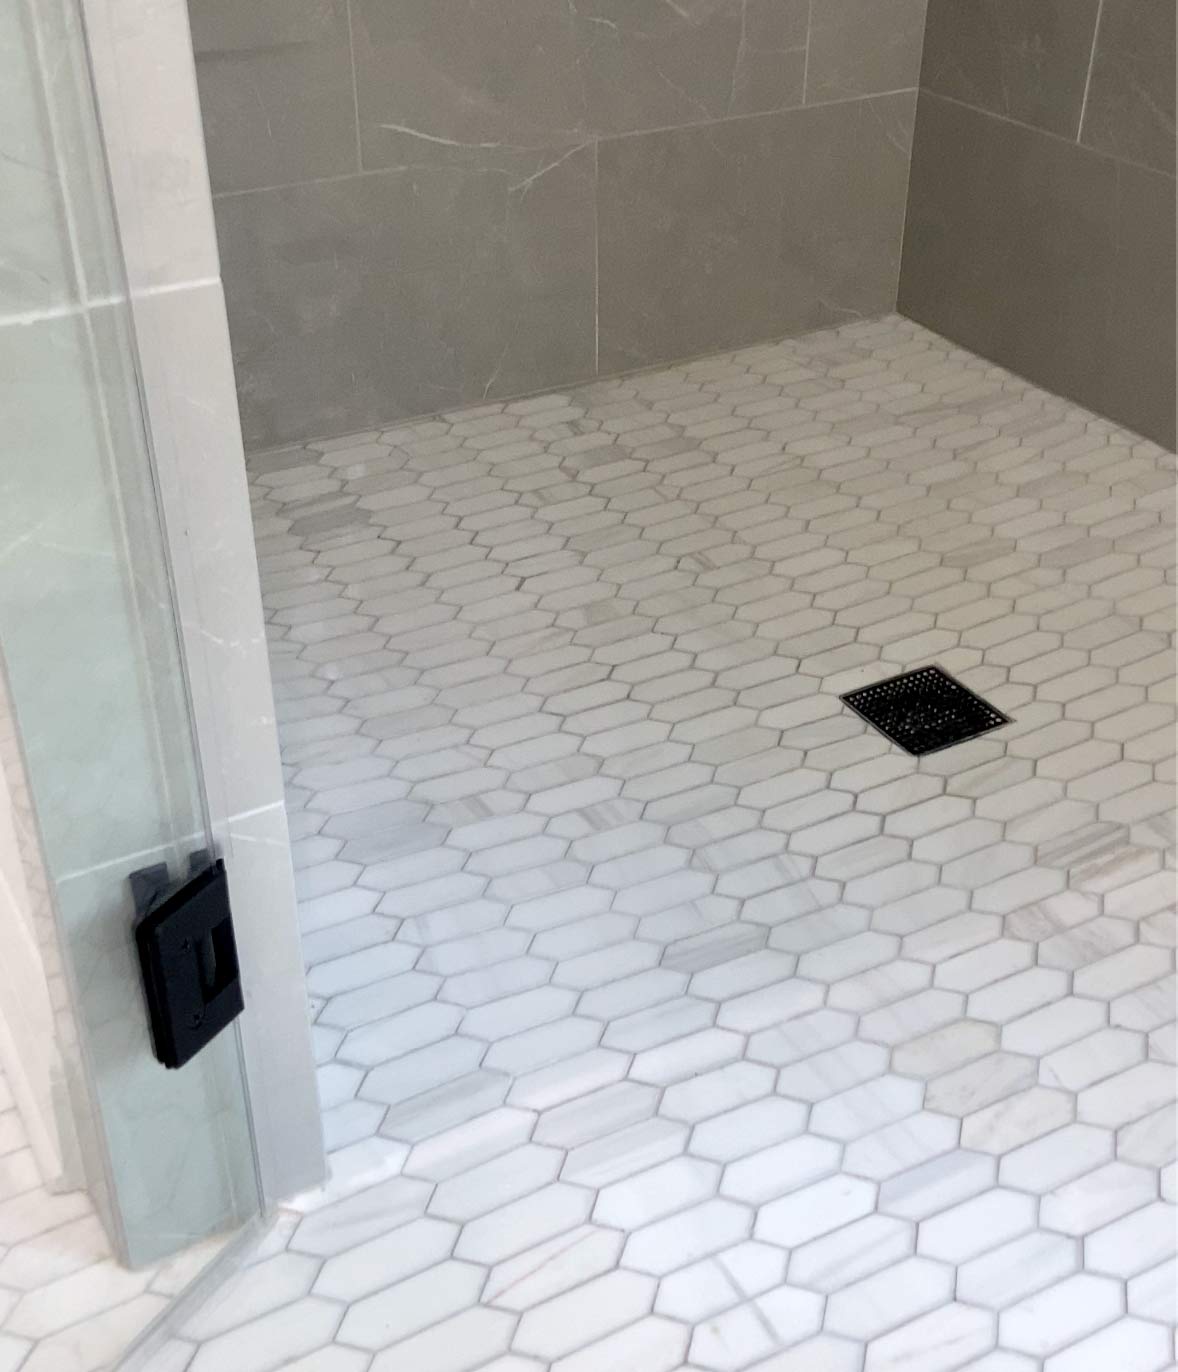
Setting The Tiles
Carefully place each tile on the thinset. Press firmly to secure it. Check alignment as you go. Use spacers to maintain gaps. This helps in grouting later. Work in rows for a neat finish. Avoid rushing; take your time. Ensure each tile is level. Adjust as needed to prevent uneven surfaces. Keep the area clean from excess thinset. Let the tiles set for 24 hours. This ensures a strong hold.
Grouting And Sealing
Picking the right grout is important. Grout fills the gaps between tiles. It comes in many colors. Choose a color that matches your tiles. Some grouts are water-resistant. These are best for shower floors. They keep water from seeping in.
Spread the grout with a rubber float. Make sure it fills all the gaps. Wipe away extra grout with a damp sponge. Let it dry for at least 24 hours.
After drying, apply a sealant. The sealant protects the grout. It keeps water and stains away. Use a brush or spray to apply it. Let the sealant dry completely. Follow the instructions on the sealant package.
Troubleshooting Common Issues
Tiling a shower floor without a pan often poses challenges. Ensure proper waterproofing to prevent leaks. Leveling the surface helps tiles adhere correctly, ensuring durability and aesthetics.
Dealing With Uneven Surfaces
Uneven floors make tiling hard. First, check the floor with a level tool. This shows where it’s not flat. Use a floor patch to fill low spots. Let it dry fully. Then, sand down any high spots. Smooth surfaces help tiles stick better.
Fixing Leaks
Leaks can ruin your work. First, find where the water escapes. Check the grout lines and tile edges. Seal these areas with waterproof sealant. Use enough to cover gaps well. Let the sealant dry before using the shower. Regular checks help stop future leaks.
Maintenance Tips
Tiling a shower floor without a pan requires careful surface preparation. Ensure the floor is level and waterproof. Use quality tile adhesive and grout for a durable finish. Regularly check your tiles for any signs of wear or damage.
Regular Cleaning
Cleaning your shower floor often keeps it looking nice. Use a mild soap and water. Scrub gently with a soft brush. Rinse well with clean water. Dry the surface with a towel. This stops water spots. Try to clean weekly for the best results. Avoid harsh chemicals. They can harm the tiles. Keep it simple for easy cleaning. Regular cleaning prevents buildup. Dirt and soap scum can stain tiles. Clean often to keep tiles bright and fresh. Regular cleaning saves time and effort.
Inspecting For Damage
Check tiles regularly for damage or cracks. Small cracks can grow. Fix them quickly. Look for loose tiles. Loose tiles can cause trips. Tighten them if needed. Check for mold or mildew. These can harm tiles. Use a gentle cleaner to remove them. Inspect grout lines too. Grout can crack over time. Fix any cracks to keep water out. Regular inspections keep your shower safe. Protect your tiles by checking often. This helps avoid big problems later.
Frequently Asked Questions
Can I Tile A Shower Floor Without A Pan?
Yes, you can tile a shower floor without a pan. Ensure the floor is waterproofed properly and has adequate drainage. Use a slope for effective water runoff. Choose tiles with slip-resistant properties for safety. Always follow building codes and professional guidelines for best results.
What Materials Are Needed For Tiling Without A Pan?
You’ll need waterproofing materials like a membrane, adhesive, grout, and tiles. Ensure the tiles are suitable for wet areas. A trowel and level are essential for installation. Use spacers for even tile placement. Always have a sponge and bucket for cleaning excess grout.
How Do I Ensure Proper Drainage?
Proper drainage requires a sloped floor directing water to the drain. The slope should be about 1/4 inch per foot. Ensure the drain is placed at the lowest point. Double-check that the waterproofing is intact around the drain to prevent leaks.
Is Waterproofing Necessary For Shower Floors?
Absolutely, waterproofing is crucial for shower floors. It prevents water damage and mold growth. Use a waterproof membrane or coating before laying tiles. Seal joints with waterproof sealant for added protection. Regularly check for leaks and maintain the waterproof layer.
Conclusion
Tiling a shower floor without a pan requires careful planning. Start with the right tools. Measure the space accurately. Choose suitable tiles for durability. Follow each step to ensure a waterproof finish. Take time to ensure tiles are laid evenly.
Regular checks prevent mistakes during installation. Proper grout application seals the tiles securely. Enjoy the satisfaction of a job well done. A tiled shower floor adds beauty and function. Your bathroom will feel fresh and new. Save money by doing it yourself.
Plus, learn a useful skill along the way. Happy tiling!


