Imagine transforming your space with a sleek, durable, and eye-catching floor that leaves a lasting impression. Epoxy flooring can do just that, and it’s easier than you might think to achieve professional-looking results on your own.
Whether you’re sprucing up your garage, basement, or commercial area, epoxy flooring offers a practical and stylish solution that stands the test of time. You might be wondering how to get started, what materials you’ll need, and the steps involved to ensure a flawless finish.
This guide is designed with you in mind, breaking down the process into simple, manageable steps. By the end of this article, you’ll have all the information you need to create a stunning epoxy floor that not only enhances your space but also boosts its value. Dive into this step-by-step tutorial, and discover how you can easily elevate your flooring game with epoxy.
Choosing The Right Epoxy Flooring
Epoxy flooring comes in different types. Each type has unique features. Water-based epoxy is easy to apply. It is good for DIY projects. Solvent-based epoxy is strong. It is often used in industrial spaces. 100% solids epoxy is very durable. It lasts for years.
Epoxy flooring has many color and design options. Choose from bold colors or neutral tones. Some options include metallic finishes. Others have simple patterns. You can even choose a custom design.
Durability is key with epoxy flooring. It can withstand heavy use. It is resistant to scratches and stains. This makes it perfect for high traffic areas. With proper care, it lasts many years. Regular cleaning keeps it looking new.
:strip_icc()/using-power-scrubber-concrete-floor-no-text-8kAPuiNq4g18PgCXFAk8D_-5bb0e32a32244746bb59a7ebae94334c.jpg)
Essential Tools And Materials
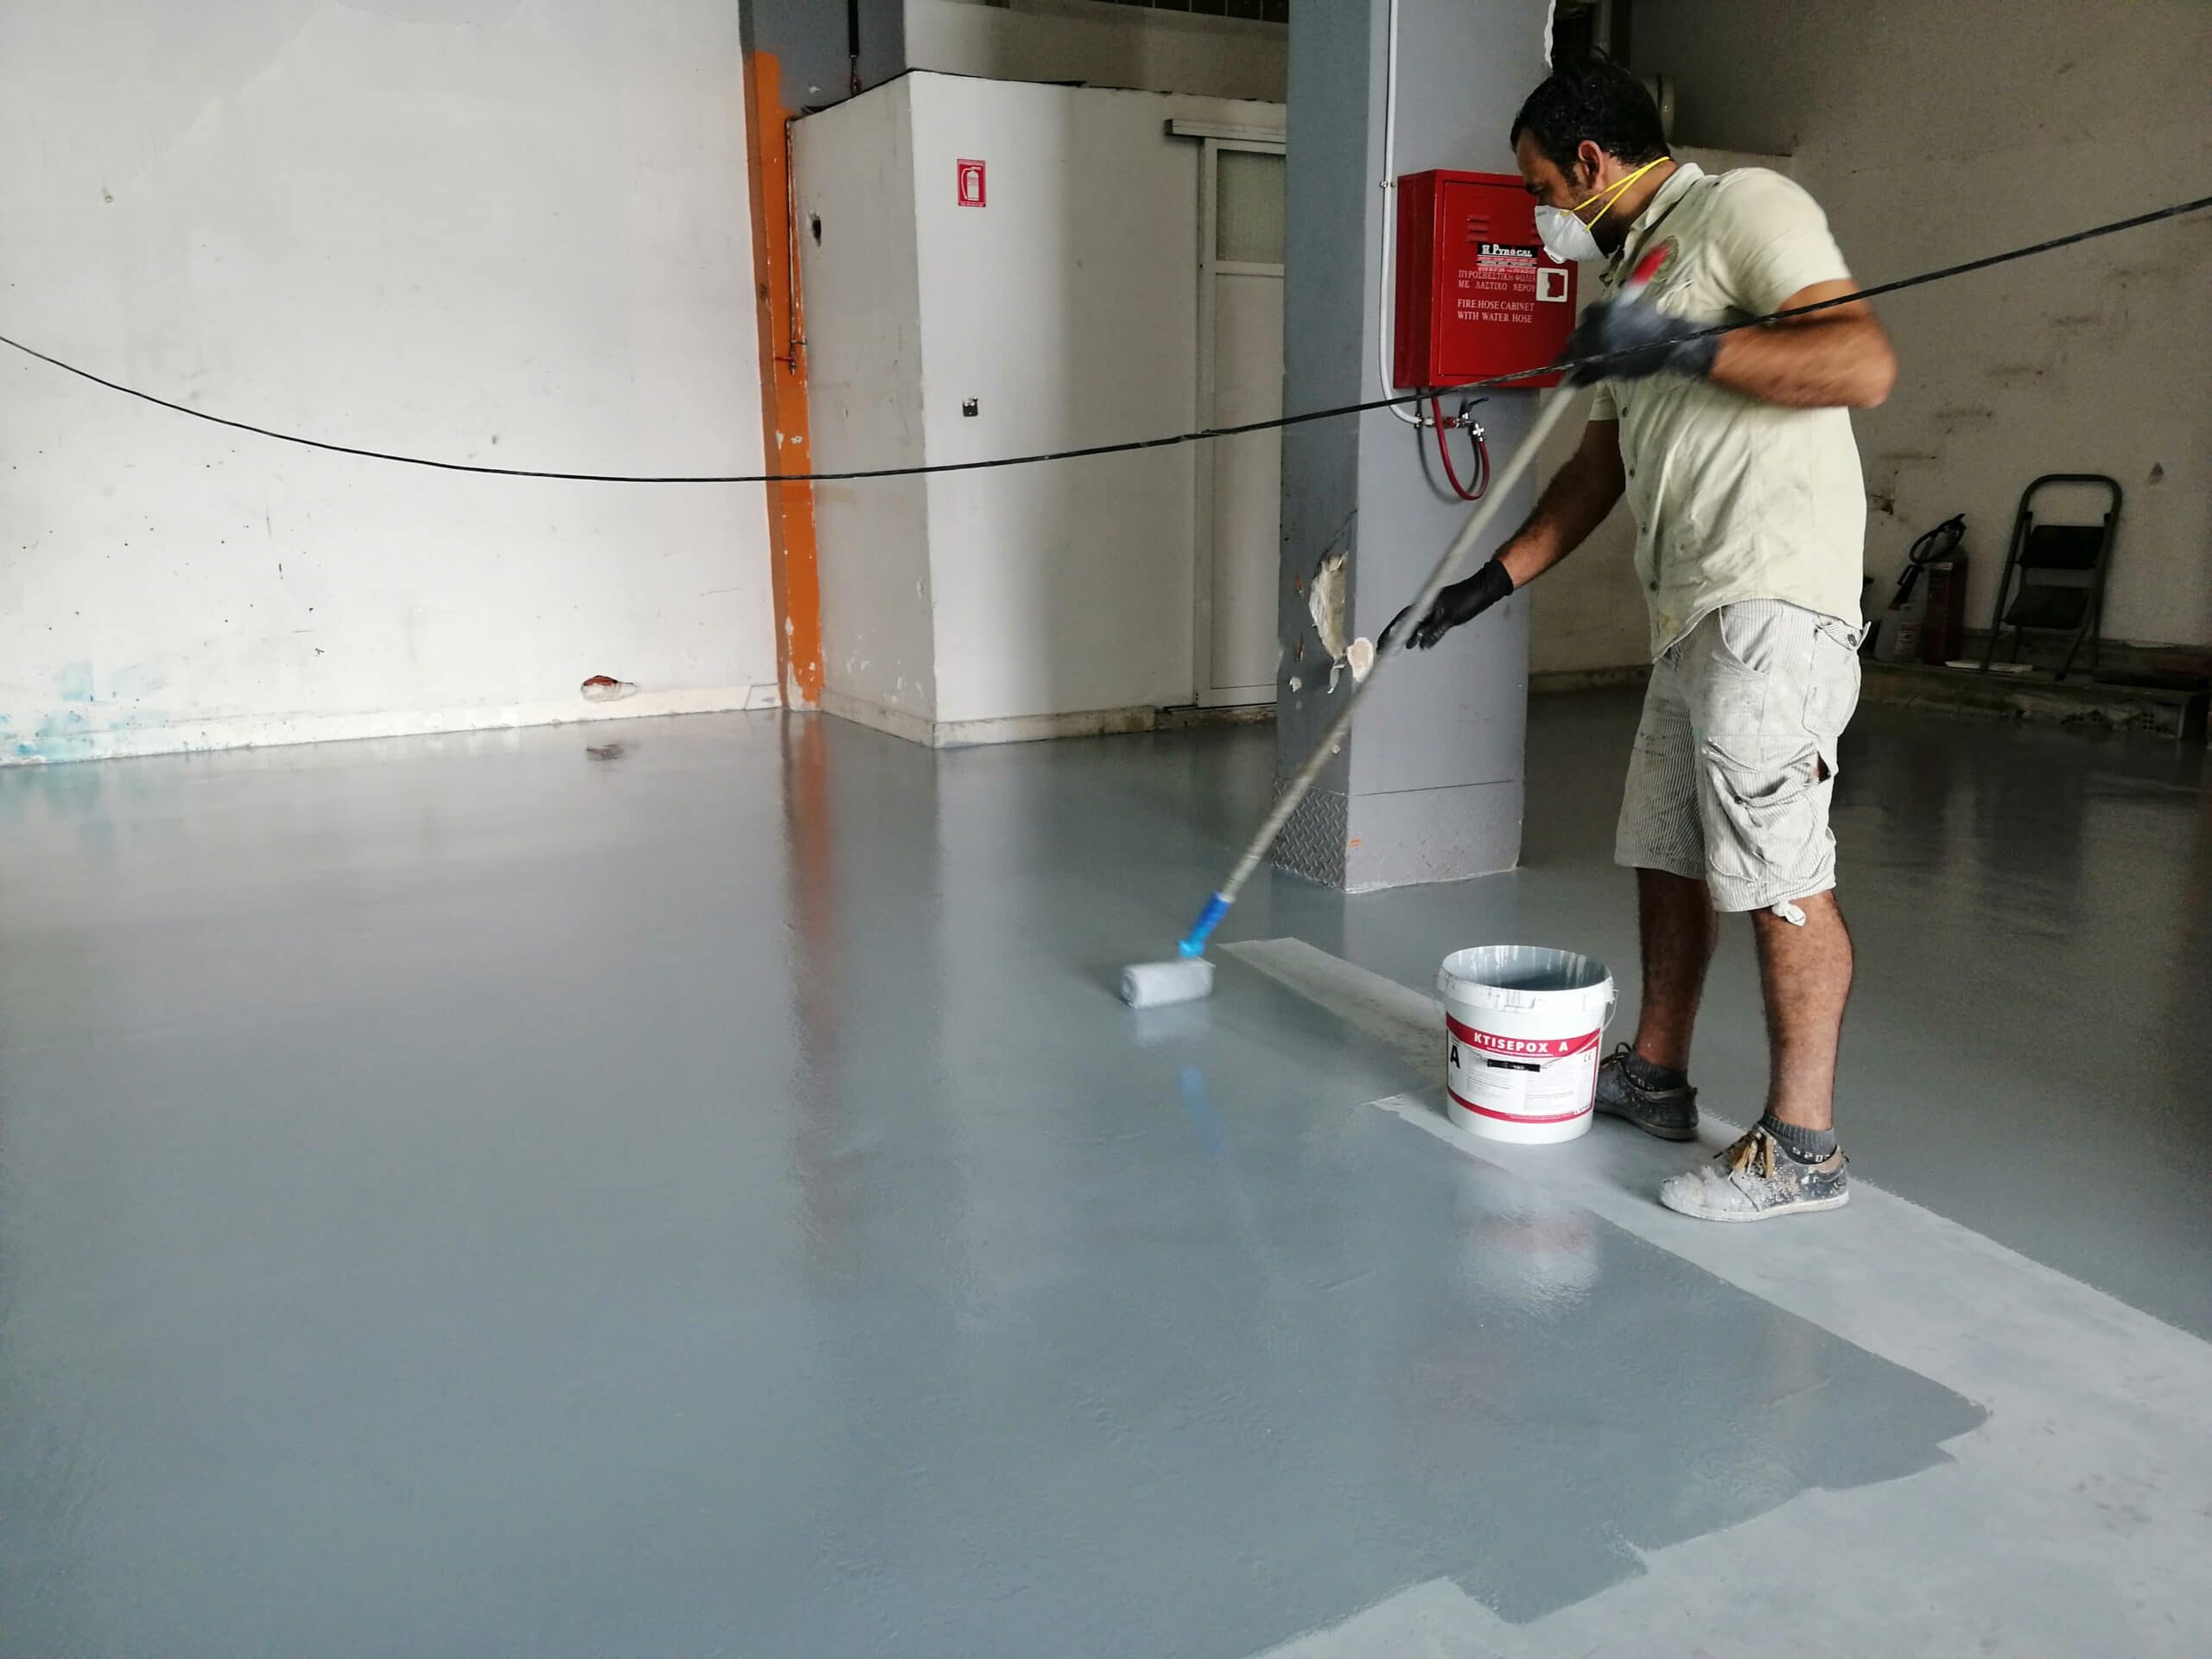
Start with a paint roller for smooth application. Use a paintbrush for edges and corners. A squeegee helps spread the epoxy evenly. A drill mixer blends the epoxy well. Don’t forget the protective gear. Gloves and goggles keep you safe. A vacuum cleaner removes dust and dirt.
You need epoxy resin for the floor. Hardener is essential to make it set. Choose a primer to prep the surface. A topcoat adds shine and protection. Sandpaper smooths the floor before starting. A cleaning solution keeps the area dust-free.
Preparing The Surface
Start by sweeping the floor. Remove all dust and dirt. Use a mop with soapy water. Ensure the floor is spotless. Let it dry completely. A clean floor helps the epoxy stick well. Check for any sticky spots. Clean those again if needed.
Look for any cracks or holes. Use a filler or putty to repair them. Fill them until they are even. Let the filler dry. Sand the area to make it smooth. A flat surface is very important for epoxy.
Sand the entire floor lightly. This helps the epoxy stick better. Use a vacuum to remove dust from sanding. Inspect the floor closely. It should be smooth without bumps or uneven spots. A good surface makes epoxy look better.
Priming The Floor
Priming prepares the floor for epoxy. It creates a strong bond. This bond helps the epoxy stick better. Without primer, epoxy may not last long. Primer also seals the floor. It stops moisture from getting in. Moisture can damage the epoxy. So, priming is very important.
First, clean the floor well. Remove dirt and dust. Then, apply the primer. Use a roller or brush. Spread evenly across the floor. Make sure to cover all spots. Let the primer dry completely. Drying may take a few hours. After it dries, the floor is ready for epoxy.
Mixing The Epoxy
Epoxy has two parts: resin and hardener. Mixing them right is key. Ratios must be exact. Use a scale or measuring cups. Read the instructions on the package. Each brand may differ. Wrong ratios can ruin the floor. The epoxy might not dry well. Or it may crack. This is why ratios matter.
Mix slowly to avoid bubbles. Use a clean bucket for best results. Stir the mixture for at least two minutes. Ensure all the resin and hardener are combined. Use a paddle or a mixing tool for this task. Pour the mixture onto the floor soon after mixing. This prevents it from hardening in the bucket. Always work in a well-ventilated area for safety.
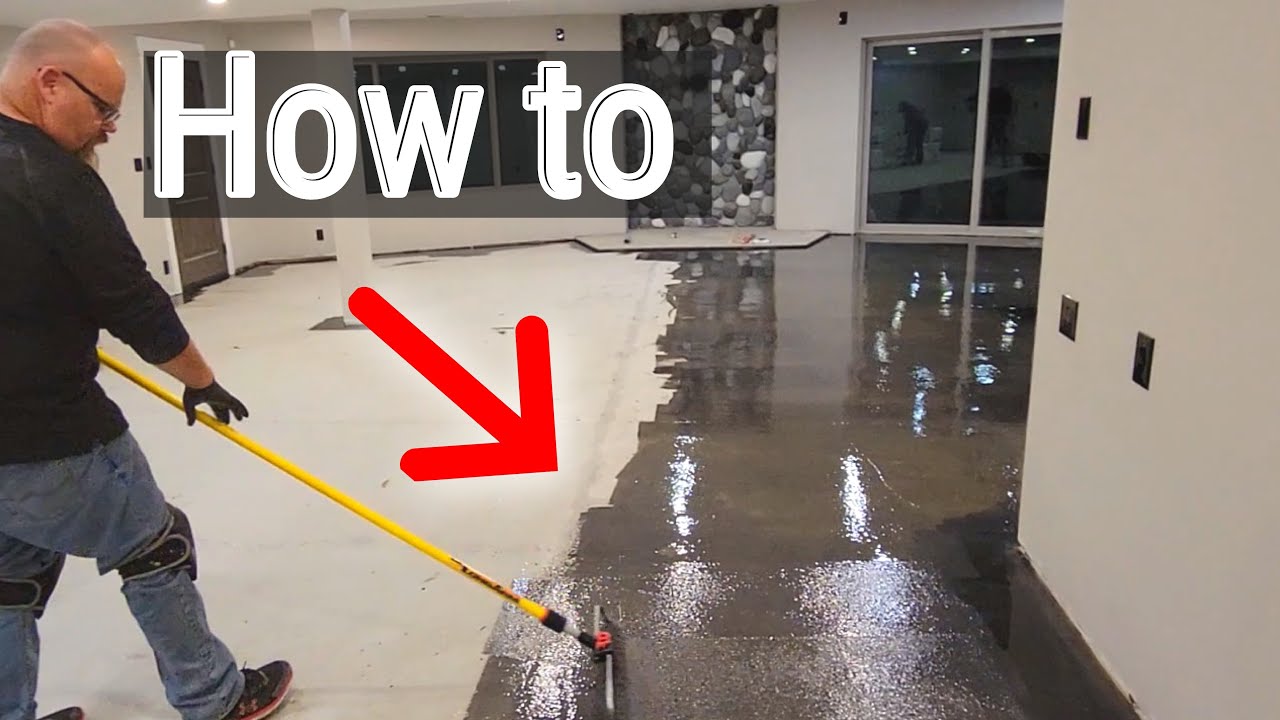
Applying The Epoxy
Apply epoxy evenly across the floor for a smooth finish. Use a roller for large areas. Ensure the layer is consistent. Let it dry for a durable and glossy surface. Perfect for garages and basements.
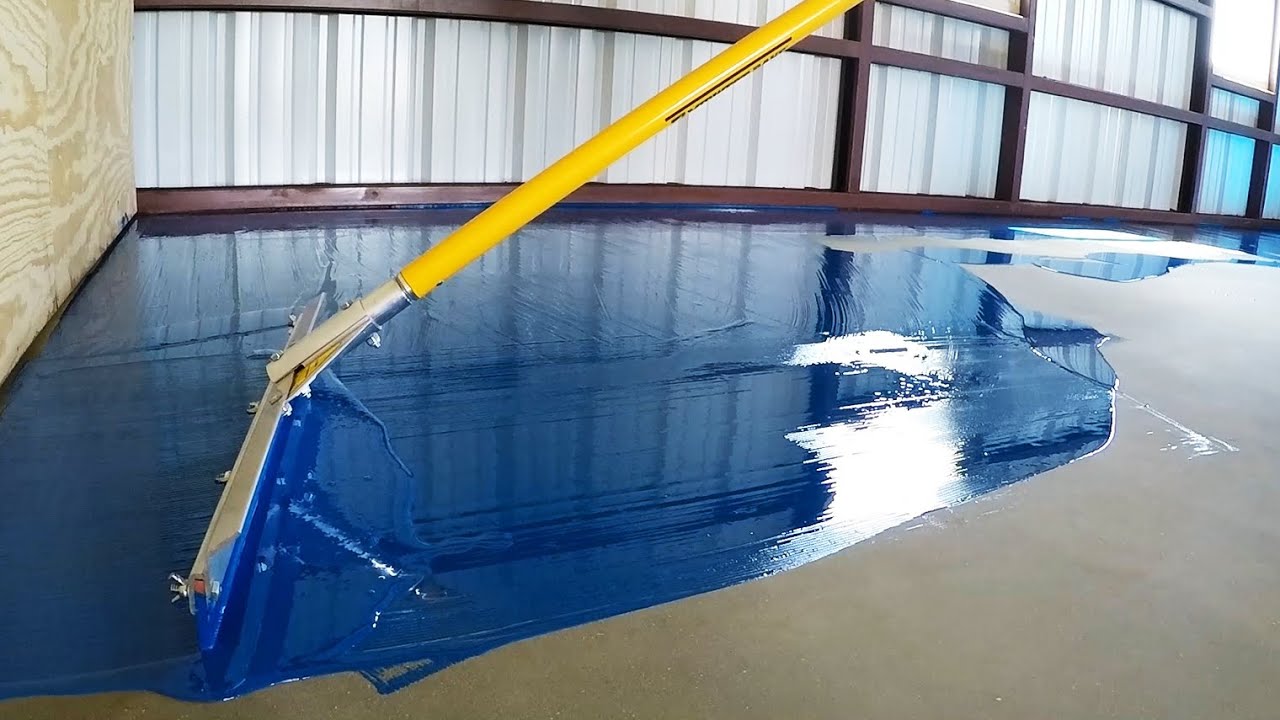
Pouring The Epoxy
Start by pouring the epoxy in small sections. This helps in managing it better. Avoid pouring too much at once. It can be messy and hard to control. Make sure the surface is clean and dry. Epoxy sticks better to clean surfaces. Work in a well-ventilated area.
Spreading Evenly
Use a flat tool for spreading the epoxy. A squeegee works well. Spread it evenly across the floor. Ensure there are no lumps or bubbles. These can ruin the smooth finish. Check for even coverage as you go.
Using A Roller For Finishing
After spreading, use a roller to finish. Roll gently over the surface. This helps in smoothing out any lines. Make sure the roller is clean. Dirty rollers can leave marks. Let the epoxy dry completely before walking on it.
Adding Decorative Elements
Color flakes make floors look fun. They come in many colors. You can sprinkle them on wet epoxy. This adds a nice touch. Use your hands or a tool to spread them. Make sure they stick well. Let the floor dry completely. This keeps the flakes in place.
Patterns make floors look special. Use tape to create lines or shapes. Pour different colors of epoxy in each section. Remove the tape carefully. Let the epoxy dry. You will see clear patterns. Clean tools between colors. This keeps the colors bright.
Curing And Drying Process
Epoxy flooring requires a careful curing and drying process to ensure durability and a smooth finish. This stage involves allowing the epoxy to harden naturally, often taking several days. Proper ventilation and controlled temperatures are crucial during this period to achieve optimal results.
Time Requirements
Epoxy floors need time to dry. Typically, it takes about 24 hours to dry. But full curing can take up to 72 hours. This means the floor becomes very hard and strong. Keep the area clear during this time. Walking on the floor too soon can cause damage.
Avoiding Common Mistakes
Many make mistakes by not waiting enough. Rushing the process can lead to poor results. The floor might not look smooth. Or it might not be as durable. Another mistake is not mixing the epoxy well. Always mix it thoroughly before applying. This helps in even curing and drying. Remember to follow instructions carefully for best results.
Maintaining Epoxy Flooring
Keep your epoxy floor shiny and clean. Use a soft mop regularly. Avoid harsh chemicals. They can damage the surface. Warm water and mild soap work best. Stains should be cleaned quickly. This prevents permanent marks. For stubborn spots, use a gentle scrub pad. Rinse the floor well after cleaning. Dry it with a soft cloth. This keeps the floor looking new.
Small scratches can be fixed easily. Use an epoxy repair kit. Mix the solution as per instructions. Apply it to the damaged area. Let it dry completely. This restores the floor’s smoothness. Cracks need a bit more care. Clean the crack first. Fill it with epoxy filler. Smooth it out with a spatula. Allow it to dry. This prevents further damage.
Frequently Asked Questions
What Is Epoxy Flooring Used For?
Epoxy flooring is used for its durability and aesthetic appeal. It provides a seamless, easy-to-clean surface. Commonly found in garages, basements, and industrial spaces, it’s resistant to chemicals, stains, and wear.
How Long Does Epoxy Flooring Last?
Epoxy flooring can last 10 to 20 years with proper maintenance. Its lifespan depends on traffic, usage, and care. Regular cleaning and avoiding heavy impacts can extend its durability.
Can I Apply Epoxy Flooring Myself?
Yes, you can apply epoxy flooring yourself with the right tools. Follow detailed instructions and ensure surface preparation. DIY kits are available, but professional installation ensures better results and longevity.
How Do I Maintain Epoxy Flooring?
Maintain epoxy flooring by sweeping and mopping regularly. Use mild detergents and avoid abrasive cleaners. Address spills immediately to prevent staining. Periodic polishing can enhance its shine and durability.
Conclusion
Epoxy flooring is a great choice for durable and stylish floors. It’s easy to install and maintain. Start by preparing the surface well. Then, mix the epoxy carefully. Apply it evenly for best results. Let it cure fully before using the floor.
This flooring type adds beauty and strength to any space. With patience and care, anyone can achieve a perfect finish. Remember to follow safety tips during installation. Enjoy your new epoxy floor, and appreciate its lasting quality. Transform your space with confidence.
Keep your floors looking great for years to come.


