Are you ready to transform your living space with a fresh, stylish look? Installing plank flooring could be the perfect solution for you.
Whether you’re aiming to boost the aesthetic appeal of your home or increase its value, plank flooring offers a versatile and budget-friendly option. Imagine walking across a surface that not only looks great but also feels durable underfoot. You’ll discover how easy it is to install plank flooring yourself, even if you’re a DIY novice.
With straightforward steps and practical tips, you’ll gain the confidence to tackle this project head-on. Don’t miss out on learning how to achieve a professional finish without the professional cost. Dive in and see how simple it can be to give your home the makeover it deserves.
Choosing The Right Plank Flooring
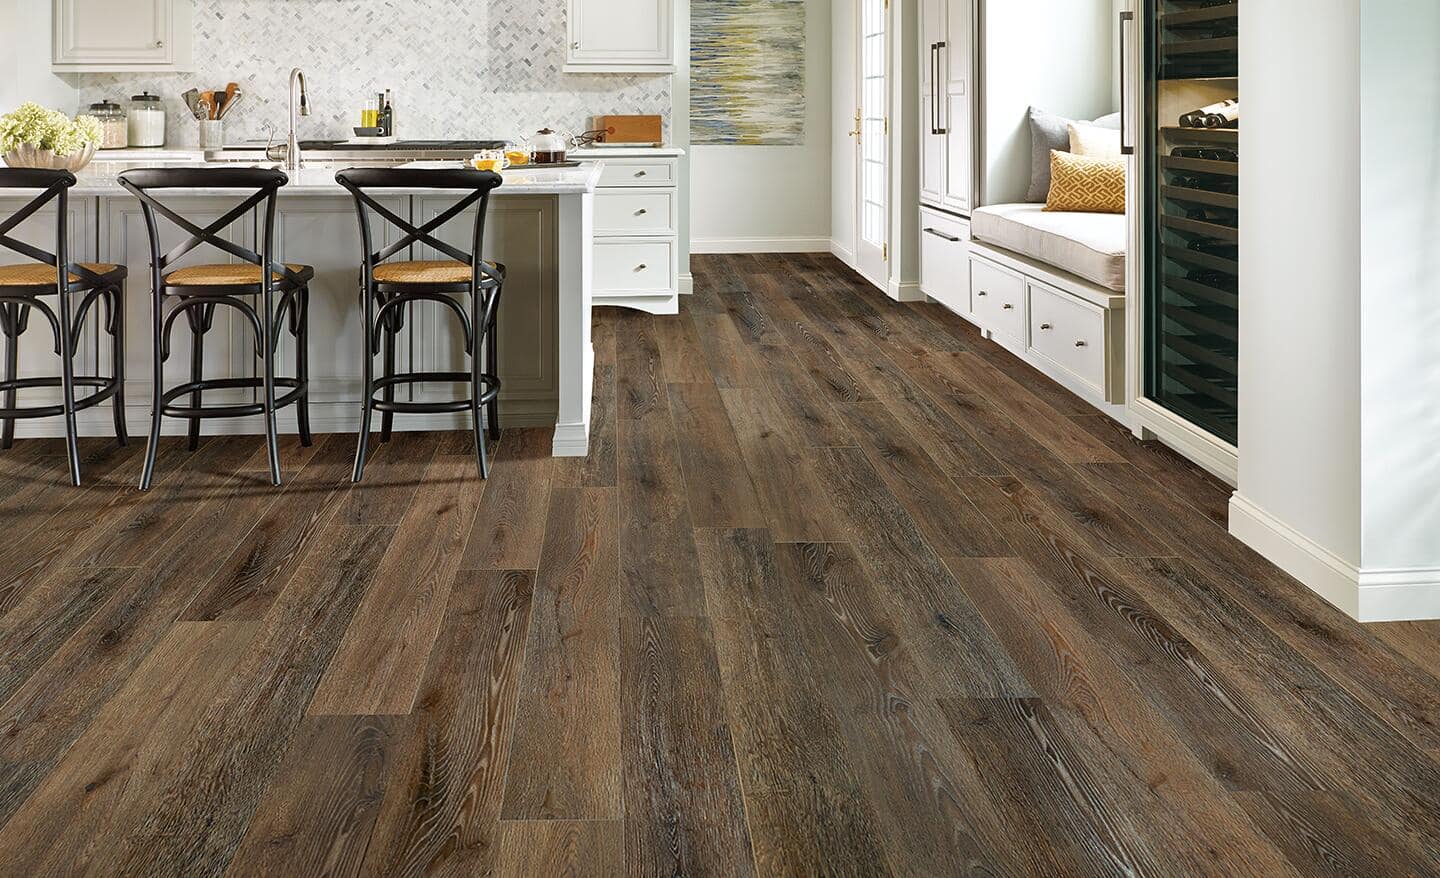
Plank flooring comes in different types. Each type has unique benefits. Laminate flooring is budget-friendly and easy to install. It’s a good choice for beginners. Vinyl plank flooring is water-resistant. It’s great for kitchens and bathrooms. Hardwood planks offer a classic look. They are durable but can be pricey. Bamboo flooring is eco-friendly and strong. It offers a modern touch. Choose what fits your needs best.
Think about the room’s usage. High-traffic areas need durable material. Scratch-resistant finish is ideal for pets. Consider the color and texture. Dark colors hide dirt but show scratches more. Light colors make rooms feel bigger. Matte finishes hide flaws better than glossy ones. Make sure the flooring matches your home’s style. Check for warranties and after-sales support. This ensures peace of mind.
Preparing Your Space
Start by moving all furniture out. This makes the work easier. Remove curtains and rugs too. Check every corner. Look for items that may get in the way. A clean room helps you start fresh. Put all items in another room.
Old flooring needs to go before new planks. Use a pry bar and gloves. This keeps your hands safe. Pull up tiles or old wood. Check for nails and staples. Remove them carefully. Sweep up all debris afterward.
The subfloor must be smooth. Look for cracks or holes. Fill them with wood filler. Let it dry completely. A flat subfloor is very important. Use a level to check evenness. Fix any high or low spots. This ensures a good plank fit.
Gathering Necessary Tools And Materials
Start with a tape measure. It helps you measure the room. A utility knife is good for cutting. Get a rubber mallet to tap the planks. A pull bar is needed for tight spaces. Use a tapping block to protect the planks. Safety goggles keep your eyes safe.
You will need underlayment. It makes the floor soft. Spacers keep gaps even. Glue might be needed for some planks. Keep a pencil handy for marking. A straight edge helps with straight lines. Cleaning supplies keep the area tidy.

Acclimating The Planks
The plank flooring must adjust to the room’s temperature. It prevents warping or shrinking. This helps the planks fit perfectly. Without it, floors may crack or gap. Acclimation ensures the floor lasts longer. It’s a key step in installation. It makes the floor look better and stay strong. Skipping this step can cause problems. It’s important for quality results.
Planks should acclimate for 48 hours. This is the minimum time needed. Some experts suggest up to 72 hours. It depends on humidity and temperature. Check the manufacturer’s guidelines. Follow their instructions for best results. Make sure the room is at normal temperature. This helps the planks settle. A stable environment is crucial. It ensures proper acclimation.
Laying Out The Flooring Plan
First, measure the length and width of the room. Use a tape measure for accuracy. Write down the numbers. Make sure to double-check your measurements. This ensures you have enough plank flooring for the room. Don’t forget to measure any odd areas or corners. These spots need special attention.
Think about how you want the planks to look. Draw a simple plan on paper. Use your measurements to help. Consider the direction of the planks. Horizontal or vertical? Decide where you will start laying them. A good plan helps you avoid mistakes. It makes the job easier.
Installing The Underlayment
Foam underlayment is light and easy to handle. It works well for floors above ground. Cork underlayment is thicker and helps with soundproofing. It is great for noisy areas. Rubber underlayment is durable and water-resistant. Use it in damp places. Each type has its own benefits. Choose based on your room’s needs.
Start by cleaning the floor. Make sure it is dry and smooth. Roll out the underlayment. Let it cover the entire floor. Cut the edges if needed. Use tape to join the pieces. Make sure there are no gaps. Lay the underlayment flat. Check for any wrinkles. The underlayment is now ready for the planks.
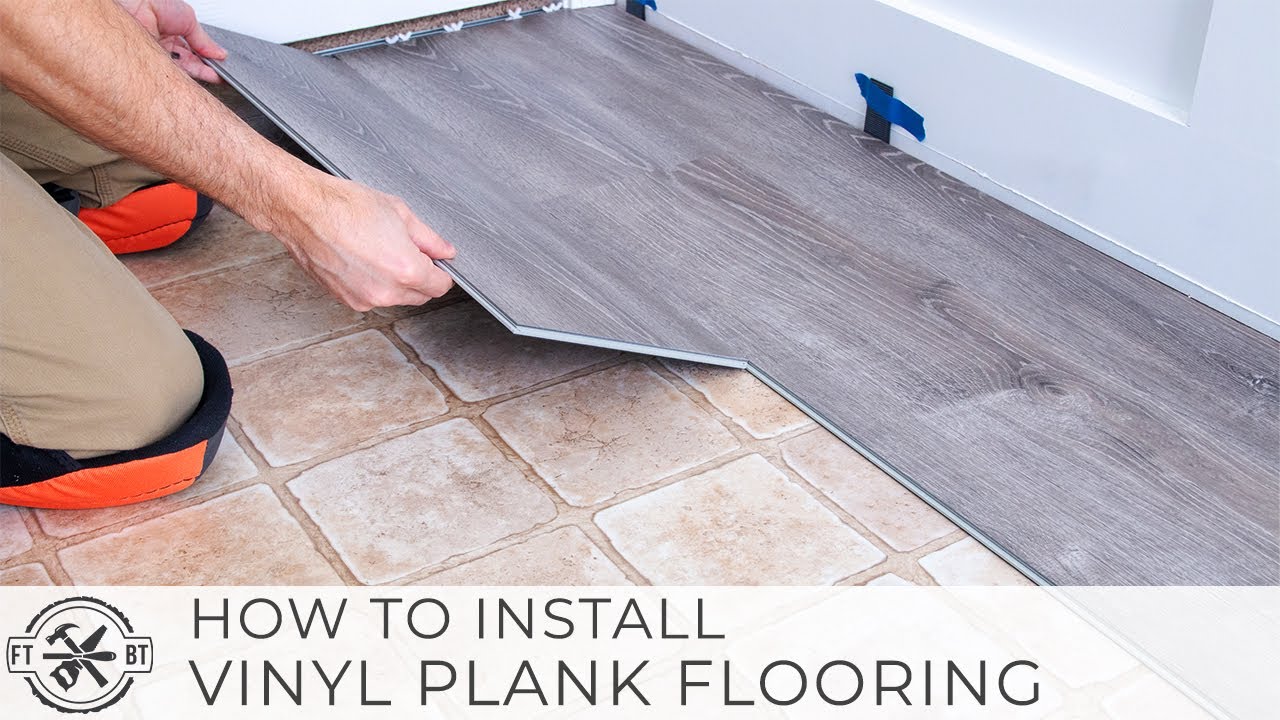
Starting The Installation
Measure the room width to find the center. Mark the center line on the floor. This helps in laying the first row. Place the first plank along the marked line. Use spacers between the plank and wall. This creates a small gap for expansion. Check the plank alignment regularly. This ensures straight rows.
Align the planks by their edges. Use a tapping block to fit them. Press the planks together tightly. This removes any gaps. Regularly check with a level tool. This keeps the flooring even. Continue this method for each row. Proper alignment is key. It gives a smooth, professional look. Enjoy your new floor!
Continuing The Installation
Begin laying planks in rows, aligning edges carefully. Use spacers to keep a small gap along walls. Secure each plank firmly, ensuring no movement. Trim the last plank in each row to fit snugly. Continue until the entire floor is covered, ensuring a seamless finish.
Using Spacers
Spacers help keep a gap between the wall and planks. This gap is important. It allows the flooring to expand. Start by placing spacers along the wall. Keep them at the edges of each plank. Make sure they are even. This helps the floor stay straight. Without spacers, planks might buckle or bend. Always check the gap size. It should be the same all around. Spacers are easy to use and remove. Remember to take them out after installing.
Cutting And Fitting Planks
Use a sharp saw for cutting planks. A miter saw works well. Measure the length needed. Mark it with a pencil. Cut slowly and carefully. Fit the plank into place. Check that it fits snugly. Sometimes, you need to trim edges. Make small adjustments as needed. Fitting planks right makes the floor look nice. Always wear safety gear while cutting. Goggles and gloves are important. This keeps you safe from harm.
Finishing Touches
Enhance your room with plank flooring by focusing on detailed finishing touches. Trim excess edges for a smooth finish. Secure planks firmly to prevent shifting, ensuring durability and style.
Installing Trim And Molding
Trim and molding complete the look of plank flooring. Use a measuring tape to ensure precise cuts. Cut trim pieces to fit around walls and corners. Nail the trim securely to the wall. Ensure no gaps between the trim and the floor. Choose trim that matches the floor color. Molding can hide gaps and imperfections. It adds a polished finish. Double-check alignment for a neat appearance.
Cleaning And Inspecting The Floor
Cleaning keeps the floor looking new. Use a soft broom or vacuum to remove dust. Avoid using water, as it can damage the floor. Inspect the floor for scratches or dents. Fix any issues promptly to maintain the floor’s beauty. Use floor cleaner suitable for plank flooring. Regular cleaning helps maintain shine and durability.
Maintenance Tips
Installing plank flooring can be simple with the right tips. Start by preparing a clean, dry surface. Ensure all planks are cut to fit tightly. Use spacers for uniform gaps, then lock planks together. Secure the edges for stability. Regular maintenance keeps floors looking new.
Routine Cleaning
Keep plank flooring clean for a long life. Sweep or vacuum daily. Use a soft broom or vacuum without a beater bar. Mop weekly with a damp mop. Avoid soaking the floor. Use only cleaners made for plank flooring. This helps keep the shine.
Preventing Damage
Place mats at doors to catch dirt. Use furniture pads under legs. This stops scratches. Keep pet nails trimmed. Water spills must be wiped up fast. Keep plant pots on trays. Avoid dragging heavy items across the floor.
Frequently Asked Questions
What Tools Are Needed For Plank Flooring Installation?
To install plank flooring, you’ll need a tape measure, utility knife, pry bar, and a rubber mallet. Additionally, a flooring nailer and spacers are essential for a professional finish. Ensure you have safety gear like gloves and goggles for protection during installation.
How Do I Prepare The Subfloor?
Preparation involves cleaning and leveling the subfloor to ensure it’s smooth and dry. Remove any debris and repair imperfections. Check for moisture issues and address them before installation. An underlayment may be necessary for added stability and sound reduction.
Can I Install Plank Flooring Myself?
Yes, plank flooring can be a DIY project. Ensure you follow manufacturer guidelines for best results. Proper preparation, tools, and patience are crucial. Watching tutorials or consulting with professionals can enhance your understanding and execution.
How Long Does Plank Flooring Installation Take?
The installation time varies based on room size and complexity. A small room may take a day, while larger areas could require two. Preparation, experience, and type of flooring affect the timeline. Allocate additional time for acclimation and finishing touches.
Conclusion
Plank flooring adds style and durability to any room. Following these steps, you can install it yourself and save money. Measure, prepare, and choose the right tools. Then, lay the planks carefully, keeping them aligned. Don’t rush the process; patience ensures better results.
Remember to check for gaps and adjust as needed. Lastly, admire your work and enjoy your new floors. With these tips, installing plank flooring becomes manageable and rewarding. Feel proud of your accomplishment and share your experience with friends. Happy flooring!


