Are you looking to update your flooring or make repairs without damaging your existing walls? Removing floor molding might seem like a daunting task, but with the right guidance, you can do it effortlessly.
Imagine the satisfaction of seeing your space transform, creating a fresh and clean canvas for your next project. You don’t have to worry about costly mistakes or time-consuming efforts; we’ll walk you through each step, ensuring you have everything you need to succeed.
Dive into this straightforward guide, and discover the simple techniques to remove floor molding like a pro. Get ready to enhance your home with confidence and ease!
Tools And Materials Needed
Gather all the tools before starting. You will need a hammer and a utility knife. A putty knife is also important. Make sure you have a pry bar. A tape measure helps you a lot. Don’t forget safety goggles. Work gloves protect your hands. You may also need a drop cloth. Keep a pencil nearby for marking.
Check for nails or screws first. Remove them carefully. This stops damage to the walls. Use the pry bar gently. Start at the corners. Work your way along the molding. Use patience and care. This makes the job easier and safer.
Preparing The Area
Make sure the area is clear before starting. Move all furniture away. Check for any items on the floor. This ensures nothing gets damaged. It also gives you more room to work. A clean space makes the task easier. You can see what you’re doing better. Keep pets and kids away. They might get hurt or cause accidents.
Use a drop cloth or old sheet on the floor. This will keep the floor safe from scratches. Tape the edges of the cloth so it stays in place. You don’t want it to slip. Cardboard also works well if you have some. Cover the entire area where you will work. A protected floor stays looking nice.
Removing Nails And Screws
Place the hammer’s claw under the nail head. Gently pull the hammer back. This will loosen the nail. Be careful not to damage the floor. If the nail is hard to remove, wiggle the hammer. This helps in loosening it more. Slowly continue pulling until the nail comes out.
Choose the correct screwdriver for the screw type. Insert the tip into the screw head. Turn the screwdriver counter-clockwise. This will unscrew it. Go slowly to prevent any damage. If the screw is stuck, apply some pressure. Keep turning until the screw is completely out.
Loosening The Molding
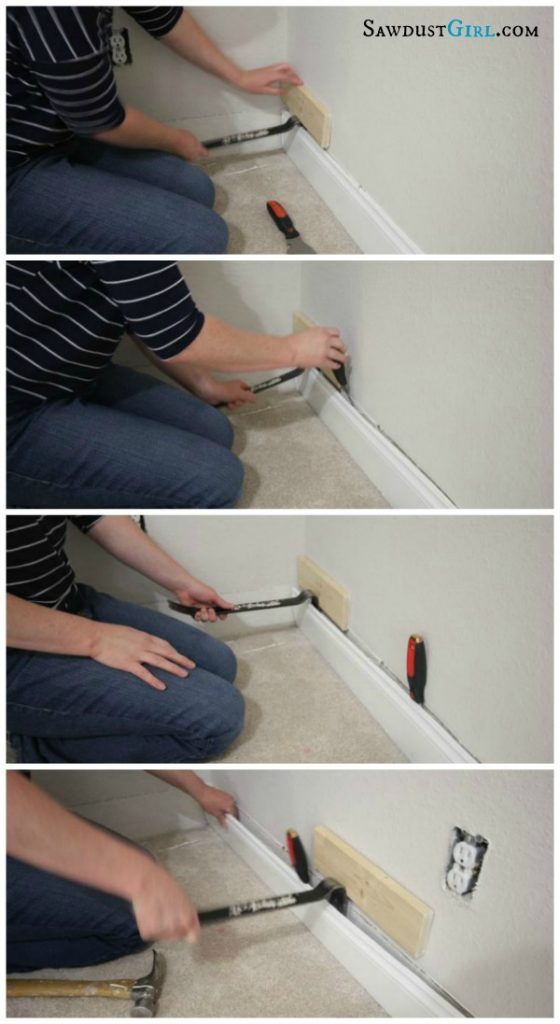
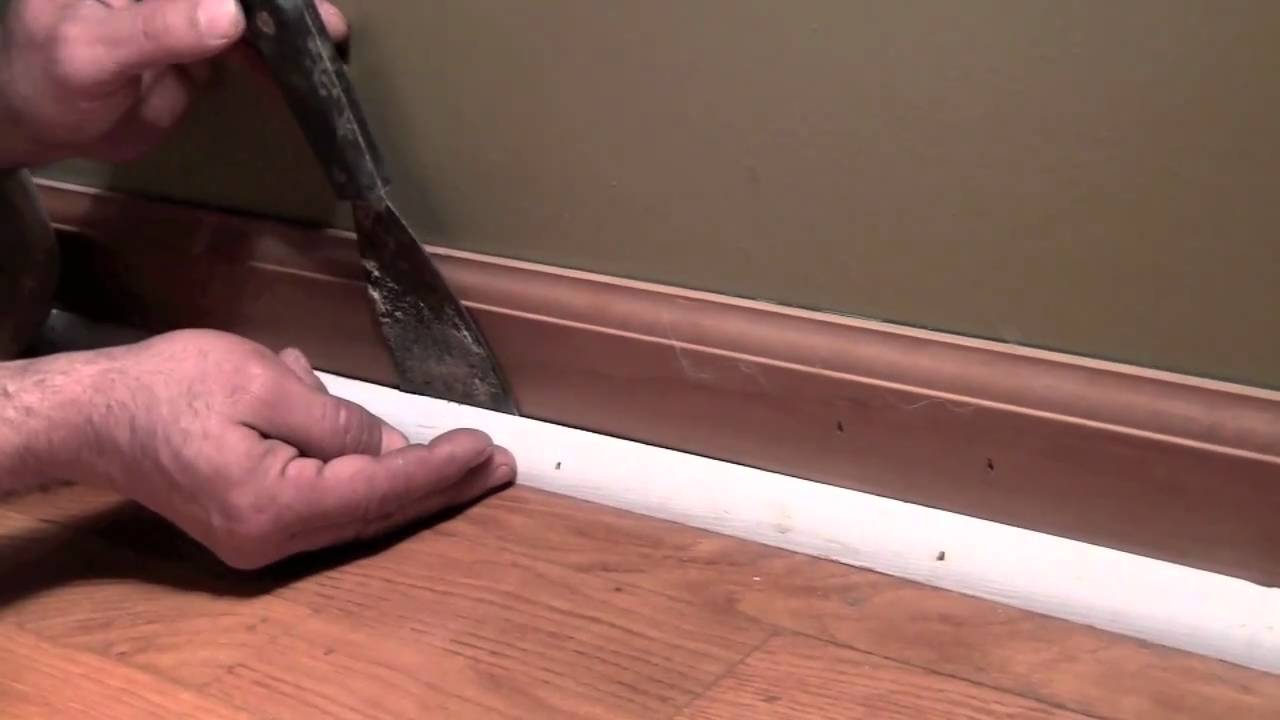
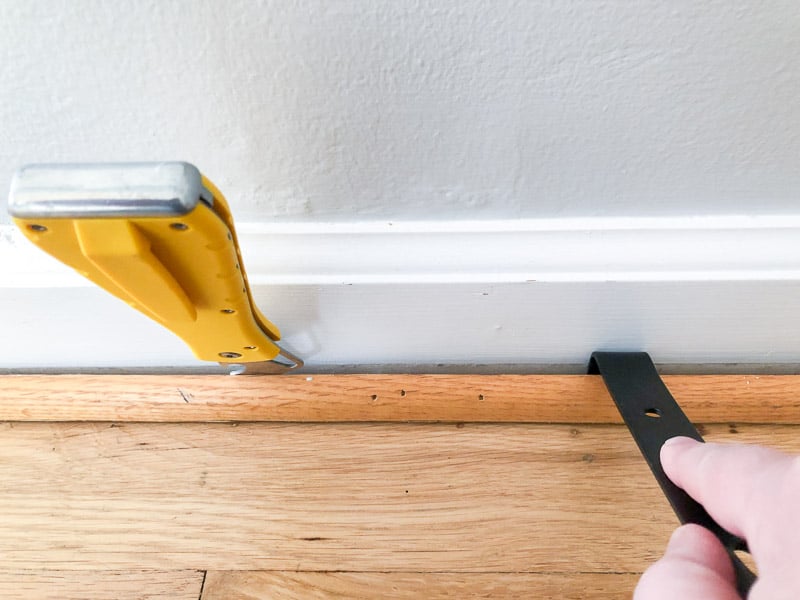
A pry bar is a useful tool. Place it between the wall and the molding. Apply gentle pressure to lift the molding. Avoid damaging the wall. Work slowly. Check every few inches. Ensure the molding loosens evenly. Be careful with corners. They need more attention. Use steady hands. Patience is key.
A utility knife helps cut through caulk. Slide the knife along the molding edge. Keep it steady. Move slowly to avoid mistakes. Cut through any paint layers. This makes the molding easier to remove. Be cautious. Sharp blades can cause injury. Always cut away from yourself. Safety first.
Detaching The Molding
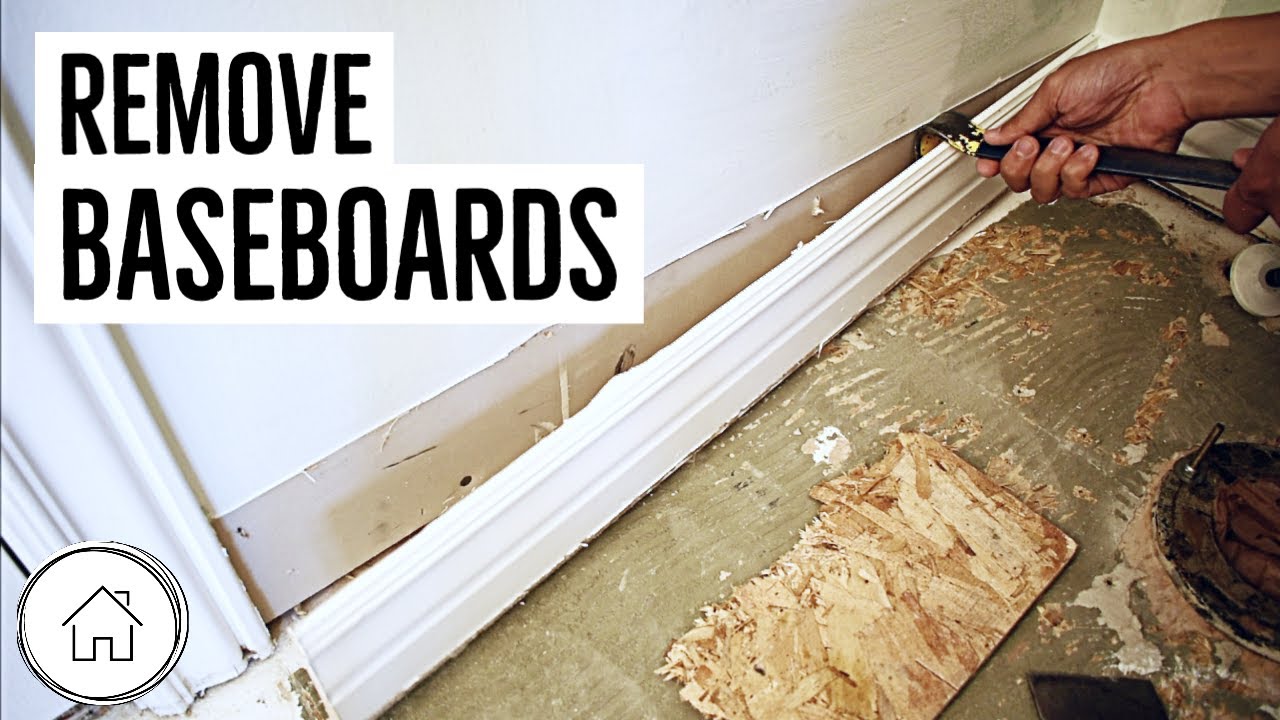
Start by finding the edges of the molding. Use a putty knife to gently pry the edges. Work slowly to avoid breaking the molding. Insert the tool behind the molding and wiggle it gently. This helps to loosen the nails or glue.
Move along the length of the molding. Use a small crowbar for tougher spots. Be patient and take your time. Sudden force might damage the wall or molding. Keep a soft cloth nearby to protect surfaces.
Some sections might be more delicate than others. Look for any cracks or weak points. Use extra care around these areas. A gentle hand is needed here. You might need to use a heat gun to soften the glue.
Apply the heat slowly and evenly. Check the molding often for any change. If it feels loose, try removing it by hand. Keep tools away from fragile areas. This prevents any unnecessary damage.
Cleaning Up Residue
Removing floor molding often leaves behind residue. Start by gently prying the molding away using a flat tool. Clean the leftover adhesive with a mixture of warm water and mild detergent.
Scraping Off Adhesive
Begin by using a putty knife to scrape off the old adhesive. Be gentle to avoid scratching the floor. Warm water can help soften the adhesive. Dip a cloth in warm water and place it on the adhesive. This will make it easier to remove. Patience is key here. Take your time and work slowly.
Sanding The Surface
Once the adhesive is gone, use fine-grit sandpaper to smooth the surface. Sand in small circles for even results. Dust the area with a soft cloth to keep it clean. Sanding helps prepare the floor for new molding. Make sure the surface feels smooth to the touch. Safety goggles are important to protect your eyes from dust.
Inspecting And Repairing
Removing floor molding involves careful inspection and repair. Gently pry the molding using a flat tool. Check for damage and replace or repair as needed.
Checking For Damage
First, look closely at the floor molding. Check for any signs of damage. Cracks, chips, and other issues are common. Use a flashlight if needed. Make sure to inspect every corner. Some damage may be hidden. Carefully note all the problem areas. These will need fixing soon.
Filling Holes And Cracks
Get some wood filler and a putty knife. Use the knife to fill holes and cracks. Press the filler in firmly. Let it dry completely. Sand the area to make it smooth. Repeat if needed for deep holes. The surface should be even with the rest. A smooth finish is important for a neat look.
Reinstalling Or Replacing
Removing floor molding is simple with the right tools. Carefully pry the molding using a flat tool like a putty knife. Protect the wall and floor to prevent damage during the process.
Choosing New Molding
Picking the right molding is important. Measure your room first. This helps to know how much you need. Choose a style that matches your room. Colors should blend well with the walls and floor. Popular choices are wood and PVC. Wood gives a classic look. PVC is easy to clean. Both are good options. Compare prices at different stores. Look for sales or discounts. This can help you save money. Ask for samples before buying. Test them at home. Check how they look in your space.
Installation Steps
Gather your tools first. You will need a hammer, nails, and a saw. Measure the length of each wall. Cut the molding to fit. Start at one corner of the room. Line up the molding with the wall. Use a hammer to nail it in place. Keep the nails even. Check that the molding is straight. Adjust if needed. Repeat for each wall. Fill any gaps with caulk. This makes the edges look smooth. Let the caulk dry completely. Finally, paint if desired.
Frequently Asked Questions
What Tools Are Needed To Remove Floor Molding?
To remove floor molding, you’ll need a pry bar, utility knife, and hammer. These tools help carefully detach molding without damage. A putty knife can be used to separate molding from the wall. Ensure you have safety goggles and gloves for protection during removal.
How Do I Avoid Damaging The Wall?
To avoid damaging walls, gently insert a putty knife between molding and wall. Use a pry bar to gradually pull molding away. Score the caulk with a utility knife before prying. Work slowly and carefully to minimize wall damage during the process.
Can Floor Molding Be Reused?
Yes, floor molding can be reused if removed carefully. Avoid breaking or splintering the molding during removal. Clean and sand any damage before reinstalling. Reusing molding saves money and maintains the style of your space.
How Do I Remove Glued Molding?
To remove glued molding, score the adhesive with a utility knife. Use a pry bar to gently separate molding from the wall. Apply heat with a hairdryer to soften glue before prying. Be patient to prevent damage during removal.
Conclusion
Removing floor molding is simple with the right steps. Gather your tools first. Be patient and careful. Start by loosening the edges. Pry gently to avoid damage. Work slowly along the entire length. Check for hidden nails or screws. Clean the area after removal.
Store molding safely if you plan to reuse it. Practice makes perfect; each attempt becomes easier. Now, you’re ready to tackle more home projects. Remember, careful work ensures great results. Enjoy your refreshed space with confidence!


