To repair vinyl flooring, start by evaluating the damage, checking for scratches, tears, or stains. Clean the area with warm, soapy water and dry it thoroughly. Gather tools like a utility knife, adhesive, and a roller. For minor scratches, use a vinyl repair kit or marker; for larger tears, cut out the damaged section and patch it with a new piece, adhering it securely. Finish by sealing the repair for durability. Regular maintenance and protective mats can help prevent future damage too, ensuring your flooring stays in top shape for years to come. Tips for ongoing care are also available.
Assessing the Damage
Before you begin any repair work on your vinyl flooring, it's vital to evaluate the damage thoroughly. Start with a visual inspection to identify damage types such as scratches, tears, or stains. Look for areas where the vinyl has become loose or has bubbles, as these can indicate underlying issues. Check for discoloration or wear patterns that might suggest heavy traffic or moisture exposure. Make notes of any significant damage, as this will guide your repair process. Understanding the extent of the damage is important; minor scratches may require different treatment than large tears or lifted sections. By accurately evaluating the damage now, you'll guarantee a more effective repair and ultimately extend the life of your flooring.
Gathering Necessary Tools
To effectively repair your vinyl flooring, you'll need a few essential tools on hand. Start with a utility knife for precise cutting, ensuring accurate tool selection for any damaged areas. A straightedge or ruler will help guide your cuts, providing clean edges. You'll also require a vinyl flooring adhesive, which is critical for securing the new pieces. Don't forget a roller or block to press the vinyl into place effectively. Additionally, keep a putty knife handy for smoothing out any air bubbles during installation. Finally, a measuring tape will assist in evaluating the size of the damaged section. Gathering these essential supplies will streamline your repair process and empower you to restore your flooring efficiently.
Cleaning the Affected Area
Since a clean surface is vital for effective repairs, you'll want to thoroughly clean the affected area before proceeding. Begin by removing any debris or dust with a soft broom or vacuum. Next, choose a suitable cleaning solution that's safe for vinyl flooring; a mixture of warm water and a few drops of mild dish soap often works well. Apply the solution with a soft cloth or mop, making sure you don't soak the vinyl. Rinse with clean water to remove any soap residue, then dry the area completely with a microfiber cloth. This surface preparation is essential, as it guarantees that any adhesives or repair materials bond effectively, promoting a longer-lasting repair.
Repairing Scratches and Scuffs
Although scratches and scuffs can be unsightly, they're often repairable with the right approach. For effective scratch repair and scuff removal, follow these steps:
- Clean the Area: Use a soft cloth and mild cleaner to remove dirt around the scratch or scuff.
- Assess Damage: Identify the severity of the scratch or scuff; deeper damage may require more intensive methods.
- Apply Repair Product: Use a vinyl floor repair kit or a specialized marker for minor scratches. Follow the manufacturer's instructions carefully.
- Seal the Repair: Once dry, apply a sealant to protect the area and enhance durability.
Fixing Dents and Bumps
When fixing dents and bumps in vinyl flooring, the first step is to identify the specific damage. You can then use the heat method to soften the vinyl, followed by the weight technique to restore its original shape. These methods will effectively address the imperfections, ensuring a smooth surface.
Identify the Damage
Identifying damage in vinyl flooring is essential for effective repair, especially when dealing with dents and bumps. Start with a thorough visual inspection to determine the damage types present. Follow these steps to assess the situation:
- Look for surface irregularities: Check for noticeable dents or bumps.
- Inspect for discoloration: Identify areas that may have faded or changed color.
- Feel for texture changes: Run your hand over the surface to detect any unevenness.
- Check for moisture: Look for signs of water damage or swelling around the edges.
Use Heat Method
Once you've assessed the damage to your vinyl flooring, you can move on to repairing those unsightly dents and bumps using the heat method. Start by gathering a heat gun or hairdryer. Direct the heat application to the affected area, keeping the tool about six inches away to avoid scorching the vinyl. As the vinyl heats up, it will begin to soften, allowing for vinyl expansion. Once the material is pliable, gently press it down with a cloth or a flat tool, smoothing it out. Be careful not to apply too much pressure, as this can create further damage. After cooling, check the surface; if needed, repeat the process until the dent or bump is level with the surrounding flooring.
Apply Weight Technique
To effectively address dents and bumps in your vinyl flooring, the weight technique can be a simple yet powerful solution. This method utilizes weight distribution to temporarily fix imperfections without extensive repairs. Here's how to apply it:
- Clean the Area: Guarantee the surface is free from dirt and debris.
- Choose Your Weight: Select a heavy object, like a stack of books or a weight plate.
- Place the Weight: Position the object directly over the dent or bump, guaranteeing even contact.
- Leave it for a While: Allow the weight to sit for at least 24 hours to guarantee effective compression.
This technique can restore your floor's appearance while providing a temporary fix until a more permanent solution is implemented.
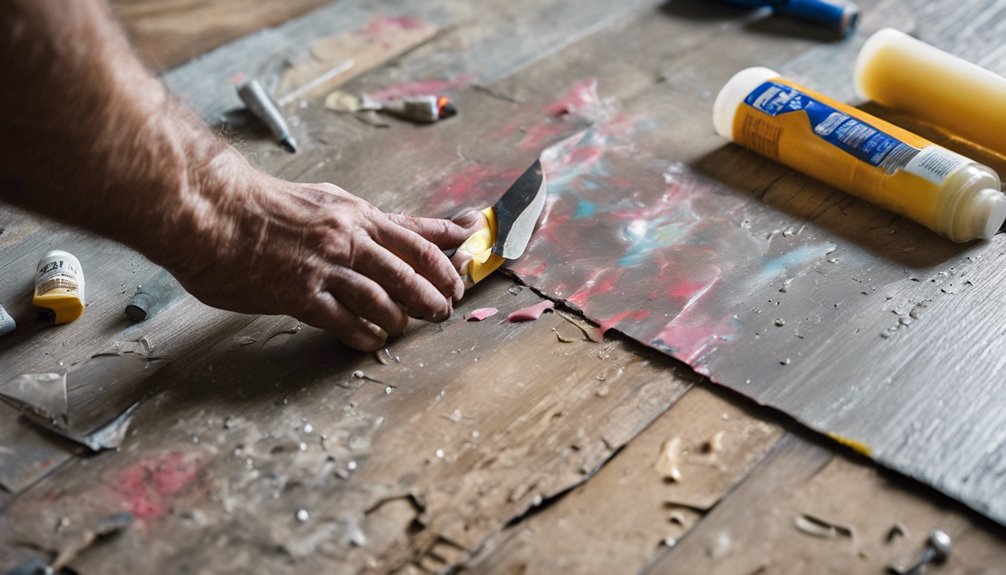
Patching Tears and Rips
Patching tears and rips in vinyl flooring can be a straightforward process if you have the right tools and materials on hand. First, clean the damaged area thoroughly to remove any debris. Next, cut a piece of vinyl that matches your flooring, making sure it's slightly larger than the tear or rip. Apply vinyl adhesive to the back of the patch and carefully place it over the damaged area, ensuring a snug fit. Press firmly to eliminate air bubbles and secure it in place. Afterward, use a weight to hold the patch down while the adhesive cures, which usually takes about 24 hours. This patch repair method not only restores the appearance but also extends the life of your vinyl flooring.
Preventive Maintenance Tips
To maintain the integrity of your vinyl flooring, establish a regular cleaning routine to prevent dirt buildup. Avoid placing heavy furniture directly on the surface to reduce the risk of indentations and damage. Additionally, using protective mats in high-traffic areas can help shield your flooring from wear and tear.
Regular Cleaning Routine
Although vinyl flooring is durable, maintaining a regular cleaning routine is essential for preserving its appearance and longevity. Implementing a consistent cleaning schedule not only enhances the floor's beauty but also prolongs its lifespan. Here are some preventive maintenance tips to follow:
- Sweep or vacuum regularly to remove dirt and debris.
- Mop with a damp cloth using gentle cleaning products formulated for vinyl.
- Spot clean spills immediately to prevent staining and damage.
- Avoid harsh chemicals that can deteriorate the flooring over time.
Avoid Heavy Furniture
When selecting furniture for a space with vinyl flooring, it's important to take into account the weight of the items you choose, as heavy furniture can cause significant damage over time. To preserve your flooring, prioritize lightweight options that won't compress the material. When planning your furniture placement, make sure that weight distribution is even across the floor to minimize localized pressure points. This can help prevent warping or indentations that may arise from concentrated weight. Additionally, consider using furniture coasters or pads to further distribute weight and protect the surface. By being mindful of your furniture choices and their arrangement, you can enjoy your space while extending the life of your vinyl flooring.
Use Protective Mats
Using protective mats is one of the most effective ways to maintain your vinyl flooring's integrity and appearance. These mats provide essential surface protection, helping to prevent scratches, dents, and stains. To maximize their benefits, consider the following:
- Entryways: Place mats at doors to trap dirt and moisture before it reaches your flooring.
- High-Traffic Areas: Use mats in spaces with frequent foot traffic to reduce wear and tear.
- Under Furniture: Position mats under heavy furniture to distribute weight and prevent indentations.
- Kitchen and Dining: Install mats in these areas to protect against spills and food debris.
Frequently Asked Questions
Can I Repair Vinyl Flooring on My Own?
Yes, you can repair vinyl flooring on your own! With the right DIY techniques and repair tools, it's definitely achievable. Start by evaluating the damage and gathering supplies like adhesive, patches, or a heat gun. Follow step-by-step instructions for your specific issue, whether it's a tear or a lifted edge. Just take your time, and don't hesitate to look up tutorials online. You'll have your floor looking great again in no time!
How Long Does a Vinyl Flooring Repair Take?
Repair time for vinyl flooring can vary depending on the damage and the repair techniques you choose. If you're using adhesive patches or self-adhesive tiles, it might only take a couple of hours, including prep and drying time. More extensive repairs, like replacing large sections, could take a full day or more. It is crucial to assess the damage carefully to determine the most efficient approach for your repair project.
What Types of Vinyl Flooring Can Be Repaired?
When it comes to vinyl flooring, not all types are created equal, and some can be repaired more easily than others. You've got luxury vinyl tiles, sheet vinyl, and vinyl planks, each offering different repair methods. For instance, peel-and-stick tiles allow for simple replacements, while sheet vinyl might require patching. Understanding your flooring types will help you choose the right repair method, ensuring your space remains both beautiful and functional.
Will Repairs Affect the Warranty of My Flooring?
When considering repairs, it's essential to understand the warranty implications. Not all repair methods are acceptable under your flooring's warranty terms. If you choose to use unapproved methods or materials, you might void your warranty. Always check the warranty documentation for specifics on what's allowed. If in doubt, consult the manufacturer or retailer to guarantee your repairs won't jeopardize your coverage, allowing you to maintain both your flooring's integrity and warranty.
Is Professional Help Recommended for Vinyl Flooring Repairs?
You might think you can handle vinyl flooring repairs yourself, but it's often a gamble. Repair costs can escalate if you make mistakes, leading to more significant issues down the line. Flooring specialists have the expertise to assess damages and guarantee the repairs are done correctly, preserving the integrity of your flooring. While it may seem like an added expense, professional help can save you time and money in the long run.


