To level a floor, start by evaluating the surface for high and low points using a level or straightedge. Clear any debris and inspect for moisture issues that could affect flooring. Gather necessary tools like a notched trowel and leveling compound. Choose a leveling method that suits your needs, such as self-leveling compound for larger areas or adjusting floor joists for sagging spots. Apply the compound evenly and let it cure properly. Finally, finish with a sealant and baseboards for a polished look. Following these steps will set you up for an effective floor leveling process.
Assessing Floor Conditions

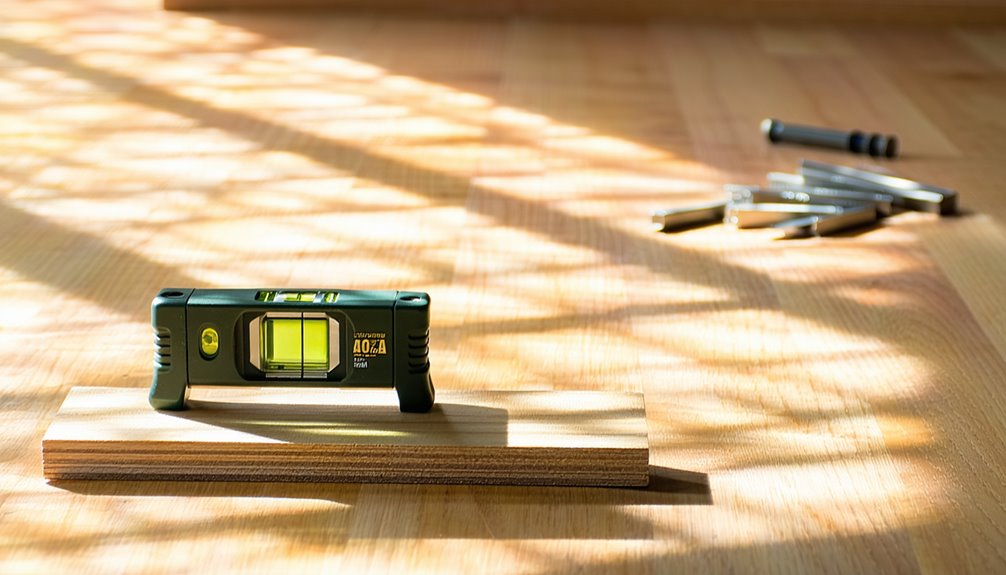
Before you can begin leveling your floor, it's essential to assess its current condition to identify any issues that need addressing. Start by checking for any floor slope; use a level or straightedge to determine the high and low points. A noticeable slope can indicate underlying problems that need fixing. Next, inspect for moisture issues, as excess humidity can weaken your flooring materials and lead to further complications. Look for signs of water damage, such as stains or warping, especially in basements or kitchens. If you find moisture, consider addressing the source before moving forward. By thoroughly evaluating these aspects, you'll guarantee a solid foundation for your leveling project, allowing for a smoother, more satisfying outcome.
Gathering Necessary Tools
Once you've assessed the floor conditions and tackled any moisture issues, it's time to gather the necessary tools for leveling your floor. Having the right tool types at your fingertips can make your project much smoother. Here's a quick list of essential items you'll need:
| Tool Type | Purpose |
|---|---|
| Level | Guarantees a flat surface |
| Measuring Tape | Measures discrepancies |
| Straight Edge | Helps identify high spots |
| Notched Trowel | Spreads leveling compound evenly |
| Mix Bucket | Holds the leveling material |
Make sure to have these tools ready before you jump in. With the right gear, you'll feel empowered to create a level floor that suits your needs!
Choosing the Right Leveling Method
When it comes to leveling your floor, you'll need to contemplate the most suitable method for your situation. You can either use a self-leveling compound for a quick solution or adjust the floor joists for more structural issues. Each approach has its benefits, so understanding your specific needs will help you make the right choice.
Self-Leveling Compound
Choosing the right leveling method is essential for achieving a smooth, even floor, and self-leveling compounds offer an effective solution for many situations. These compounds flow and settle into low spots, guaranteeing a flat surface.
| Self-Leveling Benefits | Mixing Techniques |
|---|---|
| Quick application | Use a power mixer |
| Reduces labor intensity | Follow manufacturer's instructions |
| Compatible with various substrates | Mix to a lump-free consistency |
| Fast drying time | Pour within the working time |
| Ideal for large areas | Use a gauge rake for even distribution |
Before you start, make certain you understand the mixing techniques for the best results. Proper mixing guarantees the compound achieves its self-leveling benefits, leading to a flawless finish.
Floor Joist Adjustment
To achieve a perfectly level floor, adjusting floor joists can be a crucial step in the leveling process. Begin by examining the joist spacing; ideally, it should be consistent throughout the area. If you notice any irregularities, like joist deflection, it's important to address them. You can use shims or blocking to support sagging joists, ensuring they regain their original height. Alternatively, if you're working with significant deflection, consider sistering new joists alongside the existing ones for added strength. Always check with a level to confirm your adjustments are effective. Remember, a well-supported floor not only feels better underfoot but also enhances the overall integrity of your space. Enjoy the freedom of a stable, level floor!
Preparing the Floor Surface
Before you start leveling your floor, it's essential to prepare the surface properly. Begin by clearing away any debris and dust, as a clean surface helps guarantee better adhesion for leveling compounds. Next, inspect the area for any damage or irregularities that might need repair before proceeding.
Clear Debris and Dust
Clearing debris and dust from the floor surface is a crucial first step in leveling your floor effectively. Start by using a broom or vacuum to remove loose dirt and larger debris. This initial cleaning technique prepares the surface for further inspection and guarantees a smooth application of leveling compounds. Don't forget to tackle corners and edges, where dust tends to accumulate. For stubborn dirt or stains, a damp cloth or mop can do wonders—just make sure the floor dries completely before proceeding. Thorough debris removal not only enhances the leveling process but also promotes a healthier environment. By taking the time to clean your floor, you're setting yourself up for a successful leveling project.
Inspect for Damage
Once you've cleared the floor, it's vital to inspect for any damage that could affect the leveling process. You want a solid foundation, so keep an eye out for:
- Cracks and Holes: These can lead to unevenness and must be filled.
- Moisture Issues: Check for signs of dampness or mold, which could compromise the floor's structural integrity.
- Warped or Buckled Boards: These need replacing or repair to guarantee a flat surface.
Addressing these issues is essential. Any damage can hinder your leveling efforts and lead to bigger problems down the line. Confirm you're working on a stable, dry surface to achieve the best results for your flooring project. Your freedom to create a perfect space starts here!
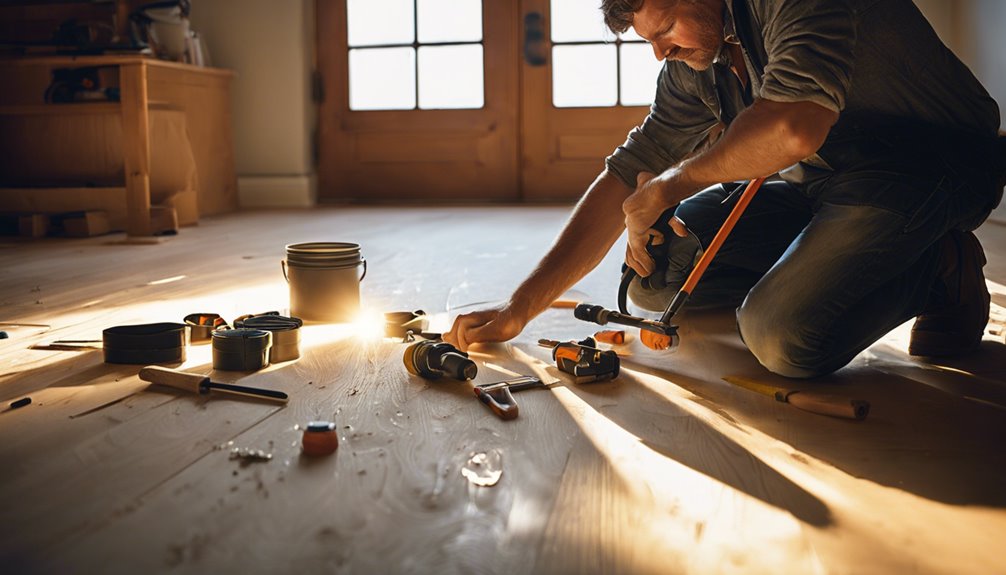
Applying Leveling Compound
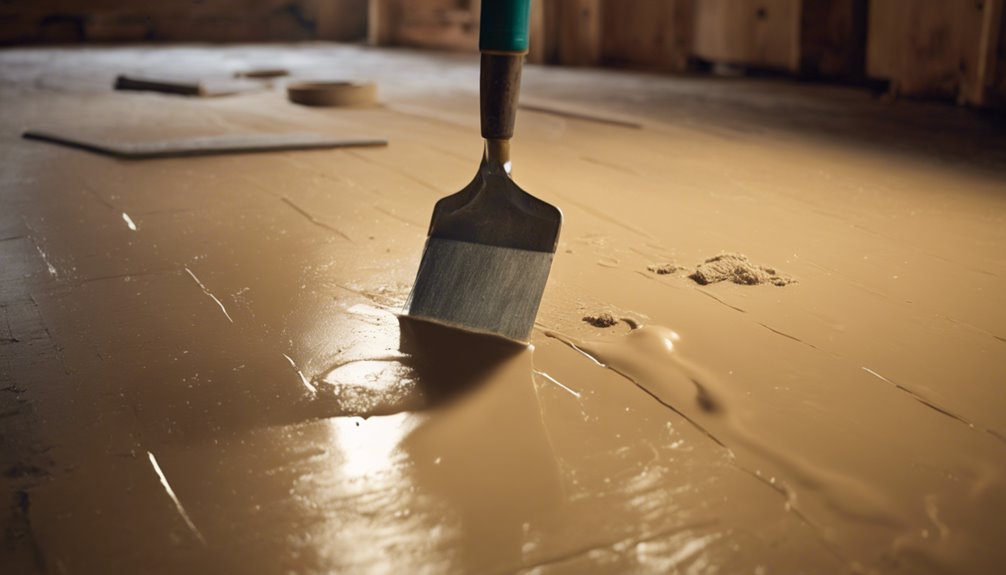
Applying leveling compound is an essential step in achieving a flat and even floor surface. Start by mixing the compound according to the manufacturer's instructions; consistency is key. You'll want to use a leveling technique that suits your floor's particular needs, whether it's a self-leveling compound or a traditional method. Pour the compound into the low spots, spreading it with a trowel or a flooring squeegee to guarantee even application. Keep an eye on the compound's thickness, as it shouldn't exceed the recommended depth. Work your way across the floor, allowing each section to set properly before moving on. Once you've completed the compound application, give it ample time to cure fully before proceeding with the next phase of your flooring project.
Finishing Touches and Tips
As you near the end of your flooring project, adding the finishing touches can greatly enhance both the appearance and durability of your new floor. Here are some practical finishing techniques to take into account before your final inspection:
- Sealant Application: Use a high-quality sealant to protect your floor from moisture and wear.
- Trimming and Molding: Install baseboards or quarter rounds for a polished look that also hides imperfections.
- Final Cleaning: Sweep or vacuum to remove dust, then mop with a suitable cleaner to make sure your floor shines.
Taking these steps not only boosts aesthetics but also extends the lifespan of your flooring. Embrace these finishing touches, and enjoy the freedom of a beautiful, level floor!
Frequently Asked Questions
How Long Does It Take for Leveling Compound to Dry?
When you're working with leveling compounds, it's important to know their drying time can vary. Typically, a thin layer of compound might dry in about 2 to 4 hours, while thicker applications could take up to 24 hours or more. Different compound types also affect drying times; some are formulated for rapid drying, while others may require longer. Always check the manufacturer's instructions to verify you're on track for the best results.
Can I Level a Floor Without Removing Existing Flooring?
Yes, you can level a floor without removing existing flooring by using a self-leveling compound. Make certain your current floor is clean, dry, and in good condition. You'll need to apply a primer suitable for your compound to guarantee proper adhesion. Then, mix and pour the self-leveling compound according to the instructions, letting it spread naturally to fill in low spots. Just be aware that this method may add some height to your floor.
Is Floor Leveling Safe for All Types of Flooring?
Imagine gliding across a perfectly level surface, like flying on a cloud. When it comes to floor leveling, it's generally safe for various flooring types, but there are exceptions. For wood flooring, verify the leveling compound is compatible to avoid damage. With carpet flooring, be cautious; excessive moisture can lead to mold. Always check the manufacturer's guidelines for your specific flooring type to maintain its integrity and guarantee a smooth, safe finish.
What Should I Do if the Floor Still Feels Uneven?
If your floor still feels uneven, start with a thorough floor inspection. Check for any hidden issues, like cracks or moisture, that could be contributing to the uneven surface. You might need to add additional leveling compounds or adjust the subfloor. If it's beyond your expertise, don't hesitate to consult a professional. Addressing the problem now will help guarantee a safe and comfortable living space in the long run.
Do I Need to Hire a Professional for Floor Leveling?
When considering whether to hire a professional for floor leveling, think about your budget and comfort with DIY techniques. While pros can guarantee a flawless finish, it can come with higher cost considerations. If you're handy and willing to learn, tackling it yourself might save you money. Just keep in mind that leveling requires precision, so weigh your skills against the potential for mistakes before deciding on your approach.


