Restoring antique tile patterns and colors demands precision and an understanding of historical context. First, assess the tiles for cracks, chips, or discoloration. Use mild soap and soft brushes to clean, carefully preserving integrity. When it comes to recoloring faded areas, match original hues with high-quality paints or glazes, ensuring attention to detail. Repair any structural damage with appropriate adhesives, always prioritizing safety and long-term durability. Finally, routine maintenance and moisture control are essential to preserving your hard work. For a thorough guide on techniques and materials, there's much more you should explore.
Understanding Antique Tile Types
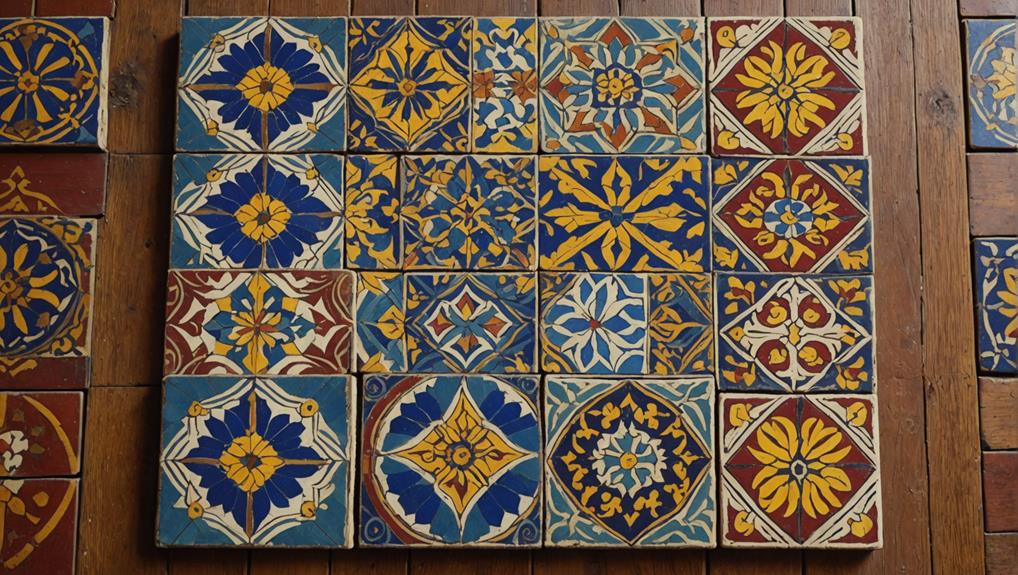
When it comes to antique tiles, understanding the various types can greatly enhance your restoration efforts. Antique tiles come with a rich tile history that spans centuries, encompassing a range of decorative styles that reflect the cultural and artistic movements of their time. You'll encounter ceramics such as encaustic tiles, known for their intricate patterns created by inlaid colors, or majolica tiles, celebrated for their vibrant glazes and illustrative designs.
Each type of tile has its own unique characteristics. For instance, you might find that tin-glazed tiles from the 16th century exhibit a distinct white surface, often adorned with blue or polychrome designs, typical of the European Renaissance. These tiles not only serve aesthetic purposes but also provide insight into the craftsmanship methods of the era. When handling these materials, be cautious, as deteriorating tiles may contain lead-based glazes, posing potential health risks.
Additionally, you'll want to familiarize yourself with the regional variations in tile production. Spanish, Portuguese, and Italian tiles each offer distinct motifs and glazing techniques, which are essential for accurate restoration. Knowledge of these decorative styles will not only guide your selection of replacement tiles but also help you maintain historical accuracy in your restoration projects. By understanding the types of antique tiles and their historical context, you're better equipped to make informed decisions that honor the craftsmanship of the past while ensuring safety in your restoration endeavors.
Assessing Damage and Wear
When evaluating the condition of antique tiles, you'll need to carefully identify the specific types of damage present, which can range from cracks to chips. Gauging surface wear is essential, as it not only affects the tile's aesthetic but also its historical value and integrity. Understanding these factors will guide you in determining the appropriate restoration methods to preserve their original charm.
Identifying Tile Condition
Evaluating the condition of antique tiles requires a keen eye and a systematic approach. Understanding tile history is essential as it helps you identify authentic materials and craftsmanship. Begin by examining the surface for any signs of wear, discoloration, or damage. Restoration techniques can vary based on the type of tile and the extent of the deterioration, making assessment critical.
Here's a simple table to help you categorize your observations:
| Observation | Description | Action Needed |
|---|---|---|
| Surface Cracks | Fine cracks that may spread | Inspect further |
| Fading Colors | Loss of vibrancy due to age | Consider restoration |
| Loose Tiles | Tiles may come off easily | Re-adhere securely |
| Stains | Marks from spills or wear | Deep clean or refinish |
Types of Damage
Evaluating damage and wear on antique tiles requires a thorough understanding of the various types of deterioration that can occur over time. You should recognize that cracks, chips, and surface abrasions are common issues that compromise the integrity and historical significance of the tiles. Cracks may arise due to temperature fluctuations or improper installation, while chips often result from heavy impacts.
In addition, the glaze can wear away, exposing the underlying clay body, which can affect the tile's color and design influences. It's essential to assess these damages not only for aesthetic restoration but also for the preservation of the tile's historical context.
Moisture damage, often overlooked, can lead to efflorescence or mold growth, posing safety hazards and additional deterioration. Moreover, discoloration may indicate chemical reactions or prolonged exposure to harsh cleaning agents, which can irreversibly alter the tile's appearance.
Surface Wear Assessment
After identifying the various types of damage that can afflict antique tiles, the next step involves a meticulous surface wear assessment. This critical evaluation helps you gauge the overall condition of the tile, focusing on how wear has affected both surface texture and color fading.
To conduct an effective assessment, consider the following:
- Surface Texture: Examine for any irregularities like scratches or chips that might compromise the tile's integrity.
- Color Fading: Take note of any areas where the vibrancy has diminished, as this can indicate prolonged exposure to sunlight or harsh cleaning agents.
- Overall Integrity: Check for cracks or loose tiles that could further exacerbate damage if not addressed promptly.
Cleaning Techniques for Restoration
When it comes to restoring antique tile patterns, effective cleaning techniques are crucial for preserving their historical integrity. The first step in your cleaning process involves evaluating the type of dirt or stains present. For light surface grime, a simple solution of warm water and mild soap can suffice. However, for tougher stains, you may need to utilize specialized chemical solutions. Always test these solutions in a small, inconspicuous area to verify they don't damage the tile.
As you gather your restoration tools, consider soft-bristle brushes, microfiber cloths, and non-abrasive sponges. Using harsh scrubbers can scratch the surface and further deteriorate the tile's finish. A soft brush can effectively lift dirt while being gentle enough to maintain the integrity of the patterns.
If you encounter mold or mildew, a solution of vinegar and water can be effective. Apply it carefully, allowing it to sit for a few minutes before gently scrubbing with a soft brush. For more severe cases, commercially available mold removers can be used, but always prioritize safety by wearing gloves and a mask.
Remember to rinse the tiles thoroughly after cleaning to remove any residual chemicals. Finally, allow the tiles to dry completely before proceeding with any further restoration work. By employing these meticulous cleaning techniques, you can verify that your antique tiles are not only clean but also preserved for future generations to appreciate.
Recoloring Faded Patterns
Recoloring faded patterns on antique tiles requires a careful approach to restore their original vibrancy without compromising their authenticity. First, you'll need to conduct thorough color matching, guaranteeing that the new hues align with the original shades. This meticulous process often involves consulting color charts or, if available, the original tiles for reference.
Once you've identified the correct colors, it's essential to prepare your workspace. Use well-ventilated areas and wear protective gear to guarantee your safety while working with paint or dyes. The next step is pattern replication, where you'll recreate the intricate designs that may have faded over time. A steady hand and a keen eye for detail are important here, as even minor deviations can alter the tile's aesthetic.
- Confirm that all materials are compatible with tile surfaces.
- Test your colors on a small, inconspicuous area first.
- Document your process for future reference or further restoration efforts.
You may consider using high-quality acrylic paints or specialized tile glazes that provide durability and longevity. It's imperative to allow adequate drying time between layers to avoid smudging. Finally, sealing the tiles with a protective finish not only enhances their appearance but also safeguards them against future wear. By carefully addressing color matching and pattern replication, you can breathe new life into faded antique tiles, preserving their historical significance while guaranteeing they remain a stunning feature in your space.
Repairing Cracks and Chips
When repairing cracks and chips in antique tiles, it's essential to first identify the type of damage you're dealing with, as this influences your restoration approach. You'll need to select appropriate repair materials that match both the tile's composition and historical context for a seamless finish. Understanding various restoration techniques will guarantee that your repairs not only preserve the tile's integrity but also maintain its aesthetic value.
Identifying Damage Types
How can you effectively identify the types of damage on antique tile patterns? Understanding the specific damage types is vital for any restoration project, especially when considering the historical significance of these tiles. Start by closely examining the surface for cracks, chips, or discoloration. Each type of damage requires distinct restoration techniques, which can impact the tile's integrity and value.
- Cracks: These often indicate stress or impact. Assess their depth and length to determine if they compromise the tile's structure.
- Chips: Look for missing pieces along the edges or corners. These not only affect aesthetics but can also lead to further deterioration if moisture penetrates.
- Discoloration: This can be caused by age, wear, or even chemical exposure. Identifying the cause is essential for selecting the right cleaning or restoration method.
Choosing Repair Materials
Selecting the right repair materials is vital for effectively restoring cracks and chips in antique tile patterns. You'll need high-quality repair adhesives that can bond securely without damaging the underlying tile or compromising its historical integrity. Look for adhesives specifically designed for ceramic or porcelain tiles, as these offer the best durability and resistance to aging.
Color matching is equally important in this process. When chips occur, they can disrupt the visual harmony of the tile. To maintain authenticity, you should carefully assess the original color and pattern of the tile. This often entails using color-matching kits or custom-mixed pigments to replicate the original hues precisely.
Furthermore, consider the safety of the materials you choose. Confirm that the repair adhesives are free from harmful chemicals and VOCs (volatile organic compounds) to protect both your health and the environment. Always follow the manufacturer's instructions for application, as improper use can lead to further damage. By prioritizing quality repair materials and meticulous color matching, you'll not only restore the aesthetic appeal of your antique tiles but also preserve their historical value for future generations.
Techniques for Restoration
After verifying you have the right repair materials, the next step involves applying effective techniques for restoring cracks and chips in antique tile patterns. Proper restoration is essential not only for aesthetic appeal but also for preserving the historical integrity of your tiles. Use specialized restoration tools, such as fine brushes, dental tools, and epoxy adhesives, to guarantee precision and safety during the process.
When addressing cracks and chips, consider these strategies:
- Thorough Cleaning: Remove debris and old adhesive to promote better bonding.
- Color Matching: Blend epoxy or filler with pigments that mimic the original tile colors for seamless restoration.
- Curing Time: Allow adequate curing time as per product instructions to guarantee a strong finish.
If the damage is extensive or if you feel uncertain about the restoration process, don't hesitate to seek professional services. Experts can provide specialized knowledge and advanced techniques that guarantee your antique tiles are restored safely and effectively. Remember, maintaining the beauty of your antique tiles requires careful attention to detail and respect for their historical significance.
Maintaining Restored Tiles
Maintaining restored tiles requires a meticulous approach to secure their longevity and aesthetic appeal. You'll want to implement effective preservation techniques that focus on both cleaning and protection. Start by establishing a routine maintenance schedule that includes gentle cleaning methods to prevent damage to the tiles' surface. Using a soft-bristle broom or a microfiber cloth can help remove dust and debris without scratching the delicate finish.
When it comes to cleaning solutions, always opt for pH-neutral products specifically designed for tile. Acidic or abrasive cleaners can erode the surface glaze and diminish the vibrancy of antique patterns. If you encounter stubborn stains, consider using a diluted solution of water and mild soap, applying it with a soft sponge.
It's also essential to avoid excessive moisture, as it can seep into the grout lines and cause mold or mildew. After cleaning, make certain that the area is dried thoroughly. For areas with high foot traffic, using protective pads under furniture and rugs can minimize wear and tear.
Furthermore, inspect your tiles regularly for any signs of damage or wear. Early detection allows for prompt repairs, which is vital in preserving the integrity of your restored tiles. Remember, maintaining the historical essence of your tiles is not just about appearances; it's about honoring the craftsmanship and stories they hold. By adhering to these guidelines, you can safeguard your restored tiles for future generations to admire.
Frequently Asked Questions
What Tools Are Essential for Restoring Antique Tiles?
For effective tile restoration techniques, you'll need several essential tools. A soft brush helps in cleaning without damaging the surface, while a steam cleaner can effectively remove grime. You'll also want a set of chisels for delicate repairs and a trowel for applying adhesives or grout. Don't forget safety goggles and gloves; antique tile preservation requires careful handling. These tools guarantee you maintain the integrity and beauty of your tiles throughout the process.
Can I Restore Tiles Without Professional Help?
Imagine breathing new life into tired tiles, reminiscent of a bygone era. Yes, you can restore tiles without professional help, using DIY techniques that honor their history. Start by evaluating their condition and gathering essential tools for tile maintenance. With care and patience, you'll clean, repair, and even re-glaze them, ensuring safety throughout the process. Just remember, meticulous attention to detail is key to preserving their timeless charm.
How Do I Identify the Original Tile Pattern?
To identify the original tile pattern, start by researching pattern sources, including historical documents or photographs of similar tiles. Examine the remaining fragments for unique shapes or colors that might indicate their significance. It's essential to take into account the historical context of your tiles, as this can guide your restoration efforts. Make certain you're using safe methods during your examination, avoiding harsh chemicals that might damage the tiles further. Document your findings for future reference.
Is It Safe to Use Chemical Cleaners on Antique Tiles?
Oh sure, go ahead and douse your antique tiles in chemical cleaners—what could possibly go wrong? But really, when it comes to chemical cleaner safety, you might want to think twice. Antique tile preservation is essential, and harsh chemicals can cause irreversible damage. Instead, opt for gentle, pH-balanced cleaners that respect the delicate nature of your tiles. Your historic treasures deserve better than a hasty scrub down with caustic substances!
What Are the Costs Associated With Tile Restoration?
When considering the costs associated with tile restoration, you'll need to evaluate various restoration techniques and their pricing. Budget considerations can greatly affect your choices, as some methods, like professional cleaning or re-grouting, may be more expensive than DIY approaches. You should also factor in materials, potential repairs, and any historical preservation requirements. By understanding these elements, you can create a thorough budget that aligns with your restoration goals and safety standards.


