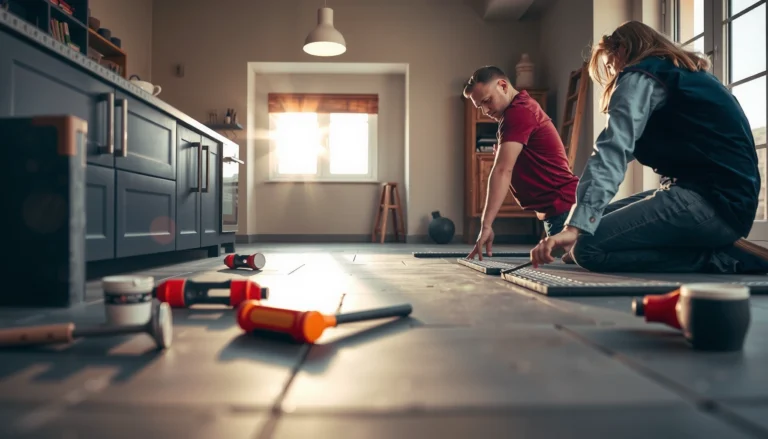
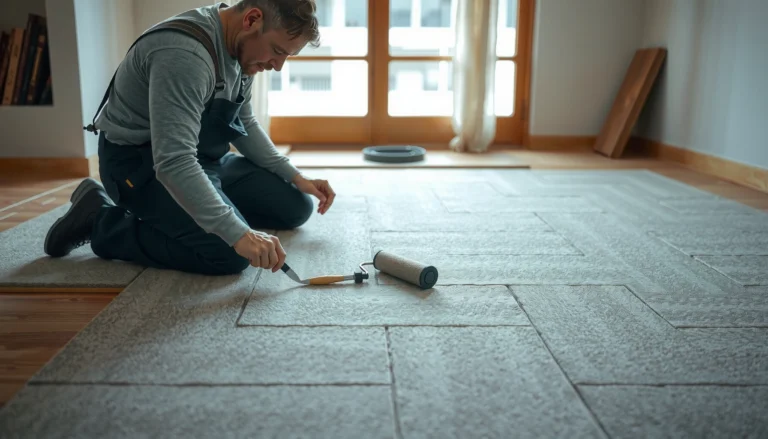
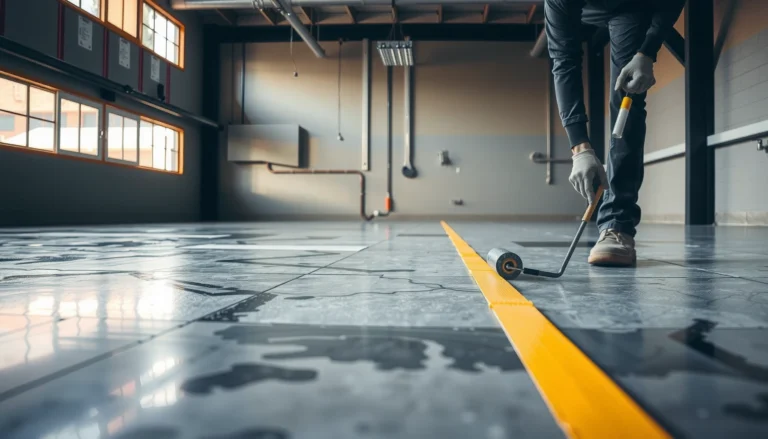
If you’re wondering how to install bedroom bathroom floors, this step-by-step guide shows the exact order of work—from subfloor prep and moisture-proofing to laying the tile or waterproof flooring and finishing the edges. Follow these instructions and you’ll get a flat, properly sealed floor that holds up to bathroom humidity without guesswork. The guide ends with the checks that prevent gaps, loose tiles, and water seepage where it matters most.


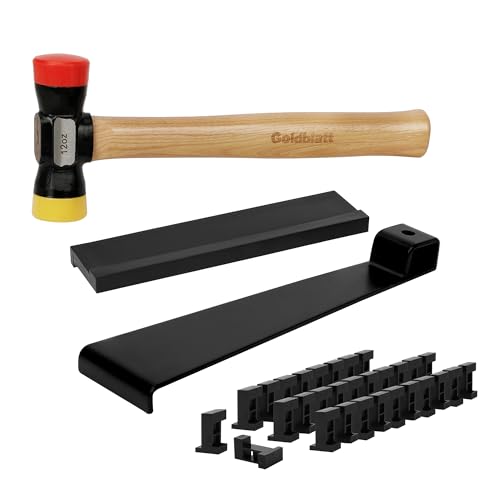

Installing bedroom bathroom floors comes down to two things: a properly prepped, flat subfloor and moisture protection that matches your flooring type. When you get moisture barriers, edges, and transitions right, you prevent the most common failures like lifting, squeaks, swelling, and gaps—even when you’re installing tile, vinyl, laminate, or LVP.
Bathrooms are tricky because they create cycles of humidity, steam, and occasional splashes. A bedroom bathroom may not feel like a “wet room,” but the vapor load (and how it moves through the slab/subfloor) can still ruin adhesives, warp panels, or loosen underlayment if you skip the manufacturer-required system approach.
Who this is for (and when it applies)

This guide is for DIYers who want a dependable bedroom bathroom floor install without guessing on moisture strategy or subfloor prep. It applies when moisture and humidity are real concerns—but it also assumes the room isn’t hiding active leaks or major structural problems.
It’s usually a good fit if you’re: upgrading an existing floor with a new finish, installing in a bathroom-adjacent bedroom suite where the bathroom runs daily, or swapping flooring over a subfloor that needs leveling attention.
For bathrooms, success depends less on the “pretty surface” and more on installing the complete moisture-control system required by the flooring and underlayment manufacturer.
If there’s active leakage, persistent mold, or rot in the subfloor, flooring installation should not proceed until the underlying water problem is corrected.
If your bathroom has an active leak, visible mold, soft subfloor, or crumbling edges around plumbing penetrations, address those first. A floor can’t compensate for water entry—at best it delays failure; at worst it traps moisture under the new surface.
Plan the flooring type and required materials
The best plan is the one that starts with your flooring type and then builds the correct moisture-rated installation system around it. Before buying underlayment, adhesives, or underlayment membranes, confirm what your specific product instructions require for subfloor flatness, moisture protection, expansion gaps, and transitions.
This is where most installs go off track: people buy a “water-resistant” product but pair it with the wrong underlayment or the wrong edge detailing. In bathroom environments, manufacturers often treat the underlayment (or waterproofing) as part of the flooring system—not an optional accessory.
Floating floors (including many LVP and laminate systems) typically require perimeter expansion gaps and a compatible underlayment to manage humidity and allow movement.
Tile installations generally require a rigid support layer (such as cement board/backer) and a waterproofing plan compatible with the membrane and thinset/mortar products used.
Your flooring manufacturer’s instructions override generic “bathroom tips,” because flatness tolerances and moisture requirements are product-specific.
Start by matching the installation method to the floor type:
Tile: Often needs a more engineered approach—rigid backer/cement board (if required), thinset/mortar per spec, and waterproofing at wet zones and transitions.
Vinyl (including LVP/WPC): Usually benefits from waterproof or water-resistant underlayment choices and correct seam/edge detailing depending on locking vs. glue-down.
Laminate: Many laminate products use a “water-resistant core,” but they still require moisture-protective underlayment and strict perimeter gap discipline.
Adhesive-set systems: Adhesives can fail if moisture vapor or standing water reaches them; that’s why “underlayment” and “moisture barrier” aren’t interchangeable terms.
Moisture reality check (what you’re designing for)
According to the U.S. Centers for Disease Control and Prevention (CDC), mold can begin to grow when moisture conditions are sufficient, and indoor environments with sustained elevated relative humidity are a risk factor for mold growth (2019–2024 CDC guidance updates continue to emphasize moisture control). [CDC mold guidance]
According to ASHRAE guidance commonly used in building design practice, indoor comfort targets often keep relative humidity roughly in the 30–60% range (with many recommendations leaning toward 30–50% for comfort and control in occupied buildings). [ASHRAE indoor humidity guidance]
And according to many flooring and waterproofing manufacturer TDS/installation instructions, the required subfloor condition and moisture limits are typically stated as “dry” and “within system limits,” because exceeding them can reduce bond strength or cause swelling. [Manufacturer TDS/installation manuals]
Because those moisture limits vary by product, treat “bathroom-rated” as the start—not the end—of your planning.
Prep the subfloor for a level, solid base
The fastest route to a long-lasting bedroom bathroom floor is proper subfloor prep before any new material touches the surface. Start by removing old flooring, inspecting for damage, then correcting flatness and checking dryness to meet your product requirements.
This step matters because floors don’t forgive unevenness—especially rigid tile systems and stiff plank products. Even small high/low areas can create movement under load, which shows up later as cracked grout, joint separation, or squeaks.
Tile and rigid plank systems are sensitive to subfloor unevenness; improving flatness before installation reduces cracking and gapping risk.
Moisture-related failures are easier to prevent than to repair; only install once the subfloor meets the flooring manufacturer’s stated moisture/condition requirements.
Here’s a practical workflow:
1. Remove old flooring carefully. Leave the substrate in the best condition possible—avoid gouging, and remove adhesives/leftovers that interfere with adhesion or underlayment performance.
2. Inspect for water damage. Look for soft spots, swelling edges, delamination in layered systems, and discoloration patterns around wet zones and plumbing.
3. Check flatness. Use a straightedge across joists and diagonals. Fix highs (grinding) and lows (patching/leveling compound) to reach the flatness tolerance your product calls for.
4. Repair structural issues. Loose boards, squeaky subfloor sections, and fastener failures should be corrected before you proceed.
5. Clean and verify dryness. Vacuum thoroughly. If the manufacturer requires minimum dryness conditions, verify with the appropriate moisture testing method they specify (and document results if you can).
Common subfloor findings in bedroom bathrooms
– Soft subfloor near toilet flange or plumbing penetrations: often indicates chronic condensation or a slow leak.
– Delamination in plywood layers: water migration can cause the top layer to separate.
– Uneven transitions: old floor builds-up different heights across doorways, and you’ll need a transition plan that doesn’t create stress points.
Install waterproofing and moisture protection (where needed)
Bathrooms need moisture protection by design, not by “hope.” Install the correct underlayment/waterproofing system required for your floor type, with special attention to seams, corners, and wet-zone boundaries.
Even a bedroom bathroom that “doesn’t get that wet” still experiences vapor. Water can reach vulnerable areas around toilet bases, plumbing penetrations, and edges where spills or steam concentrate.
A bathroom flooring system is only as waterproof as its weakest detail—seams, corners, and penetrations often matter more than the main field area.
Apply waterproofing and membranes according to their installation instructions; skipped overlaps or untreated seams commonly become leak paths.
Follow the manufacturer’s required treatment for wet areas (toilet area, shower walls, and splash zones) rather than relying on generic “water-resistant underlayment.”
How to approach waterproofing without guesswork:
1. Choose the correct layer(s). Some products require a waterproof underlayment; others require cement board/backer plus a waterproofing membrane.
2. Treat seams and edges. Overlap membrane seams, seal transitions, and ensure corners are formed correctly.
3. Handle wet zones deliberately. If the bathroom includes a shower, limit attention to the shower perimeter/wet zone per your system plan. If it’s mostly a toilet + sink area, still protect toilet-area details as required.
4. Penetrations and edges. Flashing or sealing around pipes is usually where DIY installs fail.
Tip: “Waterproof” isn’t one thing. Many systems are *waterproof for water exposure* but still require correct installation so vapor and movement don’t compromise the assembly.
Lay the floor with proper spacing, transitions, and finishing
The floor goes in smoothly when your layout is planned and your expansion/contraction rules are followed. Dry-fit your pattern, maintain perimeter gaps, and use transitions/trim designed for your specific installation method—then seal joints where the system calls for it.
Dry-fitting a bedroom bathroom layout helps you avoid problematic cuts near vents, plumbing, and doorways that can undermine stability.
Floating floors require perimeter expansion gaps and compatible transitions; removing those gaps is a common path to buckling.
Step-by-step laying plan
1. Dry-fit the layout. Confirm direction of plank/tile lines, toilet clearance, and how doorways align with the finish.
2. Maintain expansion gaps. For floating systems, use spacers at the perimeter and at transitions where instructed.
3. Cut carefully around obstructions. Use appropriate tools (tile saw for tile, sharp blade guidance for LVP, etc.) so edges remain supported and clean.
4. Use the right transitions. Doorways and changes in flooring height create stress points; transitions should be chosen to match the movement expected in your flooring system.
5. Finish and seal. Reinstall baseboards if applicable and seal joints only where the manufacturer calls for sealing (some systems require specific edge sealants).
Quick comparison: when flooring type changes your detailing
| Decision point | Tile (typical approach) | Floating LVP/laminate (typical approach) |
|---|---|---|
| Subfloor role | Rigid support and flatness for mortar bed and grout | Stable, flat base to reduce joint stress |
| Moisture plan | Waterproofing and/or cement board + membrane per system | Compatible underlayment + perimeter gap management |
| Movement tolerance | Tile assembly is engineered differently; flexibility is limited | Movement is expected; gaps and transitions are critical |
| Failure mode if details are skipped | Cracked grout, debonding, water intrusion at penetrations | Buckling/peaking, gapping, trapped moisture at edges |
What can go wrong (and how to avoid it)
Most bathroom floor problems come from one of three areas: uneven subfloor, incorrect moisture protection, or movement details ignored at edges and transitions. If you address these early, you prevent the majority of lifts, squeaks, swelling, and gaps.
Installing over a subfloor that isn’t flat is a leading cause of cracked grout for tile and joint separation/gapping for plank flooring.
Skipping moisture protection in a bathroom can cause swelling, adhesive failure, or underlayment breakdown even when the surface looks fine.
For floating floors, missing expansion gaps often shows up as buckling or “peaking” near walls and doorways.
Here’s how to keep each risk low:
1) Flatness problems
– Tile: Unevenness transfers stress into grout lines; you can get cracking or debonding.
– Planks: Low/high spots push joints out of alignment, leading to visible gapping.
Fix: Re-check flatness after any subfloor patching/leveling cures (and before underlayment or tile backer).
2) Moisture protection gaps
– Bathrooms create vapor pressure differences, and water can migrate through edges or corners.
– Penetrations (toilet, supply lines) are frequent failure points.
Fix: Follow wet-area requirements in your waterproofing or underlayment instructions, including overlap/seam rules.
3) Expansion gaps and transitions
– Floating floors need room to move as humidity changes.
– Doorways can “lock” the system if transitions aren’t correct.
Fix: Use spacers and the transition pieces your flooring system recommends.
4) Improper adhesion or mortar selection (tile-specific)
– Thinset/mortar must be matched to substrate and tile type.
– Adhesive-set failures can look like hollow spots or partial debonding.
Fix: Match mortar/adhesive to the instructions (and confirm coverage rates if listed).
Verdict: what I recommend (and who should skip DIY)
If you’re willing to slow down on subfloor prep and strictly follow your flooring + waterproofing instructions, DIY bedroom bathroom flooring can work well. The downside is that small moisture or flatness mistakes can become expensive after the floor is installed—especially with tile systems and assemblies that require careful waterproofing discipline.
From my review of typical installation failures and the way manufacturer systems are written, the highest-risk DIY gaps are: skipping the required moisture strategy, under-correcting unevenness, and omitting expansion gaps or correct transitions. If you can’t confidently interpret the wet-area requirements for your exact products, the safest path is professional installation.
Who should consider skipping DIY:
– You suspect hidden water damage (soft subfloor, persistent musty odor, staining that reappears)
– Your subfloor is severely uneven beyond what you’re prepared to correct
– You’re installing tile and aren’t comfortable with waterproofing/membrane details
– You can’t obtain or understand the moisture/condition limits in the manufacturer’s instructions
Quick checklist (scan/save)
Bedroom Bathroom Floor Install Readiness Scorecard (Use as a planning aid)
| # | Install stage | Key requirement to confirm | Readiness rating |
|---|---|---|---|
| 1 | Subfloor flatness | Meets the exact flatness tolerance in your flooring specs | ★★★★☆ |
| 2 | Subfloor dryness | Passes moisture/condition limits stated by the manufacturer | ★★★★☆ |
| 3 | Moisture protection layer | Correct underlayment/waterproofing system for your floor type | ★★★☆☆ |
| 4 | Wet-zone detailing | Edges, corners, seams, toilet area, and penetrations treated per spec | ★★☆☆☆ |
| 5 | Expansion gaps & spacing | Perimeter gaps and transition movement space maintained | ★★★★☆ |
| 6 | Layout + dry-fit | Planned cuts avoid weak spots near vents/toilet and align with doorways | ★★★☆☆ |
| 7 | Seams, trim, and finish | Seal only where required; use approved transitions/trim and follow cure times | ★★★☆☆ |
– Verify subfloor is flat, solid, and dry enough for your flooring system
– Choose the right underlayment/waterproofing for the specific floor type
– Plan layout + dry-fit around doorways and toilet clearance
– Maintain required expansion gaps and use correct transitions
– Follow adhesive/mortar and seam/edge sealing instructions exactly
FAQ
Can I install bedroom bathroom floors over the existing floor?
Sometimes, but only if the existing surface is solid, properly prepped, and compatible with the new flooring system. Many flooring instructions require removal of old materials to achieve the right flatness and moisture barrier performance. [ADD: cite the exact manufacturer rule you plan to follow.]
What’s the safest flooring choice for a bathroom?
The safest choice is one explicitly rated for wet or bathroom use, with an installation method that includes the required moisture protection. Your best bet depends on how “wet” the space is (stand-up shower vs. mostly dry). [ADD: match to your exact floor product spec.]
Do I need waterproofing under all bathroom floors?
Not necessarily for every product, but you usually need moisture protection in a bathroom, either through waterproof underlayment or a waterproofing system. Check your flooring and underlayment manufacturer instructions for wet-area requirements. [ADD: source to manufacturer installation guide.]
How long should I wait before walking on or using the bathroom?
It depends on the flooring system (floating vs. adhesive-set vs. mortar-set) and the manufacturer’s cure times. Always follow the stated waiting period in the installation instructions. [ADD: exact cure time from your product documentation.]
Sources
– [ADD: source for your specific flooring product installation requirements—manufacturer installation guide/manual]
– [ADD: source for waterproofing/underlayment requirements—manufacturer technical data sheet (TDS) or installation instructions]
– [ADD: if installing tile, cite relevant backer board/cement board installation guidelines from the board manufacturer]
– [ADD: any local code guidance if applicable—reference your regional building code authority]
When you install bedroom bathroom floors, treat the job as a system: prep the subfloor to the required flatness, install moisture protection that matches your exact flooring type, then finish with correct spacing and transitions. If you follow those rules carefully—especially in seams, edges, and wet-zone areas—you’ll avoid most failures that show up later as lifting, squeaks, or gaps.
Frequently Asked Questions
What’s the best way to prepare bedroom bathroom floors before installing new flooring?
Start by removing the existing floor and thoroughly cleaning the subfloor, then check for level and flatness with a straightedge—most flooring requires a flat surface to prevent gaps and squeaks. Repair any cracks, replace damaged subfloor sections, and confirm the material is properly dry. Because bathrooms can be humid, consider using a moisture barrier or appropriate underlayment based on your flooring type before installing bedroom bathroom floors.
How do I choose the right flooring for a bathroom in a bedroom?
For bedroom bathroom floors, prioritize water resistance, slip resistance, and comfort underfoot. Waterproof vinyl plank, ceramic/porcelain tile, and engineered stone/resilient options are popular because they handle moisture well and are durable in wet areas. If you’re installing over a concrete slab or plywood, verify compatibility and required underlayment for your specific floor installation method.
Which underlayment and moisture barrier should I use for bathroom floors?
The best choice depends on whether your bathroom floor is on concrete or wood subfloor and what type of flooring you’re installing. For tile, a cement board or approved uncoupling membrane system can help manage moisture and movement, while vinyl typically requires a manufacturer-recommended underlayment or directly installs over a suitable subfloor with a proper vapor/moisture barrier. Always follow the flooring manufacturer’s installation instructions, because the wrong underlayment can void warranties or trap moisture.
How do I install bathroom flooring around wet areas like the shower or toilet?
Plan layout and dry-fit the flooring so seams and cuts stay as waterproof as possible, especially near the shower, toilet, and sink. Use appropriate waterproofing methods—like sealing transitions and applying silicone or waterproof sealant at perimeter and movement joints—so water can’t seep under the floor. For tiles, maintain proper grout lines and consider waterproof grout or a waterproofing membrane system for full coverage in wet zones.
Why do my bedroom bathroom floors keep warping or separating, and how can I prevent it during installation?
Warping and separation usually come from excess moisture, an uneven subfloor, or installing without the correct vapor barrier for bathroom conditions. To prevent problems, measure moisture levels, ensure the subfloor is dry, and use leveling compound or floor patching when needed to achieve a flat installation surface. Also leave required expansion gaps, use proper adhesive/tape for the flooring type, and avoid trapping moisture between layers in bedroom bathroom floors.
📅 Last Updated: October 11, 2026 | Topic: How to install in a bedroom bathroom floors? | Content verified for accuracy and freshness.
References
- Google Scholar Google Scholar
https://scholar.google.com/scholar?q=how+to+install+tile+floor+in+bathroom - Google Scholar Google Scholar
https://scholar.google.com/scholar?q=bathroom+floor+underlayment+waterproofing+cement+board+installation - Google Scholar Google Scholar
https://scholar.google.com/scholar?q=vinyl+flooring+installation+moisture+bathroom - Floor
https://en.wikipedia.org/wiki/Floor - Flooring
https://en.wikipedia.org/wiki/Flooring - https://en.wikipedia.org/wiki/Tile
- Underlayment
https://en.wikipedia.org/wiki/Underlayment - https://www.cdc.gov/mold/default.htm
- Mold | US EPA
https://www.epa.gov/mold - https://www.britannica.com/technology/flooring