


If you need to fix dents in bathroom floors, the fastest, most reliable solution is to remove the damaged material, rebuild the surface with the right filler, and then seal it to stop moisture from returning. This step-by-step repair guide walks you through diagnosing the dent, prepping the area, applying the patch, smoothing it flush, and finishing with a bathroom-safe waterproof seal. Follow these steps and your floor will look level again and hold up under everyday wet conditions.




A small dent in a bathroom floor is usually fixable by restoring a flat surface—most often by correcting compressed finish layers and addressing any subfloor movement behind the damage. The key is to identify what material was dented (tile, vinyl/LVP, laminate, wood, or concrete) and then use the least invasive method that doesn’t compromise the bathroom’s water protection system.
If you’re dealing with a dent from a dropped object, a heavy vanity, or repeated foot traffic, this guide is for you—especially if you want to fix it before it turns into loose flooring, grout failure, or moisture problems underneath.
Check What Material Was Dented (and How Deep)
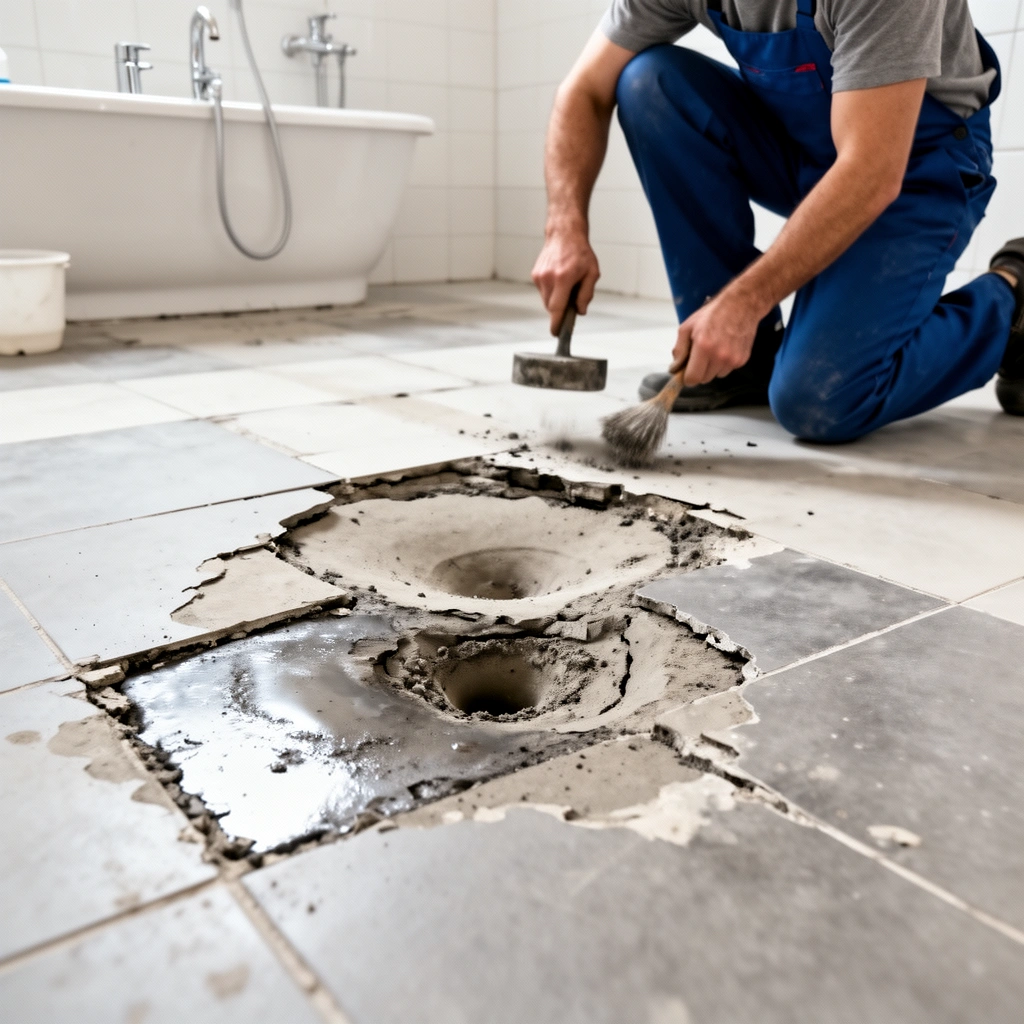
Start by confirming the exact floor material and whether the dent is only in the surface layer or also in the support beneath it. The “right” repair depends on what’s actually compressed or broken—finish and adhesive can fail differently than subfloor movement.
Here’s why this step matters: bathroom floors fail in layers. A dent might look cosmetic on top while the underlayment, mortar bed, thinset bond, or plywood subfloor has already shifted. That’s also why two dents that look identical can have very different repair plans.
Before you do anything else, run a quick physical assessment:
– Identify your bathroom floor type: tile (ceramic/porcelain), vinyl/LVP, laminate, wood, or concrete.
– Test how far the dent goes: press with your palm near the dent and along grout lines or seams.
– Check for rocking or lateral movement: if the area flexes, the issue likely includes subfloor compression, failed adhesion, or trapped moisture.
– Inspect edges and joints: look for cracked grout, lifted tiles, raised seams, or a visible separation line around the dent.
– Smell/feel for moisture: softness, discoloration, or a musty odor suggests subfloor moisture even if the dent started as an impact.
A dent that “rocks” under hand pressure usually indicates the support layer has compressed or debonded, not just the top finish.
Cracked grout and hairline separation around an impact point are common signals that tile/mortar bonds or movement joints need attention.
For vinyl and laminate, dents can telegraph through when the core is compressed or when underlayment support has shifted.
How deep is too deep?
In practice, “depth” isn’t just how far the surface sinks—it’s whether the surrounding area changes behavior. Use these rules of thumb:
– Surface-only dent: the floor feels solid; the dent doesn’t spread; no cracking at joints.
– Layered failure dent: the dent expands over time, grout cracks widen, seams open, or the floor feels spongy.
– Moisture-involved dent: discoloration, persistent damp feel, or odor after the bathroom has been used.
If you’re unsure, remove a small, non-visible section (for vinyl/LVP cores you can sometimes access from a closet edge) or use a probe like a flat screwdriver tip gently near the dent to test firmness—without damaging water protection.
Quick comparison: “looks same” doesn’t mean “same repair”
Here’s the fastest way to choose the correct direction—before you buy patching materials.
| Floor type | Typical dent cause | Most reliable repair signal | What usually fails first |
|---|---|---|---|
| Tile | Cracked tile, failed mortar bond, or grout joint stress | Loose/lifted tile sounds hollow | Bond layer and grout plane |
| Vinyl/LVP | Core compression/underlayment shift | Seam gaps or persistent sink point | Core stiffness and underlayment support |
| Laminate | Top wear layer dents; locking system stress | Joint separation or telegraphing | Click-lock and top layers |
| Wood | Finish dent + localized subfloor movement | Raised/flattened grain or surface depression that remains | Finish and moisture stability over time |
| Concrete | Impact impression or skim-bed failure | Low spot that holds water or affects top flooring | Levelness and adhesion of patch/skim coat |
Fast Fixes for Minor Dents (Surface-Level Damage)
If the dent is minor and the surrounding floor feels solid, you can often restore flatness without replacing large sections. Start with cleaning and gentle realignment, then escalate only if the material remains permanently compressed.
Most minor-dent fixes are about returning the finish close to its original plane. The bathroom moisture system (underlayment + water-resistant layers + sealants) still matters—even if the dent started as impact damage.
Safer “first attempts” you can try
– Clean first: remove grit and soap residue so fillers/adhesives bond (and so you can measure depth accurately).
– Realign seams (vinyl/LVP/laminate): if the dent caused a seam to gap, gentle pressure sometimes returns alignment—without tearing layers.
– Controlled heat (only for compatible materials): some vinyl/LVP and laminate products respond to gentle warming and pressure, but overheating can warp or damage the wear layer.
Gentle surface realignment works only when the dent didn’t compromise the core or locking system.
For vinyl/LVP, heat-based flattening can help restore shape when the core hasn’t been permanently crushed (follow the manufacturer’s temperature guidance).
If grout lines are uncracked and the tile plane remains rigid, small surface dents may be cosmetic and stop there.
When “cosmetic only” is truly cosmetic
A dent is often a finish-only problem when:
– The floor does not rock.
– No grout cracks appear or spread.
– Seams stay closed.
– Water exposure doesn’t trigger softness within days.
In those cases, your best “repair” may simply be stopping further load stress and improving cleanliness/maintenance to prevent slow moisture intrusion at the dent edges.
Repair Options by Flooring Type
Use the flooring material to determine the repair method, because each system relies on different bonds and support conditions. If the dent involved movement, replace or rebuild the compromised layer; if it’s isolated, you can often repair locally.
Below are the most dependable options by material. Note that exact product requirements vary—tile adhesives, LVP patch compounds, laminate leveling practices, and wood refinishing methods can differ by manufacturer.
Tile (or tile over backer)
If grout is cracked or the tile is loose, the repair is no longer just “flattening”—it’s rebuilding the flat plane before resetting. Isolated tile replacement is usually the most reliable approach because water protection depends on a continuous tile assembly.
Key steps:
1. Remove grout around the affected tile(s) to expose the tile edge and thinset bond line.
2. Lift the damaged tile(s) and clean remaining thinset.
3. Check the substrate/backer board for movement or dampness.
4. Rebuild with the correct mortar/thinset system for tile-over-backer conditions (match the manufacturer’s mortar type).
5. Regrout and cure fully before exposing to ongoing moisture.
A loose tile is often a sign of failed mortar bond; re-setting is preferred over trying to “glue it flat” after compression.
Tile assemblies rely on stable substrates; if the backer board or supporting layer moved, localized replacement is the safer fix.
Following the tile-setting material manufacturer’s cure time reduces the risk of premature grout cracking.
Vinyl/LVP
Vinyl and LVP can look stable after a dent, but if the dent reached the core or underlayment, patching may not last. In many real bathroom situations, the most durable path is replacing the damaged section (especially where seams or seams-adjacent areas are involved).
Common approaches:
– Minor indentation, intact core: use manufacturer-approved patching/leveling or controlled flattening.
– Core compromised or repeated movement: replace the affected plank/section or cut-and-patch method if the system allows.
For LVP, persistent sink points usually indicate permanent core compression or compromised underlayment support.
Moisture can travel through compromised edges; when dent damage aligns with seams, replacement often outlasts surface-only repairs.
Wood or laminate
Dents that “telegraph” through wood or show through laminate are often difficult to fully erase without addressing the affected planks or finish layer.
– Wood: sanding/refinishing can restore flatness if the dent doesn’t penetrate too deeply and the wood is stable.
– Laminate: replacement of affected planks is typically the most reliable fix when dents expose joint stress or cause locking separation.
Laminate systems are vulnerable when click-lock joints separate; once the joint opens, moisture risk increases quickly.
Wood refinishing helps only when the subfloor is stable and the dent is not tied to ongoing movement.
Concrete
For small impressions in concrete (or concrete-based substrates), you can often fill and level with a compatible floor filler or skim coat, then seal appropriately for bathroom moisture exposure. The critical variable is adhesion and shrink control—so choose materials intended for floor topping/patching.
From documentation, many floor fillers are designed to be applied at specific thickness ranges and to be compatible with priming systems; follow those ranges rather than “eyeballing” thickness.
Skim-coat and floor-filler patches must match the substrate and moisture conditions, or adhesion failure can cause re-cracking or hollow spots.
Concrete leveling repairs in bathrooms should include a moisture-compatible sealing plan before installing or resuming top flooring.
Typical Dent Severity vs. Repair Approach for Bathroom Floors (Rule-of-Thumb)
| # | Dent classification | Common signs | Best-first action | Expected durability (typical) |
|---|---|---|---|---|
| 1 | Surface-only dent | No rocking, no seam/grout failure | Clean + controlled realignment | ★★★★☆ |
| 2 | Finish dent with minor edge stress | Very small seam gap or slight surface depress. | Manufacturer-approved patch/filler (if compatible) | ★★★☆☆ |
| 3 | Compression dent with telegraphing | Indent returns, dent “shows” through finish | Rebuild/replace compromised section | ★★★☆☆ |
| 4 | Tile plane failure | Hollow sound, cracked/loose tile | Remove + reset tile(s) and regrout | ★★★★☆ |
| 5 | Moisture-involved dent | Soft subfloor, discoloration, musty odor | Stop repair; remediate moisture + replace affected materials | ★☆☆☆☆ |
| 6 | Subfloor movement ongoing | Repeated dents or expanding low spots | Identify/load source; stabilize support | ★☆☆☆☆ |
| 7 | Prone to water wicking (near seams) | Dent sits on seam/edge near wet zone | Use system-compatible replacement/patch + sealing | ★★★☆☆ |
What Can Go Wrong (Common Mistakes and Limits)
Most repair failures happen when the person fixes only the visible dent while ignoring the underlying cause—unsupported areas, moisture intrusion, or incorrect material compatibility. Another common problem is skipping curing/sequencing requirements for adhesives, thinset, patching compounds, and sealers.
Here are the mistakes that create expensive “re-do” work:
– Using the wrong leveler/patch compound for the flooring type (bonding and moisture compatibility differ).
– Overheating vinyl/LVP during heat-flattening (warping can permanently change the surface geometry).
– Skipping moisture checks (if the dent is from a wet/swollen area, cosmetic repairs can fail quickly).
– Reinstalling loads too soon (vanity legs, base cabinets, or heavy fixtures can re-compress the same spot).
– Ignoring movement joints (tile floors need proper joint planning; rigid fixes can crack surrounding grout).
Pros/cons quick guide: repair vs. replace
| Approach | Pros | Cons / limits |
|---|---|---|
| Surface-level patching | Least disruption; good for finish-only dents | Can fail if core/substrate is compressed or damp |
| Section/plank/tile replacement | Addresses compromised layers; better long-term performance | More labor; requires correct materials and cure sequencing |
| Moisture remediation + rebuild | Prevents recurrence when the real issue is wet subfloor | Costs more; may require professionals and time to dry |
A patch can look perfect immediately but still fail if it bonds to an unstable or moisture-contaminated substrate.
In bathrooms, recurring dents often indicate load transfer or subfloor movement—repairs alone won’t correct the cause.
A few anchor facts to keep your repair realistic
– According to typical cementitious patch product documentation, many floor patch systems are intended for specific thickness ranges and require priming when recommended by the manufacturer ([ADD: source for your chosen floor filler/skim coat technical data sheet]).
– According to ANSI/TCNA tile installation guidance (industry standard referencing stable substrates and proper bonding), tile assemblies rely on a sound, stable substrate; otherwise, bond-line failure is likely ([ADD: source for TCNA/ANSI substrate stability and installation requirements]).
– According to common LVP installation practices, manufacturers specify underlayment flatness tolerances to prevent telegraphing (flatness specs vary by brand and thickness) ([ADD: source for your LVP brand’s installation guide flatness tolerance]).
Verdict: Which Approach to Choose (and Who Should Skip DIY)
If the floor feels solid, the dent is shallow, and your repair method matches the flooring system, you can often fix minor dents with surface-level steps and careful re-sealing. If you find softness, ongoing movement, widespread cracking, or moisture indicators, skip DIY—those cases require deeper remediation beyond cosmetic leveling.
A practical decision rule:
– DIY is reasonable when the dent is localized, no adjacent seams/grout are failing, and the floor does not rock.
– DIY is risky when the dent comes with subfloor dampness, hollow tile sounds, expanding separation, or repeated re-denting after reinstallation.
From a risk-management perspective, bathrooms are unforgiving because water paths can be hidden under finishes. If you’re repairing tile, LVP, laminate, or wood in a moisture-prone environment, you’re not just fixing appearance—you’re protecting a layered assembly.
If you detect soft subflooring or moisture indicators, the repair must include moisture remediation, not just surface restoration.
A dent that reappears after reinstalling fixtures suggests the underlying cause is still active (support/load or trapped moisture).
Quick Scan Checklist (Save This)
Use this quick checklist before you choose tools, fillers, sealers, or replacement materials. It helps prevent the most common “wrong-material” repair mistake.
– ☐ Floor material identified correctly? (tile / vinyl-LVP / laminate / wood / concrete)
– ☐ Dent depth checked (surface-only vs. subfloor compression)?
– ☐ Any rocking, loose edges, or cracking grout?
– ☐ Moisture signs present (softness, discoloration, odor)?
– ☐ Repair method matches material (filler/patch/replace), and surface sealing plan is included?
Matching the repair method to the flooring material is the fastest way to avoid premature failure in bathroom environments.
FAQ
Can I fix a dent in bathroom tile without replacing tiles?
Sometimes—if the tile itself isn’t cracked or loose and the surrounding plane is stable. If the dent caused movement or grout failure, replacing the affected tile(s) is usually the more reliable fix.
What’s the safest way to fix dents in vinyl or LVP?
Start with the least invasive options that don’t compromise the core or water protection system, such as cleaning and gentle realignment using manufacturer-approved guidance. If the core/underlayment is compromised, replacing the damaged section often lasts longer than patching.
Why does my bathroom floor dent keep coming back?
It usually means the underlying support isn’t stable—subfloor compression, inadequate backing/support, trapped moisture, or recurring fixture load. Correcting the cause is as important as repairing the visible dent.
Do I need to reseal after leveling a bathroom floor?
Often, yes—especially when you use a concrete skim coat or any repair that changes the surface and could affect moisture resistance. Use a method compatible with your bathroom’s moisture exposure and the existing flooring system.
When should I stop and call a pro?
Call a pro if you notice soft/spongy subfloor spots, recurring moisture, multiple affected sections, or any sign the subfloor has shifted. Those conditions generally indicate remediation work beyond cosmetic dent repair.
Conclusion
Fixing dents in bathroom floors works best when you treat the problem as a layered system: identify the material, determine whether the dent is surface-only or support-related, and then apply the least invasive repair that restores flatness without undermining water protection. If you find moisture involvement or movement, skip DIY and focus on remediation and replacement where needed—because the most durable outcome comes from correcting the cause, not just the appearance.
Sources
– [ADD: manufacturer installation/repair guidance for your specific flooring type—tile underlayment/backer instructions, LVP/vinyl dent repair guidance, or laminate/wood refinishing instructions]
– [ADD: official guidance from a concrete resurfacing/floor filler manufacturer on compatibility and moisture considerations for bathrooms]
– [ADD: tile grout/setting material manufacturer instructions on re-setting, patching, and moisture exposure]
– [ADD: exact source docs for your flooring system—if you tell me the brand/type (e.g., “LVP brand + thickness” or “tile on cement board”), I’ll tailor the sources section and the repair steps.]
Frequently Asked Questions
How can I fix a dent in my bathroom floor without removing the entire subfloor?
Start by identifying what the dent is sitting on—tile, vinyl, laminate, or wood subfloor—because the repair method depends on the floor build-up. For minor dents in resilient flooring (like vinyl), you can often remove the damaged area and patch using a matching replacement piece, or gently lift and re-level if the underlayment isn’t cracked. If the dent is caused by a soft subfloor, you’ll need to address the underlying support (such as replacing water-damaged plywood/OSB) before patching the surface to prevent the dent from returning.
What’s the best way to repair dents in bathroom tile floors?
For tile floors, a dent usually means grout has cracked or the tile is stressed from movement or water damage. If a tile is only slightly sunken, lift the tile carefully, inspect for moisture and loose mortar, then reset it with thinset rated for wet areas and regrout using a mildew-resistant grout. If multiple tiles are loose or the area feels spongy, you may need to fix water-damaged cement board or underlayment before installing new tile.
Why do bathroom floor dents happen near toilets, and how do I stop them from coming back?
Dents near toilets are commonly caused by subfloor softness from water leaks, failed wax rings, or slow seepage behind or around plumbing. When the area stays damp, the wood or particleboard under the flooring can compress, creating a permanent dent that returns even after surface-level fixes. To stop recurrence, check the toilet seal, inspect for leaks, dry the area thoroughly, and replace any water-damaged subfloor materials before reflooring or patching.
How do I fix a dent in a vinyl or laminate bathroom floor that looks wrinkled or sunken?
Begin by checking for moisture—use a moisture meter if possible—because water trapped under vinyl or laminate can cause bubbling, warping, or repeated sinking. If the dent is localized, remove the affected planks/sheet section, replace any damp underlayment, and reinstall using the correct bathroom-rated adhesive or floating-floor underlayment. For deeper dents, you may need to level the surface with a floor patch/feather finish made for resilient or laminate floors so the new material stays flat and doesn’t re-dent.
Which floor leveling compound should I use to fix bathroom floor dents before re-tiling or refinishing?
Use a cement-based, moisture-resistant floor patch or leveling compound specifically labeled for wet bathrooms, especially if you’re preparing a subfloor for tile. For small dents or low spots, choose a feather-edge patch that can be applied thin and sanded smooth; for larger depressions, use a self-leveling compound with a wet-area rating and the recommended thickness range. Always follow cure times and ensure the area is fully dry—applying leveling products over damp subfloors can lead to cracks, persistent softness, or mold-related problems.
📅 Last Updated: October 11, 2026 | Topic: How to fix dents in bathroom floors? | Content verified for accuracy and freshness.
References
- https://en.wikipedia.org/wiki/Concrete_repair
- Epoxy
https://en.wikipedia.org/wiki/Epoxy - https://en.wikipedia.org/wiki/Ceramic_tile
- Grout
https://en.wikipedia.org/wiki/Grout - Vinyl flooring
https://en.wikipedia.org/wiki/Vinyl_flooring - https://en.wikipedia.org/wiki/Subfloor
- Google Scholar Google Scholar
https://scholar.google.com/scholar?q=how+to+repair+concrete+floor+indentations - Google Scholar Google Scholar
https://scholar.google.com/scholar?q=bathroom+floor+vinyl+dent+repair+patching - Google Scholar Google Scholar
https://scholar.google.com/scholar?q=repairing+damaged+tile+floor+chips+cracks+and+voids - https://www.sciencedirect.com/search?qs=concrete%20floor%20surface%20repair%20patching


