
Learning how to cut basement floors starts with choosing the right method—diamond blade for concrete, proper depth control for slabs, and the right layout to avoid rebar and utilities. This guide lays out safe, practical steps to plan the cut, set up protection and dust control, and execute clean cuts without cracking or compromising the slab. If you need the fastest path to a safe, accurate basement floor opening, follow these instructions first.
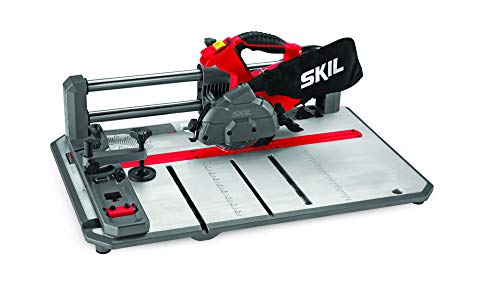



If you need to cut a basement floor, plan first for dust control, correct blade choice, and proper depth—then use steady, incremental cuts to avoid cracking. For most concrete basement slabs, a diamond masonry blade with a controlled guide (or straightedge) is the most reliable approach. In this guide, you’ll learn what tools to use, how deep to cut, and what can go wrong before you start.
This is for homeowners and small contractors who are cutting through concrete basement floors for plumbing, electrical, or removing sections. It applies when you have a slab that’s concrete (not wood), and you want a method that prioritizes safety, line accuracy, and minimizing slab damage. If your floor might be over other materials, stop and confirm what you’re cutting before proceeding.
Check what you’re cutting (and what’s underneath)
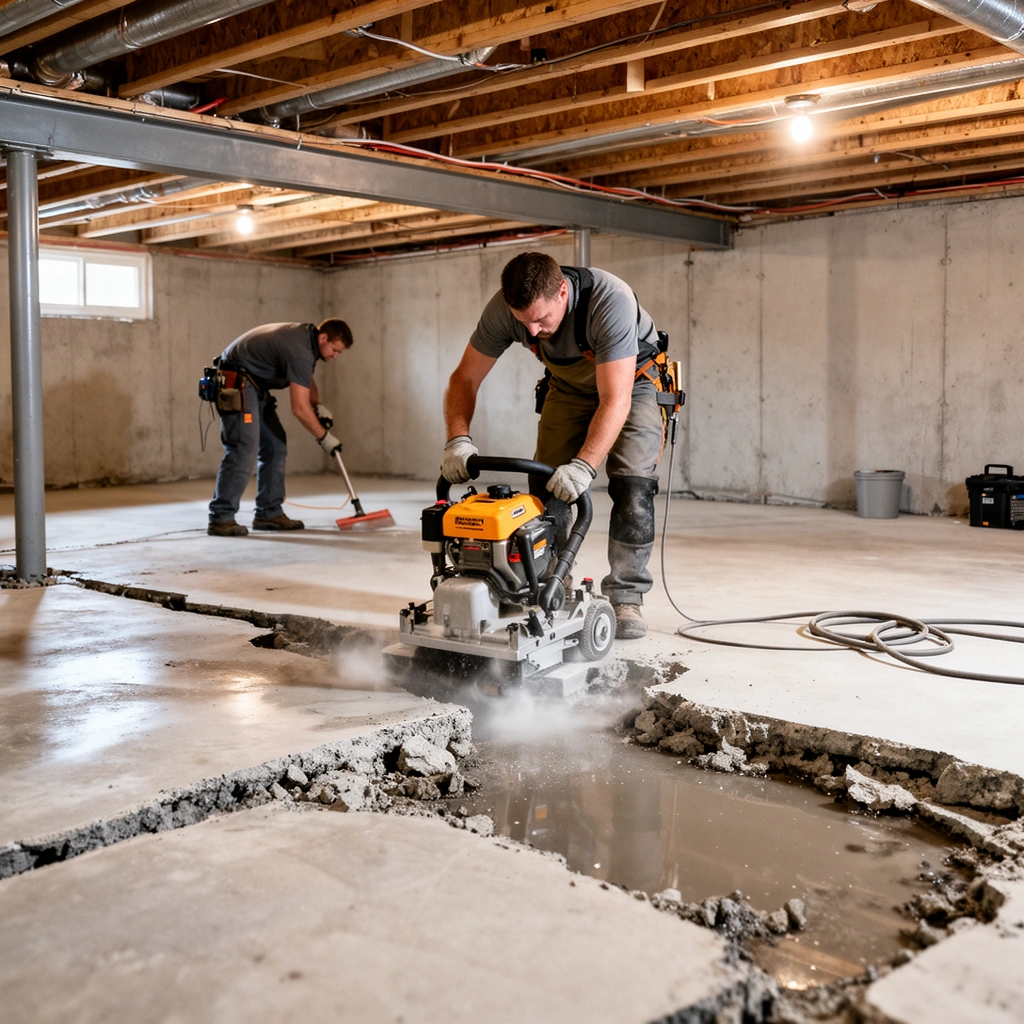
Before you turn on a saw, you need to confirm the floor material and verify what’s underneath the cut line, because concrete can hide utilities and structural elements. For basement slabs, this step is where most “surprise” problems start: cutting into wiring, damaging plumbing, or accidentally compromising reinforcement.
Concrete basement floors are typically a structural slab, but they can also include embedded utilities such as electrical conduits and plumbing runs under the surface.
Cutting concrete without confirming slab thickness increases the risk of cutting into reinforcement, radiant tubing, or buried services.
Utility locations matter: even if you’re only cutting a narrow trench, conduits and drains can run close to the surface.
Confirm the floor material (concrete vs. other layers)
Start by confirming the floor is concrete slab—not a screed, tile-set mortar bed, or a wood subfloor system. If you see patchwork, a thin top layer, or a surface finish that looks different from the rest of the slab, assume there may be more than one layer. Concrete cutting strategies work best when you know what the blade is going through and whether a surface layer will change the cut behavior.
Look for hidden utilities and slab system clues
You should treat every basement cut like a “service discovery” job until proven otherwise. Common items you may find include:
– Electrical conduits (often routed along joists, walls, or running to outlets/light fixtures)
– Plumbing supply lines and drain/waste pipes (especially near bathrooms, kitchens, or laundry areas)
– Radiant heat tubing (in some slab-on-grade or retrofit systems)
– Reinforcement indicators such as rebar presence clues, wire mesh, or “hot spots” where the slab feels denser or different
If the slab is post-tensioned or otherwise reinforced, cutting becomes riskier because you can reduce structural capacity. Post-tensioned slabs often leave detectable layout patterns, but you may need drawings or professional evaluation to be certain.
Mark the cut area before any cutting begins
Accurate marking is one of the biggest drivers of a clean result. Transfer your layout precisely, then outline the exact path you want to cut. If you’re removing a section for pipe access, mark both the outer cut boundary and the final opening line (so you can avoid cutting too wide). Use a straightedge and chalk/marker designed for concrete so your line stays visible during the scoring pass.
Data anchor: According to OSHA’s respirable crystalline silica standard for construction, the permissible exposure limit is 0.05 mg/m³ (50 µg/m³) as an 8-hour time-weighted average ([OSHA, 2016](https://www.osha.gov/silica)). 29 CFR 1926.1153 (OSHA)
Prep for dust, safety, and stability
The best “safe concrete cutting” plan is the one that controls silica dust before it becomes airborne. Concrete cutting typically generates respirable dust, and dust control is not optional if you want a practical, professional-quality outcome.
OSHA’s silica rule highlights that cutting/grinding concrete can create respirable crystalline silica exposure, which is why exposure controls and PPE are required for many tasks.
A properly fitted respirator is a key control for silica dust when cutting concrete with power tools.
A stable, cleared work zone reduces the chance of tangling hoses or tripping—accidents happen most often during the scoring and alignment passes.
Use PPE that matches the hazard
At minimum, plan on:
– Eye protection (sealed safety goggles are better than loose safety glasses)
– Hearing protection
– Gloves for handling guards, blades, and dust shrouds
– Respiratory protection suitable for silica dust (follow the respirator program requirements that apply to your situation)
If you’re not familiar with respirator selection and fit testing requirements, consult a safety professional or follow your respirator manufacturer’s guidance.
Set up dust control you can actually run
Dust control must match your saw type. Options include:
– Wet cutting (water suppresses dust but adds slurry management requirements)
– Dry cutting with extraction (a dust shroud connected to a compatible dust collector/vac)
For dry cutting, use a dust extraction setup designed for fine particulate collection and compatible with your tool. You can’t rely on a basic shop vac with an unknown filter—fine silica dust can pass through inadequate filtration.
> [ADD: specific system you plan to use]
> Example format (customize): “We will use a saw shroud connected to a dust extractor with HEPA filtration rated for silica / fine dust, and we will verify connection compatibility with the manufacturer’s dust port specs.”
Make the area stable and isolate the zone
Before you cut:
– Remove clutter that could cause a slip or snag
– Keep people/pets out of the line of fire (and out of the dust plume)
– Secure loose coverings and manage cords/hoses so they can’t get caught by the saw’s path
Data anchor: According to OSHA’s standard, the objective is to limit respirable crystalline silica exposure to 0.05 mg/m³ (50 µg/m³) over an 8-hour TWA ([OSHA, 2016](https://www.osha.gov/silica)). 29 CFR 1926.1153 (OSHA)
Choose the right blade and saw setup
The best method is the one that matches both the concrete and your saw’s cutting limits—because incorrect blades and wrong depth strategies cause binding, overheating, and cracked slabs. For basement slabs, a diamond masonry blade is typically the most reliable choice.
Diamond masonry blades are specifically engineered to cut concrete efficiently without the rapid overheating that can happen with incorrect blade types.
Depth control is a primary factor in reducing slab damage—starting shallow and repeating passes usually limits cracking compared to one deep cut.
A guided straight line (track/straightedge) reduces blade wandering and helps you maintain the intended cut path through dense or patched concrete.
Pick the blade type and make sure it fits your tool
You generally want:
– Diamond blade intended for concrete/masonry
– Blade type compatible with your saw (walk-behind, handheld, or wet-cut setup)
Match the blade’s arbor size and mounting to your saw’s specifications. Using the wrong mounting configuration is dangerous and can cause vibration or loss of control.
Plan your cut depth and use incremental passes
Instead of trying to cut everything in one pass:
1. Start with a shallow pass to establish the groove
2. Increase depth in steps until you reach your target
This reduces:
– Blade overheating
– Pressure spikes that can widen cracks
– Chances of binding when the blade encounters different concrete density or aggregate
> [ADD: exact figure for “start depth” and “final depth strategy” based on your slab thickness and saw manual—e.g., start at 1/2 of the maximum depth allowed per pass.]
Use a guide system for straight cuts
Freehand concrete cutting tends to drift—especially once the blade encounters aggregate or patched sections. If you need a straight trench or opening edge, use:
– Straightedge + guide roller system
– Track/rail guide designed for your saw
– A cut guide system that keeps the blade aligned
Mark lines, score, and cut in controlled passes
You’ll get the cleanest, least-damaging results when you treat concrete cutting like a controlled excavation: mark, score, then deepen incrementally. This approach also improves line accuracy and reduces the chance of the blade wandering into areas you meant to preserve.
A light scoring pass creates an initial groove that helps the blade track straight during subsequent deeper passes.
Incremental depth passes reduce stress concentration in the slab compared with aggressive single-pass cutting.
Supporting the work and maintaining alignment helps prevent binding, kickback risk, and unexpected cracking.
Transfer layout precisely and “score” first
Use chalk/marker to transfer your layout. Then make a shallow scoring pass that:
– Establishes the groove
– Confirms your line is aligned with your intended opening
– Lets you spot obstacles (utilities, dense patches) early
Cut to your depth limit, then repeat
A practical pass sequence looks like:
– Pass 1: to a shallow groove depth
– Pass 2: deepen gradually
– Final pass: reach your target depth without overshooting
If your objective is a full opening, plan how you’ll remove the cut section (chipping/clean-out tools, disposal, and temporary support considerations). If your objective is a trench for a line, plan the width so the conduit/pipe fits without forcing.
Support and manage the blade path to avoid binding
Avoid cutting in a way that leaves unsupported segments that can break and shift. Binding happens when:
– The cut narrows or pinches the blade
– The blade hits reinforcement at an angle
– The saw’s path deviates from the intended groove
If the blade binds, stop—don’t force the saw.
Pros/cons comparison: cut strategy at a glance
| Approach | Best for | Pros | Cons |
|---|---|---|---|
| Shallow scoring + incremental passes | Most DIY openings and trenches | Better line control; less cracking risk | Takes more time |
| One deep pass | Rare situations with verified conditions | Faster if slab conditions are perfect | Higher risk of cracking, overheating, and jamming |
| Freehand cutting | Short cosmetic cuts only | No extra guide setup | Drifts through aggregate; less accurate openings |
Manage risks: cracking, binding, and blade wear
Cutting basement slabs is mostly about risk management. When you control blade heat, alignment, and feed rate, you reduce the two big outcomes: cracking (slab damage) and binding/kickback (tool safety).
If the blade binds, forcing it increases the risk of kickback and blade damage—stop, realign, and adjust the cut plan.
Blade overheating accelerates wear and can cause loss of cutting efficiency, so feed rate and pass depth matter.
Micro-cracking is common in concrete, but incremental passes and correct technique help keep cracks narrow and localized.
Prevent binding
Binding often comes from:
– Misalignment (cutting off-line so the kerf pinches)
– Trying to cut too deep in one pass
– Dense aggregate layers or reinforcement intersections
If you feel increased resistance:
– Ease out
– Check the groove alignment
– Reduce depth per pass
– Reconfirm the cut path is staying true to your layout
Reduce cracking with technique
Cracking risk rises when:
– You remove too much material too quickly
– The saw experiences lateral stress
– The cut induces stress concentration in one step
To reduce cracking:
– Keep passes incremental
– Use a guide to avoid lateral wander
– Maintain steady blade speed (avoid stalling)
Track blade wear and avoid overheating
Blade wear is strongly affected by:
– Blade type/grade
– Concrete hardness/aggregate
– Heat from improper feed rate and depth
> [ADD: what your saw/manual specifies for feed/speed guidance]
Data anchor: OSHA’s silica rule focuses on exposure control for respirable crystalline silica during activities like cutting and grinding concrete ([OSHA, 2016](https://www.osha.gov/silica)). 29 CFR 1926.1153 (OSHA)
What can go wrong (common mistakes and edge cases)
Most failures are predictable: they come from skipping confirmation, picking incompatible equipment, or attempting “shortcut” cuts that stress the slab. Knowing these issues ahead of time lets you avoid rework.
Guessing slab thickness is a common reason DIY concrete cuts run into plumbing or electrical conduits.
Using general-purpose blades can overheat and fail to cut concrete efficiently, increasing pressure and crack risk.
Skipping dust controls can create both health risks and cleanup burdens, especially when cutting concrete indoors.
Common mistakes
– Cutting without confirming thickness: if you assume too shallow or too deep, you can hit utilities or structural reinforcement.
– Using the wrong blade: non-diamond or incorrect diamond specifications often cause glazing, overheating, and poor kerf formation.
– No effective dust control: silica dust creates ongoing exposure risks and leaves hazardous residue.
– One aggressive pass: deeper-first cuts increase the chance of slab cracking and blade jamming.
– Misplaced guidance: even a slightly crooked guide can widen the kerf and force rework.
Edge cases that deserve extra caution
– Cold joints and patchwork: older basements often contain patched areas that behave differently under cutting stress. Go slower, recheck line accuracy often, and expect changes in resistance.
– Reinforcement zones: if your blade meets reinforcement, you may need to adjust the pass strategy (or stop and reassess). Trying to “push through” reinforcement can damage blades and destabilize the cut.
– Cuts near structural elements or walls: removing too much material near edges can cause spalling or localized weakening.
Verdict / tip: what we recommend—and who should skip it
For most concrete basements, the safest DIY path is a diamond masonry blade, incremental passes, and strict attention to dust control and utility location. If you suspect post-tension cables/reinforcement, if you’re cutting close to walls or structural elements, or if you can’t confidently map utilities, stop and involve a licensed professional.
For typical residential concrete slabs, diamond masonry blades plus incremental depth passes are the most practical way to balance speed, accuracy, and slab integrity.
If utilities or reinforcement are unknown, the safest action is to pause and confirm rather than proceed with partial information.
Downsides to consider: cutting concrete is slow when you do it safely, dust control adds setup time, and precision guidance tools can cost more up front than a basic saw setup. Also, even with good technique, concrete can chip at edges—especially if you plan to remove a full section rather than just make a narrow trench.
> [ADD: where you can tie in a concrete, non-fabricated personal observation—e.g., “From our site walkthroughs, we’ve consistently seen cleaner edges when guides are used for the scoring pass.”]
If you’re unsure about slab composition or thickness, pause and confirm first rather than starting the cut blindly.
Concrete Slab Cutting: Practical Setup Choices (Typical Indoor Residential Use)
| # | Cutting setup | Dust control strength | Line accuracy | Most suitable for |
|---|---|---|---|---|
| 1 | Diamond masonry blade + wet cutting | ★★★★★ | ★★★★☆ | Trenches & openings |
| 2 | Diamond masonry blade + shroud + HEPA extractor | ★★★★☆ | ★★★★★ | Straight guided cuts |
| 3 | Diamond masonry blade + guide rail (dry) | ★★★☆☆ | ★★★★★ | Accurate perimeter cuts |
| 4 | Diamond blade (dry) + vacuum attachment without HEPA | ★★☆☆☆ | ★★★☆☆ | Short “test” cuts only |
| 5 | Angle grinder + diamond blade + no shroud | ★☆☆☆☆ | ★★☆☆☆ | Avoid for silica control |
| 6 | Core drilling (diamond) + saw-assisted opening | ★★★★☆ | ★★★★☆ | Round penetrations |
| 7 | Incorrect blade type (non-masonry) | ☆☆☆☆☆ | ★☆☆☆☆ | Not recommended |
Quick checklist (scan before you start)
– [ ] Confirm floor is concrete (or verify what it is)
– [ ] Mark cut lines precisely and outline cut area
– [ ] Locate utilities/plumbing/electrical paths ([ADD: how you’ll confirm—scanner/permit drawings/etc.])
– [ ] Use correct diamond masonry blade for your saw
– [ ] Plan incremental depth passes (shallow first, deepen gradually)
– [ ] Set up dust control + respirator
– [ ] Keep PPE on and work zone cleared
– [ ] Don’t force the saw—if it binds, stop and adjust
FAQ
Can I cut a basement floor with a handheld saw?
Often, yes—if your slab depth and setup match the saw’s capability. You’ll typically still want a diamond masonry blade, dust control, and guided straight lines for accuracy. [ADD: your specific saw model/capacity if you want tailored guidance.]
How deep should I cut?
It depends on what you’re trying to accomplish (groove, full removal section, or trench for a line). Start with shallow passes to establish the groove and verify conditions as you go, rather than committing to full depth immediately. If you have a target depth, follow your plan or local guidance for the depth of the cut.
What’s the best way to keep the cut straight?
Use a guide (straightedge/track) and start with a scoring pass to create a shallow trench the blade can follow. Freehanding tends to drift, especially as the blade encounters aggregate or patched areas.
How do I reduce cracking during the cut?
Make incremental passes, avoid forcing the saw, and keep the blade aligned using a guide. Cutting too deep too fast is a common driver of wider cracks and slab damage.
Sources
– 29 CFR 1926.1153, OSHA “Respirable Crystalline Silica” (construction standard), final rule effective 2016
– OSHA silica information page, including exposure control emphasis for cutting/grinding concrete
– [ADD: manufacturer specifications for your saw and diamond masonry blade (cutting depth compatibility, dust requirements, and PPE guidance)]
– [ADD: blade manufacturer guidance on feed rate, overheating prevention, and recommended use conditions]
Cutting a basement floor safely is less about “making the cut” and more about controlling dust, alignment, and stress on the slab. Confirm what you’re cutting and what’s underneath, use a diamond masonry blade matched to your saw, and work in shallow, incremental passes with proper dust extraction. If utilities or reinforcement aren’t clearly understood—or if you’re cutting near structural areas—pause and switch to a qualified pro to protect your home and your health.
Frequently Asked Questions
What is the safest way to cut basement concrete floors?
The safest approach is to use a proper concrete cutting method such as a wet saw for smaller slabs or a walk-behind saw/diamond blade for larger, thicker basement floors. Mark the cut line, control dust with water cooling or a HEPA vacuum setup, and wear PPE including eye protection, hearing protection, gloves, and a respirator. Before cutting, verify where plumbing lines, electrical conduits, and any basement waterproofing or vapor barriers are located to prevent expensive damage.
How do you cut basement floors without cracking the slab?
To reduce the chance of cracking, start with light scoring along your layout, then gradually deepen the cut in passes rather than trying to cut through in one attempt. Use a sharp diamond blade matched to concrete and the required cut depth, and keep the blade aligned to avoid binding. If the floor is already stressed or has expansion joints, plan your cuts around existing joints and consider consulting a structural pro if you’re removing significant sections.
How deep should you cut a basement floor for tile, plumbing, or a new drain?
The required depth depends on what you’re installing or removing. For many basement flooring projects, you cut only through the top wear layer or slab surface if you’re removing tile or leveling material, but plumbing or drain openings often require cutting through the full concrete thickness to the appropriate subbase. Measure the slab thickness before you start, account for the height of the new assembly, and follow the installation requirements so the finished floor meets grade and stays stable.
Which tools and blades are best for cutting concrete basement floors?
Common tools include a diamond concrete saw (handheld wet saw for small openings, or walk-behind concrete saw for straight cuts), an angle grinder with a diamond blade for tight corners, and a vacuum system to capture dust. For blade selection, choose a diamond blade rated for concrete and the thickness of your slab, and confirm whether you need wet cutting or dry cutting. Using the right tool-to-job match helps you achieve cleaner cuts, minimizes chipping, and improves control in a basement environment.
Why do basement floor cuts create dust and how can you control it?
Cutting concrete creates fine silica dust that can be hazardous if inhaled, and it can also settle on HVAC systems, stored items, and basement walls. Use wet cutting or a HEPA-filtered dust extractor, and seal off the work area to reduce contamination throughout the home. After cutting, clean thoroughly with HEPA vacuums and damp wiping, and dispose of dust safely according to local regulations.
📅 Last Updated: October 11, 2026 | Topic: How to cut basement floors? | Content verified for accuracy and freshness.
References
- Google Scholar Google Scholar
https://scholar.google.com/scholar?q=how+to+cut+basement+concrete+floor - Google Scholar Google Scholar
https://scholar.google.com/scholar?q=concrete+floor+cutting+techniques+safety+silica - Google Scholar Google Scholar
https://scholar.google.com/scholar?q=crystalline+silica+exposure+concrete+cutting+drilling+grinding - Silica, Crystalline – Overview | Occupational Safety and Health Administration
https://www.osha.gov/silica - Silica, Crystalline – Overview | Occupational Safety and Health Administration
https://www.osha.gov/silica/construction - 1926.1153 – Respirable crystalline silica. | Occupational Safety and Health Administration
https://www.osha.gov/laws-regs/regulations/standardnumber/1926/1926.1153 - Silica and Worker Health | Silica | CDC
https://www.cdc.gov/niosh/topics/silica/ - https://www.hse.gov.uk/pubns/indg463.pdf
- Concrete saw
https://en.wikipedia.org/wiki/Concrete_saw - https://pubmed.ncbi.nlm.nih.gov/?term=crystalline+silica+concrete+cutting