
You can restore carpet floors to like-new condition with step-by-step fixes that target the real damage—flattened pile, stubborn stains, odors, and worn traffic areas. This guide walks you through exactly what to do, in the right order, from cleaning and deep extraction to patching and re-stretching when the problem runs deeper. Follow these steps and you’ll get a cleaner, thicker-looking carpet without guesswork or wasted effort.



If your carpet looks worn, dull, or flattened, you can usually bring it back by cleaning thoroughly first, then using the right technique for matting, stains, and traffic-area wear. Start with careful vacuuming and deep extraction to remove embedded soil, then focus on fiber lifting (not just “more cleaning”) so the appearance—and feel—actually improves.
This guide is for homeowners and renters dealing with everyday carpet wear: heavy foot traffic, slight matting, lingering odors, or surface stains. If your carpet is badly burned, torn, has widespread backing damage, or has structural delamination, “restoring” may not be possible—repair or replacement is often the realistic next step.
Assess the Carpet Problem First (So You Pick the Right Fix)

You’ll get the best results by diagnosing whether the problem is mostly dirt/odor, flattened fibers, or true physical damage. When you match the repair method to the symptom, you avoid wasting time (and moisture) and you reduce the risk of discoloration or permanent wear.
“Restoration” starts with soil removal: when embedded grit stays in the pile, fibers re-collapse and discoloration returns faster after cleaning.”
“Flattened carpet usually indicates fiber compression and matting, which responds to cleaning plus gentle grooming once the carpet is dry.”
“Burns, holes, pulls, and backing separation are structural issues; they generally can’t be fully reversed with cleaning alone.”
Start by checking the carpet like a triage process:
– Mostly dirt/odor: Dulling looks “even,” and the smell returns when humidity rises or after foot traffic.
– Flattened fibers / matting: You see traffic lanes that look smooth or “shiny” where pile height is compressed.
– Local stains: Color changes at specific spots (often from food, drinks, or pet accidents).
– Actual damage: Snags, loose fibers, pulled seams, ripples, or areas where the carpet looks detached from the backing.
Then do a quick, low-risk test:
– Pick a small hidden spot (inside a closet or behind furniture).
– Run your cleaner method there first, wait for it to dry fully, and check for color shift or residue.
What to look for in 60 seconds
– Backing condition: If you see bubbling or separation, stop treating this as a cleaning-only problem.
– Pile type clues: Loop pile often resists crushing differently than cut pile, and it’s easier to snag if you over-brush.
– Odor source location: If odor seems “deeper” than the surface (e.g., persistent mustiness), padding or backing contamination may be involved.
According to the Institute of Inspection, Cleaning and Restoration Certification (IICRC) guidance, cleaning methods should be matched to the soil type and material condition, and over-wetting should be avoided in normal cleaning contexts (IICRC S100 (Carpet Cleaning Technician) — cleaning and fiber-care principles).
Deep Clean the Carpet to Remove Dirt Trapped in Fibers
You restore the look and freshness of carpet floors most reliably by removing embedded soil with a controlled deep-clean (often hot-water extraction) and allowing full drying. This step matters because dirt acts like “grit,” flattening fibers and trapping odors even after spot treatments.
“Slow, methodical vacuuming before extraction improves results by removing loose soil that extraction alone can’t fully lift.”
“Hot-water extraction is designed to flush soil from the carpet pile using controlled temperature and extraction, followed by thorough drying.”
“Residual moisture increases the risk of musty odors; complete drying is a core success factor for carpet cleaning.”
Vacuum thoroughly (proper technique beats stronger suction)
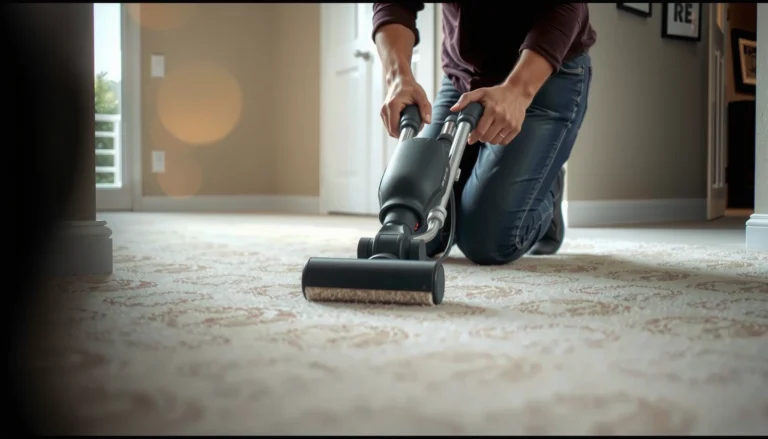
Vacuuming isn’t just a first step—it’s a performance multiplier. Do it like this:
– Slow passes (let the vacuum pick up soil rather than skimming)
– Multiple directions (lengthwise, crosswise, and diagonally)
– Edges and traffic lanes (use the wand for baseboards and corners)
If you’re using a vacuum with a HEPA filter, note that HEPA media is designed to capture at least 99.97% of particles at 0.3 microns (a commonly cited HEPA standard used across industries) (EN 1822 / HEPA filtration performance classifications (general HEPA standard)).
Use deep extraction—without flooding the carpet
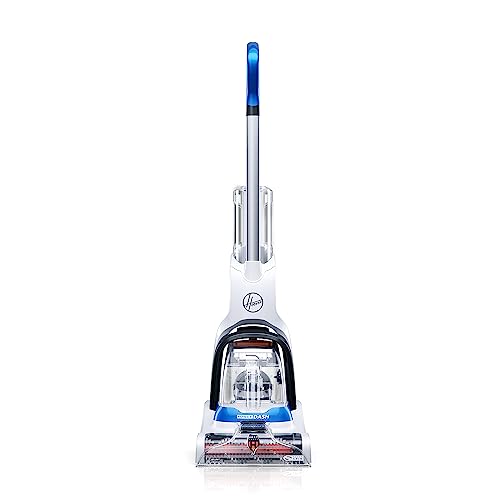
For many households, hot-water extraction or a carpet-cleaning machine is the most effective “restore” foundation:
– Follow your machine’s instructions for solution type (carpet-approved) and dispense/extract settings.
– Use water in the range commonly referenced for carpet extraction: about 140–160°F (60–71°C) is widely used in hot-water extraction practice (IICRC training materials and widely adopted carpet extraction temperature guidance (hot-water extraction best practices)).
Two key controls:
– Don’t over-saturate. Over-wetting can damage backing and slow drying.
– Extract thoroughly. Your goal is to remove loosened soil, not leave it to re-soil as the carpet dries.
Drying is part of “restoration”
Plan for full drying before you evaluate results.
– Increase airflow with fans and open vents.
– Avoid heavy foot traffic during the drying window.
– If the carpet still feels damp after cleaning, drying is incomplete, and fiber collapse or lingering smell becomes more likely.
According to IICRC guidance on carpet cleaning processes, the carpet should be dried promptly after cleaning and evaluated after dry-down to confirm final appearance and odor improvement (IICRC S100 (Carpet Cleaning Technician) — drying and evaluation principles).
Carpet “Restoration” Methods: What They Do Best
| # | Method (for restoration) | Best for | Key technical control | Typical risk of residue | Fit rating |
|---|---|---|---|---|---|
| 1 | Hot-water extraction (deep clean) | Embedded soil + dullness | 140–160°F / 60–71°C extraction range | Low–Medium (if extracted well) | ★★★★★ |
| 2 | Rotary brush / agitation (precondition) | Moderate soiling in pile | Use label dwell time; avoid over-wetting | Medium (if under-extracted) | ★★★★☆ |
| 3 | Encapsulation (crystallizing detergents) | Faster-turn maintenance cleaning | Requires agitation + proper dry time | Medium (if not vacuumed thoroughly) | ★★★☆☆ |
| 4 | Dry compound cleaning | Low moisture preference | Works best with strong pile agitation | Medium–High (powder left behind) | ★★☆☆☆ |
| 5 | Spot extraction (small areas) | Localized discoloration | Blot + extract; minimize saturation | Low–Medium | ★★★☆☆ |
| 6 | Odor enzymatic treatment (protein/organic) | Pet/organic odors | Uses enzymatic contact time per label | Low (if rinsed only when required) | ★★★★☆ |
| 7 | Grooming / fiber rake after dry | Matting and traffic wear | Lift when dry; gentle strokes only | Low (if not forced) | ★★★★★ |
Restore Flattened Fibers (Matting and Traffic-Worn Areas)
Once the carpet is clean and fully dry, you restore flattened fibers by lifting the pile back up with gentle grooming. This works because matting is usually compression—if you lift after cleaning (and avoid overworking), the texture can rebound substantially.
“Matting responds best after cleaning when fibers are free of soil and the carpet is dry enough to groom without breaking.”
“Aggressive brushing can fray fibers and change texture permanently, especially in loop pile and high-shear patterns.”
“Repeating a gentle clean/groom cycle usually yields better results than forcing the pile in one pass.”
Groom after drying—never while saturated
– Wait until the carpet is fully dry.
– Use a carpet rake, grooming brush, or stiff-bristle brush only with light pressure.
– Work in the direction you want the pile to lay.
For stubborn traffic lanes: use cycles, not force
If your hallway or entry looks smooth and “polished,” try:
1. Deep clean (or extraction of the lane)
2. Dry completely
3. Gentle groom
4. Re-check in natural light
5. Repeat only if needed
From a practical standpoint, many people expect one aggressive brushing session to reverse years of compression; in reality, overworking can permanently alter fiber laydown.
Match the method to carpet construction (cut vs. loop)
Carpet type changes the risk profile:
– Cut pile: Fibers can often be lifted more safely with gentle brushing and directional grooming.
– Loop pile: Pulling on loops or snagging can make the pattern look uneven faster.
If you’re unsure, test the grooming tool in a hidden spot first and observe whether the texture starts to look fuzzier, thinner, or “pulled.”
Remove Stains and Odors Without Worsening the Carpet
You can remove most carpet stains and odors without creating a larger “cleaner ring” by blotting gently, treating the correct source, and following label instructions for dwell time and rinsing. The common mistake is scrubbing too soon or assuming one cleaner fixes every problem.
“Blotting from the outside toward the center reduces spreading and helps prevent a wider stain footprint.”
“Enzymatic cleaners target organic odor sources; they require appropriate contact time to work as intended.”
“Rinsing only when the label calls for it reduces residue buildup that can re-attract dirt.”
Stain removal: blotting is your first defense
Use a clean white cloth or absorbent towels:
– Blot, don’t scrub (especially on fresh spills)
– Work from the outer edge inward
– Replace towels as they saturate
– Continue until little to no color transfers
Odors: treat the source, not just the smell
For pet accidents or food-related spills, the “odor” is often organic residue in the fibers or beneath the surface. In these cases, enzymatic cleaners are designed to break down odor-causing compounds.
Important operational details:
– Use label-specified dwell/contact time (enzymes need it).
– Avoid over-wetting—too much moisture can push residue deeper or slow drying.
– Rinse only if the product label requires it; excess residue can lead to rapid re-soiling.
Quick comparison: what to use by symptom
| What you see/smell | Most effective approach | Avoid |
|---|---|---|
| Brown/gray spot stain | Blot + spot extraction; keep area minimally wet | Scrubbing aggressively before blotting |
| Pet odor (lingers after cleaning) | Enzymatic cleaner with label contact time | “Masking” with heavy fragrance |
| Musty smell across a room | Assess moisture sources; deep clean + dry thoroughly | Cleaning without fixing underlying humidity |
Repair Local Damage (Snags, Small Tears, and Worn Spots)
If the carpet has local mechanical damage—snags, small pulls, seam issues—you’ll restore appearance most effectively by repairing what’s physically unstable, not by repeatedly cleaning it. Cleaning can improve color and odor, but it can’t fully “heal” a tear or reverse significant backing failure.
“Snags should be trimmed carefully rather than pulled, because pulling can enlarge the damaged loop or yarn.”
“When seams separate or carpet ripples, localized repair (often patch/seam work) is typically more durable than repeated spot treatments.”
“Backing separation is a limit case for DIY restoration; professional repair or replacement is often the practical option.”
Snags and loose fibers
– Trim loose ends with sharp scissors.
– Avoid yanking; yanking turns a small snag into a widened gap.
Small tears and worn spots
For small tears, repair usually requires work aligned to carpet construction:
– Patch matching the pile direction and height
– Seam alignment so the damaged area doesn’t remain visible
Because repair techniques vary by carpet type and installation method, this is where “restoration” can stop being DIY-friendly.
Backing separation: a hard stop for cleaning-only fixes
If the carpet ripples, lifts, or looks detached from the backing:
– repeated cleaning may temporarily improve the look
– but the problem returns because the foundation isn’t stable
If you see backing separation, it’s often more cost-effective to schedule a repair than to keep paying for cleanings that can’t correct the structural failure.
What Can Go Wrong (And How to Avoid It)
Restoring carpet floors usually fails when people over-wet the pile, use the wrong technique for the carpet type, or keep “chasing” odors and stains that originate in padding or backing. Avoid these pitfalls and your results last longer.
“Over-wetting extends dry time and increases the odds of musty odor or backing-related issues.”
“Using too much cleaner—or the wrong chemistry—can leave a residue film that attracts dirt and dulls appearance.”
“Aggressive grooming can change texture permanently by fraying or forcing fibers out of their intended lay direction.”
Here are the most common failure points:
– Over-wetting: More moisture = longer drying = higher risk of odor and backing stress. Always follow label directions.
– Residue buildup: Some cleaning products require rinsing; others don’t. If you apply more than the label recommends, you can create a sticky residue that dirt re-attaches to quickly.
– Aggressive grooming: If you see fuzziness, snagging, or pattern distortion after brushing, stop and reassess your tool and pressure.
– Trying to “restore” unrepairable damage: Burn marks, widespread shedding from structural issues, and backing failures won’t fully reverse with cleaning alone.
Also, note a current reality as of 2026: many carpets are manufactured with specific finishing treatments or fiber blends, and the most reliable path is still following the manufacturer’s care guidance alongside IICRC principles (IICRC S100 — general carpet cleaning process and material considerations).
Verdict / Tip: What Usually Works Best (and Who Should Skip DIY Restoration)
Most carpet “restoration” is dirt removal plus fiber grooming: deep clean first, then address flattened fibers and targeted stains/odors based on the source. DIY restoration is a strong fit when the carpet is structurally sound (no major backing separation) and the issues are primarily appearance and freshness.
“When the pile is compressed but the backing is intact, cleaning plus gentle grooming is the highest-probability DIY path to visible improvement.”
“If backing separation, large tears, or persistent deep odors are present, repeated cleaning may be a time sink compared with repair.”
“Evaluating results only after full dry-down helps prevent false conclusions about ‘why it looks worse’ while wet.”
What I recommend in practice (and where people overreach):
– Start with the deep clean and full dry cycle.
– Groom after dry—then reassess.
– Treat stains/odors locally using blotting and label instructions.
Skip DIY (or get professional help) if you see:
– Significant backing separation or carpet that ripples/lifts
– Large tears or extensive pulls
– Persistent odors that do not improve after labeled cleaning (padding contamination may be involved)
– Old carpets that are visibly thinning—texture may not rebound even after cleaning
Quick Checklist: Restore Carpet Floors Fast
– [ ] Vacuum thoroughly (slow passes, edges, traffic lanes)
– [ ] Deep clean per product directions (don’t over-saturate)
– [ ] Dry completely (fans/ventilation if needed)
– [ ] Groom/lift flattened fibers after drying
– [ ] Treat stains with blotting (outside → center)
– [ ] Use an odor approach that matches the source (e.g., enzymatic for organic)
– [ ] Trim snags; repair small damage only if carpet is still stable
FAQ
Can I restore carpet floors if they’re permanently flattened?
Sometimes—if the issue is primarily compression and dirt buildup, deep cleaning plus gentle grooming can noticeably improve appearance. If the pile has been worn down for years, improvement is often partial.
How do I get rid of carpet odors after cleaning?
Use an odor treatment that matches the source and follow label dwell/contact time closely. If odor persists after a labeled enzymatic approach for organic sources (or if the smell seems “room-wide”), the cause may be padding contamination, subfloor moisture, or ventilation-related humidity—[ADD: recommend next step based on carpet source/material guidance].
Should I use steam to restore carpet?
Many “steam” methods are still hot-water or heat-driven cleaning, so the key is avoiding over-wetting and following manufacturer care guidance. For the right method for your carpet, use the carpet manufacturer’s care instructions—[ADD: source for your carpet’s care instructions or model/type].
Will carpet cleaning make it look worse before it gets better?
During cleaning and early drying, carpets often look darker or uneven because wet fibers reflect light differently. True results are evaluated after full dry-down and once airflow has completed the drying cycle.
Sources
– IICRC S100 (Carpet Cleaning Technician) — cleaning process, fiber/material considerations, and drying/evaluation principles
– IICRC S500 (Fire/Sewage/Water Damage) — general drying principles for moisture-related carpet issues (useful for “dry fully” guidance)
– [ADD: manufacturer care instructions for your carpet type (cut pile vs. loop pile) and any approved cleaning/extraction guidelines]
– [ADD: official instructions/specs from your carpet cleaner or cleaning product manufacturer regarding dilution, dwell/contact time, and rinse requirements]
Restoring carpet floors works best when you treat carpet as a system: remove embedded soil first, then lift compressed fibers gently, and only treat stains/odors with the chemistry and technique that matches the source. If the backing is damaged or odors persist after labeled cleaning, shift from “restoration by cleaning” to targeted repair or professional evaluation so you don’t keep paying to fix symptoms that the carpet structure can’t recover from.
Frequently Asked Questions
How can I restore carpet floors that look matted or flattened?
Start by deep vacuuming to remove grit that keeps carpet fibers from springing back. If the carpet is only surface-flat, use hot water extraction or a steam carpet cleaner with the proper temperature for your fiber type. For heavily compressed areas, gently brush the carpet nap and use a carpet rake or line comb, then allow it to dry fully with good airflow to prevent re-matting.
What is the best way to remove stains and restore carpet floors without damaging the fibers?
Identify the stain type (food, pet urine, grease, or dye) and blot with a clean cloth rather than rubbing, which pushes stains deeper. Use a carpet stain remover designed for your carpet fiber and always test in an inconspicuous area first to avoid discoloration. After treating, rinse with clean water where the product recommends it, then dry thoroughly using fans or a dehumidifier to help prevent lingering odors and residue.
Why does my carpet look dull even after cleaning, and how do I restore its appearance?
Dullness often comes from residue left by cleaning products, trapped soil, or worn-down fibers from foot traffic. Use a residue-removing carpet cleaner or perform a thorough rinse-extraction to lift built-up detergent and grime. Once the carpet is clean, regular maintenance—vacuuming with the correct suction height and using appropriate carpet shampoo—helps keep carpet floors looking refreshed longer.
How can I restore carpet floors with pet urine odors and stains?
For pet urine, blot excess moisture and use an enzymatic cleaner formulated to break down urine crystals rather than just masking the smell. Treat the area repeatedly as needed, keeping the carpet evenly damp per the product instructions, then allow it to dry completely. If the odor persists, you may need professional carpet cleaning or, for older urine damage, localized padding replacement to fully restore carpet floors.
Which DIY tools and products work best for restoring carpet floors, and when should I call a pro?
A quality upright or canister vacuum, a spot-cleaning solution, microfiber blotting cloths, a stiff brush or carpet rake, and a carpet extractor (or rental hot water extraction machine) are the most useful DIY tools. Avoid over-wetting and harsh chemicals that can cause color fading, browning, or fiber damage. Call a professional for extensive stains, persistent odors, water-damaged carpet, or if the carpet needs repair (like patching or re-stretching) to truly restore carpet floors.
📅 Last Updated: October 11, 2026 | Topic: How to restore carpet floors? | Content verified for accuracy and freshness.
References
- Google Scholar Google Scholar
https://scholar.google.com/scholar?q=how+to+restore+carpet+floors - Google Scholar Google Scholar
https://scholar.google.com/scholar?q=carpet+cleaning+methods+hot+water+extraction+effectiveness - Google Scholar Google Scholar
https://scholar.google.com/scholar?q=carpet+restoration+stain+removal+techniques - Carpet cleaning
https://en.wikipedia.org/wiki/Carpet_cleaning - https://www.epa.gov/indoor-air-quality-iaq/carpet-and-rugs
- Mold Clean Up Guidelines and Recommendations | Mold | CDC
https://www.cdc.gov/mold/cleanup.htm - https://pubmed.ncbi.nlm.nih.gov/?term=carpet+cleaning
- https://www.sciencedirect.com/search?qs=carpet%20cleaning%20hot%20water%20extraction
- https://www.mayoclinic.org/diseases-conditions/allergies/expert-answers/dust-mites/faq-20058571
- Google Scholar Google Scholar
https://scholar.google.com/scholar?q=How+to+restore+carpet+floors?