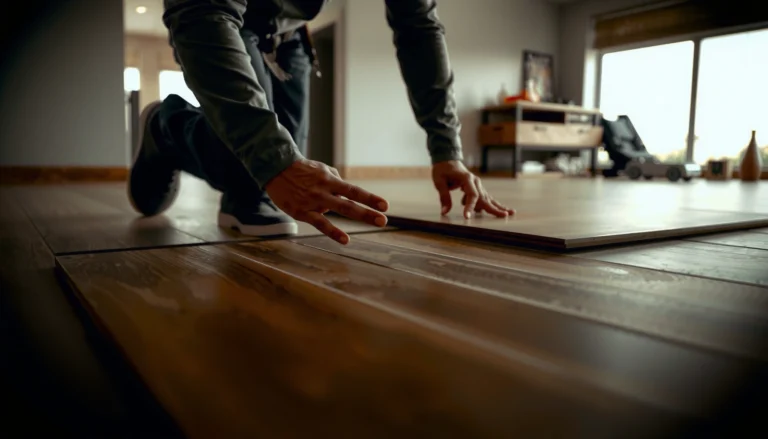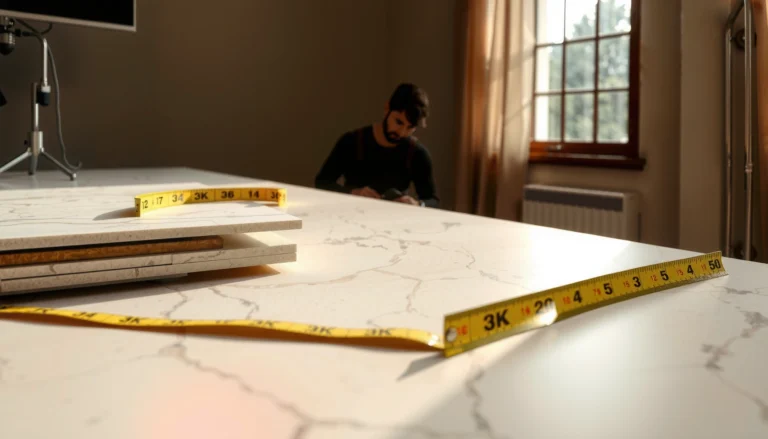

Learn how to install transitions for cork floors with a clear, step-by-step method that prevents gaps, buckling, and uneven edges. If you’re joining cork to tile, laminate, carpet, or a different-height surface, this guide walks you through choosing the right transition, prepping the subfloor, and fastening it correctly for a tight, finished seam. Follow these steps and you’ll get a clean, durable transition that looks built-in—not patched.




Installing cork floor transitions correctly is mainly about two things: picking the right transition for the seam/height difference and fastening/adhesiving it to a stable subfloor so the edge can’t rock. Measure the gap and floor heights first, then install using the transition manufacturer’s method (especially around expansion gaps and the cork surface finish) so the seam stays protected instead of turning into a trip point.
If you’re adding a doorway transition between rooms, switching from cork to tile/carpet, or bridging an expansion-height change with cork, this guide is for you. It’s also ideal when you want to avoid lifting edges, widening gaps, or a noticeable “lip” at the transition line.
Choose the right transition for your cork floor

You’ll get the best result when you match the transition type to what the seam is doing—covering a height difference vs. just bridging two floor planes. The wrong reducer, threshold, or T-molding can leave cork edges exposed, create an uneven step, or interfere with the floor’s required movement.
A reducer transition is intended to accommodate a height difference, while a T-molding or threshold is usually meant to bridge a joint and cover the seam edges.
Cork flooring still needs expansion space, so transitions should protect edges without “locking up” the floating floor’s movement.
Match the transition to the seam type (doorway, reducer, T-molding, or finish)
Most cork installations end up needing one of these:
– Doorway/threshold transitions: Typically used where the flooring meets another area (hallway to room, room to room). These often cover the seam and help control edge exposure.
– Reducers: Used when one surface is thicker than the other (e.g., cork vs. adjacent vinyl, laminate, or tile). Reducers create a smooth walking profile across the height change.
– T-molding (or similar “cap” profiles): Often used at joints where both sides are similar height and you want a mechanical cover over the seam.
– Edge/finisher transitions (wall or perimeter finishing): Used where flooring ends at an edge and you need a consistent, protected termination.
From a practical standpoint, reduce-style profiles win when you have an actual step to level out; cap-style profiles win when the job is mainly to cover the seam.
Confirm whether the transition covers height difference or only the joint
Before you buy, verify what your profile is designed to do:
– If the two floor surfaces aren’t the same height, you need a reducer (or another profile specifically designed for height changes).
– If the heights are essentially the same, you can often use a T-molding or threshold designed to cover the joint line.
– If you’re terminating flooring (not joining two floating planes), use an edge/finisher profile.
When the cork and adjacent flooring aren’t level, a reducer transition is the appropriate choice because it is built to taper between heights.
Verify installation method compatibility (fasteners vs. adhesive)
Transition systems vary: some are meant to be screwed to the subfloor, others are adhesive-set, and many are “adhesive-assisted” (adhesive + mechanical stability via the design).
– If the transition specifies fastening into the subfloor, follow it—fastening into the cork layer alone risks flex, rocking, and eventual seam failure.
– If the transition specifies adhesive, use the adhesive type and application pattern the manufacturer calls for, and avoid over-application that can stain or interfere with cork’s surface finish.
[ADD: source for transition manufacturer installation methods—fastener vs. adhesive requirements for cork floors]
[ADD: source for cork flooring manufacturer guidance on approved transition/adhesive combinations and movement rules]
Measure, mark, and plan the expansion gap
If you measure first and plan for movement, the transition will sit flush without restricting expansion. Measure the height difference and opening dimensions, then place the transition so it protects edges while leaving the required expansion gap.
Even with transitions installed, cork floors still require an expansion allowance to handle seasonal movement.
Correct placement is critical: mis-centering by even small amounts can expose cork edges where the profile doesn’t cover.
Measure height difference and the opening width/length
Grab a tape measure and note three values:
1. Height difference between the cork surface and the adjacent floor surface (tile, carpet threshold base, subfloor reveal, etc.).
2. Seam length/width where the transition will land.
3. Transition cover width (how much of the seam it hides).
If the seam is uneven, take measurements at multiple points—edges often aren’t perfectly level across long runs.
Mark the centerline of the joint and confirm alignment
Marking reduces guesswork and keeps the visible profile balanced:
– Draw the centerline of the joint on the subfloor (or clearly on masking tape on top of the cork if needed).
– Test the transition dry to confirm the profile will land where the cork plank/tile ends will be protected—not cutting through an edge or sitting over an expansion gap it shouldn’t.
Keep cork expansion gaps as required (transitions protect, not replace movement)
Transitions are designed to cover edges; they aren’t intended to permanently eliminate required movement. Your actual gap size depends on your cork product (and often the room size), so follow the flooring manufacturer’s specification.
For planning purposes, many floating-floor systems commonly cite ~6 mm (1/4 inch) as a typical expansion spacing target, but you must confirm your exact cork guideline.
[ADD: source for your cork flooring manufacturer’s expansion gap specification (typical range and any room-size adjustments)]
Common Cork Seam Planning Targets for Transition Layout (Typical Ranges)
| # | Seam scenario | Measurement you take first | Typical target to confirm* | Risk if ignored |
|---|---|---|---|---|
| 1 | Doorway joint between rooms | Height difference + seam length | Transition fully covers edge overlap | Low seam protection |
| 2 | Reducer to a thicker/wider floor | Actual step height across transition run | No “cliff” at walking edge | Trip lip |
| 3 | Tile/carpet boundary | Transition profile thickness + seat depth | Even contact across profile | Rocking seam |
| 4 | Expansion-gap management with transitions | Required expansion spacing at edges | Follow manufacturer gap spec | Buckling risk |
| 5 | Long seam with uneven subfloor | Flatness check (straightedge) | Transition seats without hollow spots | Gaps widen over time |
| 6 | Back-to-back transitions near a wall | Clearances around edge finishers | No overlap blocking movement | Binding and lifts |
| 7 | Profile over cork edge (finisher) | Edge integrity and backing condition | Cork edge must be intact | Crumbed lip |
Always confirm the exact targets (gap size, seat depth, and coverage) in your cork flooring and transition manufacturers’ documentation.
Prep the subfloor and edge surfaces
Prepping is what turns a “fits on paper” transition into a stable, non-rocking seam. Clean the subfloor contact area, verify cork edges are intact, and dry-fit before adhesives or fasteners go in.
A transition installed over debris or adhesive residue is more likely to sit unevenly and develop rocking at the seam.
Dry-fitting first helps you confirm the profile actually covers the cork edge at the expansion gap location.
Remove debris, residue, and loose material along the seam
Before setting anything:
– Vacuum thoroughly and remove dust, chips, and grit from the seam line.
– Scrape away old adhesive residue where the transition will seat (if applicable).
– Check the subfloor for soft spots, lifted underlayment, or areas that flex when pressed.
Dry-fit and mark trim/shim needs
Dry-fit the transition to verify three things:
1. It lands on the right spot relative to cork plank ends.
2. It sits flat across its length.
3. It doesn’t require forced compression that would block expansion.
If the transition system allows shimming or end adjustments, do it now—don’t “solve” alignment issues by twisting or tightening after installation.
Ensure cork edges are intact (no crumbling or lifted backing)
Transitions rely on the cork edge being protected—not already damaged.
– Inspect the edge where the profile will sit.
– If the cork surface shows crumbling or the backing is compromised, repair or replace per your cork flooring guidance before installing the transition.
Install the transition (fastener/adhesive method)
Use the transition’s specified method so it bonds to the stable base—not just the cork layer. Then seat it evenly and verify flatness before the adhesive sets or the fasteners fully lock it in.
Fasteners should be anchored to the subfloor (or as directed by the transition design) to prevent flexing and rocking at the seam.
Adhesive transitions require the correct adhesive type and application pattern to achieve full contact without contaminating cork surfaces.
If the transition is designed to be fastened: secure into subfloor
A common failure mode is anchoring into the wrong layer. If the transition instructions call for screws into the subfloor:
– Pre-plan screw/nail locations so you don’t hit joists, pipes, or wiring.
– Secure the transition evenly along its run.
– Avoid over-torquing that can deform the profile or create a hollow spot.
If adhesive/adhesive-assisted: apply per instructions and set without shifting
For adhesive installs:
– Use only the recommended adhesive chemistry for your transition material and flooring finish.
– Apply in the specified pattern (bead, trowel, or perimeter) and amount.
– Seat immediately and avoid sliding—sliding can smear adhesive into visible cork pores or create uneven thickness.
Seat evenly, then clean squeeze-out quickly
Even “clear” adhesives can leave visible spots. Wipe squeeze-out immediately with the cleanup method approved by the adhesive maker and transition maker, and keep fluids off the cork face.
Pros/cons: Fastened vs. adhesive transitions for cork seams
| Method | Pros | Cons / watch-outs |
|---|---|---|
| Fastened (into subfloor) | High resistance to rocking if subfloor is solid; easier to replace a failed section | Requires access, correct screw pattern, and careful alignment to avoid a raised edge |
| Adhesive / adhesive-assisted | Can reduce visible fasteners; good for smooth seating when subfloor is flat | Sensitive to adhesive amount, cure time, and surface contamination; wrong adhesive can stain cork finish |
Finish and test for flatness and movement
Before the job is “done,” verify that the seam feels smooth, looks protected, and doesn’t restrict movement. A quick straightedge check and walk test catch most problems before adhesive cures fully.
A straightedge check is the fastest way to confirm whether a transition is seated evenly or has a localized hollow spot.
If you feel a clicking or rocking sensation after install, it usually indicates an uneven subfloor or incomplete contact under the profile.
Check smoothness and flatness before fully setting
– Use a straightedge across the seam and observe any gaps or uneven edges.
– Adjust while you still have time (before adhesive sets completely or before fasteners are final).
Walk-test for rocking and trip lip
Walk normally along the transition and across it:
– Look for a trip lip—a visible or tactile step.
– Feel for clicking—often caused by movement under the profile rather than the cork itself.
– Confirm edge coverage still protects the seam and expansion line.
Re-check coverage after curing
If adhesive is used, re-check after cure (as directed by the adhesive maker). Confirm the transition still covers edges and hasn’t shifted.
What can go wrong (and how to avoid it)
Most transition failures come from installation choices that restrict movement or ignore subfloor flatness. If you prevent the following issues, your cork edges stay protected and the seam remains walkable.
Rocking transitions typically occur when the profile is fastened to the wrong layer or the subfloor isn’t flat enough for full seating.
Trip lips appear when the transition profile doesn’t match the actual height difference or isn’t seated flush along its run.
Common problems
– Transition rocking or lifting: usually caused by fastening into the wrong material (or not securing into stable subfloor). Fix by following the transition’s anchoring instructions and ensuring solid contact.
– Trip lip at the seam: happens when height difference is miscalculated or the profile is undersized for the step.
– Gaps widening over time: often linked to blocking expansion gaps (transition or end trim “pinning” the floor).
– Adhesive staining or residue: avoid over-applying adhesive and follow the adhesive cleanup guidance for your cork finish.
– Wrong transition style: a threshold/reducer mismatch can leave cork edges exposed or create an uneven walking profile.
Limits and edge cases to respect
– Uneven subfloor: Transitions can hide small issues, but not structural dips. If the subfloor varies significantly, address flatness first.
– Warranty constraints: Some cork warranties require specific installation methods for accessories (like transitions) and specific adhesives.
[ADD: source for cork flooring warranty requirements around transitions and adhesives]
Verdict / tip
Transitions are worth installing with care because cork edges are vulnerable—an ill-fitting threshold or reducer can lead to lifted corners and a noticeable trip point. The safest approach is to follow both the cork flooring manufacturer’s and transition manufacturer’s instructions, prioritize full, stable contact with the subfloor, and plan expansion gap coverage instead of eliminating it.
If your subfloor is uneven, you can’t confidently verify the height difference, or your cork flooring warranty depends on a specific installation method, consider professional help rather than forcing a DIY fit.
Quick checklist (scan/save)
– [ ] Identify transition type (threshold/reducer/T-molding/edge finisher) for your seam
– [ ] Measure height difference and doorway width
– [ ] Confirm cork product’s expansion gap requirements
– [ ] Dry-fit transition; mark centerline and end positions
– [ ] Prep subfloor: clean, debris-free, solid contact
– [ ] Install using the transition’s specified fasteners/adhesive method
– [ ] Verify flatness with a straightedge before curing/setting
– [ ] Re-check edge protection and walk-test after install
FAQ
Do I need an expansion gap if I’m installing a transition?
Yes. Most cork products still require expansion space, and the transition is meant to protect edges—not remove the need for movement allowance.
What’s the easiest transition type for doorways?
Many doorway seams use threshold-style transitions or T-molding, but the right choice depends on whether you have a height difference and what your specific cork/warranty guidance requires.
Should the transition fasten into cork or the subfloor?
In proper installs, transitions are secured to the subfloor (or through the system exactly as the transition design instructs), not into just the cork layer.
Can I glue a transition on cork floors?
Sometimes, but only if both the transition manufacturer and your cork flooring guidance allow adhesive in that location and won’t damage the cork finish. Use the recommended adhesive and application method.
What if my seam isn’t perfectly level?
You usually need to correct subfloor flatness first, or select an appropriately designed reducer/adjustment method allowed by the transition system. Installing over a significant dip often leads to rocking or gaps.
Sources
– [ADD: source for your cork flooring manufacturer’s installation guide—especially expansion gap requirements and approved transition/adhesive methods]
– [ADD: source for your transition manufacturer’s installation instructions—fastener/adhesive method, compatibility notes, and leveling guidance]
– [ADD: source for industry flatness or installation best-practice guidance (e.g., NWFA or ASTM related documents)]
Frequently Asked Questions
What type of transition strip works best for cork flooring between rooms?
The best transition for cork floors is usually a T-molding (for even height changes) or a reducer/threshold strip (for slight height differences). If you’re transitioning to tile or laminate, choose a profile designed for thickness change and movement, such as a metal or vinyl reducer with a compatible lip. For floating cork floors, look for transitions that allow expansion gaps to remain consistent while still covering the joint cleanly.
How do you install transitions for cork floors without damaging the edges?
Start by cleaning the subfloor and removing dust so adhesive or fasteners bond reliably. If your cork is floating, leave the manufacturer-recommended expansion gap at the edges, then position the transition over the gap so it covers the joint without pinching the flooring. Use painter’s tape to mark alignment, pre-fit the strip, and cut it carefully with a fine-tooth saw for metal or a suitable blade for vinyl—then secure with the recommended method (screws into the subfloor or flooring-safe adhesive).
How do you measure and cut transition strips for cork flooring to get a perfect fit?
Measure the doorway or seam length in at least two spots, because floors can be slightly uneven even with a flat subfloor. Transfer the measurements to the transition strip, then account for expansion by keeping the flooring gap visible under the profile as intended. For a clean look, dry-fit the pieces first, cut with the proper tool, and ensure the ends align tightly at corners or adjacent trim before you fasten anything.
Why do cork floors sometimes separate at doorways, and how can transitions help?
Cork flooring can separate at doorways if the expansion gap is blocked, the subfloor isn’t flat, or the transition doesn’t account for different floor heights. Properly installed cork floor transitions distribute movement across the seam and protect the joint from foot traffic, moisture exposure, and edge wear. Using the correct reducer or T-molding profile helps keep the cork edges supported while still allowing normal expansion and contraction.
Which installation method is better for cork floor transitions: adhesive, screws, or nail-in?
The right method depends on whether your cork is floating or glued down and what the transition strip is designed for. Nail-in or screw-down transitions are often best for durable metal or heavy profiles because they anchor securely to the subfloor, but they must be placed so they don’t interfere with expansion gaps. Adhesive is useful for certain vinyl or lighter transitions, but it requires a clean, dry substrate and careful alignment—always follow the transition manufacturer’s installation instructions for cork flooring compatibility.
📅 Last Updated: October 11, 2026 | Topic: How to install transitions for cork floors? | Content verified for accuracy and freshness.
References
- Google Scholar Google Scholar
https://scholar.google.com/scholar?q=how+to+install+transitions+for+cork+floors - Google Scholar Google Scholar
https://scholar.google.com/scholar?q=cork+flooring+installation+transition+strips+expansion+gap - Google Scholar Google Scholar
https://scholar.google.com/scholar?q=floor+transition+strip+installation+guidelines+floating+floor - https://en.wikipedia.org/wiki/Cork_flooring
- Expansion joint
https://en.wikipedia.org/wiki/Expansion_joint - https://en.wikipedia.org/wiki/Threshold_(architecture
- https://en.wikipedia.org/wiki/Flooring_underlayment
- Redirecting…
https://www.ada.gov/2010ADAstandards_index.htm - https://www.ada.gov/2010ADAstandards/appenD.htm
- https://en.wikipedia.org/wiki/Floor_surface_transition