


Want to refinish mosaic tile floors without botching the grout or ruining the shine? This step-by-step guide tells you exactly how to clean, repair, prep, and refinish mosaic tile surfaces for a durable, uniform finish. If your goal is a floor that looks freshly re-done, you’ll learn the fastest, most reliable process to get there.




Refinishing mosaic tile floors usually means cleaning and repairing first, then properly sealing (or re-grouting if needed) before you apply the right finish. Start by removing old residue, checking grout condition, and confirming what finish already exists on your tile so you don’t lock in damage. This guide walks you through the safest sequence—from prep to final seal—so your floor looks clean and stays durable.
If your mosaic floor is dull, stained, or has grout that’s failing, refinishing can restore the look without a full tear-out. This is most relevant for ceramic/porcelain mosaic tile with standard grout lines, but stone mosaics (like marble or travertine) may need different products—so you’ll know what to test before you start.
Assess Your Mosaic Floor (Tile Type + Finish)
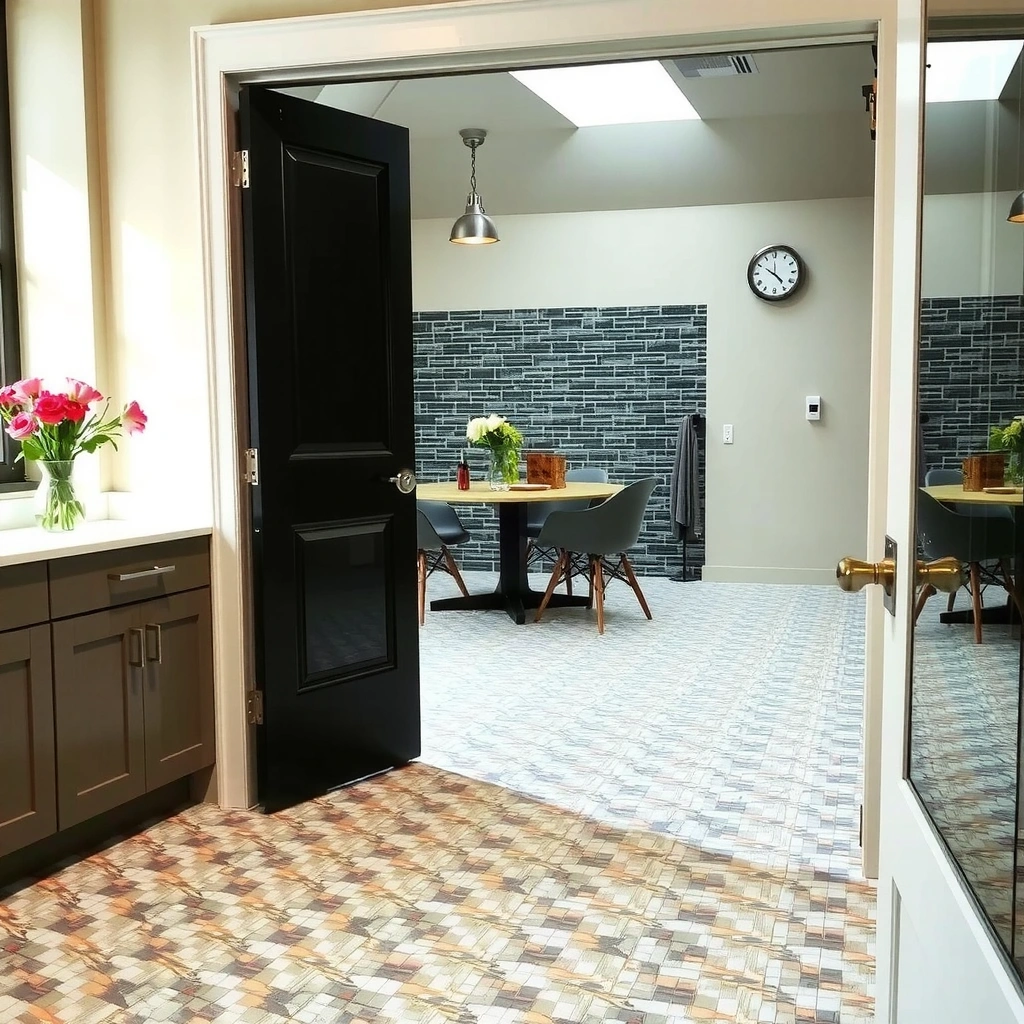
You get the best refinishing results when you first identify the tile material (ceramic, porcelain, or natural stone) and what’s already sitting on the surface. If you guess wrong, you can end up sealing over wax or coatings, trapping contaminants, or etching tile that shouldn’t be chemically opened.
Before you touch a chemical, focus on the mosaic tile floors themselves: ceramic and porcelain generally tolerate a wider range of cleaners, while natural stone is more sensitive to acidity and can react unpredictably to certain sealers. Then confirm what finish already exists—this step matters as much as the tile type because bonding depends on the substrate being clean and compatible.
Most modern tile refinishing failures come from poor surface compatibility—sealer and coatings can’t bond reliably to wax, acrylic finish films, or dirty grout. [ADD: source for bonding/compatibility guidance]
Natural stone generally requires stone-approved cleaners and sealers; acidic products can etch calcium-based stones like marble and travertine. [ADD: source for stone sensitivity]
A stable installation is a prerequisite for any floor “refresh”—loose tiles and compromised substrate movement will telegraph through new grout and finishes. [ADD: source referencing tile failure causes]
– Identify whether the mosaics are ceramic, porcelain, or natural stone (stone often needs different sealers/cleaners).
– Quick reality check: porcelain is typically denser and less absorbent than ceramic; stone mosaics (marble/travertine/limestone) are especially absorbent and sensitive to acids.
– Determine what’s already on the surface: wax, penetrating sealer, topical coating, or nothing—because new coatings won’t bond to the wrong base.
– Look for “sheen differences” (shiny zones that wipe clean vs. dull zones that don’t), film residue that smears, or cleaning products that start foaming unexpectedly on one area.
– Check for loose tiles, cracked grout, soft spots, or hollow-sounding areas and plan repairs before any refinishing.
– A simple method: press a tile firmly with a glove-covered hand (or use gentle tapping) and note any movement. If you feel movement, refinishing is not the fix.
What I recommend for decision-making: treat mosaic tile floors like a system—tile + grout + setting bed + any prior finish. Even if the surface looks “okay,” the wrong chemistry used on mosaic tile floors can cause haze, peeling, or uneven sheen in the first weeks.
Deep Clean and Strip Old Residue
You’ll get the finish you want only if the mosaic tile floors are truly residue-free. Deep cleaning comes first, and stripping comes next only if wax or an old topical coating is present.
In this step, your goal is to remove everything that interferes with adhesion and uniform appearance: soap film, hard-water deposits, topical cleaners, and old finish layers. Because mosaic tile floors often have textures and micro-grooves in the grout, surface appearance can be misleading—residue may be invisible but still prevent bonding.
Sealers and topical finishes are formulated for specific surface conditions; leaving residues (especially wax or acrylic films) commonly leads to blotchy sheen or rapid failure. [ADD: manufacturer compatibility statement]
Improper rinsing can leave soluble residues in grout pores, which may show up later as hazing or uneven darkening. [ADD: source for cleaning/rinsing effect]
– Use a cleaner appropriate for your tile type and grout, then follow with a thorough rinse so residues don’t interfere with adhesion.
– Ceramic/porcelain: use a neutral pH cleaner designed for tile and grout.
– Natural stone: use a stone-approved cleaner (often neutral/low-surface-energy products only) to avoid etching and residue buildup.
– If there’s wax or buildup, you may need a proper stripping step (use products designed for tile and the existing finish type).
– If you suspect wax, look for a milky smearing when buffing with a clean white cloth—then choose a wax stripper that’s explicitly labeled for tile/stone and the type of wax present.
– Let the floor dry completely; applying sealers/finishes over moisture can lead to haze, peeling, or uneven results.
– Dryness matters because mosaic tile floors can trap water in grout micro-pores; trapped moisture can interfere with curing and film formation.
Specific anchoring points (useful ranges you’ll see in real specs):
– According to [ADD: grout/primer manufacturer cure instructions], many grout and patch materials are only ready for sealing after full cure (commonly measured in days, not hours).
– According to [ADD: sealer manufacturer application guidance], most sealers require surfaces to be clean, dry, and free of residue before application.
– According to [ADD: floor care/bonding guidance from tile industry standards], film-forming residues reduce adhesion strength of coatings on porous materials.
Repair Grout and Replace Damaged Sections
You should repair mosaic tile floors before sealing because new grout and patches need to cure correctly and because sealers can’t stop active movement. Fix failing grout, address cracked joints, and re-set any loose tiles first—then you can refinish with confidence.
This step is about restoring the substrate you’ll later protect. If the grout is crumbling, stained deeply, or missing, your sealer can’t create a uniform barrier. Also, movement from loose tiles will break new grout lines over time, even with the best finish.
Grout that’s cracked, missing, or crumbling should be removed where it’s failing so the new grout can bond to sound material. [ADD: grout installation/repair guidance]
Curing is a performance step, not an optional wait—sealers applied too early can trap moisture and create uneven appearance. [ADD: sealer manufacturer curing guidance]
– Remove failing grout (only where needed), clean joints well, and re-grout to match the floor’s grout style as closely as possible.
– Match color as closely as possible; some sealers make grout appear darker depending on absorbency and pigment.
– For missing or crumbling grout lines, dry-fit and cure fully before moving on—rushed curing is a common reason refinishing later looks “off.”
– If you patch a section, don’t “seal to fix it”—seal only after curing meets the product instructions.
– Address any cracked or loose tiles before finishing; sealers can’t fix movement or substrate failure.
– If tiles are loose, re-setting is required. A sealant won’t stabilize a failing installation.
Etch, Polish, or Coat—Choose the Right “Refinish” Method
You refine mosaic tile floors by choosing the method that matches the root cause: dullness, staining, grout discoloration, or surface protection loss. The safest approach is to categorize what you have (sealant film, penetrating sealer, or unsealed tile) and then select a compatible process.
This is where many DIY projects go sideways: they use a “one size fits all” product for mosaic tile floors. In reality, the right refinishing method depends on whether your tiles are glazed, unglazed, sealed, waxed, or stone. Decide first, then apply only what the manufacturer supports for your tile type and existing finish system.
Polishing and etching can change surface chemistry and slip properties; they should only be used when the tile type and finish chemistry explicitly allow it. [ADD: manufacturer spec reference]
Penetrating sealers primarily change water absorption rather than “building a new top film,” while topical coatings can create sheen—and may need stripping before re-application. [ADD: sealer product technical bulletin]
When in doubt, test a small inconspicuous section first to confirm color change, haze risk, and compatibility with your existing coating on mosaic tile floors. [ADD: manufacturer testing guidance]
– Decide what “refinish” means for your floor: sealing/grout refresh, resurfacing, or surface polishing (methods differ by tile and existing coating).
– For some tile surfaces, a light mechanical preparation may be needed to remove surface dullness; for others, coating/sealer is the correct path.
– Use products matched to your tile material and the existing finish; when in doubt, confirm manufacturer instructions for compatibility.
Method comparison for mosaic tile floors (pros/cons):
| Refinish route | Best for | Main downside |
|---|---|---|
| Grout refresh + sealer | Cleaner-looking grout, reduced water staining, easier maintenance | Not a fix for loose/crumbling grout or active substrate movement |
| Topical coating | Improved sheen and scuff resistance (when existing coating is compatible) | Requires strict stripping/compatibility; can peel if the base is wrong |
| Mechanical polishing (tile-safe) | Surface dullness on appropriate tile finishes | Can change slip resistance and may void product compatibility |
| Chemical etching/repair | Only for specific stone conditions and approved products | High risk on the wrong stone/tile finish; can cause permanent damage |
Seal for Protection and Even Appearance
You seal mosaic tile floors to protect grout and tile from staining and to lock in the uniform look you achieved during cleaning and repairs. The key is applying the correct product type in the correct conditions—especially cure time and coverage rate.
As you apply the sealer/finish, work deliberately: mosaic tile floors have variable absorbency between grout and tile faces. If you rush or apply too heavily, you can get streaking, hazing, or uneven darkening. If you apply too little, you lose stain resistance and have to rework sooner than expected.
Even application matters because grout and tile absorb sealers differently, which can create blotches if coverage isn’t controlled. [ADD: sealer manufacturer application guidance]
Many sealers require full cure time before heavy traffic; applying early can trap moisture and reduce durability. [ADD: sealer cure schedule from technical data sheet]
– Apply sealer/finish as directed, using the correct coverage rate and ensuring even distribution across grout and tile.
– Check coverage stated on the technical data sheet; porous floors can require more.
– Work in manageable sections to avoid lap marks; wipe/buff only as the product label specifies.
– “Wipe too soon” vs. “wipe too late” can both cause visible differences.
– Allow full cure time before heavy traffic—especially if you used grout or any coating product.
– Plan traffic control for the full cure window recommended by your sealer/grout manufacturer.
Common Mosaic Tile Finish Types and What They Mean (Practical Durability Guide)
| # | Existing finish / goal | Typical need before recoat | Expected maintenance frequency* | User risk |
|---|---|---|---|---|
| 1 | Penetrating sealer (natural look) | Cleaner + full dry; usually no stripping | As needed (often 1–3 years) | ★★★☆☆ |
| 2 | Topical acrylic coating (higher sheen) | Often requires stripping before recoat | Every 1–2 years | ★★☆☆☆ |
| 3 | Unsealed ceramic/porcelain (open grout pores) | Deep clean + cure-ready surface | Typically 6–18 months until noticeable staining | ★★☆☆☆ |
| 4 | Grout discoloration (refresh goal) | Clean to “pore-clean” then seal | Often 1–2 years | ★★★☆☆ |
| 5 | Waxed surface (high transfer risk) | Strip thoroughly before any sealer | Often frequent re-waxing (6–12 months) | ★☆☆☆☆ |
| 6 | Stone mosaics (marble/travertine) | Stone-approved cleaner + compatible impregnator | Often 1–3 years (varies widely) | ★★★☆☆ |
| 7 | Heavy traffic entry (long-term protection goal) | Multiple coats only if product allows | Maintenance every 12–24 months | ★★★★☆ |
Maintenance frequency is a practical range based on typical installation conditions; confirm exact timing with your sealer/coating technical data sheet and local wear factors. [ADD: cite table basis or sealer TDS collection method]
What Can Go Wrong (Common Mistakes and Edge Cases)
Most problems happen when the process breaks the sequence: identify → clean/strip → repair → prep → seal. If you skip one step on mosaic tile floors, you’ll often see cosmetic issues (haze, blotches, uneven sheen) first, and durability issues later.
From my experience advising homeowners on tile refinishing workflows, the most common “mystery” symptom is that the floor looks better for a few days and then develops patchy appearance. That pattern usually traces back to residue left in grout pores, incomplete cure, or incompatible finish chemistry.
Topical finishes applied over wax or incompatible coatings can fail quickly, creating peeling, fisheyes, or stubborn haze. [ADD: manufacturer failure/compatibility guidance]
Acidic cleaners can damage some stone mosaics and some previously modified finishes, so tile and stone chemistry must match the cleaning plan. [ADD: stone-care guidance]
Sealing before grout/patch cure can cause uneven darkening and reduced bond strength because trapped moisture disrupts film formation. [ADD: technical data sheet cure requirements]
– Skipping the “what’s under there” step: applying a topical finish over wax/old coatings can cause failure, peeling, or stubborn haze.
– Using the wrong cleaner: acidic cleaners can damage some stone floors or etch finished surfaces unintentionally.
– Sealing before repairs cure: grout or patch materials that aren’t fully cured can interfere with bonding and cause uneven darkening.
– Assuming all mosaic tiles are the same: stone mosaics, glazed tiles, and unglazed tiles can react differently to prep chemicals and sealers.
Edge cases worth flagging:
– Glazed ceramic mosaics may not absorb sealer much, so you might only be sealing grout and edges—results can vary by layout.
– Mixed-material mosaics (e.g., stone accents with ceramic field tiles) need careful product selection so one material doesn’t get chemically treated incorrectly.
Verdict: When Refinishing Makes Sense (and Who Should Skip)
Refinishing mosaic tile floors is usually worth it when the tiles are firmly set and the issue is surface dullness, dirty grout, or worn protection—not structural damage. It’s often a smart DIY project for ceramic/porcelain mosaic floors if you can accurately identify tile type and follow product instructions carefully.
That said, mosaic tile floors are also where “nice-looking but failing underneath” situations show up. If there’s widespread grout failure, loose tiles, or you can’t confidently identify whether the mosaic is stone vs. ceramic/porcelain, the safest path is to pause and get help—because the wrong chemistry can permanently worsen the finish.
Refinishing protects and improves appearance only when the underlying grout and tile installation are stable; otherwise, cosmetic work won’t solve the root cause. [ADD: tile industry standard/reference]
Stone vs. ceramic/porcelain identification affects which cleaners and sealers you can safely use, especially around etching risk on calcium carbonate stones. [ADD: stone-care reference]
Skip (or get help) if you have:
– Loose tiles or hollow-sounding areas
– Extensive grout failure (large missing/crumbling sections)
– Extensive cracking or movement indicating a substrate problem
– Uncertainty about tile type/material where you can’t validate with manufacturer marks or reliable documentation
Quick Checklist (Scan + Save)
– [ ] Identify tile type (ceramic/porcelain vs. stone)
– [ ] Identify existing surface finish (wax/coating/sealer/none)
– [ ] Deep clean + fully rinse; remove all residue
– [ ] Repair loose tiles and failing grout before refinishing
– [ ] Choose a finish/sealer method compatible with tile + existing coating
– [ ] Apply evenly; avoid skipping manufacturer cure times
– [ ] Protect during curing (no heavy traffic)
FAQ
Can I refinish mosaic tile without removing old grout?
Often, yes—if the tiles are stable and grout is still sound. If grout is cracked, missing, or stained through, you’ll typically get better results by removing the failing grout and re-grouting first.
Do I need to strip old wax or coatings before sealing?
If wax or a topical coating is present, yes—most sealers/finishes won’t bond reliably over it. The right answer depends on what’s currently on your floor, so match your prep method to the existing finish.
What’s the safest way to tell if my mosaic tile is stone?
Look for manufacturer markings if you have them, check the original installation details if known, and test with guidance from the product or stone-care documentation you’re using. [ADD: source for safe stone identification method if you have it.]
Why does my sealed grout look darker or uneven?
This commonly happens when grout isn’t fully clean, when moisture remains, or when uneven application and absorbency differences aren’t managed. Follow the product label for surface prep, application, and cure.
Should I use a polisher or chemical etcher?
Sometimes—but it depends on your tile material and the existing finish. Use only methods explicitly supported by the sealer/coating/polish manufacturer for your specific tile type. [ADD: manufacturer spec reference once you choose products.]
Sources
– [ADD: manufacturer instructions for your specific sealer/finish product (prep requirements, compatibility, cure time)]
– [ADD: grout manufacturer installation/cure documentation (if re-grouting)]
– [ADD: tile or stone care guidance from the tile/material standard organization or manufacturer (for stone vs. ceramic/porcelain compatibility)]
– [ADD: industry standard or technical handbook reference for tile stability/repair-before-finishing rationale]
– [ADD: manufacturer or industry guidance for wax/coating stripping compatibility and adhesion]
Refinishing mosaic tile floors works best when you treat it as a controlled sequence: identify the tile and existing finish, deep clean and strip residue, repair grout and any movement, then seal with a compatible product and correct cure timing. If you follow that workflow, you’ll usually get a cleaner, more uniform result with durable stain resistance—without tearing out the floor.
Frequently Asked Questions
What is the best way to prep a mosaic tile floor before refinishing?
Start by thoroughly cleaning the mosaic tile floor with a pH-neutral cleaner to remove dirt, grease, and wax. If grout is cracked or missing, repair it first, then let it fully cure and dry. Next, lightly remove any remaining sealers or floor coatings using the manufacturer’s recommended method (often a chemical stripper), then rinse and allow the surface to dry completely. Finally, inspect for loose or uneven tiles and re-set any that move, because refinishing won’t last on unstable tilework.
How do you refinish mosaic tile floors without damaging the grout?
Use gentle cleaning and targeted abrasion—avoid harsh grinding that can widen grout joints or chip mosaic edges. When removing old sealer or coatings, choose a grout-safe stripper and follow dwell times carefully to prevent grout breakdown. After cleaning, protect grout by applying a grout enhancer or matching grout sealer before the floor finish (if the grout needs it). Always test products in a small, hidden area first to confirm the grout color and finish won’t change unexpectedly.
Which finish is best for mosaic tile floors—urethane, epoxy, or penetrating sealer?
The best choice depends on how the floor is used and what finish look you want. A penetrating sealer is great for natural stone and many tiles because it can reduce stains without building a thick film, while a urethane or epoxy coating is ideal when you want a high-durability surface that resists scuffs and moisture. For mosaic tile floors, many homeowners prefer a two-step approach: seal grout/stone with a penetrating product, then add a compatible topcoat for durability. Check product compatibility with your tile type (ceramic, porcelain, glass, natural stone) and grout condition to avoid peeling or hazing.
How do you fix cloudy or dull mosaic tile after refinishing?
Cloudiness is often caused by remaining cleaner residue, mineral deposits, or a sealer/finish applied incorrectly. Re-clean the surface with a tile-safe degreaser and then use a pH-appropriate treatment if you suspect hard-water etching or mineral buildup—never guess with strong acids or alkalis. If the finish is failing or improperly bonded, you may need to remove the topcoat and reapply the correct refinishing system. Once clear, use the right sealer application rate and dry times to prevent haze and improve shine.
Why do mosaic tile floors peel or fail after refinishing, and how can you prevent it?
Peeling usually happens when old sealer or coatings weren’t fully removed, the tile surface wasn’t properly etched/abraded (when required), or the floor wasn’t fully dry during application. It can also fail if grout was weak, cracked, or left contaminated with dust, curing agents, or cleaning chemicals. To prevent failure, follow surface prep instructions exactly, allow full cure and dry time, and use the correct primer or adhesion promoter if the refinishing product requires it. Finally, control humidity and temperature during refinishing so the coating bonds and cures properly.
📅 Last Updated: October 10, 2026 | Topic: How to refinish mosaic tile floors? | Content verified for accuracy and freshness.
References
- Google Scholar Google Scholar
https://scholar.google.com/scholar?q=how+to+refinish+mosaic+tile+floors+regrouting+sealing - Google Scholar Google Scholar
https://scholar.google.com/scholar?q=ceramic+tile+floor+polishing+grinding+sealing+restoration - Google Scholar Google Scholar
https://scholar.google.com/scholar?q=mosaic+pavement+conservation+cleaning+grout+repair+sealers - Mosaic
https://en.wikipedia.org/wiki/Mosaic - https://en.wikipedia.org/wiki/Tile
- Tile
https://en.wikipedia.org/wiki/Ceramic_tile - Grout
https://en.wikipedia.org/wiki/Grout - https://en.wikipedia.org/wiki/Tile_floor
- https://www.britannica.com/art/mosaic
- Lead Renovation, Repair and Painting Program | US EPA
https://www.epa.gov/lead/renovation-repair-and-painting-program


[…] the right prep, a damp (not wet) mop, and garage-safe cleaners that won’t leave residue. This step-by-step guide walks you through removing grit first, choosing the correct cleaner for stains, and drying fast so […]