To lay laminate flooring in three easy steps, first clear and prep your room by removing furniture, cleaning the subfloor, and gathering tools. Next, choose your flooring and plan the pattern—whether straight, diagonal, or herringbone—to fit your space and style. Finally, install by laying underlayment, setting spacers for expansion gaps, and locking planks tightly while staggering seams for stability. Stick with this approach, and you’ll have a flawless floor ready to enhance your home.
Prepare Your Room and Materials

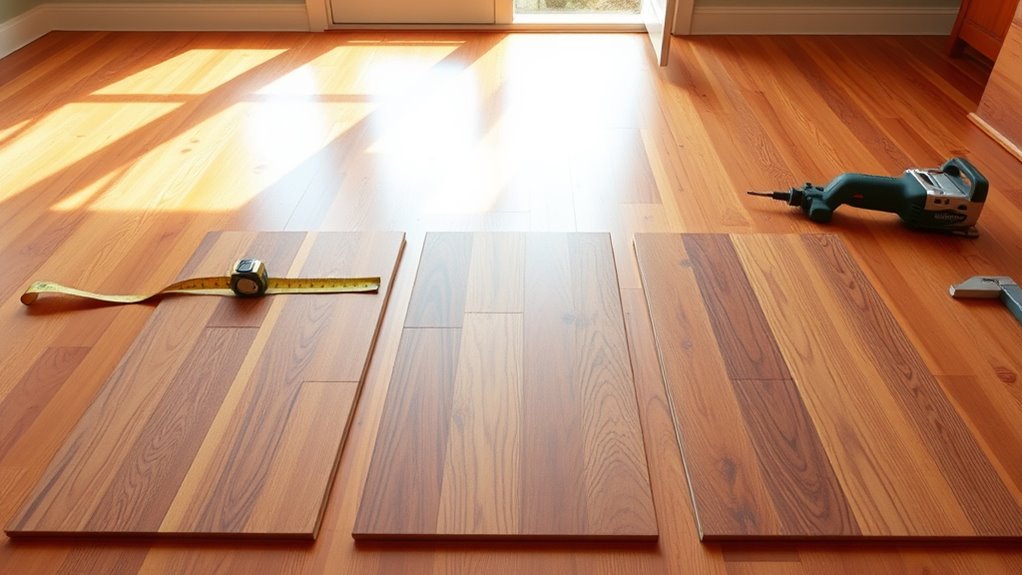
Before you begin laying your laminate flooring, you’ll need to thoroughly prepare the room and gather all necessary materials. Start by clearing the space completely—remove furniture, rugs, and baseboards to create a clean, open area. Check the subfloor for any uneven spots or debris; smooth and clean it to guarantee proper installation. Proper room preparation helps avoid future issues like warping or uneven planks. Next, focus on material selection. Choose laminate flooring that suits your style and durability needs, and don’t forget essential tools: underlayment, spacers, a tapping block, a saw, and a measuring tape. Having everything ready before you start will give you the freedom to work efficiently and confidently, setting the stage for a smooth, successful flooring project.
Choose and Plan Your Flooring Pattern
Once you’ve prepped your room and gathered materials, it’s essential to choose and plan your flooring pattern carefully. Start by exploring various flooring styles—straight plank, diagonal, or herringbone—to find what fits your space and personality. Each style offers a distinct vibe and impacts room perception. Next, consider pattern layouts that maximize both aesthetics and practicality. Measure your room and map out how the planks will align with walls, doorways, and focal points. Planning cuts and connections beforehand saves time and reduces waste. Don’t hesitate to sketch your layout or use design software for precision. By thoughtfully selecting your flooring style and pattern layout, you’re setting the foundation for a floor that reflects your freedom to create and enjoy a personalized, stunning space.
Install the Laminate Flooring Step by Step

Begin your laminate flooring installation by laying down the underlayment to provide a smooth, moisture-resistant base. Next, select the appropriate laminate types for your space, considering durability and style. Start in a corner, placing spacers along the walls to maintain expansion gaps. Use your flooring tools—like a tapping block and pull bar—to lock boards tightly together without damage. Lay the planks row by row, staggering seams for a natural look and enhanced stability. Trim the last plank in each row to fit using a saw, then continue the pattern across the room. Finally, remove spacers and install baseboards or moldings to cover expansion gaps. With patience and the right tools, you’ll enjoy a flawless laminate floor that offers lasting freedom and style.


