
To fix gaps in hardwood floors, start by measuring each gap and identifying the cause. Gather tools like a putty knife, sandpaper, and the right filler—wood putty or rope works depending on gap size. Clean gaps thoroughly, then press filler in firmly and let it dry. Sand smooth, following the wood grain, and stain to match. Finish by sealing the area to protect it. With careful steps, you’ll restore a flawless floor and understand how to handle every detail.
Assessing the Size and Cause of the Gaps
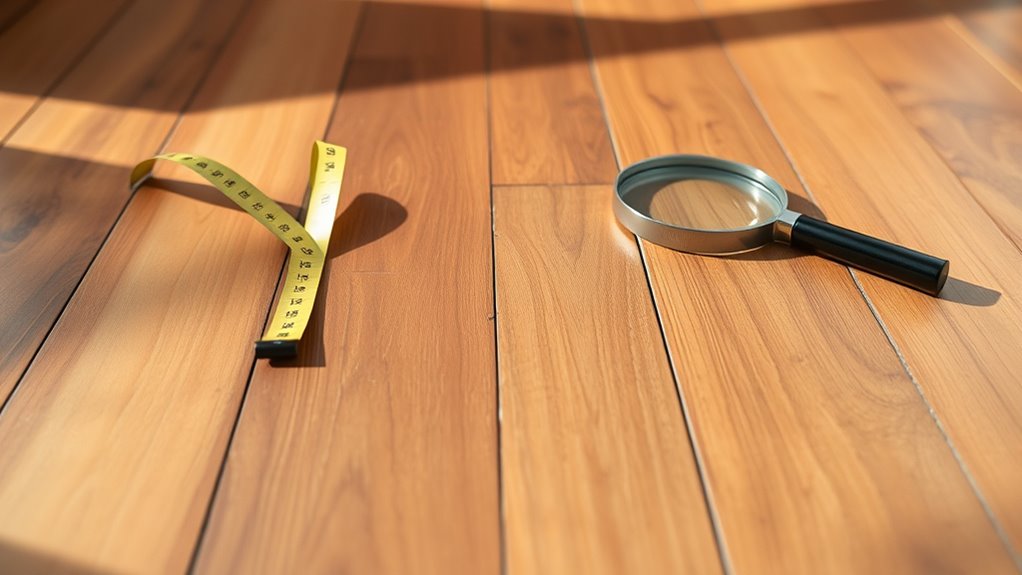
Before you begin any repairs, you need to carefully measure the width and length of each gap in your hardwood floor. Accurate gap assessment lets you determine the extent of the problem and plan your fix accordingly. Use a ruler or tape measure to note each gap’s dimensions, recording them precisely for reference. Understanding gap causes is equally vital. Gaps often appear due to seasonal humidity changes, wood shrinkage, or improper installation. Identifying whether your gaps are consistent or sporadic helps you pinpoint the root cause. This detailed evaluation guarantees you choose the right repair method, giving you the freedom to restore your floor effectively without unnecessary trial and error. Taking time here saves you effort and frustration later on.
Gathering Necessary Tools and Materials
Once you’ve identified the size and cause of the gaps in your hardwood floor, you can determine the specific tools and materials needed for the repair. Essential tool types include a putty knife or flexible scraper for applying filler, a utility knife for trimming excess material, and fine-grit sandpaper to smooth the surface afterward. You might also want a vacuum or brush to clear debris later. For material options, choose between wood filler, wood putty, or rope filler depending on gap size and floor type. Wood filler suits small to medium gaps, while rope filler works better for wider spaces. Select a filler that matches your floor’s color or one you can stain afterward for seamless blending. Having the right tools and materials upfront guarantees a clean, durable repair without unnecessary hassle.
Cleaning the Gaps and Surrounding Areas
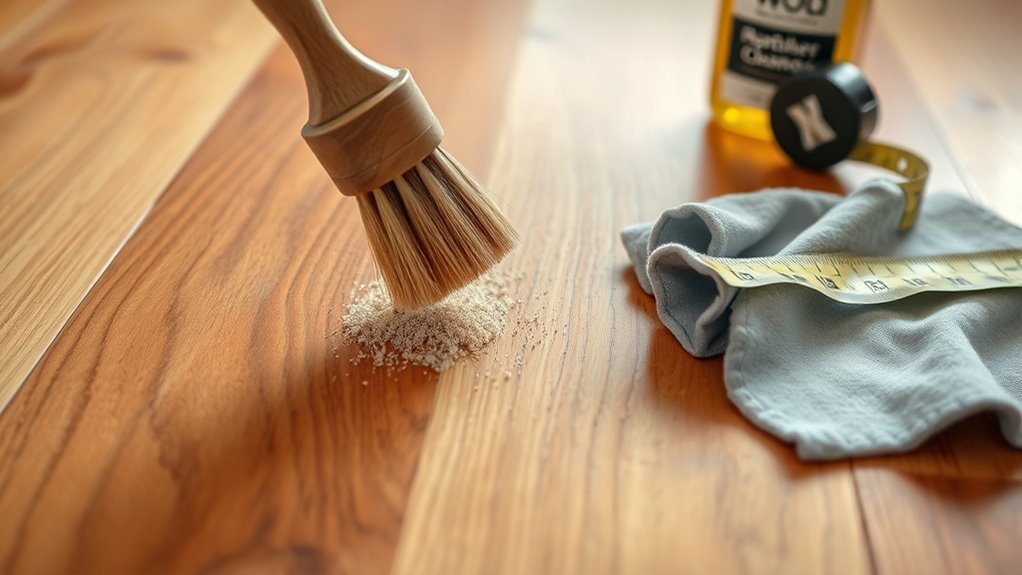
Before you start filling the gaps, make certain to remove all dirt and debris using a vacuum or a soft brush. Clean the surrounding wood surfaces with a damp cloth to guarantee proper adhesion. Taking these steps will help the filler bond securely and create a smooth finish.
Removing Dirt and Debris
Although filling gaps is the main goal, you won’t get good results unless you thoroughly remove dirt and debris from the gaps and surrounding floor area first. Start by using a vacuum with a narrow nozzle attachment to suck out loose particles trapped inside the gaps. Next, apply a soft brush or compressed air to dislodge stubborn dirt that the vacuum missed. For the surrounding hardwood, a damp microfiber cloth works best to wipe away surface dust without damaging the wood. Avoid excessive moisture, which can warp the floor. These cleaning techniques guarantee the filler adheres properly and lasts longer. Taking the time to focus on debris removal now saves you from future repairs, giving you the freedom to enjoy a flawless, gap-free hardwood floor.
Preparing Wood Surfaces
After you’ve cleared out all the dirt and debris, the next step is to prepare the wood surfaces for filling. Proper wood surface preparation guarantees the filler adheres well and the repair lasts. Start by using a vacuum or compressed air to remove any remaining dust deep within the gaps. Then, apply a wood-safe cleaner with a small brush or cloth to the area surrounding the gaps. This cleaning technique removes oils and residues that can prevent adhesion. Avoid soaking the wood; a slightly damp cloth works best. Once clean, let the wood dry completely before moving on. Paying close attention to these cleaning techniques gives you a smooth, stable base, making your hardwood floor repairs both effective and durable, freeing you from recurring gaps.
Choosing the Right Filler for Your Hardwood Floor
Selecting the right filler for your hardwood floor is essential to achieving a seamless repair that blends with the wood’s natural texture and color. You’ll want to reflect on filler types—such as wood putty, epoxy, or wax sticks—and match filler colors closely to your floor’s hue for the best results. Each type has specific benefits depending on gap size and floor finish. Use the table below to guide your choice and evoke confidence in your repair:
| Filler Type | Best For | Emotional Impact |
|---|---|---|
| Wood Putty | Small cracks | Satisfaction |
| Epoxy | Large gaps | Assurance |
| Wax Sticks | Minor surface flaws | Control |
| Stainable | Custom colors | Freedom to match |
| Fast-Dry | Quick fixes | Efficiency |
Choosing wisely gives you freedom to restore your floor beautifully.
Applying Wood Filler to Small and Medium Gaps
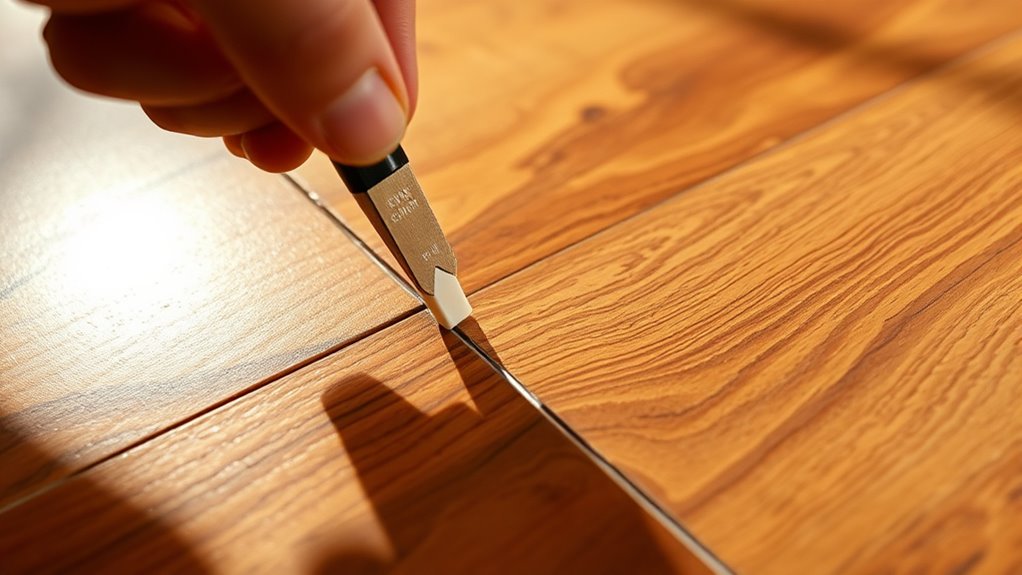
When you’re ready to fill small and medium gaps in your hardwood floor, applying wood filler correctly is key to a durable, nearly invisible repair. First, choose a filler type that matches your floor’s wood species and stain color—water-based fillers offer easy cleanup, while solvent-based ones provide stronger adhesion. Before application, clean the gaps thoroughly to remove dust and debris. Using a putty knife, press the filler firmly into the gaps, ensuring no air pockets remain. Smooth the surface level with the wood, removing excess filler immediately for a clean finish. Allow the filler to dry completely, then lightly sand to blend it seamlessly with surrounding boards. Precise application techniques like these let you restore your floor’s natural beauty while maintaining the freedom to enjoy your space without distraction.
Using Rope or Wood Strips for Larger Gaps
When dealing with larger gaps, you’ll want to select the right rope material—typically cotton or jute—for flexibility and durability. If you choose wood strips, make certain to cut them precisely to fit the width and depth of the gap for a seamless look. Proper installation involves securing the filler tightly without damaging the surrounding floorboards to guarantee a long-lasting repair.
Choosing Rope Materials
Although smaller gaps in hardwood floors can often be filled with wood putty or filler, larger gaps require more substantial materials like rope or wood strips to guarantee a durable and seamless repair. When choosing rope materials, consider rope types such as cotton, jute, or synthetic blends. Cotton ropes offer flexibility and ease of shaping, while jute provides a natural look with moderate durability. Synthetic ropes, though less traditional, excel in moisture resistance and longevity. Durability factors are key—you want a rope that won’t shrink, fray, or deteriorate over time, especially in varying indoor climates. Selecting the right rope assures the gap stays filled and maintains aesthetic appeal. By understanding these materials, you gain control over a lasting, professional finish without compromising your floor’s integrity.
Cutting Wood Strips
If you’ve decided rope isn’t the best fit for your floor gaps, cutting wood strips offers a sturdy alternative that blends well with hardwood flooring. Start by choosing wood selection that matches your floor’s species and grain for a seamless look. Use precise cutting techniques to make certain strips fit snugly without forcing them into place, which could cause damage. Measure the gap width and length accurately before cutting. Here’s what to keep in mind:
- Pick hardwood similar in color and texture to your floor
- Use a fine-tooth saw or table saw for clean cuts
- Cut strips slightly wider than the gap for sanding down later
- Sand edges smooth to avoid splinters or unevenness
- Store strips in a dry place to prevent warping
This approach guarantees durable, visually consistent gap fillers.
Installation Techniques
Since larger gaps in hardwood floors require more substantial filling, using rope or wood strips demands careful installation to guarantee a tight, lasting fit. Start by cleaning the gap thoroughly to remove debris and dust. For rope, select a natural fiber that compresses easily; press it firmly into the gap with a putty knife, ensuring it fits snugly without bulging. When using wood strips, cut them slightly oversized to account for floor expansion, then sand edges for a perfect fit. Apply wood glue sparingly along the edges before inserting the strip. Clamp the area or place a heavy object on top until the glue cures. Both installation techniques accommodate floor expansion, preventing future cracking or separation. Proper execution lets you restore your floor’s integrity while maintaining its natural movement.
Sanding and Smoothing the Repaired Area
Start by thoroughly sanding the repaired area to guarantee a smooth, even surface that blends seamlessly with the surrounding hardwood. Use proper sanding techniques to avoid gouging or uneven spots. Begin with medium-grit sandpaper, then progress to fine-grit for a polished finish. Employ smoothing methods like hand sanding corners to reach tight spaces. Remember, consistent pressure is key to avoid dips. Here’s what to focus on:
- Use a sanding block for controlled pressure
- Sand along the grain for a natural finish
- Clean dust frequently to check progress
- Use edging tools for corners and gaps
- Finish with a tack cloth to remove residual dust
Finishing Touches: Staining and Sealing the Floor
Although sanding creates a smooth surface, you’ll want to apply the right stain and sealant to protect your hardwood and enhance its appearance. Start with careful stain selection to match your floor’s tone, ensuring even absorption. After staining, focus on sealant application—this shields wood from moisture and wear, extending its life.
| Step | Tips for Success |
|---|---|
| Stain Selection | Test on scrap wood; use thin coats |
| Sealant Application | Apply evenly with brush; allow drying time |
| Final Touch | Buff lightly for a smooth finish |


