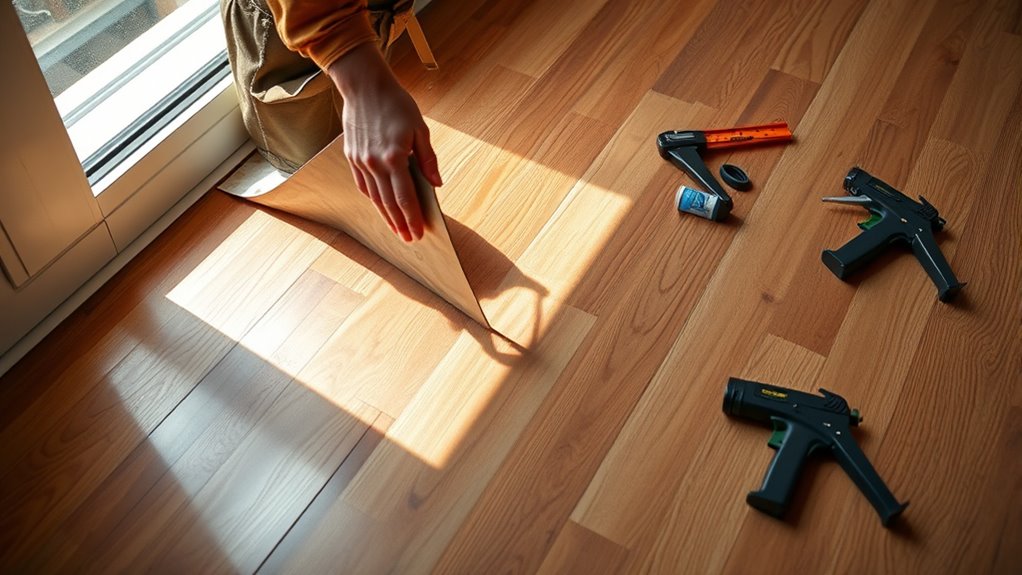
To fill gaps in your laminate flooring, first identify why they appeared—usually from temperature or humidity changes. Gather tools like a putty knife, filler matching your floor color, and cleaning supplies. Clean out the gaps thoroughly, then press wood filler or putty into small spaces, using rope or backer rod for larger gaps. Smooth the surface and seal it with a matching finish for a seamless look. Getting these details right makes your floor look great and last longer; more tips will help you perfect the repair.
Identifying the Cause of Gaps in Laminate Flooring
Before you can fix gaps in your laminate flooring, you need to understand what’s causing them. The primary causes of gaps often relate to changes in floor temperature and humidity. When the temperature drops, laminate planks contract, creating visible spaces. Conversely, warmer conditions cause expansion, but if the flooring was installed without proper expansion gaps, it can lead to buckling or gaps once it contracts again. Other causes of gaps include improper installation, subfloor issues, or natural wear over time. Recognizing these causes is essential because it helps you address the problem effectively and prevent future gaps. By understanding how floor temperature impacts your flooring, you gain the freedom to maintain your space comfortably and keep your laminate looking seamless.
Gathering the Necessary Tools and Materials
Before you start filling gaps in your laminate flooring, make sure you have the right tools like a tape measure, putty knife, and a rubber mallet. You’ll also need materials such as wood filler or laminate repair kits designed for your floor type. Having everything ready will make the repair process smoother and more efficient.
Essential Tools List
Although filling gaps in laminate flooring might seem straightforward, having the right tools on hand will make the process much smoother and more precise. Start with a good utility knife to trim any loose edges or debris in the gaps. A putty knife or plastic scraper helps you apply filler evenly without damaging the floor. You’ll also want a soft cloth or sponge for quick cleanups. For tool selection tips, choose maintenance tools that are comfortable to grip and designed for fine work—these make detailed tasks easier and reduce mistakes. Having a straight edge or ruler can aid in keeping lines neat. By gathering these essential tools beforehand, you’re setting yourself up for a faster, cleaner repair that lets you enjoy your laminate flooring without hassle.
Required Materials Overview
Since the right materials are just as important as the right tools, you’ll want to gather quality fillers and sealants designed specifically for laminate flooring gaps. Different types of laminates may require different fillers—some are water-based, while others are solvent-based or wax-based. Choose a filler that matches your floor’s color and finish for a seamless look. Alongside fillers, keep wood putty or laminate repair kits handy for deeper or wider gaps. Sealants help lock in the filler and provide long-lasting gap prevention by protecting against moisture and expansion. Don’t forget a putty knife or applicator to spread materials evenly. Having these materials ready guarantees you’re set for effective and lasting repairs, giving you the freedom to enjoy a flawless laminate floor without worrying about those pesky gaps.
Cleaning the Gaps and Surrounding Area

When you’re ready to fill the gaps in your laminate flooring, it’s important to start with a thorough cleaning of the gaps and the surrounding area. Proper cleaning techniques guarantee better adhesion and help with gap prevention in the future. Here’s how to get started:
- Use a vacuum with a crevice tool to remove dust and debris from the gaps thoroughly.
- Wipe the surrounding floor with a damp cloth and mild detergent to eliminate any residue or dirt.
- Allow the area to dry completely to prevent moisture from interfering with the filler.
Choosing the Right Filler for Your Laminate Floor
Selecting the right filler for your laminate floor is vital to achieving a seamless repair that blends well with your existing flooring. You’ll find several filler types, including wood filler, putty, and wax sticks. Each serves different gap sizes and floor finishes, so pick one based on your gap’s width and your floor’s texture. Color matching is critical; choose a filler that closely matches your floor’s shade to avoid noticeable patches. Some fillers come pre-tinted, while others can be stained after application. If your floor has a glossy finish, consider fillers designed to maintain that sheen. Taking time to select the correct filler type and color guarantees your repair stays discreet, letting you enjoy a smooth, gap-free floor without compromising your room’s style or your freedom to walk comfortably.
Applying Wood Filler or Putty to Small Gaps
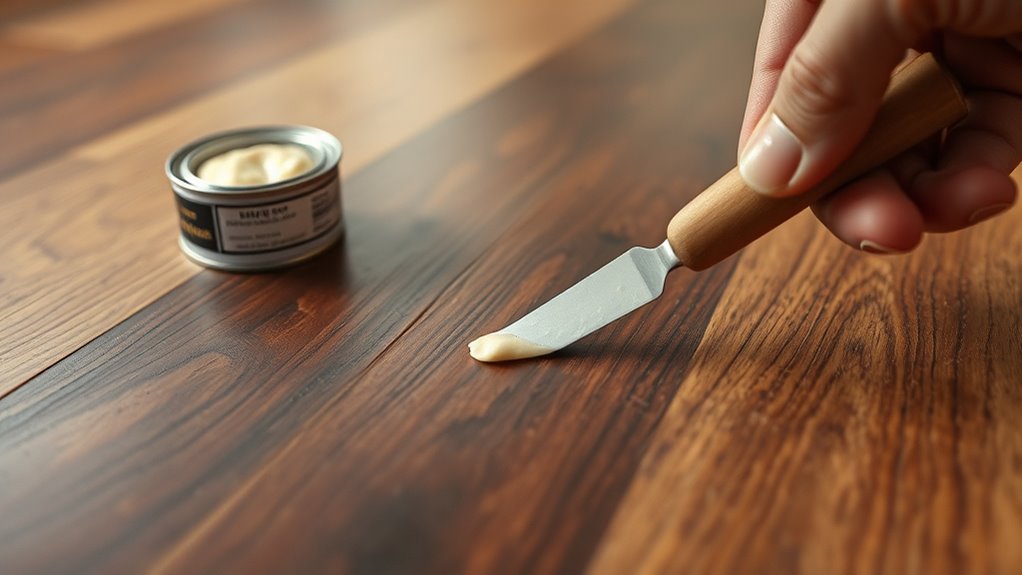
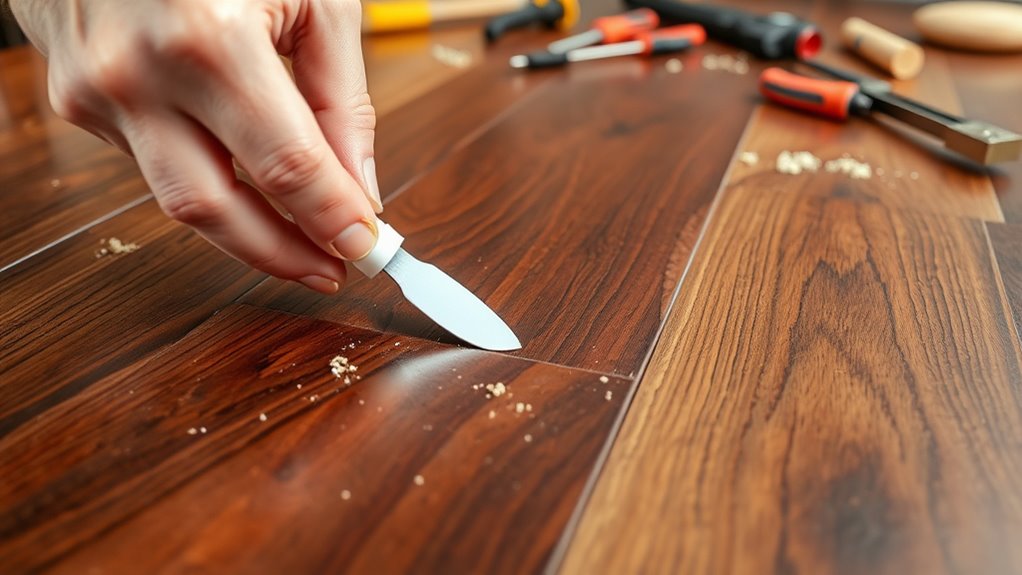
Before you apply wood filler or putty, make sure you’ve selected a product that matches your laminate’s color and is designed for small gaps. Clean the gap thoroughly to remove dust and debris, ensuring better adhesion. When you’re ready, use a putty knife to press the filler into the gap, then smooth it out for a seamless finish.
Choosing the Right Filler
Two main types of fillers work best for small gaps in laminate flooring: wood filler and putty. Choosing the right filler is key to effective gap prevention and a seamless finish. Here’s what to take into account:
- Wood Filler: Ideal for gaps that need a durable, paintable solution. It hardens firmly and can be sanded smooth, matching your floor’s texture.
- Putty: Best for quick fixes and minor gaps. It stays flexible and is easy to apply but may not be as long-lasting under heavy use.
- Color Matching: Both filler types come in various shades. Pick one closest to your flooring to keep gaps inconspicuous and maintain your room’s natural look.
Preparing the Gap Surface
Although the process might seem straightforward, properly preparing the gap surface is essential to confirm the wood filler or putty adheres well and lasts. Start by identifying the gap types you’re dealing with—small cracks between planks require different attention than wider separations. Thorough surface preparation means cleaning the gap thoroughly; remove dust, dirt, and any loose particles using a vacuum or a soft brush. If the gap edges are rough or splintered, gently sand them to create a smooth, receptive surface. Make sure the area is completely dry before proceeding, as moisture can prevent proper bonding. This careful preparation confirms the filler or putty will stick firmly, blend seamlessly, and withstand everyday wear, giving your laminate flooring a flawless, durable finish.
Applying and Smoothing Filler
Start by scooping a small amount of wood filler or putty onto a putty knife or a flexible scraper. Using proper filler application techniques guarantees the gap is fully covered without excess mess. Follow these steps:
- Press the filler firmly into the gap, pushing it deep to fill every crevice.
- Scrape off the surplus filler by holding the knife at a slight angle, leaving the surface flush with the laminate.
- Use a damp cloth or a sanding block for smoothing methods once the filler starts to set, gently refining the surface to blend with the floor.
These simple, effective steps let you restore your laminate’s seamless look while keeping your freedom to customize and repair on your own terms.
Using Rope or Backer Rod for Larger Gaps
When you encounter larger gaps in your laminate flooring that caulk or filler can’t adequately cover, using rope or backer rod can provide a sturdy and effective solution. Start by selecting a backer rod with a diameter slightly larger than the gap to guarantee a snug fit. The backer rod benefits include filling deep voids and providing a firm base for subsequent filler application. For rope installation techniques, cut a natural fiber rope to length, press it firmly into the gap, and trim any excess. This method allows flexibility and breathability, accommodating floor expansion. Both materials act as a supportive core, preventing filler from sinking or cracking later. By choosing the right approach, you’ll secure a durable, clean finish that maintains your laminate flooring’s freedom from unsightly gaps.
Sanding and Smoothing the Filled Areas
After filling the gaps in your laminate flooring, you’ll need to sand and smooth the areas to guarantee a seamless, professional finish. Proper sanding techniques and the right smoothing tools confirm the repair blends perfectly with the surrounding floor.
- Start with fine-grit sandpaper (around 220 grit) to gently even out the filler without damaging the laminate surface.
- Use a sanding block or small handheld sander to maintain control and avoid over-sanding.
- Finish by wiping the area with a damp cloth to remove dust and check for smoothness.
Taking these careful steps helps you maintain your floor’s sleek look and prevents uneven patches that could catch dirt or wear prematurely.
Sealing and Finishing to Match Your Floor Color
Once you’ve sanded the filled gaps smooth, the next step is sealing and finishing to confirm the repair blends seamlessly with your laminate floor’s color and sheen. Start by using color matching techniques—test a few stain or marker shades on a scrap piece or inconspicuous spot until you find the perfect match. Applying a thin layer of stain with a small brush or cotton swab lets you control intensity carefully. After the color sets, choose finishing options like a clear polyurethane or laminate floor finish to protect the repair and mimic the floor’s original gloss level. Apply the finish sparingly, allowing it to dry completely between coats. This precise approach confirms your filled gaps won’t stand out, giving you the freedom to enjoy a flawless, consistent floor surface.


